To install a bathroom fan without attic access, you can utilize a wall or ceiling cap that connects directly to the fan vent and vents the air outside. The process involves cutting a hole in the wall or ceiling, attaching the cap to the vent, and connecting the fan to the cap for proper ventilation.
Understanding The Importance Of Bathroom Ventilation
The role of a bathroom fan in maintaining air quality and preventing moisture damage
Bathroom ventilation is a crucial aspect of maintaining a healthy and comfortable living environment. Having a properly functioning bathroom fan is key to ensuring good air quality and preventing moisture damage. A bathroom fan serves two main purposes: removing unpleasant odors and reducing humidity levels.
When we take hot showers or baths, the steam and moisture released into the air can create an ideal breeding ground for mold, mildew, and bacteria. This excess humidity not only leads to unpleasant smells but can also cause structural damage to your bathroom, such as peeling paint, warping of wood, and even the growth of mold on walls and ceilings. This is where a bathroom fan comes into play.
A bathroom fan provides ventilation by pulling in fresh air from outside and expelling the humid air from the bathroom to the outside. This constant airflow helps to remove excess moisture, preventing condensation, and reducing the chances of harmful mold and mildew growth.
Furthermore, a bathroom fan also helps to eliminate unwanted odors that can linger in enclosed spaces. By continuously circulating the air, it helps to neutralize and remove odors, keeping your bathroom fresh and pleasant.
Common issues faced when a bathroom does not have proper ventilation
When a bathroom lacks proper ventilation, several issues can arise, which can negatively impact your health and the condition of your bathroom. Some of the most common issues include:
| Growth of mold and mildew | Poor air quality | Peeling paint and wallpaper | Warped wood and furniture |
|---|---|---|---|
| Mold and mildew thrive in humid environments. Without proper ventilation, your bathroom becomes a perfect breeding ground for these harmful microorganisms. This can lead to respiratory problems, allergies, and other health issues. | Poor air quality can be a result of the accumulation of stagnant air, odors, and chemicals present in cleaning products. Breathing in polluted air can cause irritation, breathing difficulties, and other respiratory problems. | In a poorly ventilated bathroom, the excess moisture in the air can cause paint and wallpaper to peel off. This not only looks unsightly but can also be costly to repair and repaint. | Wood and furniture in the bathroom can warp and deteriorate due to constant exposure to moisture. This can result in swollen wood, loose joints, and overall reduced lifespan of your bathroom fixtures. |
By understanding the importance of bathroom ventilation and the potential issues that can arise without it, you can take the necessary steps to ensure your bathroom remains a clean, healthy, and comfortable space.
Assessing Your Bathroom For Fan Installation
Installing a bathroom fan is an excellent idea to improve air circulation and eliminate moisture in your bathroom. However, if your bathroom doesn’t have attic access, you might be wondering how to go about this task. Before you dive into the installation process, it’s crucial to assess your bathroom and take certain factors into consideration. By doing so, you’ll be able to determine the best method to install a bathroom fan without attic access. Let’s look at two key aspects you need to consider: determining if your bathroom has access to the attic or not, and factors to consider before deciding on the installation method.
Determining if your bathroom has access to the attic or not
If you’re unsure whether your bathroom has attic access, there are a few ways to find out. Firstly, check for a small hatch or door within your bathroom. This hatch or door usually leads to the attic and can provide an opportunity to install a bathroom fan effortlessly. However, if you don’t see any access point, it’s likely that your bathroom doesn’t have direct access to the attic.
Another way to determine if your bathroom has attic access is to carefully inspect the ceiling. Look for signs of existing fixtures, such as recessed lights or vents, which could indicate that there’s an attic space above. Additionally, consider the overall layout of your home. If the bathroom is located on the uppermost level and there are other rooms directly below it, chances are there’s an attic space between them.
Factors to consider before deciding on the installation method
Before proceeding with the installation, it’s essential to consider a few factors that may influence the method you choose for installing your bathroom fan without attic access. Here are some key considerations:
- The location of your bathroom: Is your bathroom situated on an exterior wall or an interior wall? If it’s an exterior wall, you might have the option to vent the fan directly to the outside, which can simplify the installation process.
- Ventilation options: Assess the available ventilation options in your bathroom. Are there existing vents or ductwork nearby that you can tap into? Utilizing an existing ventilation system can save you time, effort, and money.
- Electrical circuitry: Determine the proximity of electrical wiring to your bathroom. Depending on the location, you may need to enlist the help of a licensed electrician to ensure the proper installation and wiring of the fan.
- Budget and time constraints: Consider your budget and time constraints. If you have a limited budget or tight schedule, you may prefer a simple installation method that doesn’t require extensive modifications.
By thoroughly evaluating these factors, you’ll be better equipped to choose the most appropriate method for installing a bathroom fan without attic access. Whether it’s through sidewall venting, utilizing existing ductwork, or other creative solutions, taking these factors into account will ensure a successful and efficient installation process.

Choosing The Right Type Of Bathroom Fan
Installing a bathroom fan is essential for maintaining proper ventilation and air circulation in your bathroom. However, if you do not have attic access, the installation process can seem daunting. But fear not, because with the right type of bathroom fan, you can still enjoy all the benefits of a well-ventilated bathroom without the need for attic access.
Understanding the different types of bathroom fans available in the market
Before diving into the factors to consider when selecting a fan for a bathroom without attic access, it is important to familiarize yourself with the different types of bathroom fans available in the market. Knowing the options will help you make an informed decision.
| Type of Bathroom Fan | Description |
|---|---|
| In-line Fans | These fans are installed in the attic or another remote location, away from the bathroom, and are connected to the bathroom through ductwork. They are a great option for bathrooms without attic access as they can be installed in a convenient location. |
| Wall-Mounted Fans | As the name suggests, these fans are mounted directly on an external wall of the bathroom. They are an excellent choice for bathrooms without attic access, as they do not require any special ductwork and can be easily installed through the wall. |
| Window Fans | Window fans are placed in the bathroom window and provide both ventilation and cooling. They are an ideal option for bathrooms without attic access, as they do not require any extensive installation or ductwork. |
Factors to consider when selecting a fan for a bathroom without attic access
Selecting the right type of bathroom fan for a bathroom without attic access involves considering a few important factors. By taking these factors into account, you can ensure that your chosen fan will meet your specific needs and requirements:
- Size and Capacity: Consider the size of your bathroom and the ventilation requirements. The fan’s capacity should be sufficient to effectively remove moisture and odors from the room.
- Noise Level: Look for a fan with a low noise level rating, especially if your bathroom is adjacent to living spaces or bedrooms.
- Energy Efficiency: Opt for an energy-efficient fan that meets the Energy Star requirements, as it will not only help you save on utility bills but also reduce your environmental footprint.
- Installation Method: Choose a fan that can be easily installed without attic access. In-line fans, wall-mounted fans, and window fans are your best options in this case.
- Additional Features: Consider any additional features you may require, such as built-in lighting, humidity sensors, adjustable fan speeds, or automatic timers.
By taking these factors into consideration, you can select the perfect bathroom fan for your space, even without attic access. With proper ventilation, your bathroom will remain fresh, clean, and free from excess moisture, creating a comfortable environment for you and your family.
Gathering The Necessary Tools And Materials
Before you can start installing a bathroom fan without attic access, it’s crucial to gather all the necessary tools and materials. Having everything you need beforehand will make the installation process much smoother and save you from unnecessary trips to the hardware store. In this section, we’ll provide you with a comprehensive list of tools and materials so you can ensure you have everything at your fingertips.
A comprehensive list of tools and materials needed for the installation process
Here’s a detailed breakdown of the tools and materials you will need:
| Tools | Materials |
|---|---|
|
|
Tips for ensuring you have everything before getting started
Before you embark on the installation process, it’s important to double-check that you have all the necessary tools and materials. To help you with this, here are a few tips:
- Create a checklist: Jot down all the required tools and materials based on the list provided above.
- Check your toolbox: Review your existing tool collection to see if you already have some of the necessary tools. This will help you identify any missing items.
- Inspect the bathroom fan: Examine the bathroom fan you purchased to ensure it includes all the essential components and accessories, such as screws and wire connectors.
- Measure the ductwork: Take accurate measurements of the ductwork to determine the length and diameter required for the installation. This will help you avoid any last-minute trips to the store.
- Purchase extra: It’s always wise to have a few extra wire nuts, pan head screws, and duct tape on hand in case you need them during the installation.
By following these tips and using the comprehensive list of tools and materials, you can ensure you have everything you need before starting the installation process. This way, you’ll be fully prepared to tackle the job and get your bathroom fan up and running without attic access.
Preparing The Workspace
Before you begin installing a bathroom fan without attic access, it’s essential to prepare your workspace properly. This will ensure a smooth and hassle-free installation process. In this section, we will guide you step-by-step on how to prepare your bathroom for the installation process.
Steps for preparing your bathroom for the installation process:
- Clearing out the necessary space
- Protecting surrounding areas
Clearing out the necessary space
The first step in preparing your bathroom for the installation process is to clear out the necessary space. Since you don’t have attic access, it’s crucial to create enough room in your bathroom for the installation to take place smoothly. Follow these steps to clear out space:
- Remove any objects or furniture that may obstruct the installation process. This includes towels, accessories, or any other items on the countertops or near the bathroom fan location.
- Ensure there is ample space near the bathroom ceiling where you plan to install the fan. It’s essential to have enough room for the fan, its components, and access for installation and maintenance in the future.
Protecting surrounding areas
Once you have cleared out the necessary space, it’s crucial to protect the surrounding areas from any potential damage during the installation process. Here are a few steps to follow:
- Cover the bathroom floor with a drop cloth or plastic sheet to prevent any debris, dust, or tools from causing damage.
- Use painter’s tape to secure the drop cloth or plastic sheet, ensuring it stays in place and covers the entire floor area near the fan installation spot.
- If there are any delicate fixtures or items near the installation area, consider covering them with plastic wrap or protective sheets to shield them from dust or accidental damage.
By carefully following these steps, you can ensure that your workspace is ready for the bathroom fan installation process without attic access. Taking the time to prepare your bathroom adequately will make the installation process more efficient, reduce potential risks, and help maintain a clean environment throughout the project.
Measuring And Marking The Fan Placement
Determining the ideal location for the bathroom fan without attic access
Installing a bathroom fan without attic access can be a bit challenging, but it’s definitely doable. The first step in the process is to determine the ideal location for the fan. This requires careful consideration of factors such as air circulation, moisture control, and noise reduction.
- Consider the layout of your bathroom. Ideally, the fan should be placed in a central location to maximize air circulation throughout the entire space. This will help prevent any stagnant air or moisture buildup in certain areas.
- Take note of any existing ventilation points in your bathroom, such as windows or vents. It’s usually best to position the fan near these areas to take advantage of the natural airflow.
- Keep in mind that bathrooms with showers or bathtubs will require higher airflow rates to effectively remove excess moisture. Therefore, it’s advisable to place the fan closer to these moisture-prone areas.
- Avoid placing the fan too close to the toilet or any other obstructions that may impede its airflow. This will ensure efficient ventilation and prevent any potential blockages.
Marking the measurements accurately for proper installation
Once you have determined the ideal location for the bathroom fan, it’s time to start marking the measurements for proper installation. Accuracy is crucial at this stage to ensure a seamless and effective installation process.
- Begin by measuring the dimensions of the fan itself, including its height, width, and depth. These measurements will serve as a guide when determining the size of the opening needed in your bathroom ceiling or wall.
- Use a pencil or marker to mark the exact center point of the planned fan placement. This will help you maintain accuracy throughout the installation process.
- Measure and mark the dimensions of the fan opening on the ceiling or wall. Be sure to leave enough space for the fan to fit securely without any obstructions.
- If you’re installing the fan on a ceiling, take into consideration any electrical wiring or joists that may be present. Mark the necessary cutouts for these elements to ensure a smooth installation.
- Before making any cuts, double-check your measurements to ensure they are accurate. It’s always better to measure twice and cut once to avoid any costly mistakes.
By following these steps and taking the time to accurately measure and mark the fan placement, you’ll be one step closer to successfully installing a bathroom fan without attic access. Remember to prioritize airflow, moisture control, and noise reduction when determining the ideal location for your fan. With proper measurements in place, the installation process will be much smoother and more efficient.
Installing The Bathroom Fan Without Attic Access
Are you looking to install a bathroom fan but don’t have attic access? No worries! We’ve got you covered. In this section, we will provide you with step-by-step instructions and useful tips to help you seamlessly install a bathroom fan without the need for attic access.
Step-by-step instructions for installing the fan in a bathroom without attic access
Installing a bathroom fan without attic access may seem challenging, but with the right guidance, it can be a straightforward process. Here’s a step-by-step breakdown of how to achieve this:
- Choose the right location: Begin by selecting the ideal location for your bathroom fan. It should be placed near the shower or bath area to effectively remove moisture and prevent mold and mildew.
- Prepare the area: Before installation, make sure to turn off the power supply to the bathroom. Remove the existing fan or any obstructions in the chosen location. Clean the area to ensure a smooth installation.
- Mark the opening: Measure the dimensions of the fan and use a pencil to mark where the opening will be. Double-check the measurements to ensure accuracy.
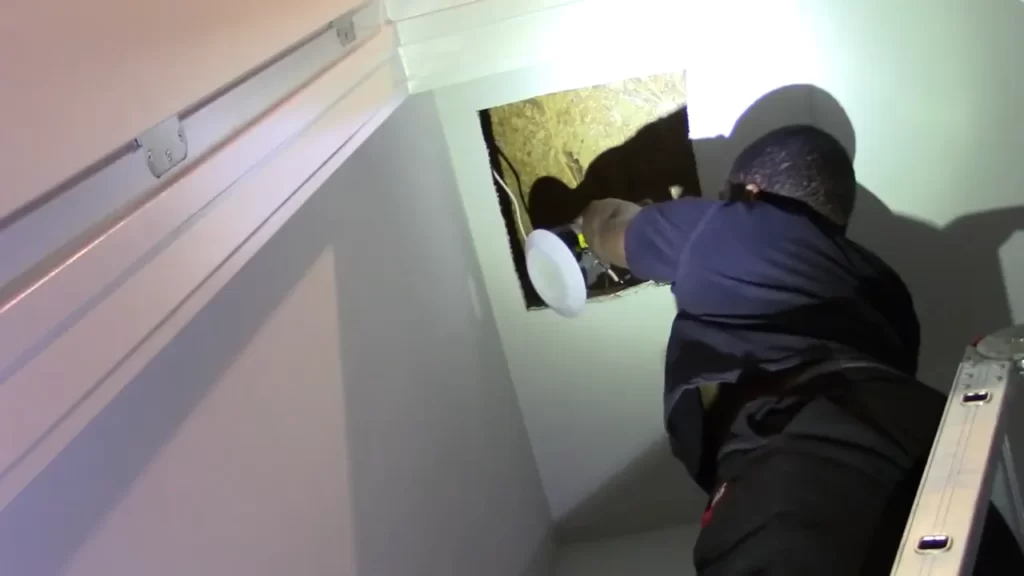
- Create the opening: Use a jigsaw or reciprocating saw to carefully cut along the marked lines. Be cautious and follow all safety guidelines when handling the cutting tools.
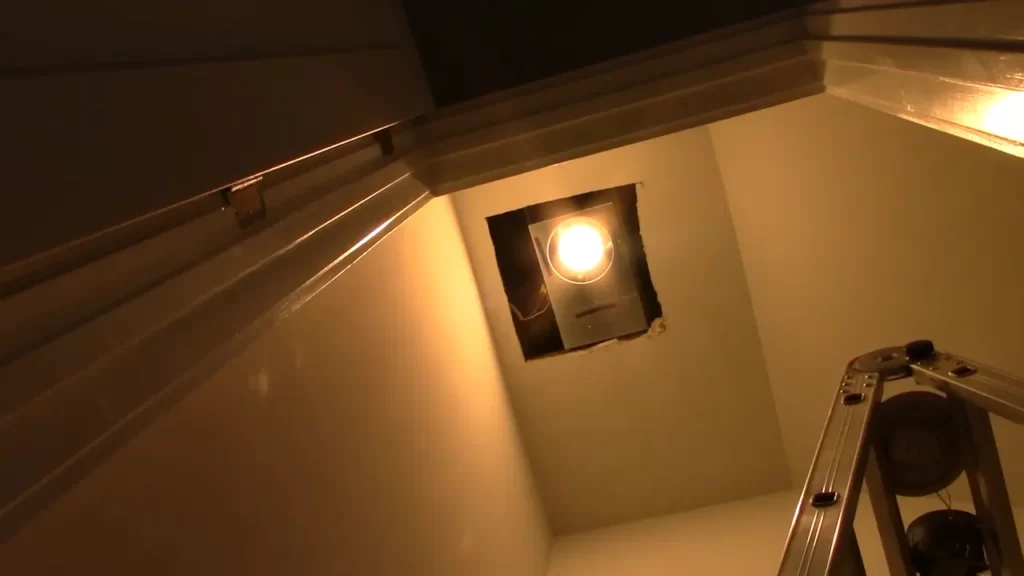
- Install the housing: Slide the fan housing into the opening. Secure it in place using screws or nails. Ensure it fits snugly and is aligned properly.
- Connect the wiring: Carefully attach the wires according to the manufacturer’s instructions. Connect the wiring from the fan to the existing electrical supply in your bathroom.
- Mount the fan grille: Attach the fan grille to the housing. Use the provided screws or clips to secure it in place. Make sure it fits securely and covers the entire opening.
- Test the fan: Once the installation is complete, turn on the power supply and test the fan. Ensure it is functioning properly, effectively ventilating the bathroom.
Tips and techniques for a seamless installation process
Installing a bathroom fan without attic access can be made even smoother by following these helpful tips:
- Invest in a ductless bathroom fan: If the installation seems overwhelming, consider using a ductless bathroom fan. These fans don’t require ductwork and can be easier to install.
- Use a flexible duct: When dealing with limited space, consider using a flexible duct for ventilation. It allows for easier maneuvering and installation.
- Check local building codes: Before beginning the installation process, consult local building codes to ensure compliance. This will help you avoid any issues or setbacks during or after installation.
- Seek professional assistance: If you’re unsure about any step or encounter difficulties during the installation, it’s best to seek professional help. They have the experience and knowledge to handle the installation properly.
- Maintain proper ventilation: Once your bathroom fan is installed, regularly clean and maintain it to ensure optimal performance. Remove any dust or debris that may affect its efficiency.
With these step-by-step instructions and valuable tips, you’re now equipped to tackle the installation of a bathroom fan without attic access. Enjoy improved air quality and ventilation in your bathroom!
Wiring And Connecting The Bathroom Fan
Proper wiring and connection of your bathroom fan are crucial for ensuring its functionality and safety. By following these guidelines and connecting the fan to the power source without damaging existing wiring, you can successfully install a bathroom fan without attic access.
Guidelines for wiring the fan properly to ensure functionality and safety
When it comes to wiring your bathroom fan, it is essential to follow specific guidelines to ensure both functionality and safety. Here are some tips to help you wire your fan properly:
- Read the instructions: Before beginning the wiring process, carefully read the instructions provided by the manufacturer of your bathroom fan. This will give you an understanding of the specific wiring requirements and ensure you follow the correct steps.
- Turn off the power: Before working with any electrical components, make sure to turn off the power to the bathroom. Locate and switch off the circuit breaker that controls the bathroom’s electrical supply.
- Secure the wires: When wiring the fan, it is vital to secure the wires properly to prevent them from coming loose or getting damaged. Use wire nuts to connect the wires securely and fasten them with electrical tape for added protection.
- Properly ground the fan: Grounding the fan is an essential step in ensuring safety. Connect the green or bare copper wire from the fan to the grounding wire in the electrical box using a wire nut.
- Check the connections: Once you have wired the fan, double-check all the connections to ensure they are secure. Loose or faulty connections can lead to electrical issues and potentially dangerous situations.
- Test the fan: After completing the wiring process, turn on the power and test the fan to ensure it is functioning correctly. Listen for any unusual noises or vibrations, as they may indicate a wiring problem that needs to be addressed.
Connecting the fan to the power source without damaging existing wiring
When connecting your bathroom fan to the power source, it is essential to do so without damaging any existing wiring. Follow these steps to ensure proper connection:
- Locate the power source: Identify the electrical source that will power your bathroom fan. This may be an existing light switch or an outlet.
- Turn off the power: Before making any connections, switch off the power to the bathroom to prevent electrical accidents. Locate the circuit breaker and switch it off to cut off electricity to the area.
- Install a junction box: If necessary, install a junction box near the power source to connect the fan’s wiring. This will provide a safe and secure location for the connections.
- Connect the wires: Use wire nuts to connect the fan’s wiring to the power source. Match the corresponding wires (e.g., black to black, white to white) and twist the wire nuts clockwise to secure the connections.
- Secure the connections: Once the wires are connected, tuck them carefully into the junction box or secure them using cable ties. Make sure there are no loose or exposed wires that could lead to safety hazards.
- Restore power and test: After completing the connections, restore power to the bathroom by turning on the circuit breaker. Test the fan to ensure it is receiving power and functioning correctly.
Following these guidelines and connecting your bathroom fan to the power source without damaging existing wiring will help you install the fan without attic access successfully. Remember to prioritize safety throughout the process and consult a professional if you are unsure about any steps.
Testing And Troubleshooting
After successfully installing your bathroom fan without attic access, it is crucial to conduct a thorough test to ensure it operates correctly. This testing phase will help you identify any issues or malfunctions that may arise, allowing you to address them promptly and ensure optimal performance from your newly installed fan.
Conducting a thorough test to ensure the fan operates correctly
To conduct a proper test and ensure your bathroom fan is operating correctly, follow these steps:
- Ensure the fan is securely mounted and properly connected to the power source. Check for any loose screws or connections.
- Turn on the fan and inspect the airflow. Place a tissue paper or lightweight object near the fan to observe if it is being properly sucked in or blown away. This step will help you confirm the direction of airflow.
- Listen for any unusual or excessive noise while the fan is running. A well-installed and functioning fan should operate quietly, so any abnormal sounds may indicate a problem.
- Measure the airflow rate using an anemometer or a similar device if possible. Compare the airflow rate to the manufacturer’s specifications to ensure it meets the recommended level for effective ventilation.
- Check if the fan has a built-in humidity sensor or timer. Test these functions by adjusting the humidity level or timer settings and confirming that the fan operates accordingly.
By conducting this thorough testing process, you can verify the functionality of your bathroom fan and make any necessary adjustments before finalizing the installation.
Troubleshooting common issues that may arise during or after installation
Even with a meticulous installation process, some common issues may still arise during or after installing a bathroom fan without attic access. Understanding and troubleshooting these problems is essential to ensure the longevity and efficiency of your fan.
Here are some common issues you may encounter:
- Insufficient airflow: If you notice weak airflow, check for any obstructions in the venting system, including debris or blockages. Cleaning or clearing these obstructions should improve the airflow.
- Excessive noise: Noisy operation can be caused by loose parts, a vibrating duct, or an improperly installed fan. Inspect all connections, tighten any loose parts, and ensure the fan is securely mounted to minimize noise.
- Poor ventilation: If the fan does not adequately remove moisture or odors from the bathroom, it may require a higher-capacity fan or a more efficient venting system. Consult the manufacturer’s guidelines or seek professional advice for appropriate solutions.
- Power or electrical issues: If the fan does not turn on or experiences intermittent operation, check the power source, wiring connections, and switches. Ensure proper electrical connections and consult an electrician if needed.
By troubleshooting these common issues promptly, you can optimize the performance of your bathroom fan and ensure a pleasant and healthy environment in your bathroom.
Maintenance And Care For Longevity
Proper maintenance and regular care are essential for ensuring the longevity of your bathroom fan without attic access. By implementing effective maintenance strategies, you can prevent potential malfunctions, reduce energy consumption, and extend the lifespan of the fan. In this section, we will provide you with some valuable tips and recommendations for maintaining and cleaning your bathroom fan.
Tips and Recommendations for Maintaining and Cleaning the Bathroom Fan
Regular Cleaning for Optimal Performance
Regular cleaning is crucial for maintaining the performance and efficiency of your bathroom fan. Dust, dirt, and debris can accumulate over time and hinder the fan’s ability to function effectively. To prevent this, it is recommended to clean the fan at least every six months or as needed. Here’s how you can do it:
- Turn off the power: Before starting any cleaning or maintenance tasks, ensure that the power to the fan is turned off to avoid accidents.
- Remove the cover: Carefully remove the cover of the fan by unscrewing the screws or following the manufacturer’s instructions.
- Clean the cover: Using a mild detergent or an all-purpose cleaner, wipe the cover with a soft cloth to remove any built-up grime or residue. Rinse and dry thoroughly before reinstalling.
- Clean the blades: Gently wipe the fan blades with a damp cloth or use a brush to remove any dust or dirt. Be careful not to bend the blades during the cleaning process.
- Vacuum the interior: Utilize a vacuum cleaner or a brush attachment to clean the interior of the fan housing. This will remove any accumulated dust or debris that may affect the fan’s performance.
- Check and clean the vent duct: The vent duct connected to the fan also needs to be cleaned periodically. Remove any obstructions or debris that may hinder the ventilation process.
- Reassemble the fan: Once the cleaning is complete, reassemble the fan by attaching the cover and securing it with the screws.
Regular cleaning not only enhances the functionality of your bathroom fan but also helps to maintain good indoor air quality in your bathroom.
Monitoring and Inspections
Aside from regular cleaning, it is important to monitor and inspect your bathroom fan to identify any potential issues early on. Here are some essential tips for monitoring and inspecting your bathroom fan:
- Check for unusual noises: Listen for any unusual noises such as rattling or grinding sounds, as they may indicate a problem with the fan motor or blades.
- Test the fan’s performance: Periodically test the fan’s performance by turning it on and ensuring that it operates smoothly and effectively.
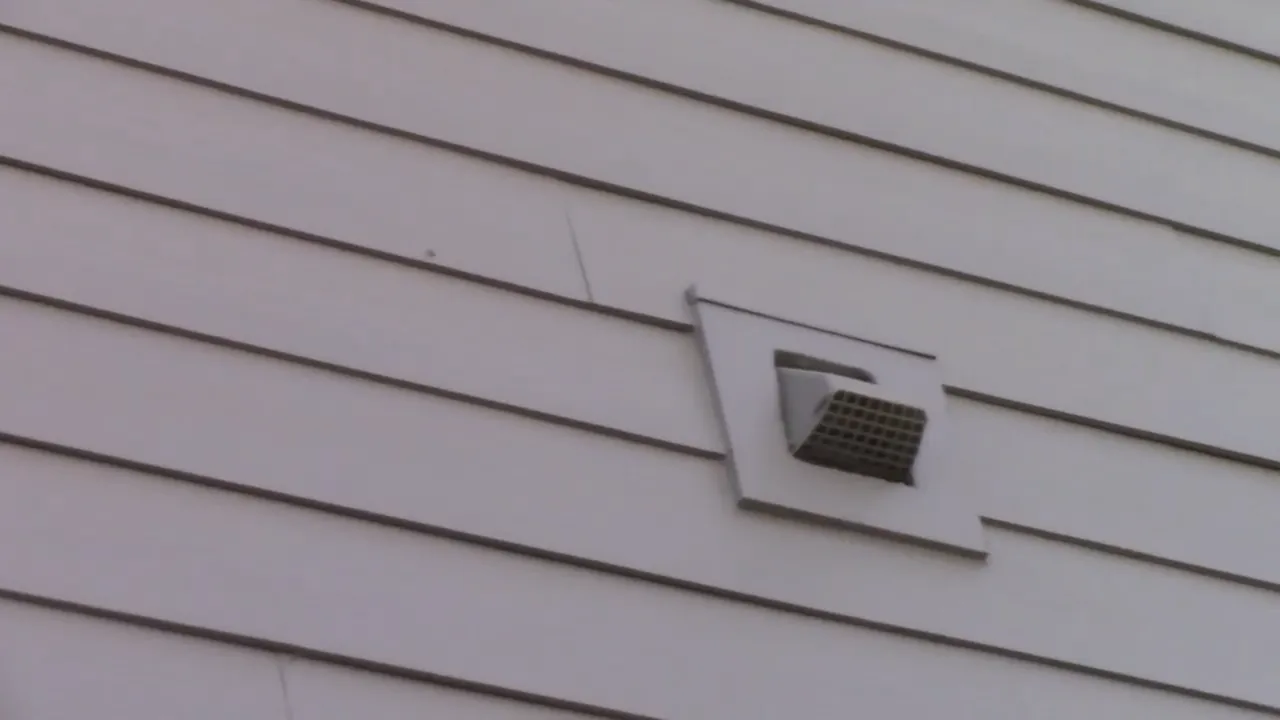
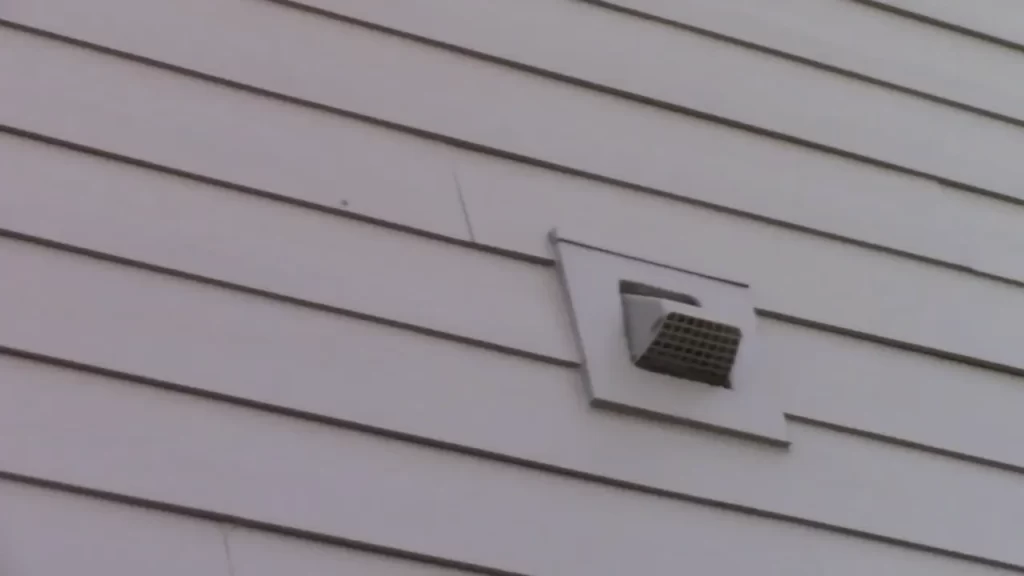
- Inspect the vent cover: Check the vent cover outside your home to ensure it is not obstructed by debris, bird nests, or other objects.
- Replace worn-out parts: If you notice any worn-out parts such as cracked blades or a malfunctioning motor, replace them promptly to maintain optimal performance.
Regular monitoring and inspections allow you to address any potential issues before they escalate and ensure that your bathroom fan operates at its best.
By following these maintenance and care tips, you can extend the lifespan of your bathroom fan without attic access, ensuring efficient ventilation and a fresh bathroom environment for years to come.
Frequently Asked Questions
How Do You Vent A Bathroom With No Ceiling Access?
To vent a bathroom with no ceiling access, install an exhaust fan on an exterior wall. Make sure the fan is strong enough to effectively remove moisture and odors from the space. You can hire a professional or do it yourself following the manufacturer’s instructions for installation.
Can You Install A Bathroom Fan Without Venting To Outside?
Yes, it is possible to install a bathroom fan without venting to the outside. However, this setup may lead to inadequate ventilation and potential moisture issues. It is recommended to properly vent the fan to the outside for better air circulation and to prevent humidity buildup in the bathroom.
Can I Install A Bathroom Fan Without Ductwork?
Yes, it is possible to install a bathroom fan without ductwork. There are ductless bathroom fans available that use filters and recirculate the air instead of venting it outside. These fans are easier to install but may not be as effective in removing moisture and odors as vented fans.
How Do You Replace A Bathroom Fan Light Combo Without Attic Access?
To replace a bathroom fan light combo without attic access, follow these steps: 1. Turn off the power to the fan and light at the circuit breaker. 2. Remove the grille and disconnect the electrical connections. 3. Unscrew and remove the old unit from the ceiling.
4. Install the new fan light combo according to the manufacturer’s instructions. 5. Reconnect the electrical connections, replace the grille, and restore power at the circuit breaker.
Conclusion
To sum up, installing a bathroom fan without attic access may seem daunting at first, but with the right tools and techniques, it can be a manageable project. From measuring the space to selecting a suitable venting route, we have explored the step-by-step process to guide you through the installation.
Remember to prioritize safety and consult professional guidance whenever needed. You’ll be well on your way to enjoying a well-ventilated bathroom in no time. Happy DIY-ing!