
To install a bathroom fan roof vent, start by choosing an appropriate location and cutting a hole in the roof. Then, secure the vent to the roof and seal it to prevent leaks.
Are you planning to install a bathroom fan roof vent? Proper ventilation in a bathroom is crucial for removing moisture, preventing mold, and maintaining good air quality. One effective way to achieve this is by installing a bathroom fan roof vent.
In this guide, we will walk you through the steps involved in the installation process. From choosing the right location to securing the vent and ensuring a leak-free seal, we will provide you with all the necessary information to complete this project successfully. So, let’s get started and improve the ventilation in your bathroom!
Choosing The Right Bathroom Fan Roof Vent
When it comes to bathroom ventilation, installing a roof vent for your bathroom fan is a crucial step. A properly installed roof vent ensures that the moist air and odors are efficiently exhausted out of your bathroom, preventing the formation of mold and mildew and maintaining fresh air quality. However, choosing the right bathroom fan roof vent is equally important to ensure optimal performance. In this section, we will discuss the factors to consider when selecting a bathroom fan roof vent and the benefits of a properly installed vent.
Factors to Consider When Selecting a Bathroom Fan Roof Vent
Choosing the right bathroom fan roof vent requires careful consideration of various factors. Let’s take a look at some key aspects to keep in mind:
1. Ventilation Capacity
Before making a decision, assess the ventilation requirements of your bathroom. Consider the size of your bathroom, the number of fixtures (toilets, showers, etc.), and the expected usage. A larger bathroom or one with multiple fixtures may require a more powerful roof vent to effectively remove moisture and odors.
2. Duct Size
Ensure that the duct size of the roof vent matches the size of your bathroom fan duct. This will ensure proper air flow and prevent any restrictions that could lead to reduced performance.
3. Material and Durability
Look for a roof vent made from high-quality materials that are resistant to weathering and corrosion. This will ensure durability and prevent any damage caused by external elements such as rain, snow, or UV rays.
4. Noise Level
Consider the noise level of the roof vent. A loud fan can be disturbing, especially in quiet environments such as bedrooms or adjacent living spaces. Look for a roof vent that provides efficient ventilation with minimal noise.
Understanding the Benefits of a Properly Installed Roof Vent
A properly installed bathroom fan roof vent offers several benefits, including:
- Improved Air Quality: By efficiently removing moist air and odors, a roof vent helps maintain fresh and clean air quality in your bathroom, reducing the risk of mold, mildew, and musty smells.
- Prevention of Damage: Excess moisture in the bathroom can lead to structural damage, such as peeling paint, rotting wood, or crumbling drywall. With a roof vent, you can prevent these issues and protect your bathroom from costly repairs.
- Enhanced Comfort: Proper ventilation helps regulate humidity levels, preventing excessive moisture that can make the bathroom feel uncomfortable and stuffy. This is especially important during hot and humid seasons.
- Energy Efficiency: When your bathroom fan is equipped with a roof vent, it helps expel the warm air generated by showers or baths, reducing the strain on your air conditioning system and potentially lowering energy costs.
By considering these factors and understanding the benefits of a properly installed roof vent, you can make an informed decision when choosing the right bathroom fan roof vent for your needs.
Tools And Materials Needed For Installation
When installing a bathroom fan roof vent, having the right tools and materials is crucial to ensure a successful and efficient installation process. By gathering the necessary tools and materials beforehand, you can save time and ensure a seamless installation. In this section, we will discuss the list of tools required and the materials needed for a bathroom fan roof vent installation.
List of tools required for the installation
Before you begin installing a bathroom fan roof vent, it’s important to have the following tools at hand:
- Tape measure: Used to measure the dimensions of the vent and determine the appropriate size.
- Jigsaw: Enables you to cut through the roof for the vent installation.
- Power drill: Needed to create holes and secure the vent in place.
- Screwdriver: Used to fasten screws and secure the vent to the roof.
- Safety goggles: Essential for protecting your eyes from debris and dust.
- Gloves: Provide added safety and grip while working with tools and materials.
- Ladder: Required for easy access to the roof and ensure safety during the installation process.
Materials needed for a successful bathroom fan roof vent installation
Now that we’ve covered the necessary tools, let’s explore the materials you’ll need for a successful bathroom fan roof vent installation:
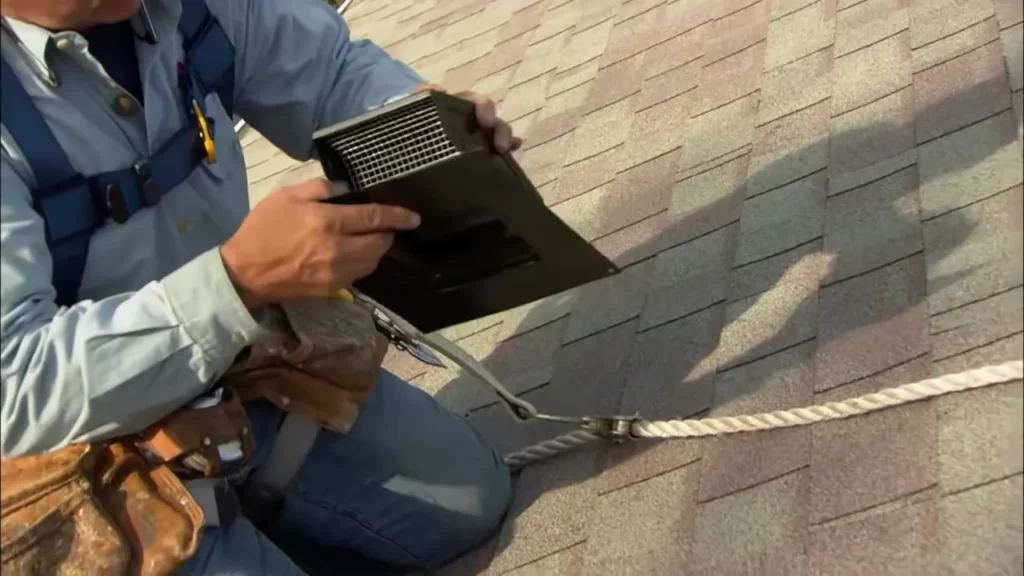
- Bathroom fan roof vent kit: This includes the vent cover, flashing, and pipe connectors.
- Roofing tar: Used as a sealant to prevent leaks around the vent area.
- Roofing nails: Required to secure the flashing and vent cover to the roof.
- Caulk: Used to seal any gaps or joints to ensure a tight fit.
- Roofing adhesive: Helps to further secure the flashing and prevent water intrusion.
- Roofing cement: Used to reinforce and seal the vent flashing for added protection.
By gathering these tools and materials, you’ll be well-prepared to install a bathroom fan roof vent. Make sure to double-check the sizes and compatibility of the materials before proceeding with the installation process. With the right tools and materials, you’ll be on your way to a well-ventilated bathroom in no time!
Measuring And Cutting The Vent Hole
Determining the ideal location for the vent hole
Determining the ideal location for the vent hole is the first crucial step in installing a bathroom fan roof vent. You need to choose a location that allows for efficient air flow and minimizes any potential leaks or damage to the roof. To determine the ideal location, consider the following factors:
1. Roof structure: Assess the structure of your roof to find the best spot for the vent hole. Look for a location that is free from any obstructions such as rafters or joists.
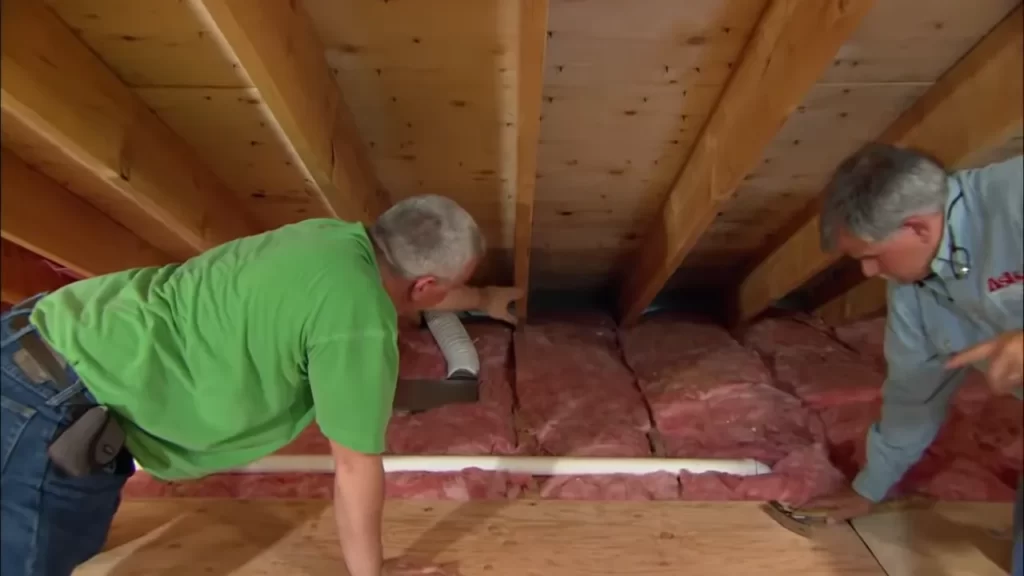
2. Attic space: Check the attic space underneath the bathroom to ensure there are no obstacles like insulation or wiring that could interfere with the installation.
3. Bathroom layout: Take into account the layout of your bathroom and the proximity to the fan before deciding on the location. You want to position the vent hole in an area that allows for the most efficient removal of moist air from the bathroom.
Measuring and marking the precise dimensions for the hole
Once you have determined the ideal location for the vent hole, it’s time to measure and mark the precise dimensions. Follow these steps to ensure accurate measurements:
1. Begin by measuring the diameter of the vent pipe. This will help you determine the size of the hole you need to cut in the roof.
2. Find the center point of the vent hole on your roof. This can be done by measuring the distance from the nearest roof edge and using a chalk line or marker to mark the center point.
3. Using a tape measure, mark the dimensions of the hole based on the diameter of the vent pipe. Ensure the markings are precise and easily visible.
Properly cutting the hole using the appropriate tools
After measuring and marking the dimensions for the vent hole, it’s time to cut the hole using the appropriate tools. Here’s what you need to do:
1. Start by gathering the necessary tools, including a reciprocating saw or jigsaw, a drill with a hole saw attachment, and a utility knife.
2. Use the drill with the hole saw attachment to create a pilot hole inside the marked dimensions. This will serve as a guide for cutting the hole.
3. Insert the reciprocating saw or jigsaw into the pilot hole and carefully cut along the marked dimensions. Take your time to ensure a clean and accurate cut.
4. Once the hole is cut, use a utility knife to remove any excess shingles or roofing materials around the edges of the hole.
By following these steps, you can effectively measure and cut the vent hole for your bathroom fan roof vent installation. Remember to always prioritize safety and accuracy when working on your roof.
Installing The Roof Flashing
Installing the roof flashing is a crucial step when installing a bathroom fan roof vent. The roof flashing not only ensures that the vent is properly placed and aligned on the roof, but also prevents leaks that can result in damage to your home. In this section, we will discuss how to ensure proper placement and alignment of the roof flashing, as well as how to secure it to the roof to prevent leaks.
Ensuring proper placement and alignment of the roof flashing:
To begin with, you need to determine the ideal location on the roof where you will install the bathroom fan roof vent. Take into consideration the slope of the roof, nearby obstacles such as chimneys or other vents, and the recommended distance from any roof edges. Once you have identified the ideal location, mark it on the roof using a marker or chalk.
Next, you should carefully measure and align the flashing to ensure that it will cover the intended area. The flashing should extend at least 3 inches beyond the opening for the vent to create a watertight seal. Ensure that the flashing is positioned properly and aligned with the marks you made on the roof.
Securing the flashing to the roof to prevent leaks:
Now that you have ensured proper placement and alignment of the roof flashing, it’s time to secure it to the roof. Begin by applying a layer of roofing cement around the area where the flashing will be placed. This will create a waterproof barrier and help to seal any gaps.
Next, carefully position the flashing over the opening and press it firmly onto the roof. Ensure that it is centered and aligned with the opening. Once in place, secure the flashing by using roofing nails or screws around the perimeter. If your roof is made of a different material, such as metal, consult the manufacturer’s instructions for the appropriate method of securing the flashing.
To further enhance the watertight seal, you can apply another layer of roofing cement over the edges of the flashing. This will help to seal any small gaps or areas that may be prone to leaks. Lastly, inspect the flashing and surrounding area to ensure there are no visible gaps or loose edges.
By following these steps, you can ensure proper placement and alignment of the roof flashing, as well as secure it to the roof to prevent leaks. Taking the time to install the roof flashing correctly will help to protect your home from potential water damage and ensure the effectiveness of your bathroom fan roof vent installation.
Attaching And Sealing The Roof Vent
Attaching and sealing the roof vent is a critical step in ensuring proper ventilation for your bathroom. By following these steps, you can connect the roof vent to the bathroom fan duct and apply sealant to create a watertight seal.
Connecting the roof vent to the bathroom fan duct
To connect the roof vent to the bathroom fan duct, you’ll need a few tools and materials:
- A ladder
- A power drill
- A screwdriver
- The roof vent kit
- Duct tape
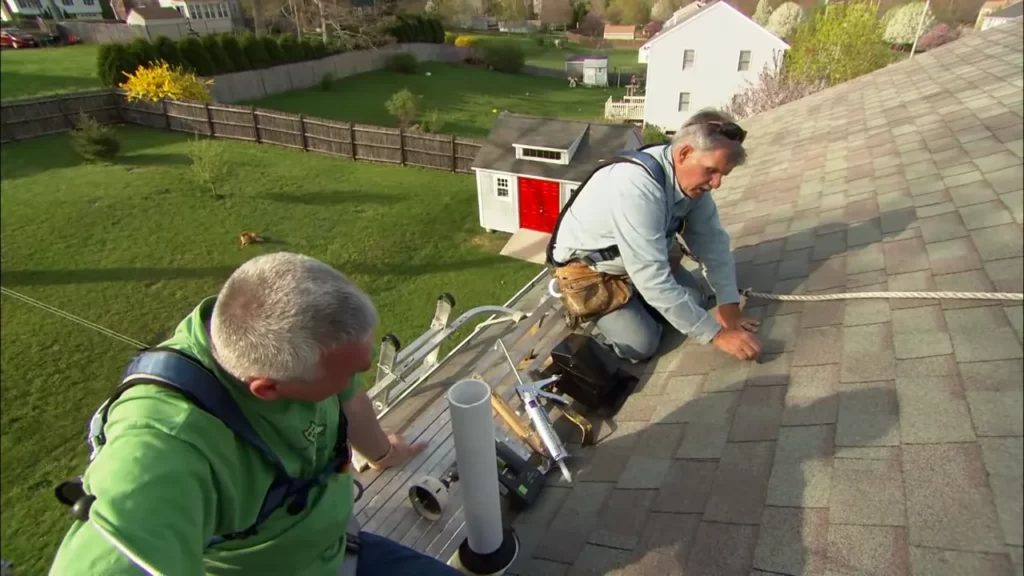
- Begin by locating the area on your roof where you want to install the roof vent. Ensure that it is clear of any obstacles such as plumbing or electrical lines.
- Using a power drill, create a hole large enough for the roof vent through the roof. Be careful not to damage any existing roofing material.
- Insert the roof vent into the hole, making sure it fits snugly. Secure it in place using screws or other provided fasteners.
- Next, locate the bathroom fan duct and ensure that it reaches the roof vent. If necessary, use duct tape to extend the length of the duct.
- Attach the bathroom fan duct to the roof vent using duct tape or the provided connectors. Make sure the connection is secure and airtight.
Applying sealant to ensure a watertight seal
Applying sealant is crucial to prevent water leakage around the roof vent. Follow these steps to ensure a watertight seal:
- Clean the area around the roof vent and duct connection to remove any dirt or debris. This will help the sealant adhere properly.
- Using a weather-resistant sealant, apply a generous amount around the roof vent and duct connection. Ensure that all gaps and openings are sealed.
- Smooth the sealant with a putty knife or your finger to create a neat and uniform seal.
- Allow the sealant to dry completely as per the manufacturer’s instructions. This will ensure a strong and long-lasting seal.
By properly connecting the roof vent to the bathroom fan duct and applying sealant for a watertight seal, you can ensure the efficient operation of your bathroom fan as well as protect your home from potential water damage. With these steps completed, you can now enjoy a well-ventilated bathroom that promotes healthy air circulation.
Completing The Installation
Properly securing the bathroom fan roof vent in place
Once you have successfully positioned and attached the bathroom fan roof vent, it is crucial to secure it properly to ensure it remains in place. This step is essential to prevent any potential leaks or damage caused by shifting or movement of the vent. Here’s what you need to do to properly secure the bathroom fan roof vent:
- Apply roofing cement or silicone caulking: Prior to securing the vent, apply a layer of roofing cement or silicone caulking around the base of the vent. This provides an additional layer of protection against water penetration and helps create a watertight seal.
- Use roofing screws: Next, use roofing screws to secure the vent to the roof. Make sure to use screws that are appropriate for your roofing material. These screws will ensure that the vent is firmly attached and can withstand various weather conditions.
- Follow manufacturer’s guidelines: Additionally, it is crucial to follow the manufacturer’s installation guidelines and instructions. Different bathroom fan roof vents may have specific requirements for proper installation, so be sure to consult the provided instructions.
- Inspect for tightness: Once the vent is secured, inspect it to ensure that it is firmly in place. Gently tug on the vent to ensure that it doesn’t move or shift. If you notice any movement, readjust and secure it again until it is firmly in place.
Testing the ventilation system for functionality
After securing the bathroom fan roof vent in place, it is essential to test the ventilation system to ensure it functions properly. This step will help confirm that the installed vent effectively removes humidity and odors from your bathroom. Here’s how you can test the functionality of your ventilation system:
- Power on the bathroom fan: Switch on the bathroom fan to activate the ventilation system. Ensure that it runs smoothly and without any unusual noises.
- Check air movement: Hold a tissue or a lightweight piece of paper near the fan grille to check for adequate air movement. The tissue should be drawn towards the grille, indicating that the fan is effectively pulling air out of the bathroom.
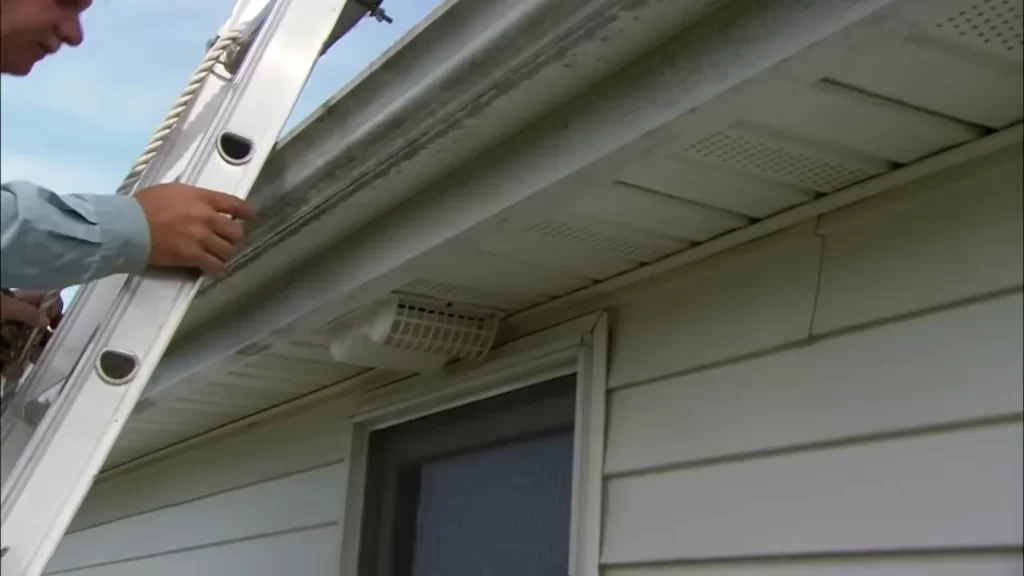
- Verify air exhaust outside: Go to the outside of your home and check for the presence of airflow coming from the bathroom fan roof vent. You should feel air being expelled from the vent, indicating that the ventilation system is operational.
- Monitor performance over time: After testing the ventilation system, it is important to monitor its performance over time. Ensure that it consistently removes moisture and odors from your bathroom to maintain a healthy and comfortable environment.
By following these steps to properly secure the vent and test the functionality of your bathroom fan roof vent, you can ensure that your bathroom stays well-ventilated and free from excess humidity and odors. Regular maintenance and cleaning of the vent will also help prolong its lifespan and maintain efficient performance.
Maintenance And Troubleshooting Tips
In order to ensure that your bathroom fan roof vent operates efficiently and effectively, regular maintenance is crucial. Additionally, being aware of common troubleshooting issues and their solutions can save you time and money in the long run. In this section, we will provide you with essential maintenance tasks to keep your bathroom fan roof vent working efficiently, as well as troubleshooting tips to address common issues that may arise.
Regular maintenance tasks to keep the bathroom fan roof vent working efficiently
Performing regular maintenance tasks can significantly prolong the lifespan of your bathroom fan roof vent and prevent any potential issues from occurring. Here are some key maintenance tips:
- Keep the vent clean: Over time, dust, debris, and other particles can accumulate in the vent, leading to reduced airflow. Regularly clean the vent using a vacuum cleaner or a soft brush to remove any obstructions.
- Check the fan blades: Dust build-up on the fan blades can cause imbalance and noisy operation. Carefully clean the blades using a damp cloth or a soft brush.
- Inspect the motor: The motor is the heart of your bathroom fan roof vent. Regularly check for any signs of wear, such as unusual noises or excessive heat. Should you notice any issues, it’s best to contact a professional for repairs or replacement.
Common troubleshooting issues and their solutions
Despite regular maintenance, you may encounter some common issues with your bathroom fan roof vent. Here are a few troubleshooting tips to help you resolve them:
| Issue | Solution |
|---|---|
| Noisy operation | Tighten any loose screws or mounting hardware. If the noise persists, the fan blades may be warped or worn out and need replacement. |
| Ineffective ventilation | Check for any obstructions in the vent, such as bird nests or debris. Clear any blockages and ensure the vent is clean and free of any restrictions. |
| Excessive vibration | Check that the vent is securely mounted to the roof. Loose mounting can cause increased vibrations. Tighten the screws or mounting hardware as necessary. |
These are just a few examples of common issues you may encounter. It’s always important to consult your bathroom fan roof vent’s user manual or contact a professional if you’re unsure about any troubleshooting tasks.
By following these regular maintenance tasks and troubleshooting tips, you can ensure that your bathroom fan roof vent operates efficiently and effectively for years to come. Remember, if you’re unsure or uncomfortable with any maintenance or repair tasks, it’s always best to seek professional assistance.
Understanding The Importance Of Regular Maintenance
Explaining the Benefits of Routine Maintenance for a Bathroom Fan Roof Vent
Regular maintenance is crucial when it comes to ensuring optimal performance and longevity of your bathroom fan roof vent. By investing a little time and effort into maintaining this essential component of your bathroom, you can avoid potential issues and enjoy the benefits of clean, efficient ventilation.
Let’s take a closer look at why routine maintenance is so important:
- Prolongs the lifespan: Just like any other mechanical device, your bathroom fan roof vent requires periodic maintenance to keep it operating at its best. By taking the time to clean and inspect it regularly, you can identify and address any issues before they turn into major problems. This proactive approach can help prolong the lifespan of your vent and save you from costly replacements in the long run.
- Improves air quality: A properly functioning bathroom fan vent is essential for removing excess moisture and odors from your bathroom. Over time, dust, dirt, and debris can accumulate in the vent, hindering its performance. Regular maintenance ensures that the vent remains clean, allowing it to efficiently extract stale air and maintain fresh, clean air quality in your bathroom.
- Reduces the risk of mold and mildew: Bathrooms are often prone to excessive moisture, which can lead to the growth of mold and mildew. A well-maintained bathroom fan roof vent helps to prevent moisture buildup, inhibiting the growth of these harmful substances. By cleaning the vent regularly, you can effectively reduce the risk of mold and mildew growth, protecting not only your bathroom but also your health.
- Enhances energy efficiency: A clogged or dirty bathroom fan vent can put unnecessary strain on the motor, causing it to work harder and consume more energy. Regular maintenance keeps the vent clean and free from obstructions, enabling it to function optimally and use energy efficiently. This not only helps to lower your energy bills but also reduces your environmental footprint.
Tips for Cleaning and Maintaining the Vent for Optimal Performance
Maintaining a bathroom fan roof vent doesn’t have to be a daunting task. With a few simple tips and regular upkeep, you can keep your vent in excellent condition:
- Regular cleaning: Use a soft brush or vacuum cleaner attachment to remove dust and debris from the vent cover and surrounding area. Wipe down the cover with a damp cloth to remove any stubborn dirt. It’s recommended to clean the vent at least once every three months to prevent clogs and ensure efficient air circulation.
- Inspect for damage: Regularly inspect the vent for any signs of damage or wear. Check for loose or broken parts, cracks in the cover, or excessive noise during operation. Addressing these issues promptly can prevent further damage and maintain the vent’s functionality.
- Check the airflow: Turn on the vent and ensure that the airflow is strong and consistent. If you notice a significant decrease in airflow, it may indicate a blockage or a worn-out motor. In such cases, it’s advisable to seek professional assistance to diagnose and repair the issue.
- Consider professional maintenance: For a more comprehensive maintenance approach, you may want to schedule a professional inspection and cleaning of your bathroom fan roof vent. HVAC technicians have the expertise and tools to thoroughly clean and service the vent, ensuring optimal performance and addressing any underlying issues.
Regular maintenance of your bathroom fan roof vent is crucial to keep it running smoothly and effectively. By following these simple tips and incorporating routine maintenance into your household chores, you can enjoy improved air quality, enhanced energy efficiency, and a long-lasting bathroom ventilation system.
Troubleshooting Common Problems
Installing a bathroom fan roof vent is an essential step towards improving the ventilation in your bathroom and preventing moisture-related issues. However, like any other home improvement project, you may encounter some common problems along the way. In this section, we will discuss how to troubleshoot these issues so that you can ensure your bathroom fan roof vent is functioning optimally.
Identifying issues such as clogs or obstructions
One of the most common problems with bathroom fan roof vents is the presence of clogs or obstructions that can hinder proper airflow. When your bathroom fan is not exhausting air as it should, it’s important to check for any possible clogs or obstructions. Here’s how you can identify and address these issues:
- Inspect the vent opening: Start by visually inspecting the vent opening on your roof. Look for any visible signs of debris such as leaves, twigs, or bird nests.
- Check the fan grille: Remove the fan grille inside your bathroom and examine it for any dust or debris accumulation. Clean it thoroughly with a damp cloth or a mild cleaning solution.
- Inspect the ductwork: Inspect the ductwork connecting the fan to the roof vent. Look for any bends, kinks, or sections that may have come loose. Make sure that the ductwork is properly connected and free from any obstructions.
- Clear away any obstructions: Use a vacuum cleaner or a brush to clear away any debris or obstructions from the vent opening and the ductwork. Make sure to wear appropriate safety gear, such as gloves and a mask, when dealing with potentially dusty or dirty materials.
By thoroughly inspecting and cleaning the vent opening, fan grille, and ductwork, you can eliminate any clogs or obstructions that might be affecting the performance of your bathroom fan roof vent.
Step-by-step solutions for common ventilation problems
In addition to clogs and obstructions, there are several other common ventilation problems that may arise when installing a bathroom fan roof vent. Here are step-by-step solutions for some of these issues:
| Problem | Solution |
|---|---|
| Noisy fan | Check if the fan blades are clean and free from any obstructions. Lubricate the fan motor if necessary and ensure that it is securely mounted. |
| Poor airflow | Ensure that the fan and ductwork are properly sized for your bathroom. Check for any leaks or gaps in the ductwork and seal them with aluminum tape. |
| Humidity buildup | Consider using a fan with a humidity sensor that automatically detects and removes excess moisture. Make sure that the fan is properly ventilating the bathroom by checking the airflow. |
By following these step-by-step solutions, you can troubleshoot and resolve common ventilation problems with your bathroom fan roof vent, ensuring efficient and effective operation.
Frequently Asked Questions
Can You Vent A Bathroom Fan Through A Roof Vent?
Yes, you can vent a bathroom fan through a roof vent. It is a common and effective method of removing moisture and odors from the bathroom.
How Much Does It Cost To Vent A Bathroom Fan Through The Roof?
To vent a bathroom fan through the roof, the cost can vary depending on factors like the type of fan and roof. Generally, it ranges from $300 to $600.
What Is The Proper Way To Vent A Bathroom Fan?
To properly vent a bathroom fan, first, ensure it is connected to a duct that leads outside, not just into the attic or crawl space. Use insulated ducting to prevent condensation. Position the duct so it exhausts away from windows and vents.
Consider installing a vent cap to prevent pests from entering.
Is It Hard To Install A Bathroom Vent Fan?
Installing a bathroom vent fan is not difficult. With basic tools and following the instructions, it can be done easily.
Conclusion
Installing a bathroom fan roof vent is essential for maintaining good indoor air quality and preventing moisture buildup. By following the step-by-step instructions provided in this blog post, you can easily and efficiently install a roof vent for your bathroom fan.
Remember to prioritize safety and use proper tools and materials. With proper ventilation, you can enjoy a fresh and comfortable bathroom space. So, go ahead and give your bathroom the ventilation it deserves!