Install a bath drain by removing the old drain, applying plumber’s putty to the new drain assembly, and tightening the assembly in place with a wrench. Then, connect the drain pipe to the waste pipe using a coupling and secure it with a screwdriver.
Preparing For The Installation
Before you begin the installation of a bath drain, it is crucial to make the necessary preparations. This ensures a smooth process and helps you avoid any unnecessary setbacks. In this section, we will discuss two essential aspects of preparing for the installation: gathering the necessary tools and materials and ensuring proper safety measures.
Gathering the necessary tools and materials
Having the right tools and materials at hand is vital to complete the installation successfully. Here is a list of items you will need:
| Tools | Materials |
|---|---|
|
|
Ensure you have all the necessary tools and materials readily available to avoid any interruptions during the installation process.
Ensuring proper safety measures
When working on any plumbing project, safety should be your top priority. Here are a few safety measures to keep in mind:
- Wear protective gloves to protect your hands from any sharp edges or potential chemical exposure.
- Use safety goggles to shield your eyes from debris or any harmful substances.
- If you are dealing with a clogged drain, avoid using harsh chemicals and opt for natural drain cleaners or a plunger instead.
- Before starting the installation, make sure to turn off the water supply to prevent any leaks or accidents.
- Carefully read and follow the instructions provided by the manufacturer to ensure proper handling of the tools and materials.
By following these safety measures, you will ensure a secure and accident-free installation process.
Once you have gathered the necessary tools and materials and taken the proper safety precautions, you are ready to move on to the next step of installing a bath drain. Stay tuned for the next section where we will guide you through the process of removing the old drain and preparing the bathtub for the installation.

Removing The Old Drain
Identifying and Turning off the Water Supply
Before proceeding to remove the old bath drain, it is crucial to identify and turn off the water supply. This step will prevent any unwanted water flow during the installation process. To identify the water supply, you can check for valves near the bathtub or locate the main water shut-off valve for your house. Once you have located the valves, turn them clockwise until they are completely closed. This will ensure that water isn’t flowing into the bathtub, allowing you to work without any disruptions.
Removing the Bathtub Stopper and Overflow Plate
The next step in removing the old drain is to take out the bathtub stopper and overflow plate. Begin by unscrewing the screws holding the overflow plate in place. Use a screwdriver or a wrench to loosen them. Once the screws are removed, gently pull the overflow plate away from the bathtub. This will expose the bathtub stopper mechanism. To remove the stopper, unscrew it counterclockwise until it comes off. Keep in mind to place the screws and other small parts in a safe spot to avoid misplacement.
Detaching the Old Drain Assembly
Now that the bathtub stopper and overflow plate are removed, it’s time to detach the old drain assembly. Start by unfastening the drain cover, which can usually be accomplished by turning it counterclockwise. Once the drain cover is removed, you’ll be able to see the drain flange. Look for a series of slots or screws holding the drain assembly in place. Unscrew them or use a wrench to release the drain flange. Be cautious not to damage the surrounding plumbing or the bathtub’s surface while detaching the old drain assembly.
After successfully unscrewing or loosening the screws and slots, gently pull out the old drain assembly. It may take a bit of force, so be patient and take your time. Ensure that all components of the old drain assembly are removed, including any plumbers putty or silicone that may be stuck to the bathtub or drain. A clean and smooth surface is necessary for a proper installation.
By following these steps, you’re now ready to proceed with the installation of your new bath drain. Removing the old drain is an important initial step, as it sets the foundation for a successful installation. Remember to take necessary precautions and ensure that the water supply is turned off to avoid any mishaps. Stay tuned for the next section of our guide, where we’ll cover the installation process in detail!
Installing The New Drain
Selecting the Right Drain Type and Size
Before diving into the installation process, it’s crucial to select the right drain type and size for your bathtub. Consider the following factors:
- Check the manufacturer’s specifications to ensure a perfect fit.
- Consider the style and finish that matches your bathroom decor.
- Choose between a regular or a pop-up drain depending on your preference.
- Measure the diameter of the current drain to determine the correct size for replacement.
Applying Plumber’s Putty or Silicone Sealant
Once you’ve selected the appropriate drain, the next step is to create a watertight seal between the drain flange and the bathtub surface using plumber’s putty or silicone sealant. Follow these easy steps:
- Apply a generous amount of plumber’s putty or silicone sealant around the bottom lip of the drain flange.
- Make sure the putty is evenly spread to ensure a tight seal.
- Hold the drain flange in position and press it firmly onto the bathtub surface, exerting gentle pressure.
- Remove any excess putty or sealant that oozes out.
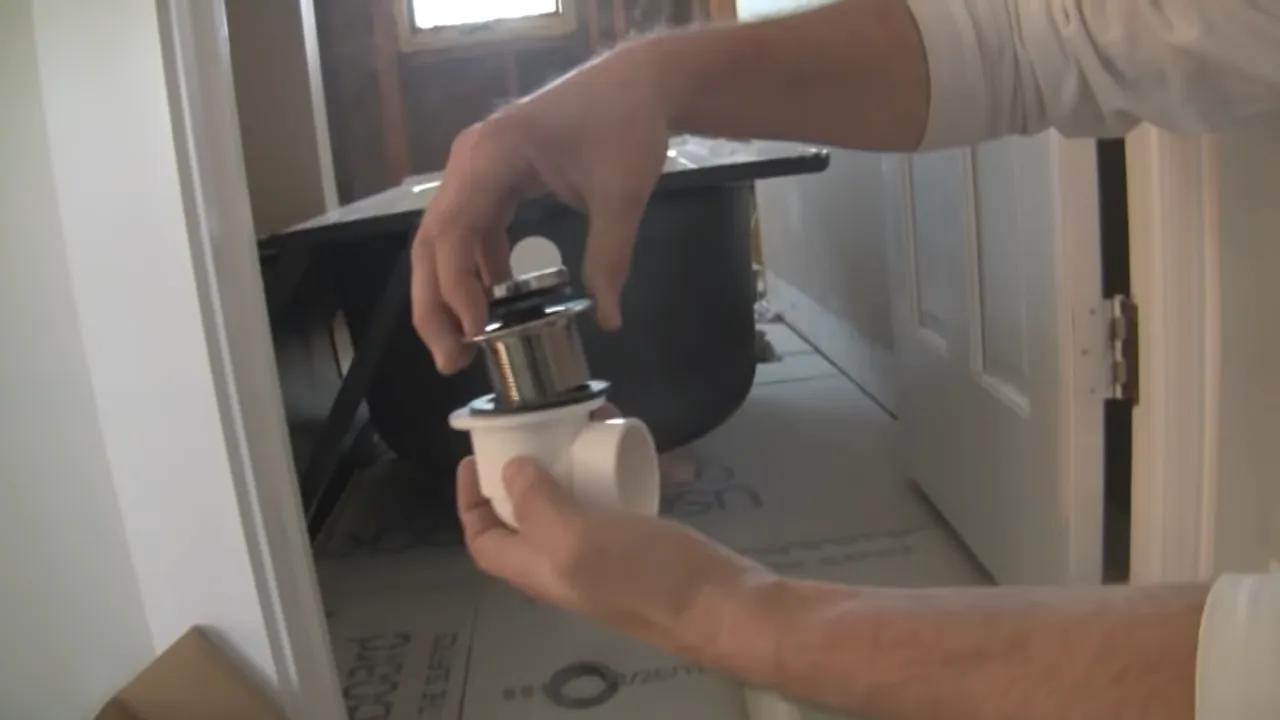
Inserting the New Drain into the Bathtub
With the sealant in place, it’s time to insert the new drain into the bathtub. Follow these step-by-step instructions:
- Apply a thin layer of plumber’s putty or silicone sealant to the underside of the drain flange.
- Insert the drain into the drain hole, ensuring that it fits snugly.
- Tighten the drain flange by turning it clockwise until it is securely in place.
- Wipe off any excess putty or sealant that may have squeezed out.
It’s important to note that each manufacturer may have specific instructions for their drains, so always refer to the installation manual provided.
By following these simple steps, you’ll be able to install a new bath drain without much hassle. So go ahead, give your bathtub a much-needed upgrade and enjoy a refreshing bathing experience!
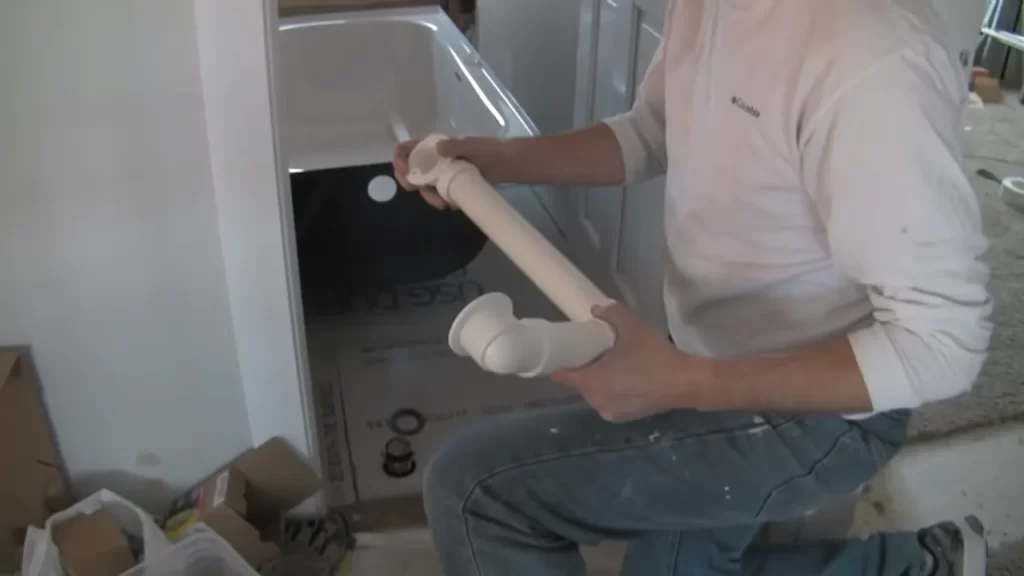
Connecting The Drain Pipe
Now that you have successfully installed the drain assembly in your bath, it’s time to connect the drain pipe. This is a crucial step in ensuring that your bath drain functions properly and efficiently. Follow these steps to connect the drain pipe seamlessly:
Attaching the drain pipe to the drain assembly
Begin by attaching the drain pipe to the drain assembly. This can be done using a suitable connector, such as a slip nut or a compression fitting. Make sure to choose the appropriate connector based on the type and size of your drain pipe. Insert the drain pipe into the connector and secure it tightly using a wrench. Ensure that the connection is secure to prevent any leaks.
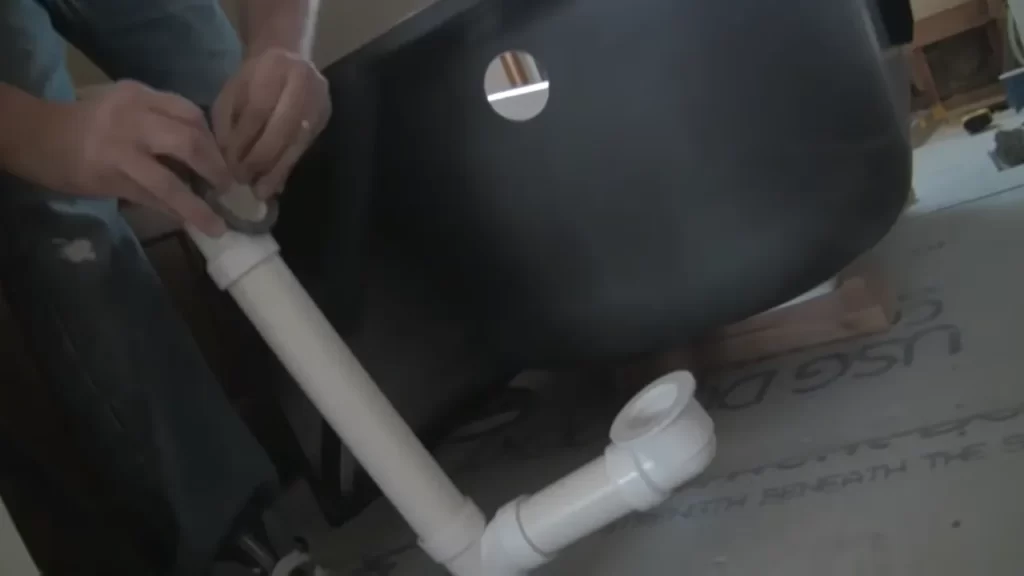
Ensuring proper alignment and snug fit
Once you have attached the drain pipe, it’s important to ensure proper alignment and a snug fit. Carefully align the drain pipe with the drain assembly, making sure that it is positioned correctly without any bends or kinks. A poorly aligned drain pipe can lead to blockages and inefficient drainage. Verify that the drain pipe fits tightly into the connector, without any gaps or looseness. A secure and snug fit will ensure optimal functionality of your bath drain.
Securing the connections with fittings or adhesive
After ensuring proper alignment and a snug fit, it’s essential to secure the connections between the drain pipe and the drain assembly. Depending on the type of drain pipe and connector used, you can secure the connections with fittings or adhesive. Fittings such as compression rings or slip nuts can be tightened using a wrench to create a watertight seal. Alternatively, you may use a suitable adhesive, following the manufacturer’s instructions, to bond the drain pipe to the connector. Whichever method you choose, be sure to secure the connections tightly to prevent any potential leaks.
By following these steps and ensuring a secure and properly connected drain pipe, you can confidently complete the installation of your bath drain. Remember to check all connections for tightness and conduct a thorough leak test before using the bath. Enjoy the benefits of a fully functional and efficient bath drain!

Testing And Finishing Touches
After successfully installing the bath drain, it’s time to move on to the testing and finishing touches. This crucial step ensures that everything is working smoothly and the installation is leak-free. In this section, we will guide you through checking for leaks and ensuring proper drainage, reinstalling the bathtub stopper and overflow plate, cleaning up the work area, and conducting final inspections.
Checking for leaks and ensuring proper drainage
Before completing the installation, it’s essential to check for any potential leaks. Follow these steps to ensure a leak-free installation:
- Fill the bathtub with water to its highest level.
- Observe the drain area carefully for any signs of leakage, such as dripping water or wet spots.
- If you notice any leaks, tighten the connections gently or apply plumber’s tape to seal them.
- Once the leaks are fixed, drain the water and ensure that it flows smoothly down the drain without any obstructions.
- If there are any drain blockages, use a plunger or a drain snake to clear them out.
Reinstalling the bathtub stopper and overflow plate
Now that you have ensured proper drainage and addressed any leaks, it’s time to reinstall the bathtub stopper and overflow plate. Following the correct steps will make sure everything functions correctly:
- Take the bathtub stopper and insert it into the drain opening, ensuring it fits securely.
- Tighten the stopper by turning it clockwise until it is firmly in place.
- Next, locate the overflow plate and align it with the overflow opening in the bathtub.
- Insert the screws provided with the overflow plate into the designated holes.
- Using a screwdriver, tighten the screws until the overflow plate is firmly attached.
Cleaning up the work area and conducting final inspections
Now that the installation is complete, it’s time to clean up and conduct final inspections to guarantee a flawless finish:
- Remove any tools or debris from the work area and dispose of them properly.
- Wipe down the area around the drain and overflow plate to remove any residue.
- Inspect the drain and overflow plate for any visible damages or signs of wear and tear.
- Ensure that the stopper is functioning correctly by pulling it up and down a few times.
- Finally, test the drain by filling the bathtub with water and ensuring it drains properly without any leaks or blockages.
Congratulations! You have successfully installed a bath drain and completed the necessary testing and finishing touches. By following these steps, you can enjoy a perfectly functioning bath drain for a relaxing and worry-free bathing experience.
Troubleshooting Tips
Common issues during bath drain installation
During the installation of a bath drain, it is not uncommon to encounter a few hiccups along the way. However, with the right troubleshooting tips, you can overcome these challenges and ensure a successful installation. In this section, we will discuss some of the common issues that may arise during bath drain installation and how to fix them.
How to fix leaks or improper fittings
One of the most frustrating problems you may encounter during bath drain installation is leaks or improper fittings. These issues can result in water leakage, which can damage your bathroom floor or walls if left unaddressed. Fortunately, there are several steps you can take to fix these problems.
1. Inspect the fittings: Start by inspecting the fittings to identify any loose or improperly connected parts. Tighten any loose fittings using an adjustable wrench or a pair of pliers. Make sure all connections are secure and snug.
2. Apply plumber’s tape: If you notice leaks around threaded connections, applying plumber’s tape can often solve the issue. Wrap the tape clockwise around the threaded portion of the fitting before reconnecting the components. This helps create a watertight seal.
3. Replace faulty gaskets: Gaskets play a crucial role in preventing leaks. If you find that a gasket is worn out or damaged, it is essential to replace it. Remove the old gasket carefully and replace it with a new one of the same size. Make sure it fits snugly before reassembling the drain.
4. Use a plumbers’ putty: In some cases, leaks may occur due to gaps around the drain flange. To seal these gaps, you can apply a small amount of plumbers’ putty around the underside of the flange before installing it. This putty helps create a seal between the drain and the surrounding bathtub surface.
5. Inspect the drain body: If the leaks persist, there may be an issue with the drain body itself. Inspect it carefully for any cracks or other damage. If you find any, it may be necessary to replace the entire drain assembly.
By following these troubleshooting tips, you can fix leaks or improper fittings during bath drain installation and ensure a watertight and well-functioning drain. Remember to take your time, double-check all connections, and seek professional help if needed. Don’t let these common installation issues dampen your enthusiasm for a beautiful and functional bath drain.
Maintenance And Care
Proper maintenance and care are essential for keeping your bath drain in top condition and preventing future issues. By following some simple tips and taking preventative measures, you can ensure that your bath drain functions properly for years to come. In this section, we will discuss tips for maintaining a properly functioning bath drain and preventative measures for avoiding future issues.
Tips for maintaining a properly functioning bath drain
Maintaining a properly functioning bath drain is crucial to prevent clogs and ensure efficient drainage. Here are some tips to help you maintain your bath drain:
- Regular cleaning: Clean the drain regularly to remove any hair, soap residue, or debris. Use a drain snake or plunger to clear any clogs that may have formed.
- Hot water flush: Once a month, pour a pot of boiling water down the drain to flush out any accumulated buildup. This will help prevent clogs and keep the drain flowing smoothly.
- Avoid chemical cleaners: Harsh chemical cleaners can damage your bath drain and pipes over time. Opt for natural alternatives such as baking soda and vinegar to clean and deodorize your drain.
- Trimming hair: Hair is one of the leading causes of drain clogs. Prevent hair from entering the drain by using a drain cover and regularly trimming hair to minimize the risk of clogs.
- Avoid pouring grease: Grease and oil can solidify in your drain, causing blockages. Dispose of cooking grease properly by letting it cool and throwing it in the trash, rather than pouring it down the drain.
Preventative measures for avoiding future issues
While regular maintenance is important, taking preventative measures can help you avoid future issues with your bath drain. Here are some preventative measures to consider:
- Use a drain strainer: Using a drain strainer can help prevent debris, hair, and other objects from entering the drain and causing clogs.
- Be mindful of what goes down the drain: Avoid letting large objects, food scraps, coffee grounds, or excessive amounts of toilet paper go down the drain, as they can contribute to clogs.
- Install a water softener: Hard water can cause mineral buildup in your pipes and drains, leading to clogs. Installing a water softener can help prevent this issue.
- Regular plumbing inspections: Periodically have a professional plumber inspect your plumbing system to identify any potential issues before they become major problems.
- Take care with DIY repairs: If you encounter a problem with your bath drain, it may be tempting to try and fix it yourself. However, if you are unsure or inexperienced, it’s best to call a professional plumber to avoid causing further damage.
By following these maintenance tips and taking preventative measures, you can keep your bath drain in excellent condition and avoid costly repairs down the line. Remember, proper care and maintenance will ensure that your bath drain provides you with trouble-free use for years to come.
Frequently Asked Questions
Installing a bath drain can seem like a daunting task, but with the right guidance, it can be a straightforward process. In this section, we will address some common queries about bath drain installation to help you navigate through the process smoothly.
Answers to common queries about bath drain installation:
1. How do I know which type of bath drain to choose?
When selecting a bath drain, it is crucial to consider the type of bathtub you have. There are two main types: a standard tub drain and a lift-and-turn drain. A standard tub drain is manually opened and closed by moving the lever up and down, while a lift-and-turn drain requires you to lift and then turn the drain cover to open and close it. Make sure to choose a bath drain that is compatible with your bathtub to ensure a proper fit.
2. Can I install a bath drain myself, or should I hire a professional?
Installing a bath drain can be a DIY project for those with basic plumbing skills and knowledge. However, if you are unsure about your abilities or if the installation requires complex plumbing work, it is best to consult a professional. They have the expertise and experience to handle any challenges that may arise during the installation process.
3. What tools and materials do I need for bath drain installation?
To install a bath drain, you will need the following tools and materials:
| Tools | Materials |
| – Screwdriver | – Bath drain assembly |
| – Adjustable wrench | – Plumbers putty |
| – Plunger | – Silicone sealant |
| – Pipe cutter | – Drain cleaning solution |
| – Pliers | – Teflon tape |
4. Can I reuse my old bath drain when installing a new one?
In most cases, it is not recommended to reuse an old bath drain when installing a new one. Over time, old bath drains may become worn out or corroded, leading to leaks or other issues. It is best to install a new bath drain for optimal performance and to ensure a proper seal.
5. How can I prevent leaks when installing a bath drain?
To prevent leaks during bath drain installation, it is essential to follow these steps:
- Ensure that the drain assembly is tightly secured.
- Apply plumbers putty or silicone sealant around the drain flange before installing it.
- Use Teflon tape on threaded connections to create a watertight seal.
- Check for any gaps or loose fittings before finalizing the installation.
- Test the drain by filling the bathtub with water and checking for any leaks.
By following these steps, you can minimize the risk of leaks and enjoy a properly functioning bath drain.
In conclusion, bath drain installation does not have to be a complicated process. By understanding the different types of bath drains, knowing when to seek professional help, having the necessary tools and materials, and taking precautions to prevent leaks, you can successfully install a bath drain and enhance your bathing experience.
Frequently Asked Questions
How Do You Install A New Drain In A Bathtub?
To install a new drain in a bathtub, follow these steps: 1. Start by removing the existing drain assembly. 2. Clean the area around the drain hole and apply plumber’s putty to create a seal. 3. Insert the new drain assembly into the hole and tighten the securing nut underneath.
4. Attach the overflow plate and stopper mechanism. 5. Test for leaks and make any necessary adjustments. Done!
Do You Use Plumbers Putty On Tub Drain?
Yes, plumbers putty can be used on a tub drain. It helps create a watertight seal for the drain to prevent leaks.
Does A Bathtub Drain Need A Trap?
Yes, a bathtub drain needs a trap. The trap prevents sewer gases from entering your bathroom and also catches debris to prevent clogs. It is an essential component of the plumbing system in ensuring proper drainage and hygiene.
How Tight Should Bathtub Drain Be?
Tighten the bathtub drain until it is secure. Avoid overtightening to prevent damage.
Conclusion
Installing a bath drain may seem intimidating, but with the right steps, it can be a manageable DIY project. By following this guide, you’ve learned how to remove the old drain, prepare the tub for installation, and securely attach the new drain.
Remember to use the right tools and materials, and take your time to ensure a proper fit. With a little patience and effort, you’ll have a functioning and leak-free bath drain in no time.