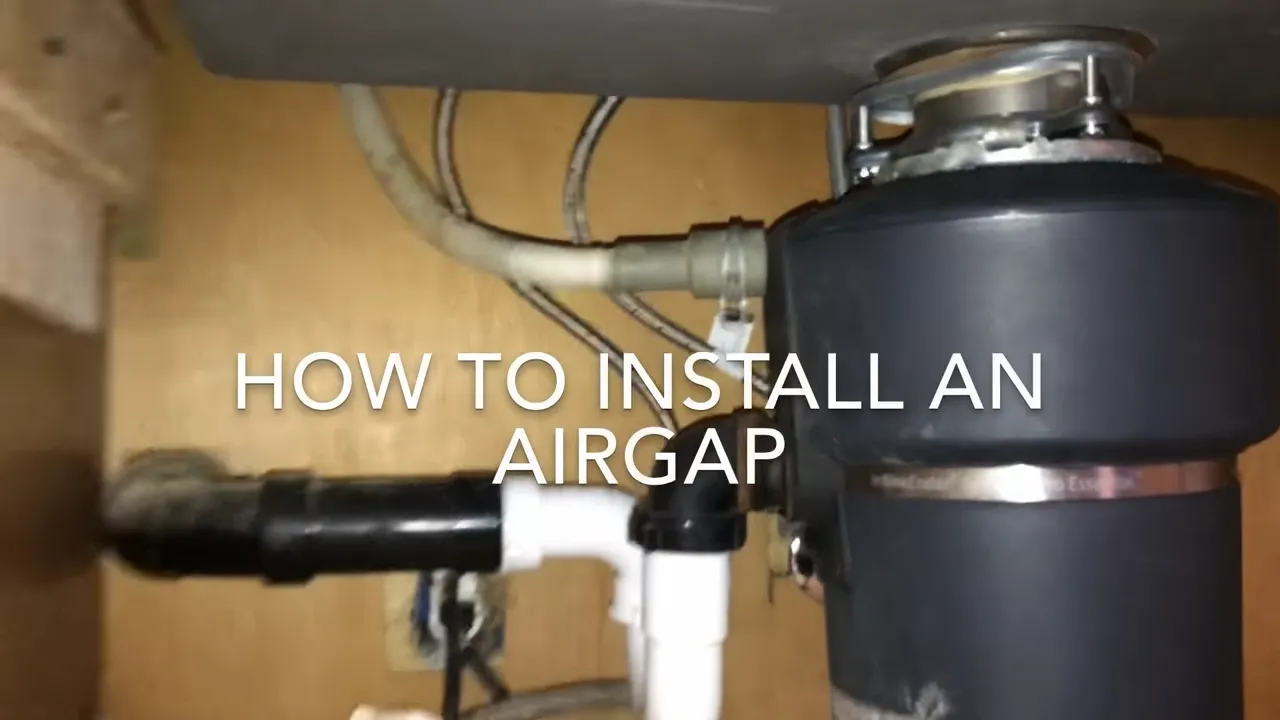
To install an air gap for your dishwasher, follow these steps: first, locate the hole on the sink and remove the cap; next, attach the air gap device to the hole and secure it with a nut; finally, connect the drain hose from the dishwasher to the air gap and secure it with a hose clamp. This will prevent any backflow of water from the sink into the dishwasher.
Installing an air gap for your dishwasher is an essential step in ensuring proper drainage and preventing contamination. By following these simple steps, you can easily install an air gap to protect your dishwasher and keep your kitchen clean and sanitary.
We will walk you through the process of installing an air gap step-by-step, so you can confidently complete the task on your own. Let’s get started!
Why You Need An Air Gap For Your Dishwasher
Installing an air gap for your dishwasher is a crucial step in ensuring the proper function and safety of your kitchen appliances. In this section, we will delve into the significance of an air gap and why you need one for your dishwasher.
Understanding the importance of an air gap in your dishwasher installation
An air gap is a simple yet effective device that prevents contaminated water from flowing back into your dishwasher. It acts as a physical barrier, ensuring that dirty water from the sink or disposal unit does not mix with the clean water used for washing the dishes.
The air gap accomplishes this by creating a gap of air between the dishwasher’s drain hose and the drain pipe or waste disposal system. This prevents any potential backflow of contaminated water, protecting your dishwasher from damage and your dishes from being exposed to harmful bacteria.
Moreover, air gaps also help to reduce the risk of clogs in the drain hose. By providing an alternate path for water to flow, any debris or food particles that may have accumulated in the drain hose can be easily flushed out, preventing blockages and ensuring smooth drainage.
Preventing contaminated water from flowing back into your dishwasher
One of the primary reasons you need an air gap for your dishwasher is to prevent contaminated water from flowing back into the dishwasher. This is particularly important in situations where the sink or disposal unit is clogged, as it minimizes the risk of dirty water contaminating your dishwasher and ultimately, your dishes.
Imagine the unpleasant consequences if contaminated water were to backflow into your dishwasher. Food particles, grease, and other debris could contaminate your clean dishes, rendering them unsanitary and requiring additional washes. Not to mention the potential damage it could cause to your dishwasher’s internal components.
Therefore, installing an air gap acts as an essential safeguard against these potential risks, ensuring that only clean water is used for washing your dishes.
Complying with plumbing codes and regulations
Aside from the practical benefits it provides, an air gap for your dishwasher is also crucial for complying with plumbing codes and regulations. Plumbing codes are put in place to ensure the health and safety of consumers, as well as to maintain the integrity of plumbing systems.
Many local building codes stipulate that an air gap is required for dishwasher installations. By installing an air gap, you can ensure that your dishwasher meets these regulations, avoiding any legal or insurance-related issues in the future. Additionally, having an air gap can also improve your chances of passing any required inspections during the installation or remodeling of your kitchen.
In conclusion, an air gap is an integral part of your dishwasher installation, both for practical and regulatory reasons. By understanding its importance in preventing contaminated water backflow and complying with plumbing codes, you can ensure the optimal efficiency, safety, and longevity of your dishwasher while having peace of mind knowing your dishes are cleaned with sanitary water.

Gathering The Necessary Tools And Supplies
If you’re considering installing an air gap for your dishwasher, it’s important to have all the necessary tools and supplies on hand before you begin the process. This will ensure a smooth and successful installation, saving you time and frustration down the line.
Identifying the tools and supplies you’ll need for a successful installation
Before diving into the installation process, it’s crucial to gather all the tools and supplies required. Here is a comprehensive list of what you’ll need:
- Air gap unit
- Tape measure
- Hacksaw
- Adjustable wrench
- Screwdriver
- Plumber’s putty or silicone sealant
Make sure to have these tools and supplies readily available so that you’re not interrupted midway through the installation process. Having everything prepared ahead of time will make the entire task more efficient.
Exploring different types of air gaps available in the market
When it comes to air gaps, there are various options available in the market. It’s important to understand the different types, as each serves the same purpose but may have subtle differences in appearance and installation method. The most common types are:
| Type | Description |
|---|---|
| Standard air gap | This is the most common type that features a simple design and is easy to install. It typically consists of a cylindrical body connected to the drain and a top cap. |
| High loop or alternative drainage method | This type doesn’t require a physical air gap but rather relies on a high loop in the drain hose or an alternative method of drainage to prevent backflow of wastewater. |
| Decorative air gap | If you’re looking to add a touch of style to your kitchen, a decorative air gap might be the perfect option. These air gaps come in various designs and finishes, allowing you to choose one that complements your kitchen decor. |
Consider your specific needs and preferences when choosing the type of air gap for your dishwasher installation.
Choosing the appropriate air gap for your dishwasher model
When selecting an air gap for your dishwasher, it’s crucial to choose a model that is compatible with your specific dishwasher model. Refer to the manufacturer’s instructions or consult a professional to ensure you choose the appropriate air gap.
Installing the wrong air gap may result in improper functionality and potential leaks. With the correct air gap, you can have peace of mind knowing that your dishwasher is protected from backflow and your kitchen remains clean and hygienic.
Preparing For Installation
Before installing an air gap for your dishwasher, it is important to prepare the area properly. This will ensure a smooth and hassle-free installation process. In this section, we will guide you through the necessary steps to prepare for the installation.
Shutting off the dishwasher’s power and water supply
The first step in preparing for the installation is to shut off the power and water supply to your dishwasher. Disconnecting the power will eliminate any potential danger and allow you to work safely. Similarly, turning off the water supply will prevent any water leakage during the installation.
To shut off the power, locate the circuit breaker in your electrical panel that controls the dishwasher. Flip the corresponding switch to the “off” position.
To turn off the water supply, find the shutoff valve beneath your sink or near the dishwasher’s location. Rotate the valve clockwise until it is fully closed. This will prevent water from flowing into the dishwasher.
Removing the dishwasher kickplate or access panel
With the power and water supply turned off, you can now proceed to remove the dishwasher kickplate or access panel. This will provide you with access to the space where the air gap will be installed.
To remove the kickplate or access panel, follow these steps:
- Locate the screws securing the kickplate or access panel to the dishwasher.
- Using a screwdriver, carefully unscrew and remove these screws.
- Gently slide or lift the kickplate or access panel to detach it from the dishwasher.
Locating the appropriate area on the sink or countertop to install the air gap
Once the kickplate or access panel is removed, you need to find the suitable area on your sink or countertop to install the air gap. The air gap should be positioned above the overflow of the sink to allow proper drainage.
Follow these guidelines to locate the appropriate area:
- Inspect the sink or countertop for an existing hole or space that can accommodate the air gap. If such an opening is available, measure its diameter to ensure compatibility with your chosen air gap.
- If there is no pre-existing opening, determine the ideal location for drilling a new hole. Consider factors such as accessibility and aesthetics.
- Use a marker to indicate the center of the chosen location.
- Measure the diameter of the air gap’s base or collar and mark the appropriate size on your chosen location.
By following these steps, you will be well-prepared for the installation process of an air gap for your dishwasher. Remember to always prioritize safety and accuracy during each step.

Installing The Air Gap
If you own a dishwasher, installing an air gap is an essential step to ensure the proper functioning and safety of your appliance. An air gap prevents wastewater from flowing back into the dishwasher, minimizing the risk of contamination and potential damage. In this guide, we will take you through the step-by-step process of installing an air gap for your dishwasher, from measuring and marking the installation spot to connecting the dishwasher drain hose. Let’s get started!
Measuring and marking the installation spot
The first step in installing an air gap is to find the perfect spot for it on your sink or countertop. Measure the distance between your sink and the bottom of the countertop to determine the height of the air gap. This distance is typically around 1.5 inches.
Use a pencil or marker to mark the desired spot on the sink or countertop where the air gap will be installed. Make sure the location is easily accessible for connecting the dishwasher drain hose later on.
Drilling a hole for the air gap
With the spot marked, it’s time to drill a hole for the air gap. Use a drill bit that matches the size specified by the manufacturer of the air gap. Typically, a 1-1.5 inch hole is needed.
Place a piece of masking tape over the spot where you will drill to prevent the drill bit from slipping. This will also help protect the surface of your sink or countertop.
Hold the drill steady and carefully drill through the marked spot, applying light and consistent pressure. Remember to wear safety goggles to protect your eyes from any debris.
Attaching the air gap to the sink or countertop
Once the hole is drilled, it’s time to attach the air gap to the sink or countertop. Insert the bottom end of the air gap into the hole from the top, ensuring a snug fit.
From underneath the sink or countertop, secure the air gap in place using the provided mounting hardware. Tighten the screws or bolts until the air gap feels secure and does not wobble.
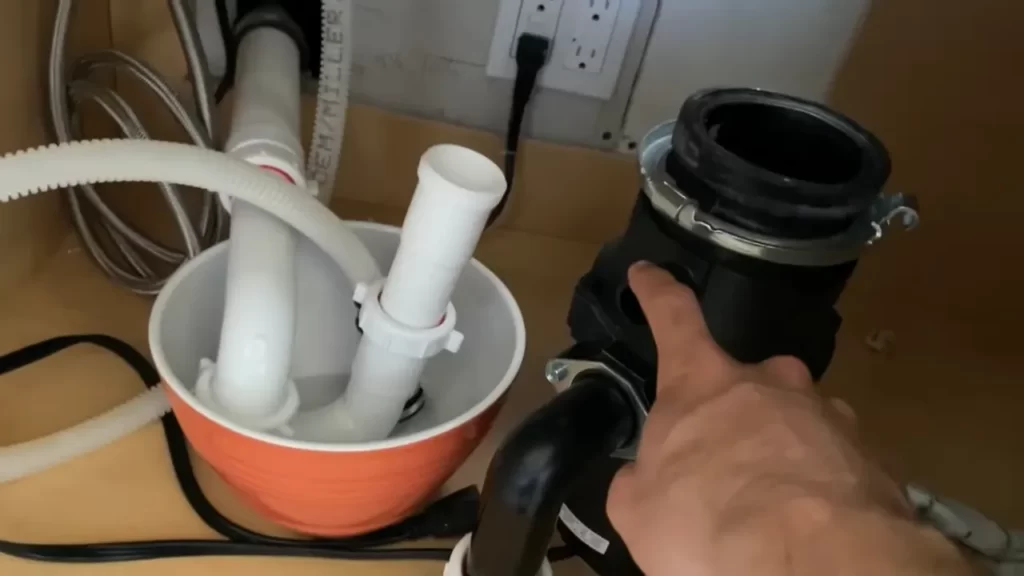
Connecting the dishwasher drain hose to the air gap
Now that the air gap is securely in place, it’s time to connect the dishwasher drain hose. Locate the dishwasher drain hose, which is usually located at the back of the dishwasher.
Attach one end of the dishwasher drain hose to the air gap’s upper connection barb. Use a hose clamp to secure the connection and ensure a tight fit.
Finally, attach the other end of the dishwasher drain hose to the designated drain line or garbage disposal unit. Again, use a hose clamp to secure the connection and prevent any leaks.
And there you have it – you have successfully installed an air gap for your dishwasher! Make sure to test the dishwasher to ensure it drains properly and that the air gap is functioning as intended. Enjoy your clean and safe dishes!
Connecting The Plumbing
Connecting the plumbing for your dishwasher installation involves understanding the connections and fittings needed, connecting the air gap to the garbage disposal or drainpipe, and checking for leaks and ensuring proper drainage. Let’s break down each step to ensure a successful installation.
Understanding the connections and fittings needed for the installation
Before you begin connecting the plumbing, it’s essential to understand the connections and fittings required for the installation. Here are the key components you’ll need:
| Component | Description |
|---|---|
| Air Gap | The air gap is a crucial part of the dishwasher plumbing setup. It prevents backflow of water from the garbage disposal or drainpipe into the dishwasher. |
| Garbage Disposal | If you have a garbage disposal, you’ll need to connect the air gap to it. The garbage disposal will act as an additional drainage option for your dishwasher. |
| Drainpipe | If you don’t have a garbage disposal, you’ll connect the air gap directly to the drainpipe. The drainpipe provides the necessary drainage for your dishwasher. |
| Hose Clamps | Hose clamps are essential for securing the connections between the air gap, garbage disposal or drainpipe, and dishwasher. |
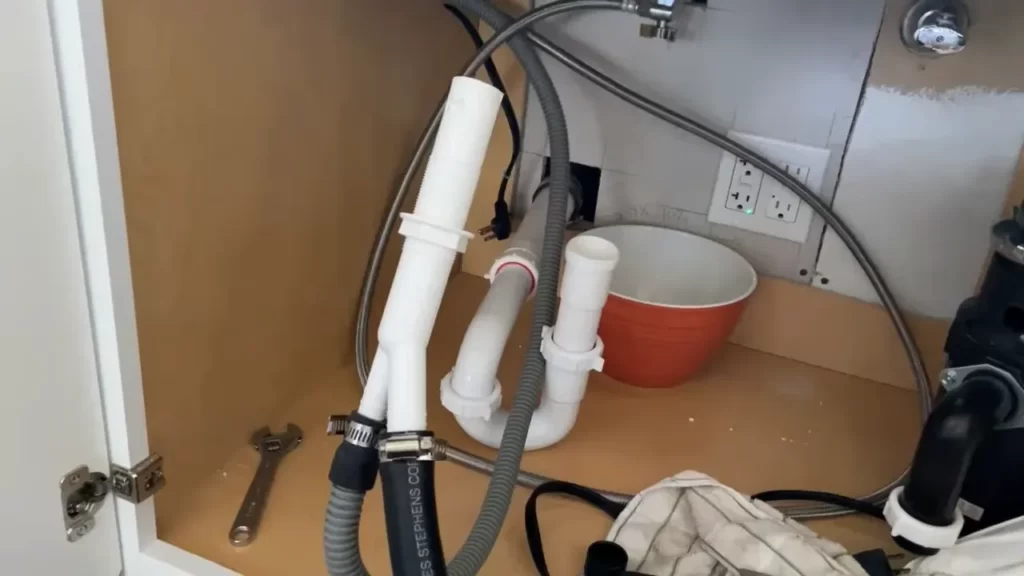
Connecting the air gap to the garbage disposal or drainpipe
Once you have all the necessary components, it’s time to connect the air gap to either the garbage disposal or drainpipe. Follow these steps:
- Position the air gap on the countertop or sink edge closest to the dishwasher. Make sure it’s secure and accessible.
- Attach one end of the drain hose to the air gap’s lower port. Ensure it’s tightly secured using a hose clamp.
- Connect the other end of the drain hose to the garbage disposal’s dishwasher inlet or directly to the drainpipe if a garbage disposal is not present. Use a hose clamp to secure the connection.
Checking for leaks and ensuring proper drainage
Once you’ve connected the air gap, it’s essential to check for leaks and ensure proper drainage. Follow these steps:
- Turn on the dishwasher and let it run a cycle. Observe any water leakage from the connections or the air gap.
- Inspect the connections to ensure they are securely fastened and free from any leaks. Tightly tighten any loose fittings if necessary.
- Check the air gap and drainpipe for proper drainage. The water should flow smoothly without any blockages.
By following these steps and ensuring a secure connection, you can successfully install an air gap for your dishwasher and enjoy worry-free operation.
Testing And Troubleshooting
Once you have installed an air gap for your dishwasher, it is essential to ensure that it functions correctly. This can be achieved by running a test cycle and troubleshooting any issues that may arise. In this section, we will walk you through the steps for running a test cycle, address common issues you may encounter, and provide tips on seeking professional help if needed.
Running a Test Cycle to Ensure the Air Gap Functions Correctly
Running a test cycle on your dishwasher after installing the air gap is an important step to confirm that it is working as intended. Here’s a step-by-step guide to help you:
- Start by making sure that the dishwasher is empty and there are no dishes or utensils inside.
- Verify that the air gap is securely in place and properly connected to the dishwasher and drain hose.
- Turn on the water supply to the dishwasher.
- Set the dishwasher to a regular wash cycle or select a test cycle specifically designed for troubleshooting purposes, if available.
- Allow the dishwasher to run through the entire cycle, paying close attention to the air gap’s performance.
- Observe if water is flowing out of the air gap during the drain phase. The air gap should create a visible gap between the dishwasher’s drain hose and the sink drain. If the air gap is functioning correctly, water should flow out of the air gap and into the sink without any blockages or leaks.
If you notice any abnormalities during the test cycle, such as water backing up or overflowing from the air gap, it is essential to troubleshoot the issue.
Troubleshooting Common Issues with the Air Gap
Despite proper installation, certain issues with the air gap may arise. Here are some common problems you may encounter and suggestions for troubleshooting:
| Common Issue | Troubleshooting Tip |
|---|---|
| Water Flowing Back into the Dishwasher | Check if the air gap is clogged with debris. Remove any obstructions and clean the air gap thoroughly. Additionally, ensure that the drain hose is not kinked or blocked. |
| Water Not Flowing Out of the Air Gap | Inspect the air gap for any clogs or blockages. Clean it thoroughly and ensure that the drain hose is properly connected and not obstructed. |
| Water Leaking from the Air Gap | Check if the air gap is correctly installed and securely connected to both the dishwasher and the sink drain. Tighten any loose connections and replace any damaged parts. |
If you have identified any issues with the air gap and have attempted the troubleshooting tips provided, but the problem persists, it may be necessary to seek professional help.
Seeking Professional Help if Necessary
If you are unable to resolve the air gap issue despite your best efforts, reaching out to a professional plumber or a dishwasher technician is recommended. They have the expertise and knowledge to diagnose and repair any complex problems with the air gap. Contacting a professional will ensure that the issue is addressed correctly, preventing further damage and maintaining the proper functioning of your dishwasher.
By testing and troubleshooting your newly installed air gap, you can ensure proper functionality and avoid potential problems with your dishwasher.
Finalizing The Installation
Congratulations! You’re almost there. Now that you have successfully installed the air gap for your dishwasher, it’s time to finalize the installation. Follow the steps below to complete the process:
Reattaching the dishwasher kickplate or access panel
Once you have positioned the air gap in its designated location and connected the necessary hoses, it’s important to reattach the dishwasher kickplate or access panel. This panel covers the bottom area of the dishwasher and provides support and protection. Use the following steps to reattach it:
- Place the kickplate or access panel in position at the base of the dishwasher.
- Align the screw holes on the panel with the corresponding holes on the dishwasher.
- Insert the screws into the holes and tighten them securely using a screwdriver or a drill.
Make sure the kickplate or access panel is securely attached to prevent any movement or potential damage to the dishwasher.
Restoring power and water supply to the dishwasher
Now that the air gap is installed and the kickplate or access panel is reattached, it’s time to restore power and water supply to the dishwasher. Follow these steps:
- Locate the power supply cord for your dishwasher.
- Plug the cord into a suitable electrical outlet.
- Turn on the power switch or breaker to supply electricity to the dishwasher.
- Next, check the water supply valve located under the sink or behind the dishwasher.
- Ensure the water supply valve is fully open to allow water to flow to the dishwasher.
Restoring power and water supply will enable your dishwasher to function properly once again, making your daily dishwashing routine a breeze.
Cleaning up and organizing your workspace
Before considering the installation process complete, it’s important to clean up and organize your workspace. Ensure each tool and component is in its proper place and any excess materials are properly disposed of. Follow these steps to tidy up:
- Clear any debris or excess hoses from the area.
- Wipe down the surrounding surfaces with a clean cloth to remove any dust or dirt.
- Double-check that all connections are secure and free from leaks.
- Dispose of any packaging materials or unused parts responsibly.
By cleaning up and organizing your workspace, you not only create a safer environment but also ensure that everything is in order for future maintenance or repairs.
Maintenance And Care Tips
Proper maintenance and care of your dishwasher’s air gap is essential to ensure its efficient operation and prevent any potential issues. Here, we discuss some important tips to help you maintain and care for your dishwasher’s air gap.
Regularly cleaning the air gap to prevent clogs and blockages
To keep your dishwasher’s air gap functioning optimally, it is crucial to clean it regularly. Over time, debris, food particles, and other residues can accumulate in the air gap, leading to clogs and blockages. Here’s how you can clean the air gap:
- Start by removing the dishwasher’s cover plate, which is typically located on the sink or countertop near the faucet.
- Inspect the air gap assembly for any visible dirt or debris.
- Using a small brush or toothbrush, gently scrub the air gap to remove any accumulated grime.
- Rinse the air gap thoroughly with running water to flush away any remaining residue.
- Once cleaned, replace the cover plate securely.
Regularly cleaning your air gap ensures that water can flow freely, preventing any potential clogs and ensuring the proper functioning of your dishwasher.
Inspecting the air gap for any signs of damage or deterioration
Another important aspect of maintaining your dishwasher’s air gap is to regularly inspect it for any signs of damage or deterioration. Over time, the air gap assembly can wear out, leading to leaks or other problems. Follow these steps to inspect your air gap:
- Visually examine the air gap for any cracks, chips, or other signs of physical damage.
- Check the connections between the air gap, dishwasher, and drain hose for any loose or faulty connections.
- If you notice any damage or loose connections, it is important to address them promptly to prevent further issues.
Regular inspections can help identify any potential problems with the air gap and allow you to take necessary action before they worsen.
Troubleshooting common maintenance issues
While proper maintenance can significantly reduce the likelihood of problems with your air gap, it’s important to be aware of common issues that may arise. Here are some troubleshooting tips for common maintenance problems:
| Issue | Troubleshooting Tip |
|---|---|
| Water leaking from the air gap | Check the connections between the air gap, dishwasher, and drain hose for any loose or faulty connections. Tighten or replace them if necessary. |
| Slow draining or water backup in the dishwasher | Inspect and clean the air gap to remove any potential clogs or blockages. Ensure that the drain hose is properly positioned and not kinked or obstructed. |
| Unpleasant odors coming from the air gap | Thoroughly clean the air gap and regularly run a dishwasher cleaning cycle to eliminate any buildup or residue causing the odor. |
By familiarizing yourself with these troubleshooting tips, you can promptly address any maintenance issues that may arise and keep your dishwasher’s air gap functioning smoothly.
Remember, proper maintenance and care are key to ensuring the efficiency and longevity of your dishwasher’s air gap. Regularly clean the air gap to prevent clogs, inspect it for damage, and troubleshoot any potential maintenance issues. By following these tips, you can promote a smooth and hassle-free dishwasher experience.
Frequently Asked Questions
Do I Need To Install An Air Gap For My Dishwasher?
Yes, it is necessary to install an air gap for your dishwasher. The air gap acts as a safety device, preventing dirty water from flowing back into your dishwasher and contaminating clean dishes. It is recommended by plumbing codes to ensure proper sanitation and prevent potential health hazards.
Where Should The Air Gap Be Placed In A Dishwasher?
The air gap in a dishwasher should be placed above the sink or countertop. It helps prevent backflow of dirty water into the dishwasher during the drain cycle.
How Much Does It Cost To Install An Air Gap In A Dishwasher?
The cost to install an air gap in a dishwasher varies, typically ranging from $20 to $50.
Do You Need A High Loop Or Air Gap For Dishwasher?
A high loop or air gap for a dishwasher is necessary to prevent dirty water from the sink back-flowing into the dishwasher. It helps maintain proper drainage and prevents clogs.
Conclusion
Installing an air gap for your dishwasher is a crucial step in ensuring the safety and performance of your kitchen. By following the step-by-step guide provided in this blog post, you can easily incorporate this important component into your dishwasher setup.
Remember, maintaining proper drainage and preventing backflow is essential in avoiding potential plumbing issues. By taking the time to install an air gap, you can enjoy clean and efficient dishwashing without any worries.