To install an acrylic bathtub, first, ensure that the area is clean and free from any debris. Next, position the bathtub in the desired location and connect the drain and water supply lines using appropriate fittings.
Understanding Acrylic Bathtubs
What are acrylic bathtubs and why choose them?
An acrylic bathtub is a type of bathtub that is made from a material called acrylic. Acrylic is a strong and lightweight material that is known for its durability and resistance to scratches, stains, and fading. It is a popular choice for bathtubs because of its many advantages over other materials.
Benefits of acrylic bathtubs over other materials
There are several reasons why you should consider choosing an acrylic bathtub over other materials:
- Durability: Acrylic bathtubs are highly durable and can withstand daily use without cracking or chipping. They are resistant to scratches, stains, and fading, which helps to maintain their appearance for a long time.
- Lightweight: Acrylic is much lighter than materials like cast iron or stone, making it easier to install and move if needed. This is particularly useful if you are planning to install the bathtub on an upper floor.
- Easy to clean: Acrylic bathtubs have a smooth and non-porous surface that is easy to clean. You can simply wipe off any dirt or stains with a soft cloth and mild soap. The non-porous surface also prevents the growth of mold and bacteria.
- Wide range of designs: Acrylic bathtubs come in a variety of shapes, sizes, and colors. Whether you prefer a classic rectangular bathtub or a modern freestanding one, you can find an acrylic bathtub that fits your style and bathroom decor.
- Excellent heat retention: Acrylic is a good insulator, which means that it can retain heat for a longer time compared to other materials. This allows you to enjoy a warm and relaxing bath without constantly adding hot water.
Overall, acrylic bathtubs offer a winning combination of durability, lightweight construction, easy maintenance, design flexibility, and superior heat retention. If you are looking to install a new bathtub or replace an existing one, an acrylic bathtub is definitely worth considering.

Preparing For Installation
Before installing an acrylic bathtub, it’s crucial to properly prepare the installation area. This includes gathering the necessary tools and materials and measuring and assessing the installation area.
Gathering the necessary tools and materials
In order to successfully install an acrylic bathtub, you will need to have the following tools and materials:
- Level
- Electric drill
- Set of screwdrivers
- Tape measure
- Plumber’s tape or putty
- Pipe wrench
- Adjustable wrench
- Plumber’s putty
- Acrylic bathtub
- Overflow gasket
- Drain pipe kit
- Shower valve and spout
- Plastic shims
- Silicone caulking
- Bucket
- Cloths or rags
Measuring and assessing the installation area
Once you have gathered all the necessary tools and materials, the next step is to measure and assess the installation area. This will help ensure a proper fit and placement of the acrylic bathtub. To do this:
- Measure the length, width, and height of the installation area using a tape measure. Take accurate measurements to ensure you choose the right size bathtub.
- Check the floor and walls for any damage or unevenness. If there are any issues, address them before proceeding with the installation.
- Assess the plumbing connections to ensure they are compatible with the acrylic bathtub. Make any necessary adjustments or repairs.
- Locate the water supply and drain pipes to determine their positioning in relation to the installation area. Ensure there is enough clearance for the bathtub and make any necessary modifications.
By following these steps and properly preparing for installation, you will be well on your way to successfully installing an acrylic bathtub. Once the installation area is ready, you can move on to the next steps in the installation process.
Removing The Old Bathtub
Before you can install a sparkling new acrylic bathtub, you’ll need to remove the old one. This process can be done safely and efficiently by following a few simple steps. In this section, we’ll walk you through the process of draining and disconnecting the plumbing, as well as removing the old bathtub safely.
Draining and disconnecting the plumbing
The first step in removing your old bathtub is to ensure all the water is drained and the plumbing is disconnected. Here’s how you can do it:
- Locate the shut-off valves for both the hot and cold water supply lines. Turn them clockwise until they are fully closed to stop the water flow.
- Next, open the faucets in the bathtub to release any remaining water in the pipes. You can use a towel or sponge to soak up any excess water.
- Once the water is drained, you can disconnect the plumbing. Use an adjustable wrench to loosen and remove the nuts and connections that attach the supply lines to the faucet and the drain pipe to the tub.
- Be sure to place a bucket or container underneath the drain pipe to catch any water that may still be trapped in the line.
Removing the old bathtub safely
Now that the plumbing is disconnected, it’s time to safely remove the old bathtub. Follow these steps:
- Remove any caulk or adhesive that may be holding the bathtub in place. You can use a putty knife or scraper to gently pry it away from the walls and floor.
- After removing the caulk, inspect the bathtub for any additional screws or fasteners that may be securing it. Remove these screws using a screwdriver or drill.
- With the screws and caulk removed, you can now carefully lift the bathtub away from the walls and floor. This might require some assistance, as bathtubs can be heavy.
- Once the old bathtub is removed, clean any remaining debris or residue from the installation area, ensuring it is smooth and ready for the new bathtub.
By following these steps, you can safely and effectively remove your old bathtub in preparation for installing a new acrylic bathtub. Remember to take your time and proceed with caution to avoid any potential damage or injuries during the removal process.
Preparing The Installation Space
Before you embark on installing your acrylic bathtub, it is crucial to prepare the installation space correctly. This step ensures that your bathtub fits seamlessly, functions optimally, and looks aesthetically pleasing. Here are two essential tasks to complete during the preparation process, specifically clearing the area and ensuring proper ventilation and making any necessary repairs or adjustments to the installation area.
Clearing the Area and Ensuring Proper Ventilation
Prior to installing your acrylic bathtub, it is imperative to clear the area around the installation site. Remove any obstacles or clutter that may hinder the installation process. This includes removing furniture, decorations, and any other items that could obstruct access to the installation space.
Moreover, ensure that the installation area has proper ventilation. Proper ventilation helps to prevent the build-up of moisture, which can lead to unpleasant odors, mold, and mildew growth. Open windows and doors in the vicinity of the installation area to allow air circulation during and after the installation process.
Making Any Necessary Repairs or Adjustments to the Installation Area
Next, assess the installation area for any repairs or adjustments that may be required before installing the acrylic bathtub. This step ensures a stable and secure installation. Here are a few factors to consider:
- Check the floor for any signs of damage or sagging. If necessary, reinforce the floor or subfloor to provide a sturdy foundation for the bathtub.
- Inspect the walls for any cracks, holes, or water damage. Repair any damages before proceeding with the installation to maintain the integrity of the surrounding structure.
- Measure the size of the installation space accurately. Ensure that the dimensions are suitable for the chosen acrylic bathtub. If necessary, make adjustments to the space by widening or narrowing it to accommodate the bathtub properly.
By completing these repairs or adjustments beforehand, you can avoid potential problems or complications during the installation process. It is vital to have a solid and stable foundation for your acrylic bathtub to ensure its longevity and functionality.
Now that you have prepared the installation space, you are ready to proceed with the next steps in installing your acrylic bathtub. Stay tuned for our upcoming blog posts, where we will guide you through the installation process in a step-by-step manner.
Installing The Drain And Plumbing
Determining the appropriate drain position and size
Determining the proper drain position and size for your acrylic bathtub is a crucial step in ensuring a successful installation. It is important to follow the manufacturer’s instructions carefully to ensure that the drain is in the correct position and that it is the correct size to match the plumbing fixtures. To determine the appropriate drain position, start by measuring the distance between the center of the drain and the back wall of the tub, as well as the distance between the center of the drain and the side walls. This will help you determine the exact location of the drain on the floor. Additionally, you should also measure the depth of the tub to ensure that the drain is positioned correctly and will allow for proper drainage.
Connecting the drain and plumbing fixtures according to the manufacturer’s instructions
Once you have determined the appropriate drain position and size, it is time to connect the drain and plumbing fixtures. This step is crucial to ensure that your bathtub functions properly and that there are no leaks or issues with the plumbing. Start by referring to the manufacturer’s instructions for the specific drain and plumbing fixtures that you are using. This will provide you with detailed instructions on how to connect the drain to the plumbing system. Follow these instructions carefully, making sure to use the correct tools and materials as recommended by the manufacturer.
Ensuring each H3 heading adheres to HTML syntax
When creating a blog post about installing an acrylic bathtub and focusing on the subheading “Installing the Drain and Plumbing,” it is important to ensure that each H3 heading adheres to HTML syntax to optimize its visibility on search engines. To do this, you can enclose each H3 heading in the appropriate HTML tags. For example:
<h3>Determining the appropriate drain position and size</h3>
<h3>Connecting the drain and plumbing fixtures according to the manufacturer’s instructions</h3>
<h3>Ensuring each H3 heading adheres to HTML syntax</h3>
Placing The Acrylic Bathtub
Properly placing the acrylic bathtub in the installation area is crucial to ensuring a seamless and hassle-free installation process. This step-by-step guide will walk you through the process of positioning the bathtub, ensuring proper alignment and levelness for a perfect fit.
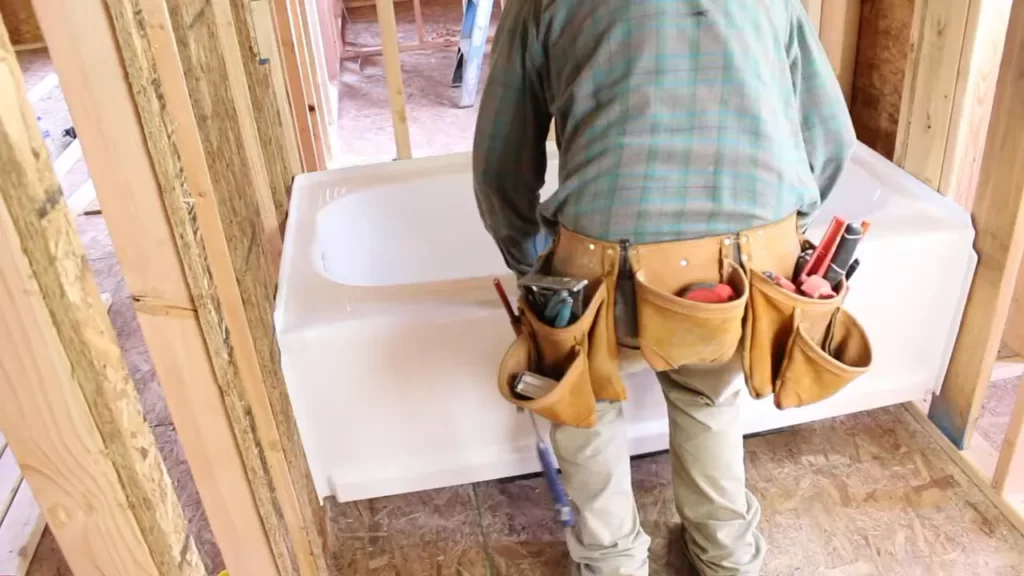
Positioning the bathtub in the installation area
Before beginning the installation process, ensure that the installation area is clean and free of any debris or obstacles that may hinder the placement of the bathtub. Once you have cleared the area, carefully position the bathtub in the designated spot, taking note of the layout and dimensions provided by the manufacturer.
It is important to ensure sufficient space around the tub for accessibility during installation and for any future maintenance needs. Placing the bathtub in the installation area also requires consideration of the plumbing and drainage connections that must be aligned properly.
Ensuring proper alignment and levelness
Once the bathtub is in the desired position, it is critical to ensure proper alignment and levelness. This will promote stability and prevent any future problems such as leaks or drainage issues. Here are the steps to achieve proper alignment and levelness:
- Using a level, check the horizontal alignment of the bathtub by placing the level vertically against the sides of the tub. Adjust the tub as necessary until it is perfectly level from left to right.
- Next, check the vertical alignment by placing the level horizontally against the front and back edges of the tub. Make any adjustments needed to achieve a level bathtub from front to back.
- Once the bathtub is both horizontally and vertically level, secure it in place using the recommended securing methods provided by the manufacturer. This may include using adhesive or brackets to ensure stability.
Ensuring proper alignment and levelness is essential not only for aesthetics but also for the functionality and longevity of the acrylic bathtub. Taking the time to properly position and secure the tub will contribute to a successful and enjoyable installation process.
Securing The Acrylic Bathtub
Properly securing your acrylic bathtub is crucial to ensure its stability and longevity. By using support frames or brackets and appropriate fasteners, you can ensure that your bathtub is securely in place, providing you with a comfortable and worry-free bathing experience.
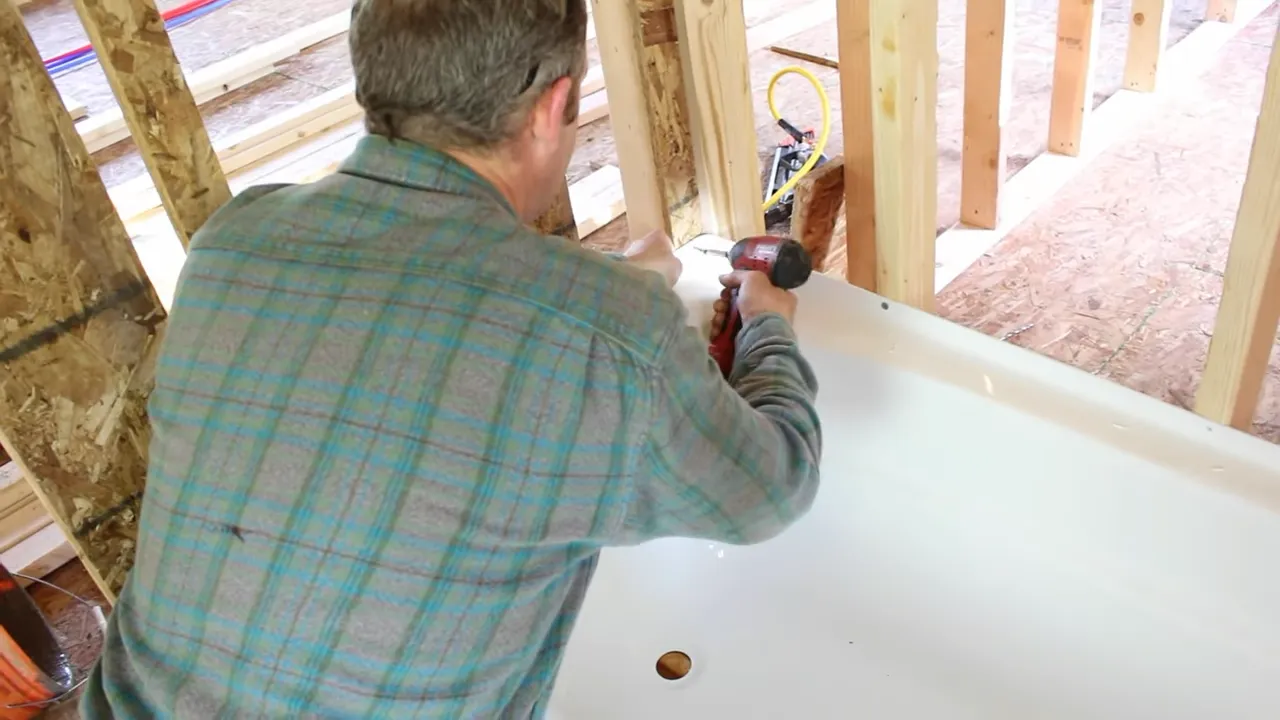
Using Support Frames or Brackets to Secure the Bathtub
Support frames or brackets are essential components when it comes to securing your acrylic bathtub. These frames or brackets provide structural support and help distribute the weight of the bathtub evenly, minimizing the risk of any movement or shifting over time.
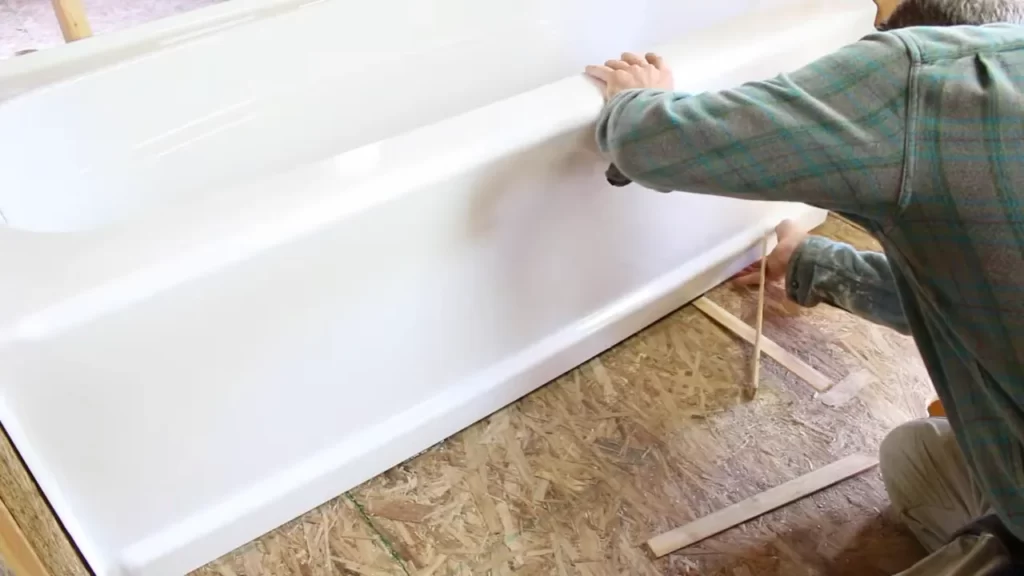
To use support frames, you will need to follow these steps:
- Measure the length and width of your bathtub.
- Choose sturdy lumber or metal framing materials that can bear the weight of the bathtub.
- Using a saw, cut the lumber or metal into appropriately sized sections to create a frame.
- Position the frame around the edges of the bathtub, ensuring it fits snugly.
- Secure the frame to the floor and wall studs using screws or nails, ensuring it is level and plumb.
Alternatively, you can also use brackets specifically designed for bathtub installations. These brackets attach to the sides of the bathtub and provide additional support, preventing any movement. Simply follow the manufacturer’s instructions to properly install and secure the brackets.
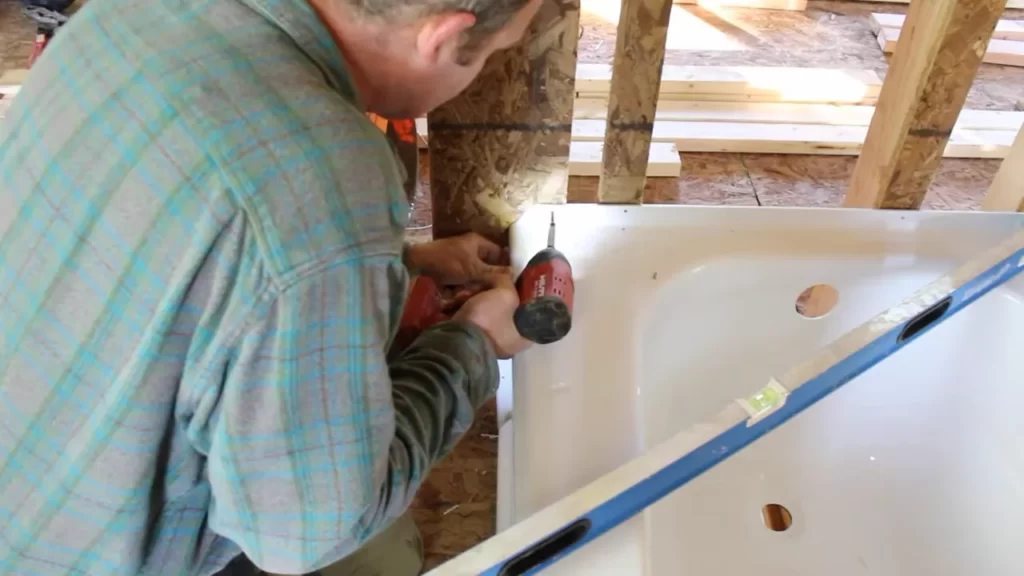
Using Appropriate Fasteners to Ensure Stability
Using the right fasteners is crucial to ensure the stability of your acrylic bathtub. Fasteners that are too weak or incompatible with the bathtub material can compromise the bathtub’s integrity and increase the risk of damage or accidents. Follow these guidelines when choosing fasteners:
- Opt for corrosion-resistant fasteners, such as stainless steel screws or nails, to prevent rusting and deterioration over time.
- Ensure that the size and length of the fasteners are suitable for the type and thickness of the bathtub material.
- Use washers with the fasteners to distribute the weight evenly and protect the surface of the bathtub.
- Consult the manufacturer’s instructions or seek professional advice to determine the best type of fasteners for your specific bathtub model.
Remember to securely fasten the support frames or brackets to the bathtub and the surrounding structure, ensuring a stable and secure installation. By following these steps and using the appropriate materials, you can enjoy a worry-free bathing experience in your newly installed acrylic bathtub.
Connecting The Plumbing
Connecting the Plumbing
Once you have successfully installed your new acrylic bathtub, the next step is to connect the plumbing fixtures to ensure proper functionality. This involves reconnecting the water supply lines, drain pipes, and any other necessary components. Follow these steps to complete this crucial stage of the installation process:
Reconnecting the plumbing fixtures to the bathtub
1. Water Supply Lines: Begin by reattaching the water supply lines to the appropriate openings on the bathtub. Ensure that the connections are secure and leak-free. It’s recommended to use Teflon tape to enhance the tightness of the connections.
2. Drain Pipes: Connect the drain pipes from the tub to the existing plumbing system. Make sure to align the drainpipe with the drain opening on the bathtub. Apply plumber’s putty or silicone sealant around the drain flange to create a tight seal, preventing any potential leaks.
3. Overflow Drain: If your acrylic bathtub includes an overflow drain, attach the overflow pipe to the overflow opening on the bathtub. Secure it in place using the provided hardware, and again, ensure a tight fit.
4. Sealing: To avoid any water leakage, apply a waterproof sealant to all the connections. This will protect against potential water damage and provide added durability to your plumbing system.
Testing for any leaks or issues
Once you have finished connecting the plumbing fixtures, it’s crucial to test for any leaks or issues to prevent further damage. Follow these steps to ensure everything is functioning properly:
-
Turn on the water supply: Slowly turn on the water supply and check for any leaks around the connections you have just made. Keep an eye on the water flow and inspect the surrounding areas for any signs of moisture.
-
Check drainage: Fill the bathtub with water and watch how it drains. Make sure the water is flowing smoothly and efficiently through the drainpipe without any obstructions or slow draining.
If you notice any leaks or issues during this testing phase, do not hesitate to address them immediately. Tighten any loose connections and reapply sealant if necessary to ensure a watertight and reliable plumbing system.
Following these steps will help you successfully connect the plumbing fixtures to your acrylic bathtub, ensuring a smooth and hassle-free installation process. By checking for any leaks or issues, you can enjoy your new bathtub with peace of mind, knowing it’s properly connected and functioning optimally.
Sealing And Caulking
Applying sealant and caulk around the edges of the bathtub is a crucial step in the installation process. It not only ensures a watertight seal but also prevents any potential water damage. To achieve a professional and long-lasting result, follow these steps:
1. Prepare the area:
Before applying sealant and caulk, make sure the area is clean and dry. Remove any old caulk or adhesive residue using a scraper or caulk remover tool. Wipe the surface with a cloth or sponge to remove any remaining debris or moisture.
2. Choose the right sealant:
Selecting the right sealant is essential for a durable and waterproof finish. Look for a high-quality silicone-based sealant specifically designed for use in the bathroom. It should be mildew-resistant and capable of withstanding frequent exposure to water.
3. Apply the sealant:
Using a caulk gun, carefully apply a thin and even bead of sealant along the edges of the bathtub. Start from one corner and move towards the other, maintaining a steady hand. Be generous but avoid over-applying, as excessive sealant can be messy and difficult to clean up.
4. Smooth the sealant:
Immediately after applying the sealant, use a caulk smoothing tool or your finger dipped in soapy water to create a smooth and tidy finish. Gently run the tool or your finger along the bead of sealant, removing any excess and ensuring it adheres well to both the bathtub and the wall or tiles.
5. Allow it to cure:
Let the sealant cure according to the manufacturer’s instructions. This usually takes around 24 hours, but it’s best to check the specific drying time on the sealant tube. Avoid using the bathtub or exposing the sealant to water during this period to allow it to fully set.
6. Regular maintenance:
To ensure the sealant remains intact and effective, it’s important to conduct regular maintenance. Check for any signs of wear or damage, such as cracks or gaps, and reapply sealant as needed. This will help maintain the integrity of the seal and prevent any potential water leakage.
By following these steps to seal and caulk your acrylic bathtub, you can achieve a professional and watertight installation. Taking the time to properly seal your bathtub will not only enhance its longevity but also protect your bathroom from potential water damage.
Finishing Touches
After successfully installing your acrylic bathtub, it’s time to add those final details that will elevate your bathing experience. In this section, we will explore two essential steps to make your acrylic bathtub shine and ensure additional features or accessories are added seamlessly.
Cleaning and Polishing the Acrylic Surface
Keeping your acrylic bathtub clean is crucial to maintain its pristine appearance and prolong its lifespan. Follow these steps to effectively clean and polish the acrylic surface:
- Start by using a mild, non-abrasive cleaner specifically designed for acrylic surfaces. Avoid using harsh chemicals or rough scrub brushes that can damage the material.
- Dampen a soft cloth or sponge with warm water and apply the cleaner onto it.
- Gently scrub the entire surface of the bathtub, paying attention to any stains or spots. Use circular motions and moderate pressure to remove any dirt or grime.
- Rinse the bathtub thoroughly with warm water to remove any residue from the cleaning agent.
- Once the bathtub is clean, take a dry, lint-free cloth and gently buff the entire surface in a circular motion. This will help restore the shine and remove any remaining water spots.
- Finally, inspect the bathtub for any stubborn stains or scuffs. If necessary, use a specialized acrylic cleaner or polish to target those areas directly.
Adding Any Additional Accessories or Features
Now that your acrylic bathtub is sparkling clean, you may want to enhance it further by incorporating some additional accessories or features. Whether it’s a convenient showerhead for versatile bathing options or grab bars for added safety, follow the steps below to ensure a seamless installation:
- Research the type of accessory or feature you wish to add and ensure compatibility with your acrylic bathtub. Consult the manufacturer’s guidelines to avoid any potential risks or damage.
- Invest in high-quality accessories or features that are specifically designed for use with acrylic bathtubs. This will ensure durability and a perfect fit.
- Follow the manufacturer’s instructions carefully when installing the accessory. This often involves securely fastening it to the bathtub’s walls or designated areas.
- Double-check the stability and functionality of the added accessory or feature to ensure it meets your expectations.
- Once installed, test the functionality and adjust any settings or positions as needed. Enjoy the enhanced bathing experience provided by your new additions!
By following these steps, you can maintain the cleanliness and shine of your acrylic bathtub while also incorporating any additional accessories or features seamlessly. Now, sit back, relax, and soak in the comfort of your newly installed acrylic bathtub!
Maintenance And Care
Proper maintenance and care are essential for prolonging the lifespan and beauty of your acrylic bathtub. By following a few simple steps and incorporating a regular cleaning routine, you can ensure that your bathtub stays in pristine condition for years to come.
Tips for Maintaining and Cleaning Your Acrylic Bathtub
Regular cleaning is crucial to prevent the buildup of grime and stains on your acrylic bathtub. By adopting a few cleaning tips and techniques, you can keep your bathtub looking as good as new.
1. Use Mild Cleaners:
When it comes to cleaning your acrylic bathtub, it’s important to avoid abrasive cleaners or harsh chemicals. These can cause damage to the surface of the tub. Instead, opt for mild, non-abrasive cleaners that are specifically formulated for acrylic surfaces. You can easily find these cleaners at your local home improvement store.
2. Avoid Scratching:
Acrylic bathtubs are prone to scratching, so it’s important to use gentle cleaning tools to avoid any damage. Soft sponges or microfiber cloths are ideal for cleaning the surface of the tub without causing any scratches. Additionally, make sure to avoid using abrasive scrub brushes or scouring pads.
3. Keep Water Temperature Moderate:
Excessive heat can cause the acrylic to expand and potentially warp the bathtub’s shape. It’s best to keep the water temperature moderate to prevent any damage. Avoid using extremely hot water and ensure that the water temperature remains within the manufacturer’s recommended range.
How to Address Common Issues and Prevent Damage
Even with regular maintenance and care, certain issues may arise with your acrylic bathtub. By addressing these issues promptly and taking preventive measures, you can avoid further damage and maintain the quality of your bathtub.
1. Removing Stains:
If you notice stubborn stains on your acrylic bathtub, you can create a simple cleaning solution by mixing baking soda and water. Apply the mixture to the stained area, let it sit for a few minutes, and then gently scrub with a soft cloth. Rinse thoroughly with warm water to remove any residue.
2. Preventing Scratches:
To prevent scratches on your acrylic bathtub, make sure to avoid using abrasive cleaners or scrubbing tools, as mentioned earlier. It’s also a good idea to place a rubber or non-slip mat on the tub floor to provide a protective surface and prevent any accidental scratches.
3. Minimizing Fading:
Acrylic can fade over time when exposed to direct sunlight. To prevent fading, consider installing UV-protective blinds or curtains in your bathroom to shield the tub from direct sunlight. If you have a window near the bathtub, make sure to keep it covered when not in use.
By following these maintenance tips and addressing common issues promptly, you can ensure that your acrylic bathtub remains a beautiful and functional centerpiece in your bathroom. Regular cleaning and preventive measures will help you enjoy your bathtub for many years to come.
Frequently Asked Questions
How Do You Support An Acrylic Bathtub?
Supporting an acrylic bathtub is crucial. Use a sturdy frame made of pressure-treated lumber or metal, ensuring that it closely matches the tub’s shape and size. Secure it tightly to the floor to prevent any movement or sagging. Check for proper support to avoid cracks or damage.
Do You Have To Support An Acrylic Tub?
Yes, an acrylic tub needs to be properly supported to avoid cracking or sagging. This is usually done by using a support system, like a mortar bed or a foam or wood platform underneath the tub. It is important to follow manufacturer’s guidelines for installation to prevent any damage.
Should Acrylic Tubs Be Set In Mortar?
Yes, acrylic tubs should be set in mortar.
What Do You Put Under A Bathtub For Support?
A bathtub needs to be properly supported with a sturdy base. The most common support options include a mortar bed, a foam and concrete slab, or adjustable feet. These options provide stability and prevent any movement or sagging of the bathtub.
Conclusion
Installing an acrylic bathtub may seem daunting, but with the right tools and guidance, it can be a hassle-free task. By following the step-by-step process outlined in this blog post, you can ensure a successful installation. Remember to take accurate measurements, prepare the space, and follow the manufacturer’s instructions.
With a little patience and preparation, you’ll soon be enjoying a luxurious and durable acrylic bathtub in your home. Happy installing!