
To install a 4 piece shower, start by assembling the shower walls, base, and faucet according to the manufacturer’s instructions. Then, secure the walls and base together using the provided connectors or adhesive.
Finally, connect the plumbing fixtures and test for any leaks.
Understanding The Basics Of A 4 Piece Shower Installation
Installing a 4 piece shower can be an exciting home improvement project that will not only enhance the functionality of your bathroom but also add value to your home. Whether you’re remodeling your bathroom or starting from scratch, understanding the basics of a 4 piece shower installation is crucial. In this section, we will delve into the components of a 4 piece shower, the benefits it offers, and the tools and materials you’ll need for a successful installation.
Components of a 4 Piece Shower
A 4 piece shower typically consists of four separate pieces that are assembled on-site to create a complete shower enclosure. These pieces include:
- The shower pan or base, which serves as the foundation for the shower.
- The back wall panel, which is attached to the wall behind the shower.
- Two side wall panels, which are attached to the adjacent walls on either side of the shower.
- The shower door or curtain, which provides entry and seals the shower.
Each of these components plays a crucial role in creating a functional and visually appealing shower space.
Benefits of a 4 Piece Shower
There are several benefits to choosing a 4 piece shower for your bathroom installation project. Some of these benefits include:
- Easy Installation: Compared to other types of showers, 4 piece showers are relatively easy to install. The separate pieces can be maneuvered through tight spaces and assembled on-site, making the installation process simpler.
- Flexibility: With a 4 piece shower, you have the flexibility to customize the size and configuration to fit your bathroom layout. This allows you to make the most of the available space without compromising on functionality.
- Durability: 4 piece showers are typically made from durable materials such as fiberglass or acrylic. These materials are resistant to staining, scratching, and fading, ensuring that your shower will remain in pristine condition for years to come.
- Cost-Effective: Compared to building a traditional tile shower from scratch, a 4 piece shower is often a more cost-effective option. The reduced labor and materials required for installation can save you both time and money.
Tools and Materials Needed for Installation
Before embarking on your 4 piece shower installation, it’s important to gather the necessary tools and materials. Here are the essentials you’ll need:
| Tools | Materials |
|---|---|
|
|
Having these tools and materials on hand will ensure a smooth and successful installation process.
Now that you have a better understanding of the basics of a 4 piece shower installation, you’re ready to begin your bathroom transformation. Stay tuned for the next section where we’ll guide you step-by-step through the installation process.
Preparing For Installation
Preparing for installation is an important step to ensure a successful and hassle-free installation of a 4 piece shower. Proper preparation will not only save you time and effort but also help in achieving a professional-looking finish. In this article, we will discuss the key steps involved in preparing for the installation of a 4 piece shower.
Measuring and Marking the Area
The first step in preparing for the installation of a 4 piece shower is to accurately measure and mark the area where the shower will be installed. Start by measuring the dimensions of the shower unit, including the width, height, and depth. Take into consideration any obstacles or fixtures that may affect the placement of the shower. Use a measuring tape and level to ensure accuracy.
Once you have the measurements, mark the area on the floor where the shower will be installed. Use a pencil or masking tape to create an outline or template of the shower unit. This will serve as a guide when positioning the shower components and ensure that everything fits properly.
Ensuring Proper Drainage
Proper drainage is crucial for a functional and efficient shower installation. Before installing the shower, make sure that the existing drainage system is in good working condition and meets the requirements for the new shower unit. Inspect the drain pipe and ensure that it is clear of any debris or blockages.
If needed, replace or repair the drain pipe to ensure a proper fit with the new shower unit. Additionally, check the floor for any signs of water damage or mold. If there are any issues with the existing drainage or flooring, address them before proceeding with the installation.
Preparing the Subfloor
The subfloor is the foundation of the shower installation and plays a vital role in ensuring its stability and longevity. Before installing the shower, prepare the subfloor to create a sturdy and level surface. Begin by removing any existing flooring materials, such as tiles or vinyl, to expose the subfloor.
Inspect the subfloor for any signs of damage or decay. Replace any damaged areas to ensure structural integrity. Use a level to check for any unevenness or slopes in the subfloor. If required, use plywood or a leveling compound to even out the surface.
Ensure that the subfloor is clean and free of dust or debris. This will help in creating a strong bond between the shower pan and the subfloor. Sweep or vacuum the subfloor thoroughly before proceeding with the installation.
By following these steps and properly preparing for the installation of a 4 piece shower, you can ensure a successful and long-lasting installation. Taking the time to measure and mark the area, ensure proper drainage, and prepare the subfloor will result in a professional-looking finish and a functional shower space.
Assembling The Shower Walls And Base
Installing the Back Wall
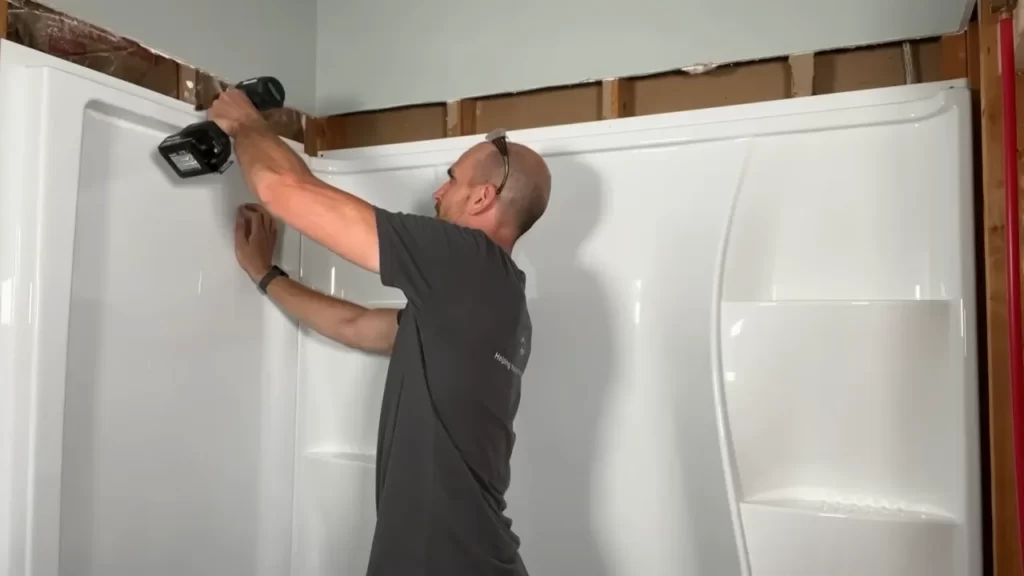
When it comes to assembling a 4 piece shower, the first step is installing the back wall. This wall, often the largest piece, is crucial for providing stability and support to the entire shower unit. To begin, make sure the area where the shower will be installed is clean and free from any debris. Put on your safety goggles and gloves before starting the installation process: safety always comes first!
To install the back wall, follow these simple steps:
- Gently position the back wall against the designated wall area, making sure it aligns perfectly with the shower base.
- Secure the back wall to the wall studs using screws or nails, ensuring a firm attachment.
- Check for any gaps between the wall and the shower base, using a level to ensure the back wall is plumb and straight. Adjust as needed.
- Finally, use a waterproof sealant to fill any gaps or joints between the back wall and the shower base. This will prevent water leakage and maintain the integrity of the installation.
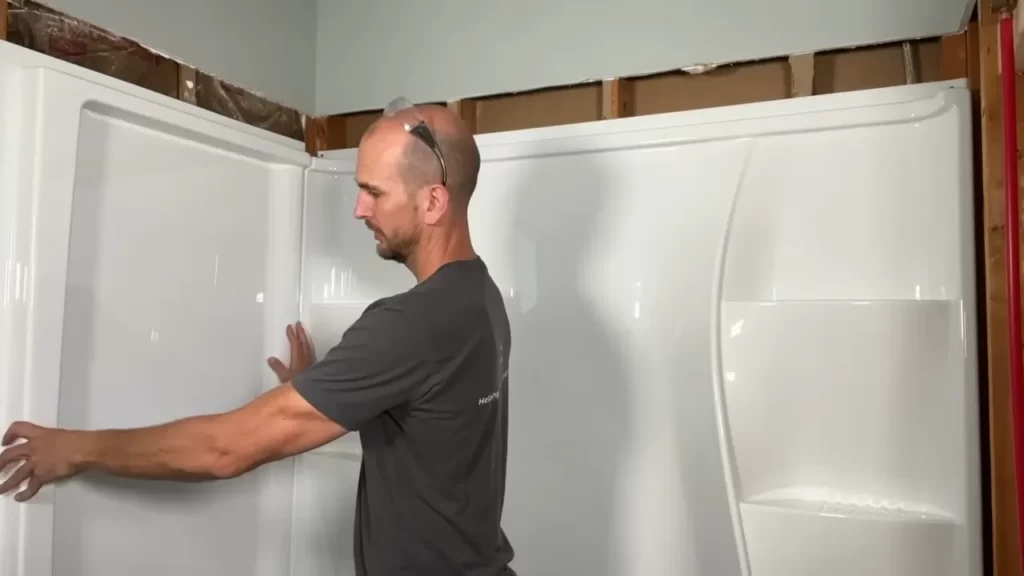
Attaching the Side Walls
After successfully installing the back wall, it’s time to move on to attaching the side walls. These walls provide additional support and enclosure to the shower unit, ensuring a secure and functional space.
Follow these steps to attach the side walls:
- Position one side wall against the back wall, ensuring a snug fit and alignment with the shower base.
- Secure the side wall to the wall studs using appropriate screws or nails.
- Repeat the process with the opposite side wall, ensuring proper alignment and levelness.
- Use a level to check and adjust the position of the side walls, ensuring they are plumb and straight.
- Apply a waterproof sealant to all joints and gaps between the side walls and the back wall, as well as the base. This will further enhance the shower’s water resistance.
Securing the Base
The final step in assembling a 4 piece shower is securing the base. The shower base, also known as the tray or pan, provides a sturdy foundation for the entire shower unit. It is essential to ensure a proper and secure installation to prevent any leaks or unstable conditions.
Here’s how to secure the base:
- Place the shower base on the designated area, ensuring it is situated correctly against the back and side walls.
- Use a level to check the base’s levelness, adjusting if necessary.
- Secure the base to the subfloor using appropriate screws or nails, ensuring a tight and stable connection.
- Apply a waterproof sealant around the edges of the base where it meets the walls, ensuring a watertight seal.
Congratulations! You have now successfully assembled a 4 piece shower by following these simple steps for installing the back wall, attaching the side walls, and securing the base. Your new shower is ready to provide you with a relaxing and functional bathing experience!
Connecting The Plumbing
Connecting the plumbing is a crucial step when installing a 4 piece shower. Properly connecting the water supply lines, drain, and shower head and controls ensures that your shower functions efficiently and avoids any leaks or water damage. In this section, we will delve into the process of positioning the shower head and controls, attaching the water supply lines, and connecting the drain. Let’s get started!
Positioning the Shower Head and Controls
When positioning the shower head and controls, it’s important to consider the height and accessibility for users. Follow these steps to ensure the optimal placement:
- Begin by determining the desired height of the shower head. This will depend on personal preference and the height of the individuals using the shower.
- Using a measuring tape, mark the desired height on the wall where the shower head will be installed.
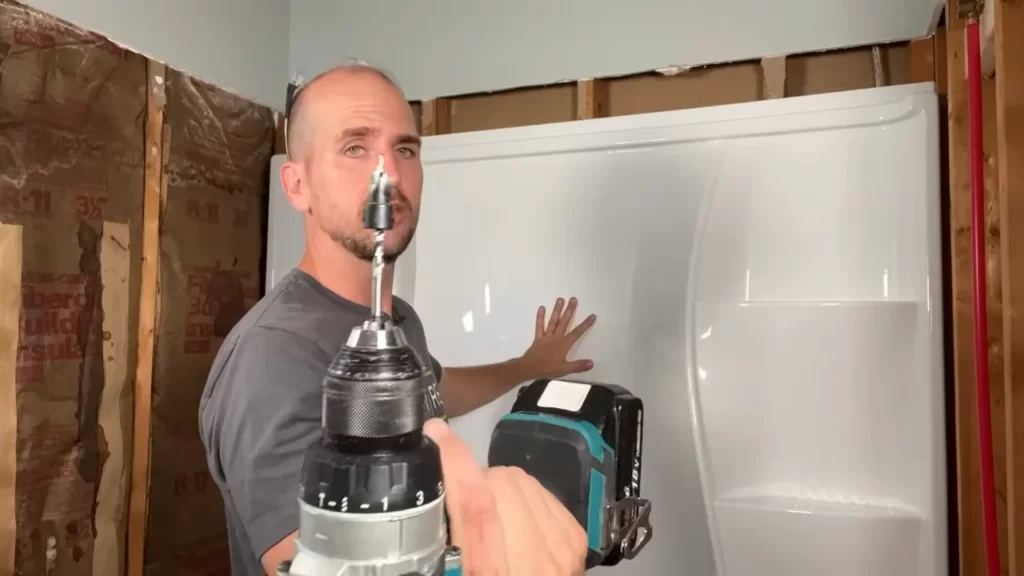
- Locate the studs behind the wall and mark their positions. This will provide a secure anchor for mounting the shower head and controls.
- Using a drill and appropriate screws, attach the mounting bracket for the shower head and controls to the marked positions on the wall.
- Ensure the shower head and controls align properly with the mounting bracket and make any necessary adjustments.
Once the shower head and controls are positioned, it’s time to move on to attaching the water supply lines.
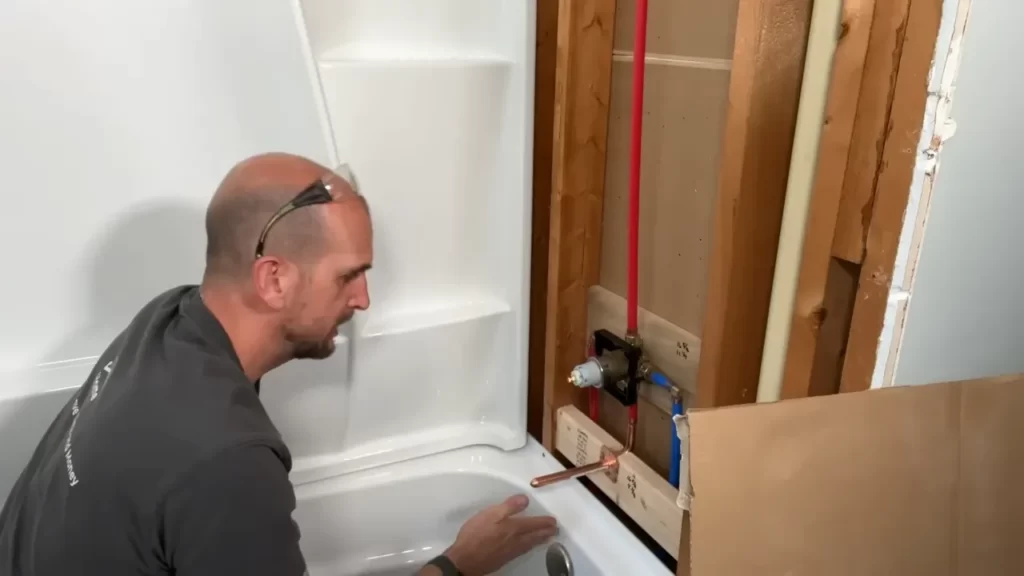
Attaching the Water Supply Lines
Properly attaching the water supply lines is essential for a functioning shower. Follow these steps to connect the water supply lines:
- Before connecting the supply lines, ensure the water supply to the shower is turned off.
- Identify the hot and cold water supply lines coming from the wall.
- Apply plumber’s tape or thread sealant to the threaded ends of the supply lines to create a watertight seal.
- Connect the hot water supply line to the designated hot water inlet on the shower valve. Use an adjustable wrench to tighten the connection.
- Similarly, connect the cold water supply line to the designated cold water inlet on the shower valve.
- Tighten the connections with an adjustable wrench to ensure they are secure but be careful not to overtighten and damage the fittings.
Now that the water supply lines are securely attached, the next step is to connect the drain.
Connecting the Drain
Properly connecting the drain ensures the water flows out of the shower effectively. Follow these steps to connect the drain:
- Remove any debris or old drain components from the drain opening.
- Place a rubber gasket onto the drain opening. This gasket will create a watertight seal.
- Insert the drain assembly into the opening, aligning it with the gasket.
- Tighten the drain assembly using the appropriate wrench.
- Ensure the drain pipe is properly connected to the drain assembly and tighten the connection.
- Test the drain by running water into the shower and check for any leaks or drainage issues.
By following these steps, you can successfully connect the plumbing components of your 4 piece shower. Remember to pay attention to details to ensure a safe and functional installation. Now you’re one step closer to enjoying your new shower!
Sealing And Finishing Touches
Sealing and Finishing Touches
Once you have successfully installed the main components of your new 4-piece shower, it is essential to focus on sealing and adding the finishing touches to ensure a watertight and aesthetically pleasing result. This final stage involves applying waterproof sealant, installing corner moldings, and caulking joints and edges. Paying attention to these details will not only protect your shower from leaks but also give it a professional and polished look.
Applying Waterproof Sealant
One crucial step in sealing your 4-piece shower is to apply a waterproof sealant to all the seams and gaps. This will prevent any water from seeping through, which could potentially lead to structural damage and mold growth.
Before applying the sealant, make sure the surface is dry and free from any dirt or debris. Using a low modulus silicone sealant is recommended as it is flexible, durable and specifically designed for wet areas.
Here’s a step-by-step guide for applying the waterproof sealant:
- Cut the nozzle of the silicone tube at a 45-degree angle.
- Insert the tube into a caulking gun and squeeze out a small amount of sealant to prime the gun.
- Starting from one corner, carefully apply the sealant along the seams, ensuring an even and continuous line.
- Use a caulking tool or your finger to smooth the sealant and create a neat finish.
- Wipe away any excess sealant with a damp cloth.
- Allow the sealant to cure according to the manufacturer’s instructions before using the shower.
Installing Corner Moldings
Corner moldings not only provide a decorative touch but also help to protect the corners of your 4-piece shower from water damage and wear. These moldings are typically made of PVC or acrylic and are designed to fit seamlessly into the corners.
Here’s how you can install corner moldings:
- Measure and cut the moldings to the desired length using a saw or utility knife.
- Apply adhesive to the back of the molding.
- Press the molding firmly into place, ensuring it is aligned with the edges of the shower walls.
- Secure the molding in place using masking tape until the adhesive dries.
- Repeat the process for each corner.
Caulking Joints and Edges
Caulking joints and edges is the final step in ensuring a tight seal for your 4-piece shower. Caulk is a flexible and waterproof material that fills the gaps between different components, such as the shower base, walls, and doors. This helps to prevent water from leaking out and causing damage.
Follow these steps to caulk the joints and edges:
- Choose a high-quality silicone caulk specifically designed for bathrooms.
- Cut the tip of the caulk tube at a 45-degree angle.
- Insert the tube into a caulking gun and apply a thin and even bead of caulk along the joints and edges.
- Use a wet finger or a caulk smoothing tool to smooth the caulk line and remove any excess.
- Allow the caulk to dry completely before using the shower.
By following these steps and paying attention to the details, you can ensure a properly sealed and finished 4-piece shower. Take your time and ensure that each stage is done correctly to achieve a long-lasting and beautiful result.
Ensuring Proper Leveling And Alignment
Proper leveling and alignment are crucial when installing a 4-piece shower. This ensures that your shower is stable, safe to use, and aesthetically pleasing. In this section, we will guide you through the process of leveling the shower panels and ensuring they are aligned correctly.
Using a Leveling Tool
Before you begin installing the shower panels, it is essential to have a good quality leveling tool on hand. This tool will help you determine if the panels are level and if they need any adjustments. Here’s how to use it:
- Carefully place the leveling tool on top of the panels.
- Check the bubble within the leveling tool. If it is centered, it indicates that the panels are level.
- If the bubble is off-center, you will need to make adjustments.
Adjusting the Wall Panels
Once you have identified that the panels are not level, it’s time to make the necessary adjustments. Follow these steps to ensure proper alignment:
- Start by loosening the screws on the panel that needs adjustment.
- Gently push or pull the panel in the desired direction to level it.
- Once the panel is level, tighten the screws to secure it in place.
- Repeat the process for the remaining panels, ensuring each one is level and aligned with the others.
By using a leveling tool and making the necessary adjustments, you can ensure that your 4-piece shower is installed with proper leveling and alignment. This will not only enhance the functionality of the shower but also improve the overall appearance of your bathroom.
Addressing Common Installation Challenges
Installing a 4 piece shower can be a fantastic way to upgrade your bathroom, adding both style and functionality. However, like any home improvement project, it can come with its fair share of challenges. In this section, we will address some of the most common installation challenges you may face when installing a 4 piece shower, and provide you with helpful tips and guidance to overcome them.
Dealing with Uneven Floors
One of the most common challenges during the installation of a 4 piece shower is dealing with uneven floors. Uneven floors can make it difficult for the shower base to sit level, causing potential leakages and compromising the overall stability of the shower. To address this challenge, you can:
- Use a leveling compound: Before installing the shower base, apply a leveling compound to the uneven sections of the floor. This will help create a smooth and even surface for the base to rest on.
- Adjust the base legs: Most 4 piece shower bases come with adjustable legs. Make use of these adjustable legs to compensate for the uneven sections of the floor. Ensure all legs are set to the proper height for a level installation.
- Shim the base: If the leveling compound and adjustable legs are not sufficient, you can use shims to further level the shower base. Place shims under the low areas until the base is perfectly level.
Making Adjustments for Plumbing Connections
When installing a 4 piece shower, you may encounter challenges with the plumbing connections. Misaligned or incompatible pipes can lead to leaks and other plumbing issues. To overcome these challenges, consider the following:
- Inspect the existing plumbing: Before beginning the installation, carefully inspect the existing plumbing connections. Ensure they are in good condition, properly aligned, and compatible with the new shower fixture.
- Make necessary adjustments: If you find any issues or mismatches with the plumbing, make the necessary adjustments. This may involve replacing sections of pipes, using adapters, or even hiring a professional plumber for complex modifications.
- Remember to apply plumber’s tape: To prevent leaks, always apply plumber’s tape to the threads of the plumbing connections. This will create a tight seal and help maintain the integrity of the plumbing system.
Repairing Wall Damage
During the installation of a 4 piece shower, it is common to encounter wall damage. This can occur when removing the old shower fixture, preparing the walls, or during the installation process itself. Here’s what you can do to address wall damage:
- Inspect and repair any damage: Before installing the new shower, thoroughly inspect the walls for any damage. This can include holes, cracks, or water damage. Repair any issues using appropriate materials such as drywall patching compound, joint compound, or caulk.
- Allow for proper drying time: Once the repairs are made, allow sufficient drying time as per the manufacturer’s instructions. This will ensure that the walls are ready for the installation and prevent future issues.
- Consider a wall reinforcement kit: If you have concerns about the stability of the walls or want to reinforce them for additional support, consider using a wall reinforcement kit. These kits provide extra strength and stability to the walls surrounding the shower.
By addressing these common installation challenges, you can ensure a smooth and successful installation of your 4 piece shower. Remember to always follow the manufacturer’s instructions and seek professional assistance if needed. With proper preparation and problem-solving, you’ll soon be enjoying your new shower in all its glory!
Maintenance And Care For Your 4 Piece Shower
Maintaining and caring for your 4 piece shower is essential to ensure its longevity and keep it looking pristine. By following a regular maintenance routine and taking preventive measures, you can prevent issues such as mold and mildew buildup and other common problems. In this section, we will discuss cleaning and preventing mold and mildew, regular inspection and maintenance, as well as troubleshooting common issues. Let’s dive in.
Cleaning and Preventing Mold and Mildew
One of the main challenges in keeping your 4 piece shower clean is preventing the growth of mold and mildew. These pesky problems not only look unsightly but also pose potential health risks. Here are some tips to clean and prevent mold and mildew:
- Regularly clean your shower using mild, non-abrasive cleaners specifically formulated for showers.
- Use an anti-mold and mildew spray or solution to treat the surfaces of your shower regularly. Be sure to follow the manufacturer’s instructions.
- Wipe down the shower after each use to remove excess moisture and prevent mold and mildew growth.
- Keep the bathroom well-ventilated to reduce humidity. Use an exhaust fan or open windows during and after showers to allow air circulation.
- Check for any leaks or cracks in the shower and repair them immediately. Moisture can seep through these openings and promote mold and mildew growth.
Regular Inspection and Maintenance
To keep your 4 piece shower in top condition, it’s important to conduct regular inspection and maintenance. Here’s what you should do:
- Inspect the shower walls, base, doors, and any other components for any signs of damage, such as cracks or loose tiles. Address these issues promptly to prevent further damage.
- Check the fittings, such as faucets and showerheads, for any leaks or drips. Tighten or replace any faulty parts.
- Ensure the drainage system is working properly. Remove any clogs or debris that may obstruct the flow of water.
- Clean the showerhead regularly to remove mineral buildup. Use a descaling solution or vinegar to dissolve any deposits.
- Inspect the caulking around the edges of the shower to ensure it is intact and free from cracks. Replace any damaged caulking to maintain a watertight seal.
Troubleshooting Common Issues
Despite regular maintenance, you may encounter some common issues with your 4 piece shower. Here are solutions for troubleshooting potential problems:
| Issue | Solution |
|---|---|
| Low water pressure | Check the showerhead for mineral buildup. Clean or replace if necessary. Also, ensure the water supply valves are fully open. |
| Leaking shower doors | Inspect the door seals and gaskets for any damage or wear. Replace faulty parts to create a watertight seal. |
| Discolored or stained shower walls | Use a mildew remover or a mixture of water and bleach to remove tough stains. Scrub gently and rinse thoroughly. |
| Clogged drains | Pour a mixture of hot water and baking soda down the drain to break up the clog. Use a plunger if necessary. If the clog persists, consider using a drain snake or calling a professional plumber. |
By following these maintenance and care tips, you can keep your 4 piece shower in excellent condition and enjoy a clean and refreshing bathing experience for years to come.
Can I Install A 4 Piece Shower Without Professional Help?
If you’re wondering whether you can tackle the installation of a 4 piece shower on your own, the answer is yes! While it may seem like a complex task, with the right preparation and guidance, DIY installation is possible. By following some considerations for DIY installation, you can save money and feel accomplished by completing the project yourself.
Considerations for DIY Installation
1. Assess your Skill Level:
Before delving into a DIY 4 piece shower installation, it’s important to evaluate your skill level. While this type of installation can be completed by most homeowners, it requires basic plumbing and carpentry knowledge. If you have experience with similar projects or you’re comfortable learning new skills, you should feel confident in taking on the task. However, if you’re unsure about your abilities, it’s advisable to seek professional help.
2. Gather the Necessary Tools and Materials:
A successful DIY installation relies on having the right tools and materials. Make sure you have all the necessary equipment, such as a drill, wrenches, level, and utility knife. Additionally, check that you have the appropriate materials, such as the 4 piece shower kit, silicone sealant, and waterproofing materials. Planning ahead and having everything ready will streamline the installation process and help you avoid unnecessary trips to the hardware store.
3. Understand the Instructions:
Before beginning the installation, thoroughly read and understand the instructions provided by the manufacturer. Each 4 piece shower kit may have specific installation requirements, and following the instructions correctly is crucial for a successful installation. Take your time to familiarize yourself with the steps, diagrams, and any other supporting information provided. If you have any questions or uncertainties, consult the manufacturer or refer to online resources for clarification.
4. Prepare the Installation Area:
Prior to installation, ensure that the installation area is properly prepared. This includes measuring and marking the areas where the shower components will be placed, as well as ensuring that the floor and walls are clean, level, and free from any obstructions or existing fixtures. Taking the time to properly prepare the area will result in a smoother installation process and a more professional-looking end result.
5. Seek Assistance if Needed:
Although DIY installation is achievable for many homeowners, there may be instances where certain tasks require additional help. Don’t hesitate to ask a friend or family member for assistance, especially when it comes to lifting and positioning heavy shower components. Working with someone else can also enhance safety and efficiency during the installation process.
By considering these key factors, you can confidently install a 4 piece shower without professional help. Remember to always prioritize safety, follow instructions carefully, and seek assistance if necessary. With the right mindset, tools, and preparation, you’ll have your new shower installed and ready for use in no time!
How Long Does It Take To Install A 4 Piece Shower?
Installing a 4 piece shower can be a complex task that requires careful planning and execution. The length of time it takes to complete the installation will depend on several factors. In this article, we will discuss the factors that affect installation time and provide some general guidelines for estimating how long it may take to install a 4 piece shower.
Factors Affecting Installation Time
1. Size and complexity of the shower
The size and complexity of the 4 piece shower will play a significant role in determining how long it takes to install. Larger showers with more intricate designs may require more time for installation compared to smaller, simpler ones.
2. Experience level of the installer
The experience level of the installer can also affect the installation time. An experienced professional who specializes in shower installations will likely complete the job more quickly and efficiently compared to someone with limited experience.
3. Preparation work required
The amount of preparation work needed before the installation can begin will impact the overall installation time. This includes clearing and cleaning the installation area, removing any existing fixtures or tiles, and ensuring the area is properly prepped for the new shower installation.
4. Plumbing and electrical work
If the installation requires plumbing or electrical work, the installation time will understandably be longer. Connecting the shower to the existing plumbing and electrical systems requires careful attention and expertise.
5. Accessibility of the installation area
If the installation area is difficult to access, such as in a tight bathroom or on a higher floor of a building, it may take longer to complete the installation. The installer may need to navigate around obstacles or work in confined spaces, which can slow down the process.
Estimating Installation Time
While the time it takes to install a 4 piece shower can vary, here is a general guideline:
- For a simple and straightforward installation, it may take around 4-6 hours.
- If the installation involves additional plumbing or electrical work, it may take 6-8 hours or more.
- For larger, more complex showers, the installation time may extend to a full day or more, depending on the size and design.
It is important to note that these estimates are just general guidelines and the actual installation time may vary depending on the factors mentioned earlier.
Conclusion
A 4 piece shower installation requires careful consideration of multiple factors that influence the time it takes to complete the project. From the size and complexity of the shower to the level of experience of the installer, various elements contribute to the overall installation time. By considering these factors and seeking professional expertise, you can better estimate how long it will take to install a 4 piece shower.
Can I Replace One Piece Of The Shower If It Gets Damaged?
Understanding Replacement Options
When it comes to shower installation, it’s natural to wonder what options are available if one piece of your 4 piece shower gets damaged. Perhaps you accidentally dropped a heavy object in the shower, causing a crack in the base, or maybe a panel got scratched during an overzealous cleaning session. Whatever the case may be, the good news is that in most cases, you can replace individual pieces of your 4 piece shower without having to uninstall the entire unit.
Before we dive into the specific steps of replacing a damaged piece, it’s important to understand the options available to you. There are typically two types of replacement options when it comes to 4 piece showers:
1. Replacing by Piece
In this method, you have the option to replace the damaged piece without disturbing the rest of the shower unit. For example, if the base of your shower is cracked, you can simply remove the damaged base and replace it with a new one, while leaving the sidewalls and back panel untouched. This type of replacement is generally more cost-effective and less time-consuming than replacing the entire shower.
2. Replacing the Entire Set
If the damage to your 4 piece shower is extensive or if you simply prefer a fresh look, you also have the option to replace the entire set. This involves uninstalling all the pieces of your existing shower and replacing them with a new set. While this option may be a bit more laborious, it allows you to start anew with a brand-new shower that is free from any damage or signs of wear and tear.
Now that you understand the replacement options available to you, let’s explore the steps involved in replacing a damaged piece of your 4 piece shower.
Frequently Asked Questions
How Do You Install A Prebuilt Shower?
To install a prebuilt shower, follow these steps: 1. Prepare the space by removing any existing fixtures. 2. Install the shower base according to the manufacturer’s instructions. 3. Attach the walls to the base using adhesive or screws. 4. Connect the plumbing fixtures, including the showerhead and faucets.
5. Seal all joints with silicone caulk to prevent leaks.
How To Install A 3 Piece Walk In Shower?
Installing a 3 piece walk-in shower involves these steps: 1. Measure and mark the shower area on the wall. 2. Attach the shower pan to the floor, ensuring it is level. 3. Install the back and side shower panels, securing them in place.
4. Connect the plumbing and drain. 5. Seal the joints and edges with silicone caulk.
What Do You Put Under A Shower Base?
To ensure a stable and secure installation, a shower base should be placed on a solid and level subfloor or concrete surface. It is important to use proper mortar or adhesive to attach the shower base securely, providing a sturdy foundation for the shower.
How To Install A Shower Step By Step?
To install a shower step by step, follow these guidelines: 1. Measure and mark the area for the shower. 2. Install the shower pan by leveling and securing it. 3. Assemble and attach the shower walls. 4. Connect the plumbing fixtures and fittings.
5. Test the shower for leaks and make any necessary adjustments.
Conclusion
Installing a 4 piece shower can be a daunting task, but with the right tools and guidance, it becomes a manageable DIY project. By following the step-by-step instructions provided in this blog post, you can successfully complete the installation process.
Remember to gather all necessary materials beforehand and take your time to ensure a proper and secure fit. Happy showering!