To install a 3-way dimmer switch, first, turn off the power to the circuit, remove the existing switch, and connect the dimmer according to the manufacturer’s instructions. Then, rewire the other switch location to operate with the dimmer.
Are you tired of the harsh lighting in your home? Installing a 3-way dimmer switch can help you create a more inviting and comfortable ambiance. With a few simple steps, you can easily upgrade your existing switches and enjoy adjustable lighting in any room.
In this guide, we will walk you through the process of installing a 3-way dimmer switch, ensuring that you achieve the perfect lighting for your space. So, let’s get started and transform your home with a dimmer switch.
Factors To Consider
Before installing a 3-way dimmer switch, there are several factors you should take into account to ensure a successful installation. These include:
Compatibility with existing wiring
One of the first things to consider is whether the 3-way dimmer switch is compatible with your existing wiring. Different types of switches require specific wiring configurations, so it’s essential to check if your current setup supports a dimmer switch. If you are unsure about the compatibility, it’s always a good idea to consult an electrician or refer to the manufacturer’s guidelines.
Number of switches and dimmers needed
The next consideration is the number of switches and dimmers you will need for your desired lighting setup. Three-way switches allow you to control a single light fixture from two different locations, while a dimmer adds the option to adjust the brightness. If you have multiple switches controlling the same light fixture, you’ll need to determine how many dimmers you want to install. It’s important to note that each dimmer must be compatible with the three-way switch configuration.
Dimming range and capabilities
When selecting a 3-way dimmer switch, you should also take into account its dimming range and capabilities. Some dimmers have a wider range, allowing for more precise control of the brightness levels, while others have a limited range. Consider the specific lighting needs of the area where you’ll install the dimmer switch. For example, if it’s a room where you want to create different moods or adjust the lighting for specific activities such as reading or watching movies, you may want a dimmer with a broader dimming range.
In addition to the dimming range, you should also consider other capabilities that the dimmer switch offers. Some advanced dimmers have features such as programmable presets, fade-in and fade-out effects, and compatibility with smart home systems. These additional functionalities can enhance your overall lighting experience and provide convenience and flexibility.
By considering these factors, you can ensure that your 3-way dimmer switch installation suits your existing wiring, the number of switches required, and provides the desired dimming range and capabilities.

Types Of Dimmer Switches
When it comes to creating the perfect ambiance in your living space, dimmer switches are a must-have. They allow you to adjust the brightness of your lights to suit different moods and activities. But with so many options available in the market, it can be overwhelming to choose the right one. In this post, we will explore the different types of dimmer switches and their respective functionalities to help you make an informed decision.
Single-pole dimmer switches
Single-pole dimmer switches are the simplest and most common type. They are designed for controlling a single light fixture or a group of lights from one location. These switches replace your standard on/off switches, allowing you to adjust the light output smoothly. Single-pole dimmers are ideal for bedrooms, living rooms, and other areas where you need to control the brightness from a single switch.
Three-way dimmer switches
Three-way dimmer switches are used in areas where you want to control the lights from two separate locations. For instance, if you have a long hallway with lights at both ends, a three-way dimmer switch can give you the convenience of adjusting the brightness from either end of the hallway. These switches work in conjunction with regular three-way switches and require specific wiring configurations. It is important to note that not all three-way switches are compatible with dimmers, so make sure to choose a dimmer switch specifically designed for this purpose.
Multi-location dimmer switches
If you have a large room or multiple entry points that require control over the lighting, multi-location dimmer switches are the perfect choice. These switches can be paired with regular three-way or four-way switches to control the lights from more than two locations. For example, if you have a living room with entry doors at both ends, you can install a multi-location dimmer switch by the entrance and additional regular switches near the other doors. This way, you can adjust the lights from any of the entrances to suit your preference.
Now that you are familiar with the different types of dimmer switches, you can choose one that best suits your needs and preferences. Whether you opt for a single-pole, three-way, or multi-location dimmer switch, you can now take control over the lighting in your space and create the perfect ambiance for any occasion.
Tools
Before you begin installing a 3-way dimmer switch, make sure you have the necessary tools. Having the right tools on hand will ensure a smooth installation process. Here are the tools you will need:
Screwdriver
A screwdriver is an essential tool for removing and tightening screws. You will need a flathead screwdriver to remove the cover plate and a Phillips screwdriver to disconnect the wires from the existing switch.
Voltage tester
A voltage tester is used to check if there is any electrical current present in the wires. This tool ensures your safety by allowing you to detect live wires before working on them. It is crucial to use a voltage tester to avoid any potential hazards.
Wire stripper
A wire stripper is necessary to remove the insulation from the wires. This tool allows you to expose the bare copper wire for proper connection. Make sure you choose a wire stripper that is suitable for the size of the wires you are working with.
Pliers
Pliers are versatile tools that can be used for various purposes during the installation process. They can help you twist and secure wires together, bend them if needed, or loosen tight connections. Having a pair of pliers handy will make the installation easier and more efficient.
Phillips screwdriver
A Phillips screwdriver is used to connect the wires to the new dimmer switch. This type of screwdriver is characterized by its cross-shaped tip, which fits securely into Phillips screws.
Now that you have gathered all the necessary tools, you’re ready to move on to the next steps of installing your 3-way dimmer switch.
Materials
Before you can begin installing a 3-way dimmer switch, it’s essential to gather all the necessary materials. Having everything you need right at your fingertips will enable you to complete the installation efficiently and achieve the desired results. The following materials are required for a smooth installation:
3-Way Dimmer Switch
The centerpiece of this installation is, of course, the 3-way dimmer switch itself. This specialized switch allows you to control the brightness of your lights from multiple locations. It is important to choose a high-quality dimmer switch that is compatible with your existing lighting system for optimal performance. Make sure to check the manufacturer’s instructions for any specific model requirements.
Wire Connectors
Wire connectors play a crucial role in securely connecting the electrical wires together. These connectors not only ensure a safe and reliable connection but also protect against accidental electrical shocks. It is recommended to use wire connectors that are compatible with the gauge of the wires you are working with.
Electrical Tape
Electrical tape is an indispensable tool when it comes to electrical installations. It helps to insulate and protect exposed wires, preventing any potential short circuits or electrical hazards. It is advised to use high-quality electrical tape that is specifically designed for electrical applications. Applying electrical tape to exposed wires will ensure they are well protected.
Wire Nuts
Wire nuts are another essential component required for connecting wires. They provide a secure and reliable connection while also protecting against electrical shorts. Wire nuts are available in different sizes, so it’s important to choose the appropriate size based on the diameter of the wires being connected. With the right wire nuts, you can have peace of mind knowing that your connections are safe and secure.
Turn Off The Power
In this step-by-step guide, we will walk you through the process of installing a 3-way dimmer switch in your home. This installation allows you to control the brightness of your lights from multiple locations, providing both convenience and energy savings. Before we dive into the installation process, it is crucial to take the necessary safety precautions by turning off the power to the circuit. Let’s start by locating the circuit breaker panel.
Locate the circuit breaker panel
The circuit breaker panel is usually located in a discrete area of your home, such as a basement, utility room, or garage. It is essential to have a clear understanding of its location to ensure you can easily access it when needed.
If you are unsure of the panel’s location, check near your electrical meter or consult your home’s blueprint. Once you have identified the circuit breaker panel, make sure you have sufficient lighting to work safely.
Switch off the power
Before beginning any electrical work, it is crucial to switch off the power to the specific circuit you will be working on. This step is essential to minimize the risk of electric shock. Follow the steps below to turn off the power:
- Open the circuit breaker panel door by carefully removing the cover.
- Locate the breaker that controls the circuit you will be working on. Usually, breakers are labeled to indicate which circuits they control. Look for the label that corresponds to the area you will be installing the dimmer switch.
- Flip the breaker switch to the “off” position by pushing it firmly downwards or to the side, depending on the breaker design.
Ensure that the breaker switch is fully in the “off” position to guarantee that the power to the circuit is completely disconnected.
Additionally, it is advisable to use a non-contact voltage tester to double-check that the power is indeed turned off. This device can detect the presence of electrical current without direct contact, providing an extra layer of safety.
Once you have determined that the power is off, it is safe to proceed with the installation process of your 3-way dimmer switch. Remember to keep other individuals away from the circuit breaker panel while you are working and to exercise caution throughout the installation.
Now that we have safely turned off the power, let’s move on to the next step in this installation guide.
Remove Old Switches
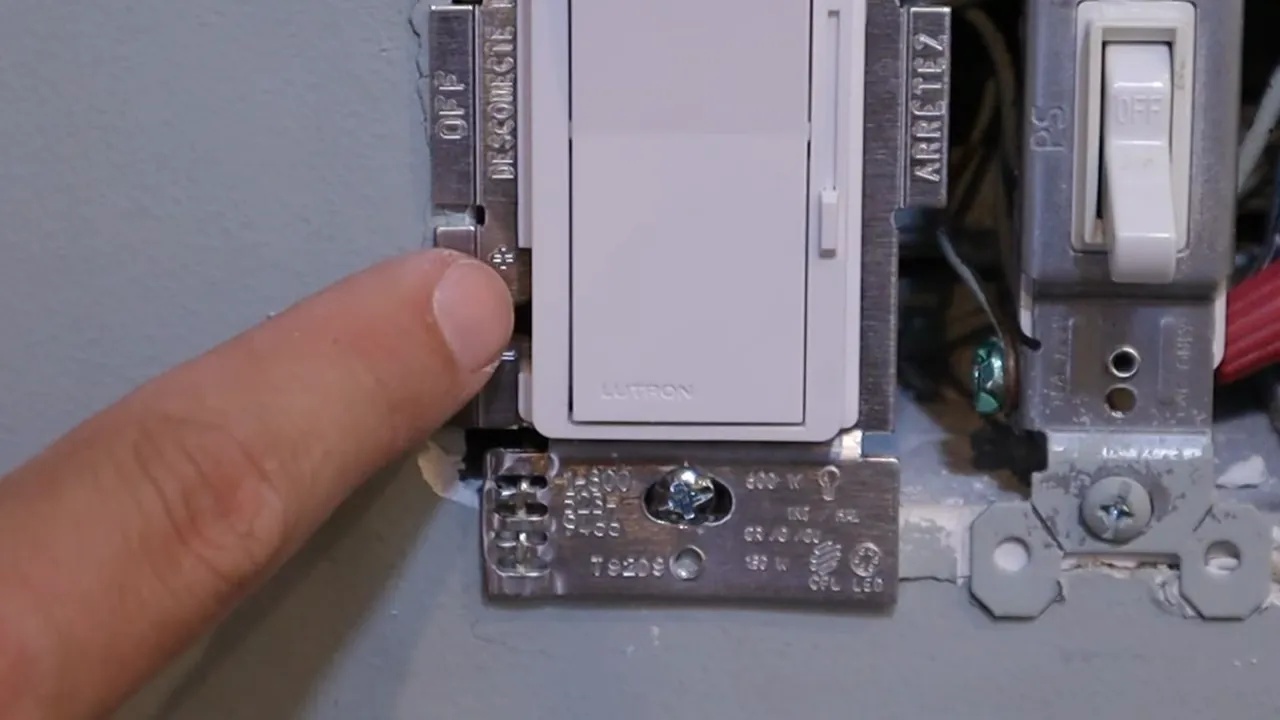
Remove the switch plate cover
Before you can install a new 3-way dimmer switch, the first step is to remove the switch plate cover. This cover protects the switches and wiring behind it, and it is usually held in place by small screws. To remove the switch plate cover, follow these simple steps:
- Turn off the power to the switches by flipping the corresponding circuit breaker in your electrical panel.
- Use a small screwdriver to unscrew the screws that hold the switch plate cover in place.
- Once the screws are removed, carefully lift the switch plate cover away from the wall.
With the switch plate cover removed, you will have access to the old switches and wiring that need to be replaced.
Unscrew and disconnect the old switches
Now that the switch plate cover is out of the way, it’s time to unscrew and disconnect the old switches. Follow these steps to remove the old switches:
- Use a screwdriver to unscrew the screws holding the switches in place.
- Slowly pull the switches away from the wall, being careful not to damage the wiring.
- Take note of how the wires are connected to the old switches. This will be important when you install the new dimmer switch.
- Using a pair of pliers, carefully disconnect the wires from the old switches.
Once the old switches are unscrewed and disconnected, you are now ready to install the new 3-way dimmer switch!
Identify The Wiring Setup
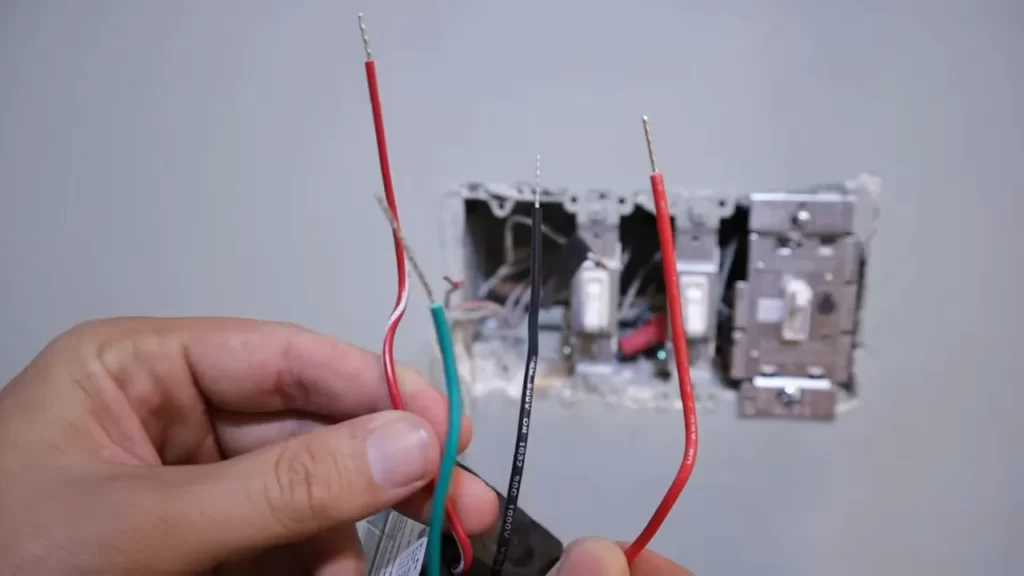
Before installing a 3-way dimmer switch, it’s crucial to identify the wiring setup in order to ensure a successful installation. By understanding the different wires involved, you’ll be able to wire the dimmer switch correctly and avoid any potential mishaps. Let’s take a closer look at how to identify the common wire and traveler wires:
Identify the common wire
The common wire, also known as the “hot” wire, is an essential part of the 3-way dimmer switch installation. This wire is responsible for providing power to the switch and allowing it to control the flow of electricity to the connected lights. To identify the common wire:
- First, turn off the power to the circuit at the breaker box. This step is crucial to ensure your safety during the installation process.
- Next, remove the existing switch cover plate by unscrewing the screws that hold it in place. carefully pull the switch out from the wall.
- Once the switch is out, take a close look at the wires connected to it. Look for a wire that is connected to a screw terminal labeled “Common” or marked by a different color screw.
- Use a voltage tester to double-check which wire is hot. Remember to be cautious and follow all safety measures when using electrical testing equipment.
- Once you have identified the common wire, mark it for easy recognition during the installation process.
Identify the traveler wires
Traveler wires are the wires that connect the two 3-way switches together and allow for control of the lights from multiple locations. To identify the traveler wires:
- Start by turning off the power to the circuit at the breaker box and removing the switch cover plate.
- Take a look at the wires that were connected to the original switch. You should see two wires connected to screw terminals labeled “Traveler” or marked by a different color screw.
- Use a voltage tester to double-check that these wires are not hot. This will confirm that they are indeed the traveler wires.
- Once you have identified the traveler wires, mark them for easy recognition during the installation process. You can use some electrical tape or other labeling methods to ensure you don’t confuse them with the common wire.
By properly identifying the common wire and traveler wires, you’ll be on the right track to install your 3-way dimmer switch correctly. This understanding of the wiring setup will make the rest of the installation process smoother and easier.
Connect The Dimmer Switch
Connect the Dimmer Switch
Installing a 3-way dimmer switch can add ambiance and convenience to any room. Once you have identified the common wire and traveler wires, it’s time to connect the dimmer switch. In this section, we will guide you through the process of connecting each wire to the dimmer switch, ensuring a safe and efficient installation.
Connect the common wire to the dimmer switch:
The common wire, also known as the “hot” wire, is typically colored black or labeled with a “common” marking. To connect this wire to the dimmer switch, follow these steps:
1. Turn off the power: Before starting any electrical work, always make sure to turn off the power to the circuit at the breaker box. This precautionary step will prevent any accidents or electric shocks.
2. Strip the wire: Use a wire stripper to remove about 3/4 inch of insulation from the end of the common wire. This exposed copper should be free of any frayed strands.
3. Connect the wire: On the dimmer switch, locate the terminal labeled “common” or “hot.” Loosen the screw on the terminal using a screwdriver and insert the stripped end of the common wire. Tighten the screw securely to ensure a proper connection.
4. Test the connection: Double-check that your common wire is securely connected to the dimmer switch. Once you are confident in the connection, restore power to the circuit at the breaker box and test the switch to ensure it is functioning correctly.
Connect the traveler wires to the dimmer switch:
In a 3-way switch setup, there are two traveler wires that carry the electrical current between switches. To connect these wires to the dimmer switch, follow these steps:
1. Turn off the power: As mentioned earlier, always turn off the power before working on any electrical connections for safety.
2. Strip the wires: Use a wire stripper to remove about 3/4 inch of insulation from each end of the traveler wires. Make sure the exposed copper is clean and free of any frayed strands.
3. Connect the wires: On the dimmer switch, locate the two terminals labeled “traveler” or “T1” and “T2.” Loosen the screws on these terminals and insert the stripped ends of the traveler wires. Make sure to match the correct wire to each terminal. Tighten the screws securely to establish a solid connection.
4. Test the connection: Once the traveler wires are securely connected, restore power to the circuit at the breaker box and test the dimmer switch. Check for proper functionality by toggling the switch from both the existing switches.
Remember, if you are uncertain about any aspect of the installation process, it is always best to consult a professional electrician. With these steps, you can now effectively connect the common wire and traveler wires to your 3-way dimmer switch, bringing enhanced lighting control to your space.
Secure And Test The Connections
Once you have successfully connected your 3-way dimmer switch, it’s time to secure the connections and test its functionality. This step is crucial to ensure a safe and efficient installation process.
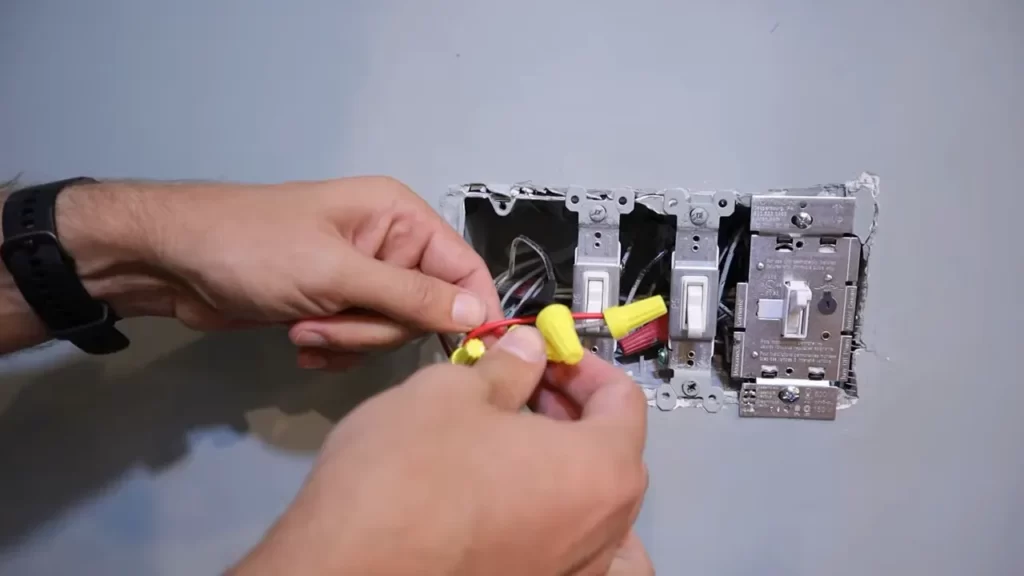
Use Wire Connectors and Electrical Tape to Secure the Connections
Securing the connections is an essential part of installing a 3-way dimmer switch. You can use wire connectors and electrical tape to ensure that the wires are properly connected and insulated. Wire connectors provide a secure and reliable connection between the wires, preventing any electrical hazards. By using electrical tape, you can further protect the connections from any accidental exposure to moisture or other external elements.
Here is a step-by-step guide on how to secure the connections:
- Make sure all the wires are properly stripped and free from any insulation.
- Take a wire connector and hold one end of the dimmer switch wire together with the corresponding wire from the power source or the circuit.
- Insert both wires into the wire connector and twist it tightly clockwise until it is secure.
- Repeat this process for each connection, ensuring that all the wires are securely connected.
- After securing the connections with wire connectors, wrap each connection with electrical tape. This will provide an extra layer of insulation and protect against any potential electrical hazards.
By following these steps and securing the connections properly, you can ensure a safe and reliable installation of your 3-way dimmer switch.
Test the Dimmer Switch to Ensure It Functions Properly
After securing the connections, it is crucial to test the dimmer switch to ensure that it functions properly. This step will enable you to identify any potential issues and make necessary adjustments before completing the installation process.
Here’s how to test the dimmer switch:
- Restore power to the circuit by turning on the breaker.
- Turn on the lights connected to the dimmer switch.
- Gradually adjust the dimmer switch to different levels and observe the brightness of the lights. Ensure that the lights respond smoothly and without flickering.
- If you notice any issues, such as flickering lights or inconsistent dimming, turn off the power and revisit the connections to troubleshoot the problem.
By testing the dimmer switch, you can ensure that it operates correctly, providing you with the desired level of lighting control in your space.
Install The Dimmer Switch In The Wall Box
Carefully Tuck the Wires Back into the Wall Box
After successfully removing the old switch, it’s time to install the new 3-way dimmer switch into the wall box. But before you proceed, make sure the power is turned off at the circuit breaker to avoid any electrical mishaps. Safety first!
Now, carefully tuck the wires back into the wall box. Take a moment to examine all the wires and identify their respective colors. Pay close attention to the manufacturer’s instructions and guidelines for the specific dimmer switch you’re installing, as wire colors and configurations may vary.
To tuck the wires back into the wall box, follow these steps:
- Organize the wires: Group the same-colored wires together, separating the hot wire(s) from the neutral wire(s).
- Trim the wires: Trim the exposed wire ends if necessary, ensuring that only about 5/8 inch of copper wire is exposed.
- Twist the wires: Twist the exposed wire ends together using your fingers or pliers, making sure the connections are secure. If there are multiple wires of the same color, use a wire connector or wire nut to join them.
- Push the wires: Gently push the wires back into the wall box, making sure they are neatly arranged and not sticking out or interfering with the dimmer switch.
By carefully tucking the wires back into the wall box, you’ll ensure a clean and organized installation, reducing the risk of any loose connections and potential electrical hazards.
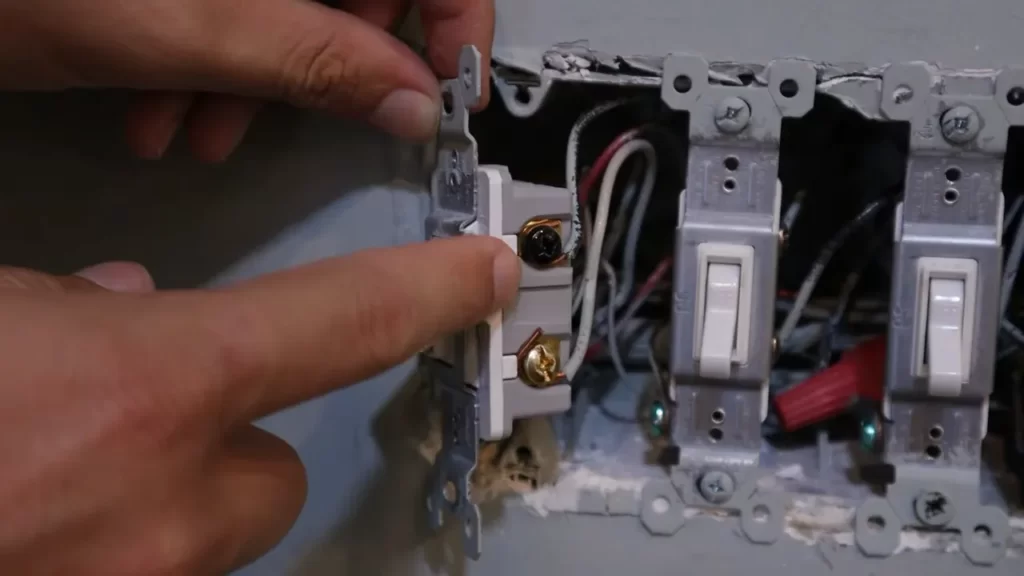
Screw the Dimmer Switch onto the Wall Box
Now that the wires are neatly tucked away, it’s time to attach the dimmer switch securely onto the wall box. Follow these steps to successfully screw the dimmer switch:
- Position the dimmer switch: Hold the dimmer switch in front of the wall box, aligning the screw holes of the switch with the holes in the wall box.
- Secure the switch: Using a screwdriver, tighten the screws into the screw holes, ensuring the dimmer switch is firmly attached to the wall box. Be careful not to overtighten, as it may damage the switch or the wall box.
- Double-check the alignment: Once the switch is secured, verify that it is straight and properly aligned with the wall box. Adjust if necessary.
By screwing the dimmer switch onto the wall box securely, you’ll ensure a stable installation that won’t move or become loose over time. This is crucial for the proper functionality and longevity of your dimmer switch.
Now that you have carefully tucked the wires back into the wall box and securely screwed the dimmer switch onto it, you’ve completed the crucial steps to install a 3-way dimmer switch. But remember, the installation process may vary depending on the specific switch and wiring setup. Always refer to the manufacturer’s instructions and consult a professional electrician if needed.
Restore Power And Test The Dimmer Switch
Turn the power back on at the circuit breaker panel
Now that you have successfully wired and connected your 3-way dimmer switch, it’s time to restore power and put it to the test. Remember, safety first! Always exercise caution when working with electricity.
To restore power, head over to your circuit breaker panel and locate the circuit that you turned off earlier. It should be labeled accordingly, making it easier to identify. Once you’ve located the correct circuit, switch it back on by flipping the corresponding breaker switch to the “on” position.
| Tip: | Ensure the circuit breaker switch is securely in the “on” position. If it’s not fully engaged, your dimmer switch may not work properly. |
Test the dimmer switch by adjusting the lighting levels
With the power restored, it’s time to put your newly installed 3-way dimmer switch to the test. Go ahead and adjust the lighting levels using the control dial or slider on the dimmer switch. You should notice the lights gradually dimming or brightening, depending on your preference.
- Start by setting the dimmer switch to the highest level – This will allow you to test whether the switch can handle the maximum load of your lights. If the lights turn off, flicker, or exhibit any unusual behavior, there may be an issue with the wiring or compatibility.
- Gradually lower the lighting levels – As you lower the dimmer switch, observe how the lights respond. They should smoothly transition from bright to dim without any flickering or sudden changes.
- Test the switch at different locations – If you have multiple switches that control the same lights, test the dimmer switch at each location. This will ensure that it functions properly from all switch points.
If you notice any problems during testing, it’s important to troubleshoot the issue immediately. Double-check your wiring connections and consult the manufacturer’s instructions for troubleshooting steps. As with any electrical project, safety should be your top priority.
Congratulations! You’ve successfully installed and tested your 3-way dimmer switch. Now, sit back, relax, and enjoy the ambiance that adjustable lighting can bring to your space.
Dimmer Not Working Properly
Check the wiring connections
If your 3-way dimmer switch is not working properly, one of the first things you should do is check the wiring connections. Faulty or loose connections can prevent the dimmer switch from functioning as it should. Here’s how you can check the wiring connections:
- Turn off the power: Before you start examining the wiring connections, ensure that you have turned off the power at the breaker box to avoid any risk of electrical shock.
- Inspect the connections: Carefully remove the switch cover plate and examine the wiring connections. Look for any loose or disconnected wires.
- Tighten the connections: If you find any loose connections, use a screwdriver to tighten them securely. Make sure all the wires are properly attached to their respective terminals.
- Replace damaged wires: If you notice any damaged or frayed wires, they should be replaced immediately. Damaged wires can interfere with the proper functioning of the dimmer switch.
Once you have checked and rectified any issues with the wiring connections, you should test the dimmer switch to see if it is now working properly. If the problem persists, move on to the next step.
Verify compatibility with the light source
Another common reason for a 3-way dimmer switch not working properly is an incompatibility between the dimmer switch and the light source. Not all dimmer switches are compatible with every type of light bulb or fixture. To ensure compatibility:
- Check the bulb type: Make sure that the light bulbs you are using are compatible with dimmer switches. Some bulbs, such as fluorescent lights, may not be dimmable.
- Verify wattage compatibility: Dimmer switches have wattage ratings, so check the packaging or manufacturer’s instructions to ensure that the switch can handle the total wattage of the lights connected to it. Exceeding the wattage rating can cause the dimmer switch to malfunction.
- Consider LED compatibility: If you are using LED bulbs, make sure that the dimmer switch is specifically designed to work with LED lighting. LED bulbs often require a compatible dimmer switch to function properly.
By confirming the compatibility between the dimmer switch and the light source, you can troubleshoot any issues related to its proper functioning. If the dimmer switch still doesn’t work as expected, further investigation or professional help may be required to identify and resolve the problem.
Lights Flickering Or Not Fully Dimming
One common issue that many people encounter when installing a 3-way dimmer switch is lights flickering or not fully dimming. This can be frustrating and may disrupt the ambiance you are trying to create. However, there are a few steps you can take to address this problem and ensure a smooth and effective dimmer switch installation. In this section, we will explore two potential causes of lights flickering or not fully dimming and discuss how to troubleshoot them.
Check for loose connections
One possible reason for lights flickering or not fully dimming is loose connections. When the wires are not securely fastened, it can cause intermittent power supply to the lights, resulting in flickering. To check for loose connections, follow these steps:
- Turn off the power supply to the switch at the circuit breaker.
- Using a screwdriver, remove the switch plate and carefully pull out the switch from the wall.
- Inspect the wiring connections at the switch. Look for any loose or disconnected wires.
- If you find any loose wires, tighten them securely by twisting the wire ends together using pliers.
- Push the switch back into the wall and secure it with the screw and plate.
- Turn the power supply back on and test the dimmer switch to see if the lights are now functioning properly.
Ensure the dimmer switch is compatible with dimmable LED bulbs
Another possible cause of lights flickering or not fully dimming is using a dimmer switch that is not compatible with dimmable LED bulbs. LED bulbs require a specific type of dimmer switch to function correctly. To ensure compatibility, follow these steps:
| Step | Instructions |
|---|---|
| 1 | Turn off the power supply to the switch at the circuit breaker. |
| 2 | Identify the type of LED bulbs you have installed in your lighting fixtures. |
| 3 | Consult the manufacturer’s specifications or packaging of the dimmer switch to ensure it is compatible with dimmable LED bulbs. |
| 4 | If the dimmer switch is not compatible, purchase a dimmer switch specifically designed for dimmable LED bulbs. |
| 5 | Install the new dimmer switch following the manufacturer’s instructions. |
| 6 | Turn the power supply back on and test the dimmer switch to see if the lights are now functioning properly. |
By checking for loose connections and ensuring compatibility with dimmable LED bulbs, you can resolve the issue of lights flickering or not fully dimming when installing a 3-way dimmer switch. Following these troubleshooting steps will help you create the desired lighting atmosphere and enjoy the benefits of a properly functioning dimmer switch.
Dimmer Getting Hot
If you’ve ever noticed that your dimmer switch is getting hot, it can be a cause for concern. A dimmer switch that gets excessively hot can not only be a fire hazard but may also indicate an underlying issue that needs to be addressed. To ensure the safety and proper functioning of your dimmer switch, it’s essential to investigate the cause of the excessive heat. This section will guide you through the steps to check for proper wattage rating and verify proper ventilation around the dimmer switch.
Check for proper wattage rating
One of the primary causes of a dimmer switch getting hot is an incorrect wattage rating. Every dimmer switch is designed to handle a specific wattage limit, which is usually indicated on the packaging or the switch itself. It’s crucial to verify that the wattage of the light bulbs connected to the dimmer switch is within the prescribed range. Here are the steps to check for proper wattage rating:
- Turn off the power to the dimmer switch by flipping the breaker in your electrical panel.
- Remove the dimmer switch cover plate by unscrewing the screws that hold it in place.
- Carefully unscrew the dimmer switch from the electrical box to expose the wiring behind it.
- Take note of the wattage rating indicated on the dimmer switch.
- Check the wattage of each light bulb connected to the dimmer switch by reading the labeling on the bulbs or referring to the manufacturer’s specifications.
- Calculate the total wattage of the connected bulbs and ensure it does not exceed the wattage rating of the dimmer switch.
- If the wattage exceeds the rating, replace the bulbs with lower wattage options or upgrade to a dimmer switch that can handle the load.
Verify proper ventilation around the dimmer switch
Inadequate ventilation can also contribute to a dimmer switch getting hot. When a dimmer switch is enclosed in a tight space or covered by insulation, it restricts the airflow, which can lead to overheating. To verify proper ventilation around the dimmer switch, follow these steps:
- Inspect the area surrounding the dimmer switch for any obstructions, such as furniture or décor items, that may impede air circulation.
- If the dimmer switch is installed in an electrical box, ensure that the box has ventilation holes to allow airflow.
- Remove any excessive insulation around the dimmer switch, ensuring there is a sufficient gap between the switch and insulation material to allow heat dissipation.
- Consider installing a heat sink or a fan nearby to promote cooling if the dimmer switch continues to get hot even after addressing the ventilation issues.
By checking for proper wattage rating and verifying proper ventilation, you can alleviate the issue of a dimmer switch getting hot. Regularly monitoring the temperature of your dimmer switch and taking necessary precautions ensures not only the safety of your home but also prolongs the lifespan of the switch itself. Remember, when dealing with electrical components, always prioritize safety and consult a professional electrician if needed.
Frequently Asked Questions
How Do You Wire A 3-Way Switch Dimmer?
To wire a 3-way switch dimmer, first, turn off the power to the switch at the circuit breaker. Next, remove the old switch and connect the dimmer’s wires to the corresponding wires in the junction box. Finally, attach the dimmer to the box and restore power to test its operation.
Can A 3-Way Switch Have A Dimmer On Both Ends?
Yes, a 3-way switch can have a dimmer on both ends. This allows you to control the lighting intensity from either switch. It is useful when you want to dim or brighten lights from different locations in a room.
Does It Matter Where The Dimmer Goes In A 3-Way Switch?
The location of the dimmer in a 3-way switch does matter. It should be installed at the switch location with the power source to avoid complications.
How To Install A 3-Way Dimmer Switch Lutron?
To install a 3-way dimmer switch by Lutron, follow these steps: 1. Turn off the circuit breaker controlling the switch. 2. Remove the existing switch and separate the wires. 3. Connect the new dimmer switch, matching the wire colors. 4. Mount the dimmer switch back into the electrical box.
5. Turn on the circuit breaker and test the dimmer switch.
Conclusion
To summarize, installing a 3-way dimmer switch can greatly enhance the ambiance and functionality of your lighting system. By following the step-by-step instructions outlined in this blog post, you can easily replace your existing switch and enjoy the convenience of controlling your lights from multiple locations.
Remember to ensure compatibility with your existing wiring and consult a professional if needed. With the right tools and a little patience, you’ll be able to create the perfect lighting atmosphere for any occasion.