
To install a Delta Faucet, start by shutting off the water supply. Then, remove the old faucet, apply Teflon tape to the threads of the new faucet, and connect the supply lines.
Finally, turn on the water supply and test the faucet for any leaks. Installing a Delta Faucet is a straightforward process that can be done by following a few simple steps. By shutting off the water supply and removing the old faucet, you can make room for the new one.
Applying Teflon tape to the threads of the new faucet and connecting the supply lines will ensure a secure and leak-free installation. Once everything is in place, turn on the water supply and test the faucet for any leaks. With these steps, you’ll have your new Delta Faucet installed and ready to use in no time.
Preparing For A Smooth Installation
If you’re ready to give your bathroom a fresh new look, installing a Delta faucet is a great place to start. But before you dive into the installation process, it’s important to take a few steps to ensure a smooth and hassle-free experience. In this guide, we’ll walk you through the preparations you need to make for a successful Delta faucet installation.
Gather all necessary tools and materials
To begin, make sure you have all the tools and materials you’ll need for the installation. This will not only save you time but also prevent any delays or interruptions in the middle of the project. Here’s a checklist of essential items you’ll need:
- Adjustable wrench
- Plumber’s tape
- Bucket or container for water drainage
- Scissors or utility knife
- Silicone caulk
- Delta faucet kit
Shut off the water supply
Before you remove the old faucet, it’s crucial to turn off the water supply to your bathroom. This will help prevent any water leakage or damage during the installation process. Here’s how you can shut off the water supply:
- Locate the shut-off valves for your bathroom sink.
- Turn the valves clockwise until they are fully closed.
- Test the faucets to ensure the water supply has been successfully shut off.
Remove the old faucet
Now that the water supply is turned off, it’s time to remove the old faucet. Follow these steps to ensure a smooth removal process:
- Place a bucket or container underneath the sink to catch any water remaining in the pipes.
- Use an adjustable wrench to disconnect the supply lines from the faucet.
- Carefully remove any nuts or bolts securing the faucet to the sink.
- Gently lift the old faucet out of the sink and set it aside.
By preparing well and following these steps, you’ll be setting yourself up for a successful Delta faucet installation. Next, we’ll guide you through the process of installing your new Delta faucet, so stay tuned!
Installing The New Delta Faucet
Installing a new Delta faucet can instantly upgrade the look and functionality of your kitchen or bathroom. With its innovative design and reliable performance, a Delta faucet can transform your space into a stylish and efficient oasis. Whether you’re a seasoned DIYer or a first-time installer, this step-by-step guide will help you confidently install your new Delta faucet.
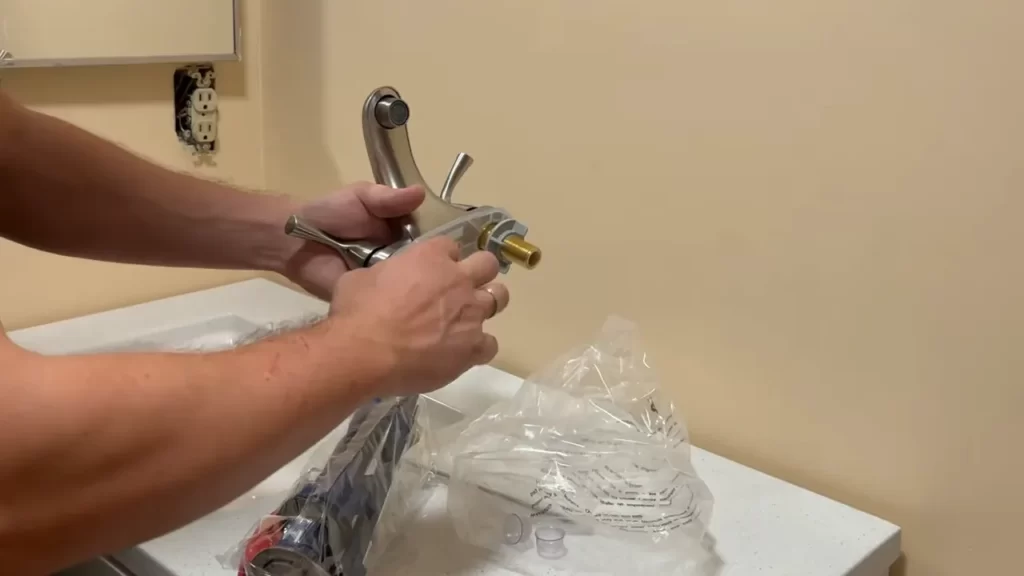
Familiarize yourself with the components of the Delta Faucet
Before you begin the installation process, it’s important to familiarize yourself with the various components of the Delta faucet. This will ensure you have a clear understanding of how the faucet functions and how the different parts work together. Refer to the manufacturer’s instructions or the product manual for a detailed breakdown of each component.
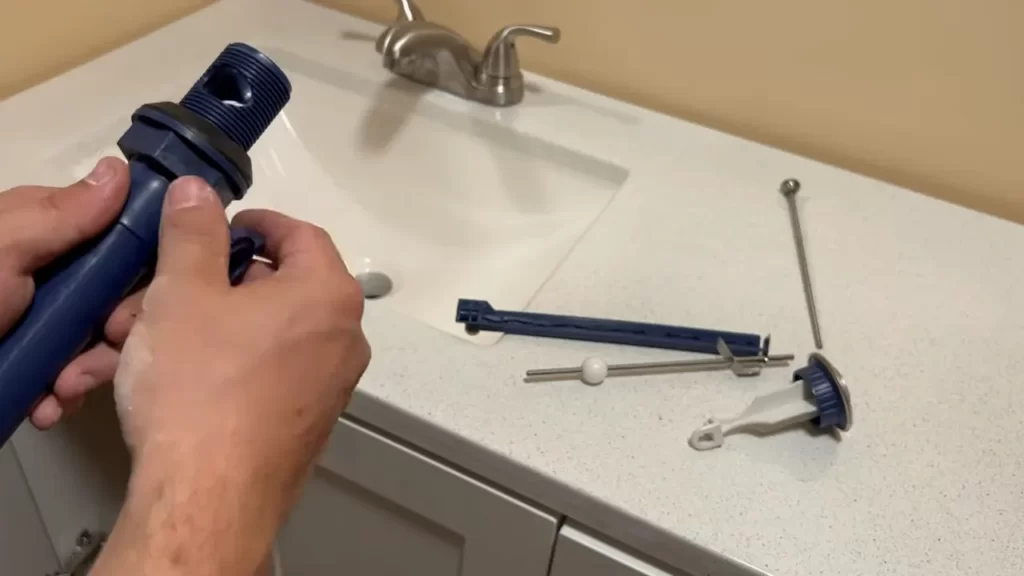
Prepare the faucet and other necessary parts for installation
Once you have a good grasp of the faucet’s components, it’s time to prepare them for installation. Begin by gathering all the necessary tools and materials, including a wrench, plumber’s tape, and a bucket. Make sure the water supply to the sink or countertop is turned off before proceeding.
Connect the water supply lines
The next step is to connect the water supply lines to the faucet. Start by applying plumber’s tape to the threaded ends of the supply lines to create a watertight seal. Then, carefully thread the lines onto the corresponding inlet ports on the faucet, making sure to tighten them securely with a wrench. Double-check that the lines are connected to the correct hot and cold water supply.
Secure the faucet to the sink or countertop
With the water supply lines connected, it’s time to secure the faucet to the sink or countertop. Place the faucet into the mounting holes and position it so that it is level and aligned properly. Once in position, use the provided mounting hardware to secure the faucet in place. This may involve tightening nuts or screws underneath the sink or countertop, depending on the specific faucet model.
Attach the escutcheon, if applicable
If your Delta faucet includes an escutcheon plate, now is the time to attach it. The escutcheon plate is designed to cover any extra mounting holes on the sink or countertop if your new faucet is smaller than the previous one. Simply place the escutcheon plate over the mounting holes and secure it with the provided hardware.
Install the handle and any additional components
Once the faucet is securely mounted, it’s time to install the handle and any additional components, such as a soap dispenser or side spray. Follow the manufacturer’s instructions for attaching these parts, making sure they are aligned and functioning properly. Tightly secure all connections to prevent any future leaks or issues.
Test the faucet for leaks and proper functionality
Before considering the installation complete, it’s important to thoroughly test the faucet for any leaks or functionality issues. Turn on the water supply and check all connections for any signs of water leakage. Additionally, test the handle, spout, and any additional components to ensure they operate smoothly and without any problems. Address any issues that arise before using the faucet regularly.
By following these steps, you can confidently install your new Delta faucet and enjoy the beauty and performance it brings to your space. Remember to always refer to the manufacturer’s instructions for your specific faucet model and reach out to a professional plumber if you encounter any difficulties during the installation process.
Troubleshooting Common Installation Issues
Installing a Delta faucet can greatly enhance the functionality and aesthetics of your kitchen or bathroom. However, like any plumbing project, there may be some common installation issues that you may encounter. In this section, we will discuss how to identify and resolve leaks, adjust water temperature and pressure, and deal with loose or wobbly faucet handles.
Identifying and Resolving Leaks
Leaky faucets can be quite frustrating and waste a significant amount of water. If you notice any leaks after installing your Delta faucet, follow these steps to identify and resolve the issue:
- Check the connections: Inspect all the connections between the faucet and the water supply lines. Ensure that they are tightly secured and not causing any leakage.
- Inspect the O-rings: The O-rings inside the faucet may wear out over time, leading to leaks. To resolve this issue, turn off the water supply, disassemble the faucet, and replace any damaged or worn-out O-rings.
- Check the cartridge: A faulty cartridge can also cause leaks. Remove the faucet handle, locate the cartridge, and inspect it for any cracks or damage. If necessary, replace the cartridge with a new one.
Adjusting Water Temperature and Pressure
Having the proper water temperature and pressure is essential for a comfortable and functional faucet. If you’re experiencing issues in this area, here’s how you can adjust them:
- Water temperature adjustment: Locate the temperature adjustment feature on your Delta faucet. Use a screwdriver to adjust the set screw, which controls the hot water limit stop. Turn the screw clockwise to decrease the temperature and counterclockwise to increase it.
- Water pressure adjustment: Delta faucets typically have a water pressure regulator located near the valve area. Locate the regulator and use a screwdriver to adjust the screw. Turning the screw clockwise will reduce the water pressure, while turning it counterclockwise will increase it. Make small adjustments at a time and test the water pressure until it meets your desired level.
Dealing with Loose or Wobbly Faucet Handles
Having loose or wobbly faucet handles can be not only annoying but also make it challenging to operate your faucet properly. Follow these steps to fix this issue:
- Identify the type of handle: Delta faucets can have either a single-handle or a double-handle design. Understanding the type of handle will help you determine the proper repair method.
- Tighten the handle: For a single-handle faucet, locate the set screw on the handle and tighten it with an Allen wrench. For a double-handle faucet, tighten the screws on the base of each handle.
- Check the stem unit assembly: If tightening the handle doesn’t resolve the issue, you may need to inspect the stem unit assembly. Turn off the water supply, remove the handle, and examine the stem unit assembly for any loose or damaged parts. Replace any faulty components as necessary.
By following these troubleshooting steps, you can overcome common installation issues that may arise when installing a Delta faucet. Don’t hesitate to seek professional help if you are unsure or encounter more complex problems. Enjoy your new faucet and the improved functionality it brings!
Frequently Asked Questions
How Do You Install A Delta Two Handle Kitchen Faucet?
To install a Delta two handle kitchen faucet, start by turning off the water supply. Next, remove the old faucet and clean the area. Then, install the new faucet according to the manufacturer’s instructions. Finally, turn the water supply back on and test for any leaks.
How To Install Delta Shower Faucet Seats And Springs?
To install Delta shower faucet seats and springs, follow these steps: 1. Turn off the water supply. 2. Remove the handle and trim sleeve. 3. Take out the old seats and springs. 4. Insert the new seats and springs. 5.
Reassemble the faucet and turn on the water to test for leaks.
How Can I Remove A Delta Faucet Handle That Has No Set Screw?
To remove a Delta faucet handle without a set screw, you can try using a strap wrench or a handle puller tool. Apply steady pressure and twist the handle counterclockwise to loosen it. If the handle is still difficult to remove, you may need to use lubricant or contact a professional plumber for assistance.
How Do You Change A Delta Single Handle Bathroom Faucet Cartridge?
To change a Delta single handle bathroom faucet cartridge, follow these 6 steps: 1. Turn off the water supply. 2. Open the faucet handle and remove the handle adapter. 3. Unscrew the bonnet nut. 4. Remove the old cartridge. 5.
Install the new cartridge. 6. Reassemble the faucet and test for leaks.
Conclusion
In a few simple steps, you can successfully install your Delta faucet and enhance the functionality of your kitchen or bathroom. With its user-friendly design and clear instructions, the process becomes quick and straightforward. Remember to gather all the necessary tools beforehand and follow the provided guidelines diligently.
By installing your Delta faucet correctly, you can enjoy long-lasting performance and a stylish addition to your space. Happy plumbing!