To install a Fluidmaster toilet fill valve, start by turning off the water supply. Then, remove the old fill valve and clean the area.
Place the new valve into the fill hole and secure it with the provided nuts. Lastly, reconnect the water supply and adjust the valve height if necessary. This process ensures a smooth installation and efficient functioning of the fill valve in your toilet.
Installing a Fluidmaster toilet fill valve is a straightforward process that can help improve the performance of your toilet. Whether you’re replacing a faulty valve or upgrading to a more efficient one, this step-by-step guide will walk you through the installation. By following these instructions, you can ensure a hassle-free and leak-free installation, allowing your toilet to fill up quickly and effectively. So, without further ado, let’s delve into the details of how to install a Fluidmaster toilet fill valve.
The Importance Of A Properly Functioning Toilet Fill Valve
The role of the toilet fill valve in the overall functioning of a toilet
A toilet fill valve may seem like a small and insignificant component of your toilet, but it plays a crucial role in its overall functioning. It is responsible for regulating the entry of water into the toilet tank, allowing for a proper flush and refill cycle.
When you press that flush button, it is the fill valve that opens up and lets water flow into the tank. This water is necessary to create the necessary pressure for a powerful flush. Once the tank is emptied, the fill valve shuts off the water supply, preventing any overflow or wastage.
Having a properly functioning fill valve ensures that your toilet flushes efficiently, without any issues. It ensures the proper amount of water is delivered to the tank, allowing for effective flushing while conserving water.
The consequences of a faulty or malfunctioning toilet fill valve
A faulty or malfunctioning toilet fill valve can lead to various problems that can disrupt the proper functioning of your toilet and cause inconveniences. Here are some of the consequences you may encounter:
- Continuous running water: A malfunctioning fill valve may fail to shut off the water supply completely, resulting in constant running water that can waste a significant amount of water and inflate your water bills.
- Weak flushes: If the fill valve doesn’t allow enough water into the tank, your toilet flushes may become weak and ineffective. This can lead to multiple flushes, wasting water and causing frustration.
- Noisy operation: A worn-out or faulty fill valve may produce loud gurgling or hissing noises during the refill cycle. These noises can be disruptive and indicate a need for replacement.
- Inefficient use of water: A fill valve that delivers too much water to the tank can result in excessive use of water during each flush. This not only wastes a precious resource but also increases your water bills.
Why it’s essential to regularly maintain and replace the fill valve
Maintaining and replacing the fill valve at regular intervals is essential to ensure the proper functioning of your toilet and avoid potential issues. Here’s why you should give adequate attention to your fill valve:
- Prevent water wastage: By maintaining and replacing the fill valve, you can prevent leaks and ensure that water is not continuously running, saving both water and money.
- Reduce the risk of clogs: A faulty fill valve may not provide enough water to flush down waste properly, increasing the chances of clogs and requiring multiple flushes.
- Improve flushing performance: A properly functioning fill valve ensures an adequate amount of water enters the tank, enabling powerful and efficient flushes.
- Enhance water efficiency: Regular maintenance and replacement of the fill valve can help optimize water usage during each flush, promoting water conservation.
Regularly inspecting your fill valve, cleaning sediment build-up, and replacing it when necessary will help keep your toilet working flawlessly, saving water, and preventing any unexpected toilet troubles that may inconvenience you or your household.
Tools And Materials You’Ll Need
Tools and Materials You’ll Need:
Installing a Fluidmaster toilet fill valve is a relatively simple task that can be easily accomplished with a few basic tools and materials. Before you begin, it’s important to gather everything you’ll need to ensure a smooth installation process. Here is an overview of the tools and materials required:
1. Adjustable Wrench
– The adjustable wrench is an essential tool for tightening and loosening nuts and bolts. It allows you to easily adjust its size to fit different sizes of nuts and bolts, making it versatile for various plumbing projects.
2. Screwdriver
– A screwdriver is used to loosen and tighten screws. In the case of installing a Fluidmaster toilet fill valve, you may need a flathead or Phillips head screwdriver, depending on the type of screws used.
3. Pipe Wrench
– A pipe wrench is a heavy-duty wrench designed for gripping and turning pipes and fittings. It provides a strong grip and leverage, especially for removing and installing water supply lines.
4. Teflon Tape
– Teflon tape, also known as plumber’s tape, is a thin white tape used to create a watertight seal on threaded pipe connections. It prevents leaks by filling in any gaps and provides an extra layer of protection against corrosion.
5. Bucket or Towel
– Having a bucket or towel nearby is essential for catching any water that may spill or leak during the installation process. This will help prevent any damage to your bathroom floor or surrounding area.
6. Fluidmaster Toilet Fill Valve Kit
– Of course, you will need the Fluidmaster toilet fill valve kit itself, which includes the fill valve, flush valve, flapper, and other necessary components. It is important to choose the correct kit for your specific toilet model to ensure compatibility and proper functioning.
Where to Purchase
Now that you know the tools and materials required, you might be wondering where to purchase them. Hardware stores, home improvement centers, and online retailers are great places to find all the necessary items. Some popular options include:
- Home Depot
- Lowe’s
- Amazon
- Walmart
These retailers offer a wide selection and competitive prices, making it convenient to find everything you need for installing a Fluidmaster toilet fill valve.
Step-By-Step Guide To Installing A Fluidmaster Toilet Fill Valve
If your toilet is constantly running or not filling up properly, it may be time to replace the fill valve. The Fluidmaster toilet fill valve is a popular choice known for its durability and efficiency. In this step-by-step guide, we’ll walk you through the process of installing a Fluidmaster fill valve, ensuring a hassle-free experience. Let’s get started!
Preparing for the installation process
Before you begin, it’s important to gather all the necessary tools and components for the installation. Here’s what you’ll need:
- A Fluidmaster toilet fill valve kit
- An adjustable wrench
- A pair of pliers
- A bucket or towels
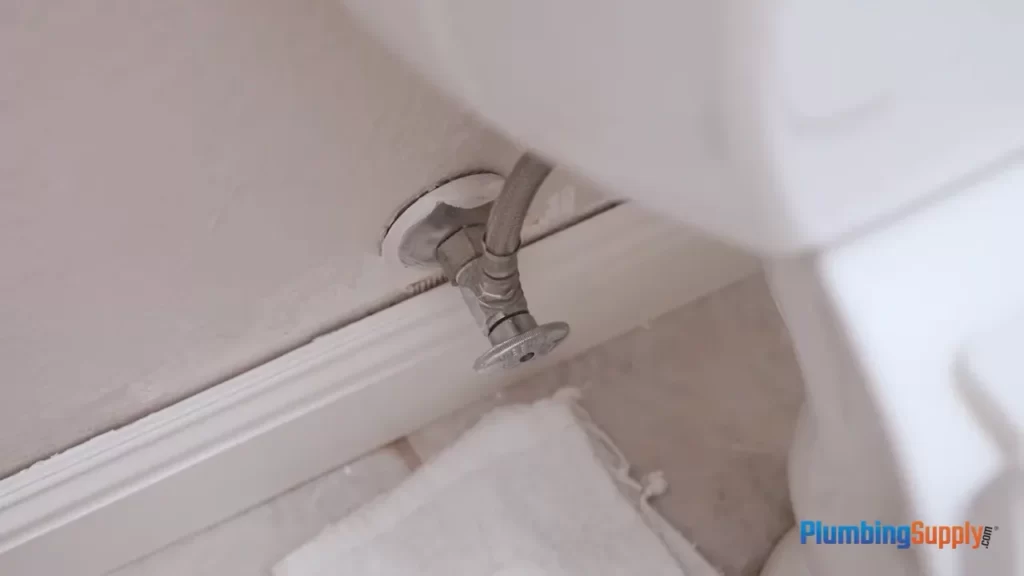
Shutting off the water supply and draining the toilet tank
First, locate the water shut-off valve near the base of your toilet and turn it clockwise to shut off the water supply. Next, flush the toilet to drain the tank. You can speed up the process by using a bucket or towels to soak up any remaining water.
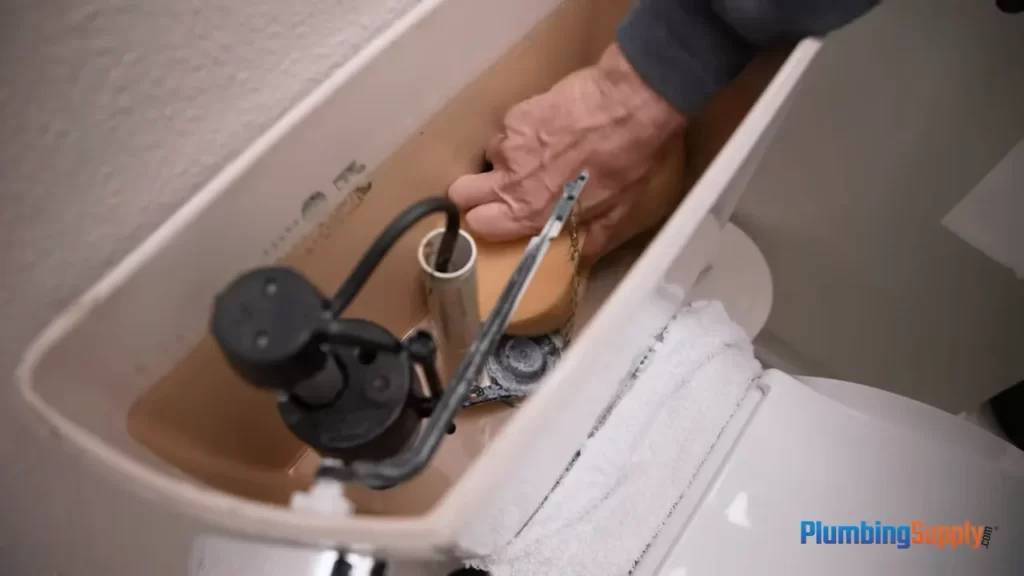
Removing the old fill valve
To remove the old fill valve, locate the coupling nut connecting the supply line to the bottom of the tank. Use an adjustable wrench to loosen and remove the nut. Then, disconnect the fill valve from the overflow pipe by unscrewing the nut underneath the tank. Once both nuts are removed, lift the old fill valve out of the tank.
Understanding the components of the Fluidmaster toilet fill valve
The Fluidmaster toilet fill valve consists of several components that work together to control the water level in your toilet tank. These components include:
| Component | Function |
|---|---|
| Fill valve | Regulates the water flow into the tank |
| Refill tube | Directs water from the fill valve into the overflow pipe |
| Float arm | Controls the position of the float to monitor water levels |
| Float cup | Adjusts water levels using buoyancy |
| Overflow pipe | Prevents the tank from overflowing |
These components are specifically designed to ensure efficient and reliable water fill cycles.
Installing the Fluidmaster toilet fill valve
Now it’s time to install the new Fluidmaster fill valve. Follow these steps:
- Attach the new fill valve to the bottom of the tank, making sure it fits securely.
- Adjust the height of the valve according to the manufacturer’s instructions to ensure proper water levels.
- Connect the water supply line to the fill valve by tightening the coupling nut with an adjustable wrench.
Once the fill valve is securely attached and the water supply line is connected, you’re ready to test and troubleshoot.
Testing and troubleshooting
Turn the water supply back on by turning the shut-off valve counterclockwise. Allow the tank to fill up and listen for any unusual sounds or leaks. If you notice any issues, follow these troubleshooting steps:
- Check the connection between the fill valve and the tank to ensure it is tightly secured.
- Inspect the refill tube for any obstructions or kinks that may be affecting water flow.
- Adjust the float arm to achieve the desired water level by bending it gently if necessary.
By following these steps, you can successfully install a Fluidmaster toilet fill valve and enjoy improved performance and water efficiency in your toilet. Say goodbye to constant running and hello to a properly functioning toilet!
Tips And Tricks For A Successful Installation
Common mistakes to avoid during the installation process
Installing a Fluidmaster toilet fill valve can be a straightforward process, but it’s important to avoid some common mistakes that may hinder your success. Familiarize yourself with these potential pitfalls to ensure a smooth installation:
- Incorrect positioning of the valve: One of the most critical aspects of the installation is ensuring the valve is properly positioned in the toilet tank. Make sure it is centered and securely attached to the designated hole to avoid leakage.
- Over-tightening or under-tightening: Achieving the right amount of tightness is essential to prevent leaks. Be cautious not to overtighten the valve, as it may cause damage to the tank, but make sure it is securely tightened to prevent any water leakage.
- Not properly aligning the valve: Ensure that the valve’s top assembly is aligned correctly with the overflow pipe. Misalignment can cause incomplete filling or even overflow, leading to potential water damage.
- Ignoring the installation instructions: Fluidmaster provides detailed installation instructions with every product. It is crucial to carefully read and follow these instructions to guarantee a successful installation.
- Not performing a leak test: Once the installation is complete, always conduct a leak test. Fill the toilet tank with water and observe for any signs of leakage around the valve. This step will help you identify and rectify any issues before they escalate.
Additional tips for maximizing the lifespan and performance of the Fluidmaster fill valve
Now that you’ve successfully installed your Fluidmaster toilet fill valve, you’ll want to ensure its longevity and optimal performance. Consider these additional tips:
- Regular maintenance: Periodically inspect the fill valve for any signs of wear and tear. Clean the valve and surrounding areas as needed to prevent any buildup of sediment or debris that could affect its functionality.
- Adjusting water level: The Fluidmaster valve allows you to adjust the water level in your toilet tank. Experiment with adjusting this level to find the optimal balance between flushing power and water conservation.
- Monitoring water pressure: Excessively high water pressure can strain the valve and cause premature failure. Use a water pressure gauge to ensure the pressure is within the recommended range.
- Inspecting flapper and seals: Periodically check the toilet flapper and seals for any signs of damage or wear. Replace them if necessary to maintain a watertight seal and prevent leaks.
Troubleshooting tips for any persistent issues
If you encounter any persistent issues with your Fluidmaster fill valve, here are some troubleshooting tips to help you resolve them:
- Overfilling tank: If your toilet tank consistently overfills, check that the float adjustment is properly set. Adjust it so that the water shuts off at the desired level.
- Intermittent filling: If your toilet tank fills sporadically or partially, examine the valve’s inlet screen for any clogs or blockages. Clean it out if necessary to restore proper flow.
- Water hammer noise: If you experience a loud banging noise after flushing, it may be due to water hammer. Consider installing a water hammer arrestor or adjusting the water pressure to alleviate this issue.
- Constant running: If your toilet tank continuously runs even after filling, inspect the flapper for any misalignment or damage. Adjust or replace the flapper as needed to maintain a proper seal.
By avoiding common installation mistakes, implementing maintenance practices, and troubleshooting persisting issues, you can ensure a successful installation and proper functioning of your Fluidmaster toilet fill valve for years to come.
Frequently Asked Questions
What Is The Most Common Problem Associated With The Fluidmaster?
The most common problem with Fluidmaster is a faulty valve that causes toilet refilling issues.
Can I Replace A Toilet Fill Valve Myself?
Yes, you can replace a toilet fill valve yourself. It’s a simple DIY task. Turn off the water supply, flush the toilet, remove the old valve, and install the new one following the manufacturer’s instructions. Remember to test for leaks once you’re done.
How Do You Install A Fluidmaster Toilet Flush Valve Seal?
To install a Fluidmaster toilet flush valve seal, follow these steps: 1. Turn off the water supply. 2. Remove the tank lid and flush the toilet to drain the water. 3. Disconnect the old seal and remove it. 4. Place the new seal correctly onto the valve base.
5. Reconnect the water supply and test for leaks. Done!
How Do You Replace A Toilet Fill Valve Assembly?
To replace a toilet fill valve assembly, turn off the water supply and flush the toilet. Disconnect the water supply line and remove the old fill valve. Install the new fill valve, reconnect the water supply line, and turn the water back on.
Test for leaks and adjust the water level if necessary.
Conclusion
Installing a Fluidmaster toilet fill valve is a simple and efficient way to ensure a reliable and consistent water flow in your toilet. By following a few easy steps and using the right tools, you can easily replace your old fill valve with a new Fluidmaster valve.
With its durability and improved performance, this installation will save you time and money in the long run. Don’t wait any longer – get started today and enjoy a fully operational toilet!