To install a hand shower, first, gather the necessary tools and materials. Then, follow these steps: remove the old showerhead, apply plumber’s tape to the shower arm, attach the hand shower holder to the shower arm, attach the hose to the hand shower holder, and finally, connect the other end of the hose to the hand shower.
Once everything is securely in place, test the hand shower by turning on the water and adjusting the settings. Enjoy your new hand shower experience! Introducing a hand shower can greatly enhance your bathing experience, providing flexibility and convenience. Whether you’re looking to replace an old showerhead or upgrade your current setup, learning how to install a hand shower is a simple process that can be completed in just a few steps.
In this guide, we will walk you through the installation process, ensuring that you have all the necessary tools and materials before getting started. So, let’s dive in and transform your shower into a functional and enjoyable space.
Understanding The Basic Equipment Needed
Prior to installing a hand shower, it’s crucial to gather the necessary tools and equipment. Having the right equipment will not only simplify the installation process but also ensure a secure and efficient outcome. In this section, we will discuss the key equipment required for a successful hand shower installation. From a proper hand shower kit to an adjustable wrench, plumber’s tape, and a handy bucket, we will delve into each essential item to help you get started on the right foot.
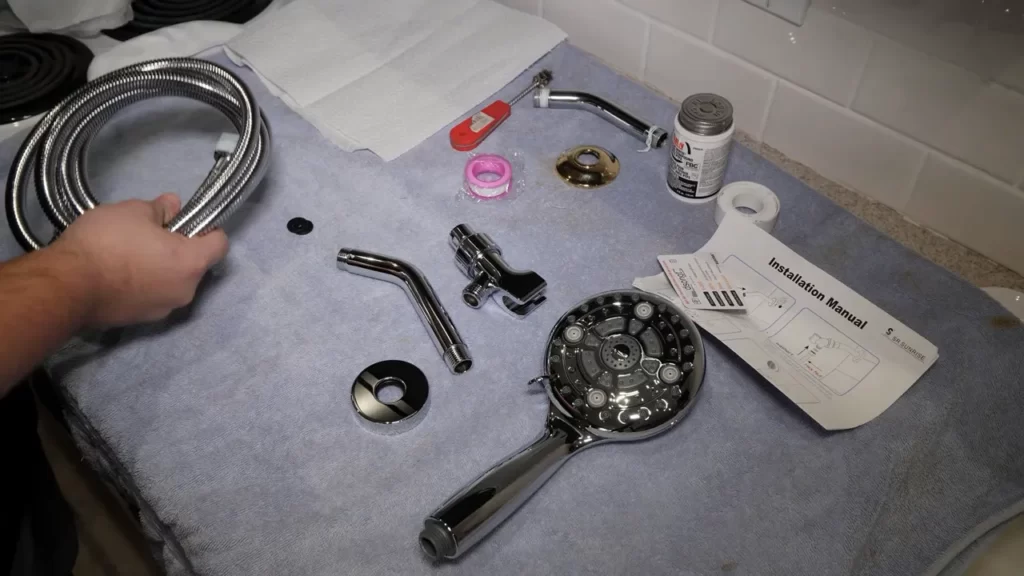
Proper hand shower kit
A proper hand shower kit is the foundation of a functional and visually appealing installation. A hand shower kit typically includes the hand shower itself, a sliding rail or wall bracket for mounting, a shower hose, and necessary fittings. It is important to choose a hand shower kit that suits your specific preferences and needs. Whether you prefer a fixed mount or a handheld option, ensure that the kit is complete and compatible with your existing shower system.
Adjustable wrench
An adjustable wrench is an indispensable tool when it comes to plumbing projects, including hand shower installation. It allows you to easily tighten or loosen nuts and fittings, ensuring a secure and leak-free connection. When selecting an adjustable wrench, look for one with a comfortable grip and adjustable jaws to fit different sizes of nuts and fittings commonly found in hand shower installations.
Plumber’s tape
Plumber’s tape, also known as thread seal tape or Teflon tape, is a crucial accessory for preventing leaks in threaded connections. It acts as a sealant, creating a tight and reliable barrier that prevents water from seeping out. To use plumber’s tape, simply wrap it around the male threads of fittings before screwing them into the female threads. This simple step can save you from potential headaches caused by leaks down the line.
Bucket
Although it may seem like a basic item, having a bucket nearby during the installation process can be incredibly handy. It can catch any water that may spill or spray during the disconnection and reconnection of plumbing components. This prevents potential water damage and keeps your work area clean and dry. Additionally, having a bucket allows you to conveniently store tools and small parts, keeping everything within reach throughout the installation process.
Preparing The Bathroom For Installation
Before you can install a hand shower in your bathroom, there are a few essential steps you need to take to prepare the space. Following these steps will ensure a smooth installation process and optimal functionality of your new hand shower. In this section, we will guide you through each step in detail, starting with turning off the water supply.
Turn off the Water Supply
The first step in preparing your bathroom for a hand shower installation is to turn off the water supply. This is crucial to prevent any water leakage and avoid potential damage during the installation process. Here’s how you can do it:
- Locate the main water supply valve in your bathroom.
- Turn the valve clockwise until it is fully closed, stopping the water flow.
Drain any Residual Water
After turning off the water supply, it’s important to drain any residual water from the pipes. This step will help prevent any water from leaking or splashing when you remove the existing showerhead. Follow these simple steps to drain the residual water:
- Open a faucet or valve in your bathroom to release any remaining water pressure.
- Allow the water to fully drain out until there is no more water flowing.
Remove the Existing Showerhead
Now that you have turned off the water supply and drained any remaining water, it’s time to remove the existing showerhead. Follow these steps carefully to avoid any damage to the showerhead or the shower arm:
- Using an adjustable wrench, grip the showerhead firmly.
- Turn the showerhead counterclockwise to loosen it from the shower arm.
- Once loose, continue unscrewing the showerhead by hand until it is fully removed.
Clean the Shower Arm
Before installing the new hand shower, it’s important to clean the shower arm thoroughly. This will ensure a secure and leak-free connection between the shower arm and the hand shower. Follow these steps to clean the shower arm:
- Prepare a solution of warm water and mild soap.
- Dip a soft cloth into the solution and gently scrub the shower arm to remove any dirt or debris.
- Rinse the shower arm with clean water to remove any soap residue.
- Inspect the shower arm for any signs of damage or corrosion. If necessary, consider replacing the shower arm before proceeding with the installation.
By following these steps and properly preparing your bathroom for installation, you are now ready to move on to the next phase – installing the hand shower itself. Make sure to refer to the manufacturer’s instructions for the specific installation process of your hand shower model.
Applying Plumber’S Tape
Applying plumber’s tape is an essential step when installing a hand shower. Plumber’s tape, also known as Teflon tape, is a thin strip of material that helps create a watertight seal between the shower arm and the hand shower. This prevents any leaks and ensures a smooth flow of water. Follow the steps below to apply plumber’s tape correctly:
Start wrapping the plumber’s tape around the threads of the shower arm
Begin by taking the roll of plumber’s tape and locating the end of the tape. Hold the shower arm firmly with one hand to keep it steady. With your other hand, start wrapping the plumber’s tape around the threads of the shower arm, making sure to cover the entire threaded area.
Note: When wrapping the plumber’s tape, it is important to wrap it tightly in a clockwise direction. This ensures that the tape does not come off when you screw on the hand shower.
Securely wrap the plumber’s tape
As you wrap the plumber’s tape, make sure to exert enough pressure so that it adheres firmly to the threads. This will create a tight seal and prevent any water leakage. Continue wrapping until you have covered the entire threaded area.
Trim off any excess tape
Once you have wrapped the plumber’s tape around the shower arm, inspect the wrapped area. If you notice any excess tape sticking out, use a pair of scissors or a utility knife to trim it off. This will ensure a neat and clean installation.
Note: It is crucial to trim off any excess tape as it may interfere with the proper fitting of the hand shower.
Test for a tight seal
After applying the plumber’s tape, it is important to test for a tight seal before proceeding to install the hand shower. To do this, turn on the water supply and check for any signs of leakage around the threaded area of the shower arm. If you notice any leaks, make sure to retighten the hand shower until the leaks stop.
By applying plumber’s tape correctly, you ensure a secure and leak-free connection between the shower arm and the hand shower. This simple step goes a long way in ensuring a smooth and enjoyable showering experience.
Installing The Hand Shower Holder
When it comes to upgrading your shower experience, installing a hand shower can make all the difference. Not only does it add convenience and versatility, but it also provides a luxurious and spa-like feel. In this guide, we will walk you through the process of installing a hand shower, focusing on the crucial step of attaching the hand shower holder to the shower arm.
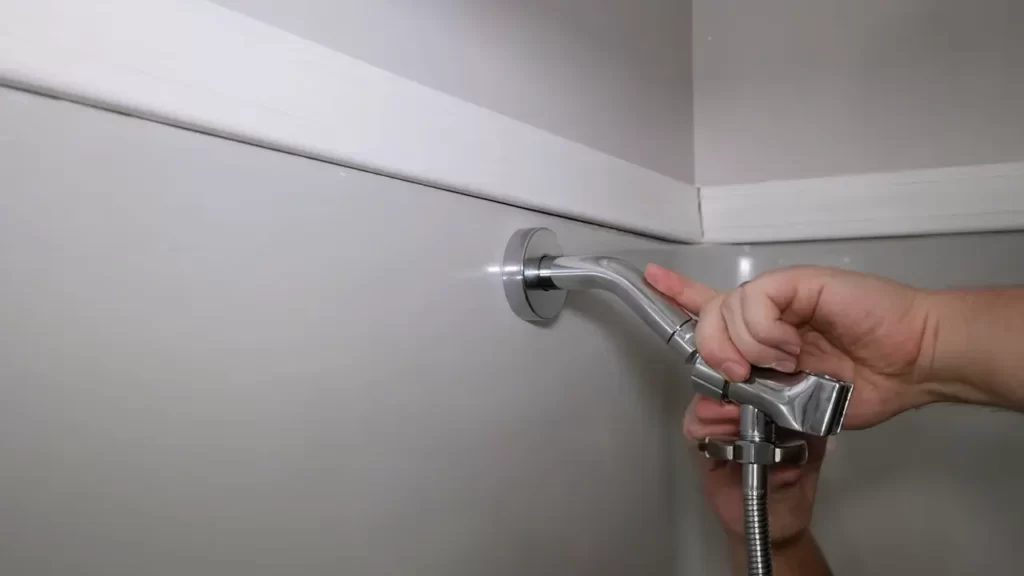
Attach the hand shower holder to the shower arm
To begin the installation process, first, locate the shower arm on the wall. The shower arm is the pipe-like structure that extends from the wall and allows water to flow into the showerhead. Ensure that the shower arm is clean and free of any debris or residue.
Next, take the hand shower holder and align it with the end of the shower arm. Position the holder in a way that feels comfortable and convenient for your desired shower experience. Once you have found the perfect spot, it’s time to secure the holder in place.
Using an adjustable wrench, tighten the hand shower holder onto the shower arm. Make sure to hold the holder steady with one hand while tightening it with the wrench using the other hand. This will help ensure a secure and stable installation. Keep in mind to not overtighten, as this could potentially damage the holder or the shower arm.
Once the hand shower holder feels securely attached, give it a gentle tug to confirm its stability. You want it to hold firm and not wobble or come loose during use. If the holder does not feel secure, double-check the tightness and make any necessary adjustments.
In addition, it is important to check that the hand shower holder is positioned at the desired height for comfortable use. You can easily adjust the height of the holder by loosening the screws or other fastening mechanisms and sliding it up or down the shower arm. Once you have found the ideal position, secure it in place again.
Congratulations! You have successfully attached the hand shower holder to the shower arm. This crucial step sets the foundation for a seamless hand shower installation. In the next section, we will cover how to connect the hand shower hose to the holder, bringing you one step closer to enjoying a rejuvenating shower experience.
Connecting The Hand Shower Hose
Connect one end of the hose to the hand shower holder
Connecting the hand shower hose is a crucial step in the installation process. This is where you join one end of the hose to the hand shower holder, allowing water to flow smoothly and giving you the flexibility to enjoy a delightful shower experience. Let’s dive into the steps you need to follow.
To begin, ensure that the hand shower holder is securely attached to the wall or any other convenient location within your reach. You can use screws or adhesive tapes depending on the type of holder you have. Once the holder is in place, it’s time to connect the hose.
Start by examining the ends of the hose. One end usually has a female connection, and the other end has a male connection. The female connection end typically goes into the hand shower holder.
Gently screw the female end of the hose onto the hand shower holder until it fits snugly. It’s crucial to tighten it properly to avoid any leaks or disconnection during use. If the hose comes with a rubber gasket, make sure to place it between the hose and the hand shower holder to achieve a watertight seal.
To ensure that the hose is tightly secured, give it a gentle tug after attaching it to the hand shower holder. If it feels loose, rotate it clockwise until you achieve a secure connection. A firm and secure connection will prevent any water loss or unwanted movements while using the hand shower.
Now that you have successfully connected one end of the hose to the hand shower holder, you can move on to connecting the other end to either the water supply valve or the fixed showerhead, depending on the configuration of your shower system. Refer to the manufacturer’s instructions for guidance on this step.
Remember, a proper hand shower installation requires precise connection of the hose to the hand shower holder. This ensures a stable and efficient water flow during your showers.
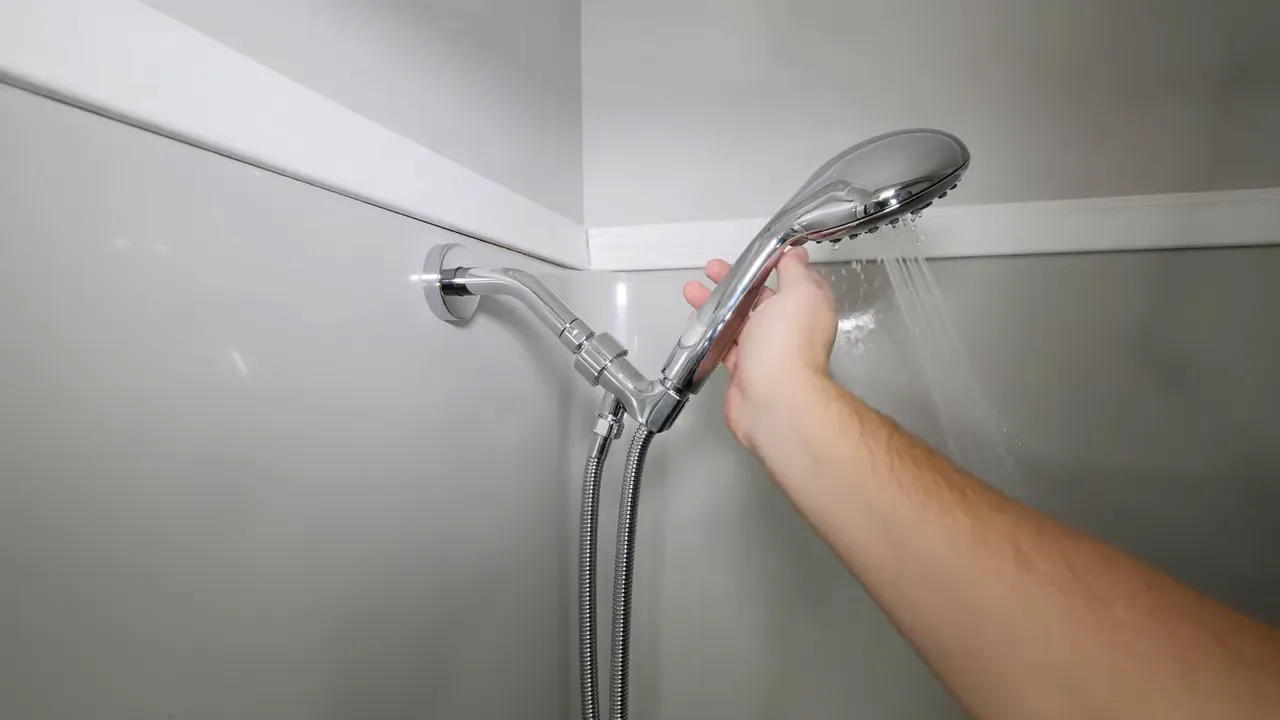
Attaching The Hand Shower
Once you have successfully mounted the hand shower bracket on the shower wall, you can proceed to attach the hand shower itself. This step is crucial in completing the installation process and ensuring that your hand shower is ready for use. Follow the simple steps below to effortlessly connect the other end of the hose to the hand shower.
Connect the other end of the hose to the hand shower
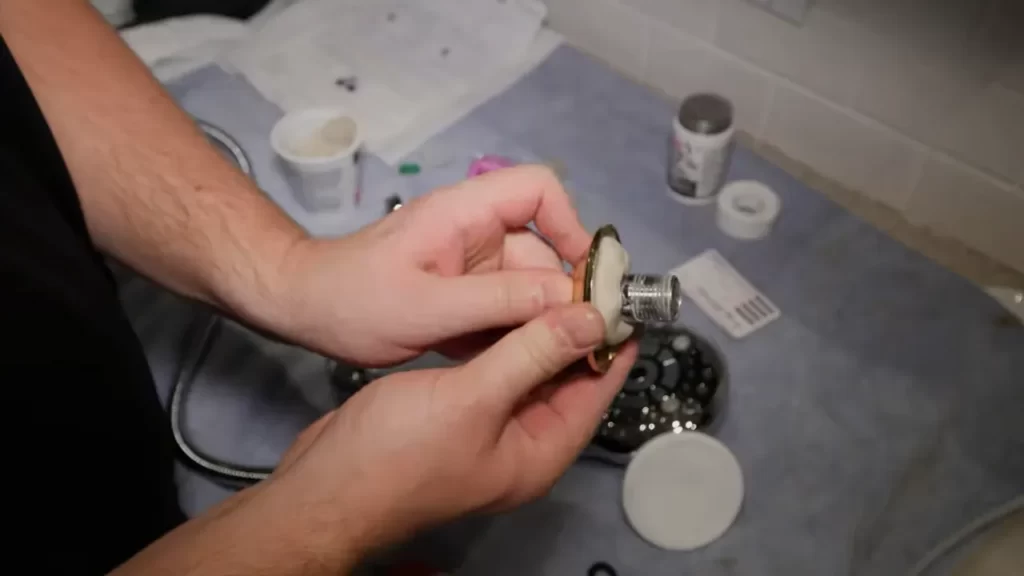
Firstly, locate the end of the hose that does not have the showerhead attached to it. This end will have fittings designed to connect securely to the hand shower. Take a moment to familiarize yourself with these fittings, which are typically threaded or have a compression-style connection.
Next, identify the corresponding fittings on the hand shower itself. These fittings can be found at the bottom or back of the hand shower, depending on the specific model you have purchased. Ensure that the fittings align and are compatible, as they need to securely connect to guarantee a leak-free installation.
Once you have identified the fittings on both the hose and hand shower, take the end of the hose and insert it into the fitting on the hand shower. Apply gentle pressure and twist the hose clockwise until you feel it snugly fit into place.
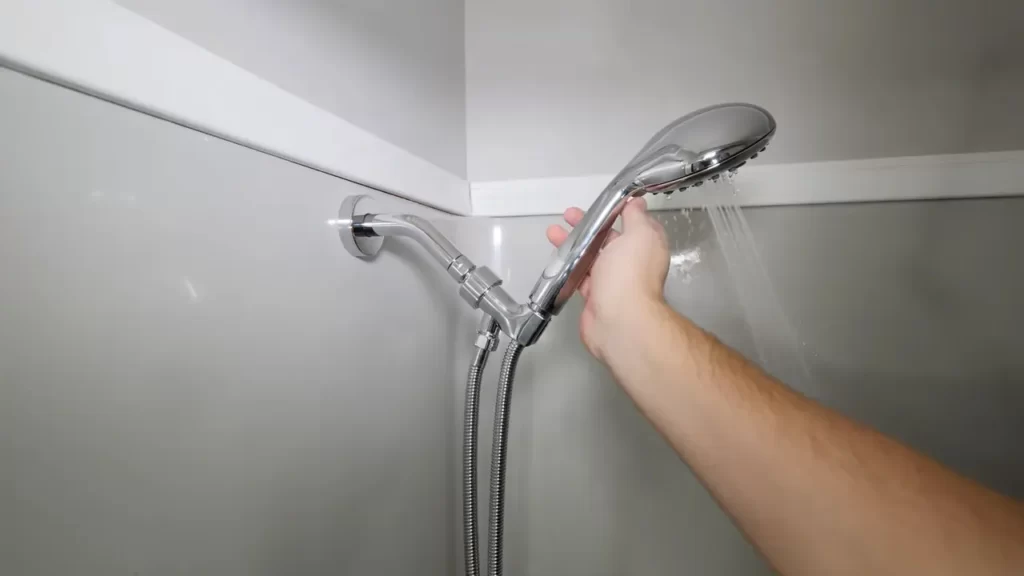
Hold it firmly and tighten the connection
To ensure a watertight and stable connection, hold the hand shower in one hand and the hose in the other. With a firm grip, start turning the hand shower clockwise to tighten the connection between the hose and hand shower fittings. Avoid using excessive force, as overtightening can potentially damage the fittings or cause leaks.
If you are uncertain about the required tightness, consider using pliers with soft jaws or an adjustable wrench to achieve a secure connection without causing any harm. Remember, the goal is to tighten the connection enough to prevent leaks while still maintaining the integrity of the fittings.
Once the connection feels secure, double-check that it is tightened properly by giving it a gentle tug. Ideally, the hose should remain firmly attached to the hand shower without any movement or signs of detachment.
With the hose firmly connected to the hand shower, you have successfully attached the essential components of your hand shower system. Congratulations! The next step is to test the installation to ensure everything is in working order. Simply turn on the water, and voila! You can now enjoy the convenience and versatility of your newly installed hand shower.
Testing The Installation
Once you have successfully installed your hand shower, it’s time to test it out to ensure everything is working properly. Testing the installation is an important step to avoid any future complications and to make sure your hand shower is ready for use. In this section, we will guide you on how to test the installation of your hand shower.
Turn on the water supply
The first thing you need to do when testing your hand shower installation is to turn on the water supply. Before doing so, make sure the hand shower handle is in the off position. Slowly turn the water supply valve on to allow water to flow through the showerhead and the hand shower.
If you notice any leaks or water dripping from the connections, immediately turn off the water supply and check for any loose fittings. Tighten any loose connections until they’re secure and then turn the water supply back on to continue testing.
Check for any leaks
Once the water is flowing, carefully inspect all the connections, including the hose, the hand shower, and the holder. Look for any signs of leaks or water seepage. A common area where leaks may occur is at the connections, so pay close attention to these areas.
If you find any leaks, it’s essential to address them before using the hand shower regularly. Simply tighten any loose fittings or connections to eliminate the leaks. If the issue persists, you may need to replace faulty parts or seek professional assistance.
Adjust the hand shower settings to ensure proper functionality
Now that you have confirmed that there are no leaks, it’s time to test the functionality of your hand shower. Start by adjusting the different settings, such as the flow intensity and spray pattern, as per your preference.
To adjust the flow intensity, use the setting control on the hand shower. This will allow you to increase or decrease the water pressure to your liking. Additionally, you can also switch between different spray patterns, such as massage, rain, or mist, depending on the hand shower model you have installed.
Activate each setting and ensure that the water flow is consistent and the hand shower operates without any issues or disruptions. Test each function thoroughly to guarantee that all settings are working correctly.
Once you have completed these tests and confirmed that everything is functioning as expected, congratulations! You have successfully installed and tested your hand shower. Enjoy the convenience and relaxation that a hand shower brings to your daily routine.
Additional Tips For A Successful Installation
Installing a hand shower can greatly enhance your showering experience, providing you with improved flexibility and convenience. To ensure a successful installation, it is important to follow proper techniques and take necessary precautions. In this section, we will discuss some additional tips and best practices to help you achieve a seamless installation of your hand shower.
Use a cloth or towel to protect the finish of the fixtures during installation
When installing a hand shower, it’s crucial to protect the finish of your fixtures to prevent scratches or damage. One simple yet effective way to do this is by using a cloth or towel as a barrier between the tools and the fixtures. Wrap the cloth or towel around the fixtures before starting the installation process. This will ensure that no accidental scratches or dings occur during the installation.
Apply a small amount of silicone sealant if there are any gaps or leaks
While installing a hand shower, you may encounter gaps or leaks where the shower head connects to the shower arm or the hose connects to the shower head. To prevent any water leakage, it is recommended to apply a small amount of silicone sealant. The sealant will create a watertight seal and prevent any potential leaks from occurring. Remember to follow the manufacturer’s instructions when applying the sealant and ensure that it is fully cured before using the hand shower.
By following these additional tips, you can enhance the installation process and achieve a successful installation of your hand shower. Remember to take your time, read the instructions carefully, and pay attention to detail. With the right techniques and precautions, you can enjoy a fully functional and leak-free hand shower in your bathroom.
Troubleshooting Common Issues
Installing a hand shower can greatly enhance your bathing experience, providing you with flexibility and convenience. However, like any plumbing installation, there may be some common issues that you encounter along the way. In this section, we will look at the troubleshooting steps for low water pressure, leaking connections, and a hand shower that doesn’t stay in place.
Low Water Pressure
If you’re experiencing low water pressure in your hand shower, there are a few things you can check to resolve the issue:
- First, ensure that the water supply valve is fully open. Sometimes, it may not be turned on all the way, resulting in reduced water pressure.
- Next, check if the hand shower filter is clogged. Over time, mineral deposits can accumulate and restrict water flow. Remove the hand shower head and clean the filter thoroughly, using a mixture of vinegar and water to dissolve any buildup.
- It’s also important to examine the hose for any kinks or obstructions. Straighten out any bends or remove any debris that may be blocking the water flow.
- If these steps don’t improve the water pressure, you may need to consult a professional plumber to further diagnose and resolve the issue.
Leaking Connections
Leaking connections are a common problem when installing a hand shower. Here’s what you can do to fix it:
- Start by checking the shower hose connections. Make sure they are tightly secured and that there are no loose fittings.
- If you notice any gaps or leaks, you may need to replace the washers or O-rings. These small rubber seals can deteriorate over time and cause leaks. Simply remove the affected part and replace it with a new one.
- Another possible cause of leaking connections is improper installation. Ensure that all connections are properly threaded and tightened to prevent any water leakage.
- If the problem persists, it’s advisable to seek professional help to avoid any further damage.
Hand Shower Not Staying in Place
If your hand shower keeps slipping or doesn’t stay in place, follow these steps:
- Check if the hand shower holder is securely attached to the wall. Sometimes, insufficient fastening can cause the holder to become loose and unable to support the weight of the hand shower. Tighten any screws or brackets to ensure a secure fit.
- Inspect the holder for any wear or damage. If the holder is worn out or cracked, it may not be able to grip the hand shower properly. Consider replacing the holder with a new one.
- Adjust the angle of the hand shower. Some models have adjustable brackets or swivel heads that allow you to change the position of the hand shower. Experiment with different angles to find a position that holds the hand shower securely.
- If none of these steps work, it may be necessary to consult a professional to assess the situation and provide a suitable solution.
By troubleshooting these common issues – low water pressure, leaking connections, and a hand shower that doesn’t stay in place – you can ensure that your hand shower installation is both functional and enjoyable. Take the time to address these issues, and you’ll be rewarded with a relaxing and satisfying bathing experience.
Frequently Asked Questions
Can You Add A Hand Held Shower To An Existing Shower?
Yes, it is possible to add a hand-held shower to an existing shower. This can be done by installing a diverter valve, which allows you to switch between the regular showerhead and the hand-held shower. It is a simple and cost-effective solution for added convenience and flexibility in your shower experience.
How Do You Attach A Hand Shower?
To attach a hand shower, follow these steps: 1. Locate the shower arm on the wall. 2. Unscrew the existing showerhead by turning it counter-clockwise. 3. Apply some plumber’s tape to the threaded end of the shower arm. 4. Screw the hand shower onto the shower arm by turning it clockwise.
5. Tighten it securely, but be careful not to overtighten.
Where Should A Hand Held Shower Be Mounted?
A hand held shower should be mounted at a height that is comfortable for the user. It is typically installed on a wall or shower arm, allowing for easy access and flexibility during use.
How Do I Change My Shower Head To Handheld?
To change your shower head to handheld, start by turning off the water supply. Unscrew the existing shower head counterclockwise. Apply plumber’s tape to the threaded end of the shower arm. Screw on the handheld shower head clockwise until it is snug.
Turn on the water to test for any leaks.
Conclusion
Installing a hand shower is a simple and effective way to enhance your shower experience. By following the step-by-step instructions in this guide, you can easily achieve a practical and versatile addition to your bathroom. Remember to gather all the necessary tools and materials before starting the installation process.
With the right approach and a bit of patience, you’ll be enjoying the benefits of a hand shower in no time. So go ahead, take the plunge and transform your shower routine!