To install a grab bar in drywall, follow these steps: locate studs, mark and drill holes, secure the bar with screws. Now let’s explore a more detailed guide on how to install a grab bar in drywall.
Installing a grab bar in your bathroom or shower can provide added safety and assistance for those with limited mobility. We will walk you through the step-by-step process of installing a grab bar in drywall. By following these simple instructions, you can ensure a secure and stable grab bar installation in your home.
So let’s get started and create a safer, more accessible space for everyone.
Ensure Safety And Accessibility In Your Home
Ensuring safety and accessibility in your home is crucial for a comfortable and independent lifestyle. One of the essential elements to consider is the installation of grab bars in drywall. These sturdy and reliable fixtures serve as a support system, particularly for those with mobility issues, allowing them to move around with ease and providing additional stability. In this blog post, we will explore the importance of grab bars in promoting safety and independence, the benefits of installing grab bars in drywall for people with mobility issues, and how they enhance accessibility in bathrooms and other areas of the home.
Importance of grab bars in promoting safety and independence
The importance of grab bars in promoting safety and independence cannot be overstated. For individuals with mobility issues, navigating certain areas of the home, especially slippery surfaces like bathrooms, can be challenging and hazardous. Grab bars provide a stable handhold, reducing the risk of slips, falls, and injuries. They offer a sense of security and confidence to individuals as they move around their living spaces, allowing them to maintain their independence and perform day-to-day activities more comfortably.
Benefits of installing grab bars in drywall for people with mobility issues
Installing grab bars in drywall can offer various benefits to individuals with mobility issues. These bars are specifically designed to withstand weight and provide support, making them an essential addition. Some key benefits include:
- Improved stability: Grab bars provide an additional point of support, reducing the risk of balance loss and falls.
- Enhanced convenience: With grab bars strategically placed, individuals can navigate spaces independently with minimal assistance.
- Flexibility and adaptability: Grab bars can be installed in various locations and adjusted to different heights, catering to the specific needs of each individual.
- Increased confidence: The presence of grab bars instills a sense of confidence and reassurance, enabling individuals to perform daily activities without fear of accidents.
Considering these benefits, it’s clear that installing grab bars in drywall is a practical solution for improving the quality of life for people with mobility issues.
Enhancing accessibility in bathrooms and other areas of the home
Bathrooms are one of the most important areas to focus on when it comes to accessibility. Installing grab bars near toilets, bathtubs, and showers can significantly improve safety and make these spaces more user-friendly for individuals with mobility challenges. Moreover, grab bars can also be installed in other areas of the home, such as hallways, stairwells, and bedrooms, to ensure accessibility throughout the entire living environment.
By enhancing accessibility through the installation of grab bars in drywall, you create a more inclusive and secure home environment. Whether it’s for yourself, an elderly family member, or someone with a temporary mobility limitation, the presence of these bars positively impacts daily life and contributes to overall well-being.

Tools And Materials Needed
Installing a grab bar in drywall is a relatively simple process that can greatly enhance the safety and accessibility of your bathroom. To get started, you will need the following tools and materials:
Necessary tools for the installation process:
- Measuring tape: To accurately measure the desired location and length of the grab bar.
- Pencil: To mark the exact spots where the grab bar will be installed.
- Level: To ensure that the grab bar is perfectly straight and aligned.
- Power drill: To create pilot holes for the screws.
- Wall anchors: To provide additional support and stability for the grab bar.
- Screwdriver: To tighten the screws and secure the grab bar in place.
- Allen wrench: If your grab bar requires set screws, an Allen wrench may be necessary to tighten them.
- Stud finder: To locate the studs behind the drywall and ensure secure installation.
- Masking tape: To prevent the drill bit from slipping or scratching the surface of the drywall.
Types of grab bars suitable for drywall installation:
Before you embark on the installation process, it is essential to choose the right type of grab bar for your specific needs. Here are a few popular options:
- Straight grab bars: These are the most common type of grab bars and are available in various lengths. They are ideal for providing stability and support in areas where balance is crucial, such as near toilets or in showers.
- Angled grab bars: These grab bars are designed with an angled shape that allows for a more ergonomic grip. They are particularly useful for individuals with limited mobility or strength.
- Foldable grab bars: These grab bars provide a convenient solution for smaller bathrooms or spaces where a permanent grab bar may not be suitable. Foldable grab bars can be easily folded up when not in use, saving space and ensuring accessibility.
- Decorative grab bars: If aesthetics are important to you, decorative grab bars are an excellent option. They come in various styles and finishes, allowing you to choose a grab bar that complements your bathroom decor while still providing the necessary support.
Choosing the right size and style of grab bar for your needs:
When selecting a grab bar, it is important to consider both the size and style to ensure it meets your specific requirements. Here are a few key factors to keep in mind:
- Length: Measure the area where you plan to install the grab bar and choose a length that fits comfortably within that space. Additionally, consider the amount of surface area you will need to grip for optimal support.
- Weight capacity: Make sure the grab bar you choose is rated for your weight and provides sufficient support.
- Finish: Consider the finish of the grab bar, ensuring it complements the existing fixtures and decor in your bathroom.
- Grip: Look for grab bars with textured surfaces or rubberized grips to provide a secure and slip-resistant grip.
By carefully considering the necessary tools, types of grab bars, and choosing the right size and style, you can now move forward with the installation process with confidence. In the next section, we will guide you step-by-step through the installation process, ensuring a safe and secure grab bar installation in your drywall.
Identifying The Ideal Location For The Grab Bar
When it comes to installing a grab bar in drywall, identifying the ideal location is essential to ensure safety and practicality. The right placement is crucial for providing the necessary support and stability, especially for individuals with limited mobility or balance issues. In this section, we will explore the factors to consider when choosing the installation location, examining wall studs to determine the most secure spots, and ensuring proper positioning for optimal support and stability.
Factors to consider when choosing the installation location
- The height of the grab bar: The height of the grab bar should be determined by the user’s specific needs. Generally, grab bars positioned between 33 and 36 inches from the floor are recommended for optimal accessibility.
- Accessibility: The grab bar should be placed in an easily accessible location, within reach of the intended user. Consider the individual’s height, arm reach, and any mobility limitations they may have.
- Functionality: Identify the primary purpose of the grab bar installation. Is it for assistance while standing up from a toilet, getting in and out of a shower, or navigating a hallway? Understanding the intended function will help you choose the appropriate location.
Examining wall studs and determining the most secure spots
To ensure the grab bar is securely installed, it is crucial to locate the wall studs. Wall studs are vertical wooden or metal beams that provide structural support to the walls. Follow these steps to find the most secure spots:
- Use an electronic stud finder or a knuckle-tapping technique to locate the studs. The stud finder will emit a sound or visual indication when it detects the presence of a stud beneath the drywall.
- Once you have identified the studs, mark their location using a pencil or masking tape.
- Determine the appropriate length for the grab bar based on the distance between the studs. Ideally, the grab bar should span across at least two studs to ensure maximum strength and stability.
Ensuring proper positioning for optimal support and stability
Once you have located the studs, it is essential to position the grab bar correctly for optimal support and stability. Follow these guidelines:
- The grab bar should be installed in a horizontal position parallel to the floor.
- Ensure the bar is installed at a comfortable height for the user, considering their specific needs and accessibility.
- Use a level to ensure the grab bar is perfectly straight before marking the placement for installation.
- Mark the screw hole locations on the wall, then pre-drill holes to make the installation process smoother.
- Secure the grab bar using appropriate screws or mounting hardware, ensuring it is firmly attached to the wall studs for maximum stability.
By following these steps, you can confidently identify the ideal location for installing a grab bar in drywall. This ensures the grab bar provides the necessary support and stability required to promote safety and independence for individuals with limited mobility.
Properly Measuring And Marking The Wall
Accurate measurements for precise installation
Before installing a grab bar in drywall, it is crucial to start with accurate measurements to ensure a precise installation. Here are the steps you should follow:
- Begin by identifying the desired location for the grab bar. Consider the individual’s height and reach to determine the most suitable placement.
- Using a tape measure, measure the length of the grab bar you plan to install. It is essential to select a bar that fits comfortably within the available space.
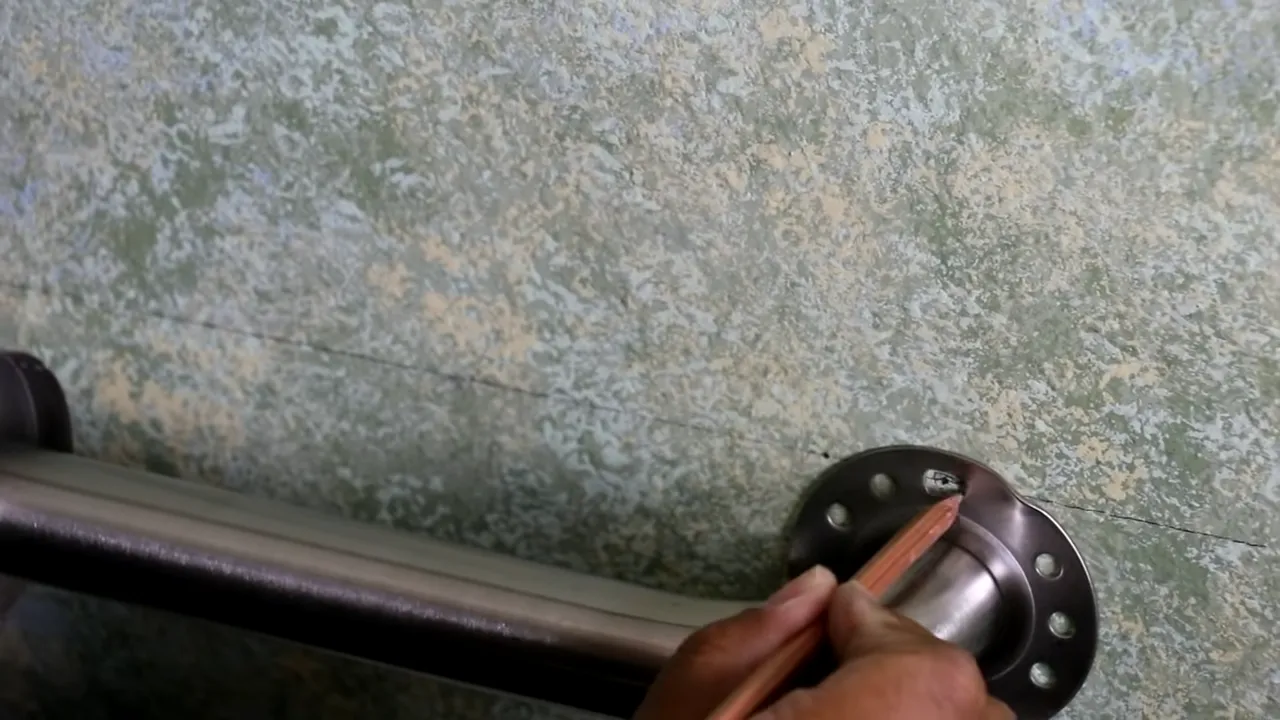
- Next, use the tape measure to mark the center of the wall where the grab bar will be positioned. This measurement should align with the individual’s needs and preferences.
- Measure the distance between the center mark and the nearest structure, such as a wall stud or corner. This measurement will help determine the placement of mounting brackets and any potential obstructions.
Marking the holes for mounting brackets
Once the measurements are accurate, it is time to mark the holes for the mounting brackets. This step will ensure a secure and stable installation. Follow these guidelines:
- Place the mounting brackets against the wall at the desired location. Align them with the center mark previously made.
- Using a pencil, trace the outline of each mounting bracket. This step will indicate where the holes should be drilled for secure attachment.
- Anchors, such as toggle bolts or simple wall anchors, may be necessary depending on the wall type and the weight-bearing capacity needed. Refer to the manufacturer’s instructions for the appropriate anchoring method and mark the holes accordingly.
- Double-check the marked holes to ensure they are aligned vertically and symmetrically. This step is crucial for a visually appealing and well-balanced installation.
Ensuring proper alignment and levelness of the grab bar
Proper alignment and levelness of the grab bar are essential for both functionality and aesthetics. Follow these steps to ensure a professional installation:
- Hold the grab bar against the wall, aligning it with the marked holes and mounting brackets.
- Check the vertical alignment using a level. Adjust the position of the grab bar if necessary to ensure it is perfectly straight.
- Use a pencil or marker to mark the outline of the grab bar against the wall. This mark will help you maintain the proper position during the installation process.
- Confirm the levelness of the grab bar by placing the level across the top surface. Adjust the position as needed until it is perfectly level.
- Once you have confirmed the alignment and levelness, you can proceed with drilling the necessary holes and securing the grab bar to the wall following the manufacturer’s instructions.
Drilling Holes And Anchoring The Mounting Brackets
Using a stud finder to locate the center of the wall stud
Before drilling holes for mounting brackets, you’ll need to find the center of the wall stud where you’ll anchor the grab bar securely. To do this, first, grab a stud finder tool. These handy devices can detect the presence of studs behind drywall by measuring density changes in the wall. Once you’ve powered on the stud finder, move it slowly along the wall until it indicates the location of a stud. Take note of the center of the stud, as this is where you’ll be drilling your pilot holes for the grab bar.
Drilling pilot holes for the mounting brackets
Now that you’ve found the center of the wall stud, it’s time to drill pilot holes for the mounting brackets. The pilot holes will help guide the screws and ensure a secure attachment of the grab bar. Grab a power drill with a drill bit slightly smaller than the screws provided with the grab bar. Position the mounting bracket against the wall, aligning it with the center of the stud, and place your bit into the pilot hole of the bracket. Firmly press the drill against the wall and power it on, drilling straight into the stud until the desired depth is reached. Repeat this process for the other mounting bracket, ensuring they are aligned properly.
Inserting anchors for added support in drywall installations
While drilling pilot holes into the wall stud is typically enough to provide a sturdy mounting for your grab bar, you may want to consider inserting anchors for added support in drywall installations. Anchors help distribute the weight of the grab bar across a larger area of the wall, reducing the risk of damage or failure. To insert anchors, first, select the appropriate type (plastic or metal) and size for your grab bar and wall material. Using a pre-drilled hole or a drill bit slightly larger than the anchor, create a hole in the drywall at the desired location. Insert the anchor into the hole, ensuring it is flush with the wall. Tighten the screw into the anchor, securing it firmly in place. Repeat this process for each anchor needed, following the manufacturer’s instructions for proper installation.
Ensuring each H3 heading adheres to HTML syntax:
To ensure that each H3 heading adheres to HTML syntax, you need to enclose the heading within <h3> and </h3> tags. This helps search engines understand the structure and hierarchy of your content, making it easier to crawl and index. By organizing your headings in HTML format, you enhance the readability and accessibility of your blog post, leading to better SEO performance and user experience. Don’t forget to close any opened HTML tags properly to maintain the integrity of your website’s code.
Attaching The Grab Bar To The Mounting Brackets
Now that you have your mounting brackets securely installed in the drywall, it’s time to attach the grab bar to them. This step is crucial for ensuring the stability and functionality of the grab bar. Follow these simple steps to complete this part of the installation process:
Placing the grab bar onto the installed mounting brackets
Take the grab bar and carefully position it onto the installed mounting brackets. Make sure the grab bar is aligned properly to ensure a secure connection. It’s important to note that different grab bar models may have specific instructions for placement, so always refer to the manufacturer’s guidelines if available.
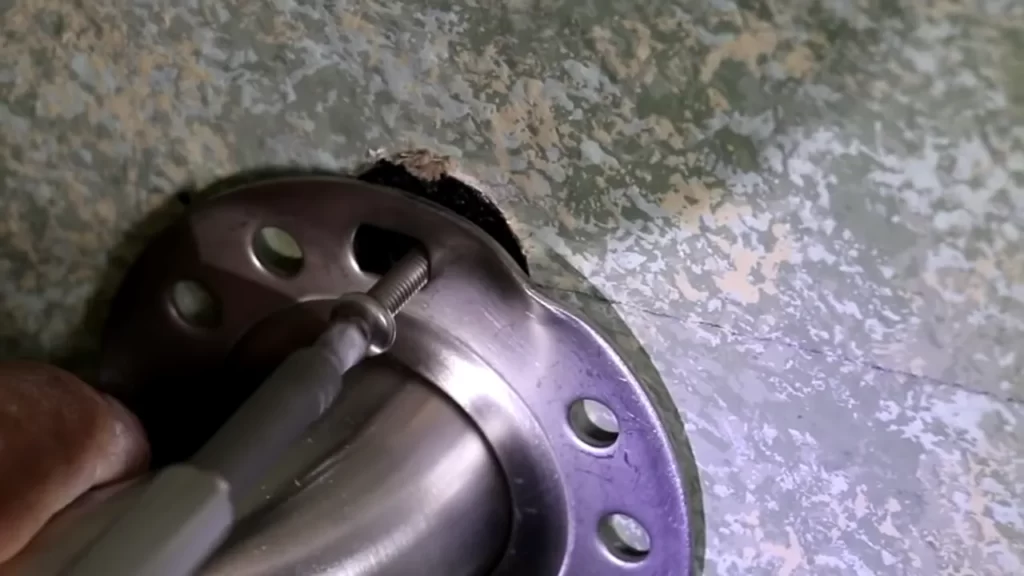
Securing the grab bar in place using screws or other provided hardware
To secure the grab bar onto the mounting brackets, you will need to use screws or other hardware provided with the grab bar kit. Refer to the manufacturer’s instructions to determine the appropriate size and type of screws or hardware to use. Make sure to use a screwdriver or drill suitable for the specific screws provided.
Keeping the grab bar aligned with the mounting brackets, insert the screws through the holes in the grab bar and into the brackets. Tighten the screws until the grab bar feels secure. Be careful not to overtighten, as this may damage the mounting brackets or the grab bar itself.
Checking for proper alignment and ensuring a secure connection
Once the grab bar is secured in place, it’s important to double-check the alignment and ensure a secure connection. Give the grab bar a firm tug to test its stability. If it feels loose or wobbly, you may need to tighten the screws further or re-adjust the placement of the grab bar on the mounting brackets.
It’s also crucial to check that each mounting bracket is properly attached to the wall. If you notice any movement or instability, revisit the installation process for the mounting brackets to ensure they are securely fastened to the drywall.
By following these steps, you can successfully attach the grab bar to the mounting brackets. This will provide you with a sturdy and dependable support system in your bathroom or any other location where it’s needed.
Covering And Concealing Mounting Hardware
When installing a grab bar in drywall, it’s important to not only focus on its functionality but also its visual appeal. One crucial aspect of achieving a polished finished look is covering and concealing the mounting hardware. There are a few options available for this, including using decorative caps or flanges that seamlessly blend with the surrounding decor. By maintaining accessibility while enhancing visual appeal, you can ensure that your grab bar serves its purpose without compromising on style.
Options for covering exposed screw heads
If your grab bar installation requires the use of screws, it’s essential to cover the exposed screw heads for a more aesthetically pleasing appearance. Here are a few options you can consider:
- 1. Trimmed Screw Covers: These covers are designed to fit over the screw heads and can be trimmed to match the wall color or the grab bar finish. They provide a clean and finished look.
- 2. Paint or Wall Texture: Another option is to paint the screw heads to match the surrounding wall color. If your wall has a textured finish, you can also apply a matching texture to the screw heads for better blending.
Using decorative caps or flanges for a finished appearance
For a more professional and finished look, you can opt for decorative caps or flanges that are specifically designed to conceal the mounting hardware while adding a touch of elegance. These caps or flanges can be made of various materials, such as metal, plastic, or even wood, and are available in different finishes to complement the style of your bathroom or any other area where the grab bar is installed. Simply attach them over the mounting hardware to create a cohesive and visually appealing look.
Maintaining accessibility while enhancing visual appeal
While it’s important to cover and conceal the mounting hardware for a visually pleasing grab bar installation, it’s equally crucial to ensure that accessibility is not compromised. Accessibility is essential for individuals with mobility limitations who rely on grab bars for support and stability. When choosing decorative caps or flanges, make sure they do not obstruct the use and functionality of the grab bar. Opt for designs that allow easy gripping and do not compromise the strength and stability of the bar itself. By striking the right balance between functionality and style, you can achieve a grab bar installation that is both visually appealing and accessible.
Testing The Grab Bar’S Stability And Strength
Ensuring the stability and strength of a grab bar is essential for its proper functioning and the safety of those who rely on it. Before you can trust the grab bar to support your weight, it is important to conduct thorough testing to verify its stability and strength. This section will guide you through the steps to test the grab bar and ensure its durability.
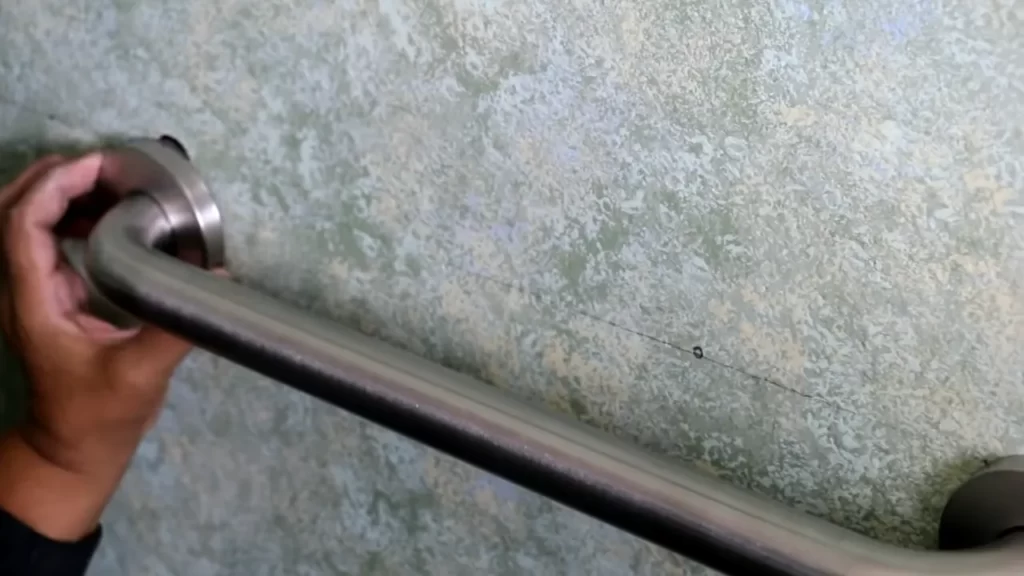
Applying pressure to ensure a secure and sturdy installation
Once you have installed the grab bar in your drywall, it is crucial to apply pressure to check if it is securely fastened. A grab bar that is not properly installed may pose a risk of accidents or injuries. To test the grab bar’s stability, hold onto it firmly and gently apply pressure in different directions. Pay attention to any movement or shifting of the bar. If you notice any instability or the grab bar feels loose, you need to reinforce its installation for a secure and sturdy fit.
Verifying the strength of the grab bar before regular use
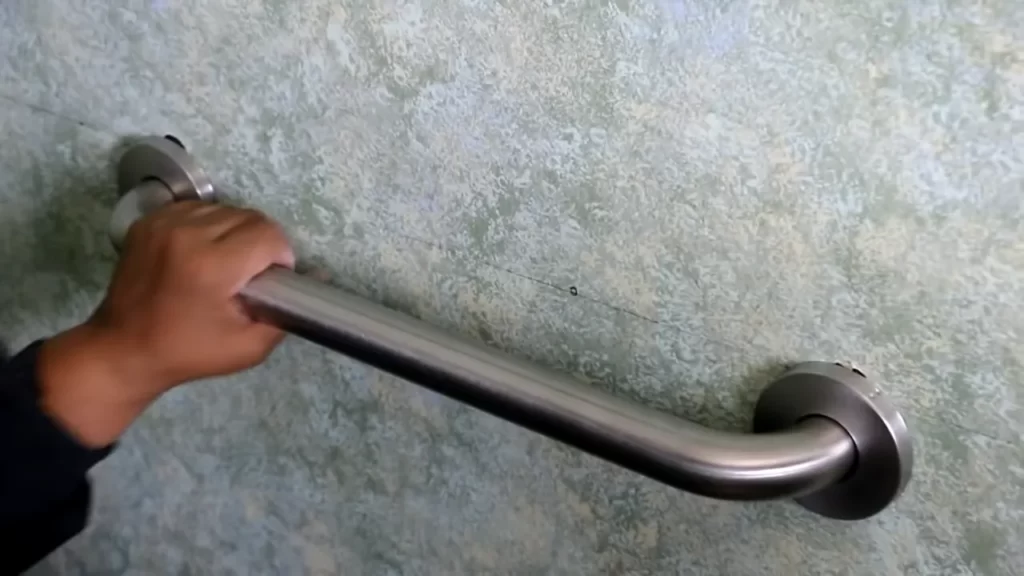
Before relying on the grab bar for regular use, it is important to verify its strength. This can be done by applying increasing pressure gradually while ensuring that the grab bar remains firmly fixed. Lean your body weight onto the grab bar and distribute it evenly to test its strength. If the grab bar holds your weight without any signs of weakness or insecurity, you can be confident in its strength and suitability for use.
Conducting regular inspections for maintenance and safety purposes
To ensure the ongoing safety and reliability of the grab bar, regular inspections are necessary. These inspections serve to identify any signs of wear and tear, damage, or loosening of the installation. Inspect the grab bar visually and physically, checking for any cracks, rust, or loose screws. Make sure to test its stability again from time to time, especially after significant use or if any concerns arise. By conducting regular inspections, you can address any maintenance or safety issues promptly, maintaining the effectiveness of the grab bar as a safety feature.
In conclusion, testing the grab bar’s stability and strength is crucial to ensure its proper installation and functionality. By applying pressure for a secure fit, verifying its strength before regular use, and conducting regular inspections for maintenance and safety purposes, you can rely on the grab bar for support and safety. Remember to prioritize the stability and strength of the grab bar to ensure its effectiveness in providing assistance whenever it is needed.
Frequently Asked Questions
How Do You Attach A Grab Bar Without Studs?
To attach a grab bar without studs, use a wall anchor or a grab bar mounting kit. These provide strong support by distributing weight across a larger area of the wall. Make sure to follow the manufacturer’s instructions for installation to ensure proper stability and safety.
How Do You Install A Grab Bar On The Wall?
To install a grab bar on the wall, first locate the studs using a stud finder. Mark the positioning of the bar and pre-drill holes into the studs. Attach the bar using screws and anchor hardware. Make sure the bar is securely fastened and test its stability before use.
What Is The Best Anchor For Grab Bars?
The best anchor for grab bars is a solid and sturdy one that can securely hold the weight of the bars and provide stability. It is important to use anchors specifically designed for grab bars to ensure they can withstand the pressure and provide a safe and reliable support.
Should Grab Bars Be Installed At An Angle?
Grab bars should not be installed at an angle. They should be securely mounted horizontally or vertically for maximum safety and stability. Installing them at an angle may compromise their strength and effectiveness in providing support for individuals.
Conclusion
Installing a grab bar in drywall is a simple and efficient way to enhance bathroom safety. By following the step-by-step process outlined in this guide, you can make your bathroom more accessible for people of all ages and abilities. Remember to choose the right grab bar and use the appropriate tools for a secure installation.
With proper planning and care, you can provide invaluable support and peace of mind for yourself and your loved ones.