
To install a bathroom backsplash, measure and cut the backsplash material, apply adhesive to the backsplash and wall, press the backsplash into place, and secure it with nails or clamps. Now, let’s dive into a comprehensive guide on how to install a bathroom backsplash in your home.
Adding a backsplash to your bathroom can not only enhance its aesthetic appeal but also protect the walls from water damage and make cleaning easier. Whether you want to update your bathroom’s look or simply add a practical element, installing a backsplash can be a relatively straightforward DIY project.
Just follow these steps to give your bathroom a fresh, new look.
Choosing The Right Backsplash For Your Bathroom
Installing a backsplash in your bathroom is a fantastic way to add style and personality to the space. Not only does it protect your walls from water damage, but it also creates a visual focal point that can enhance the overall aesthetic of your bathroom. When it comes to choosing the right backsplash for your bathroom, there are several factors to consider.
Factors to consider when selecting a bathroom backsplash
Before you start browsing options, it’s important to think about the specific factors that will influence your decision. By considering these factors upfront, you can ensure that your chosen backsplash meets not only your style preferences but also your functional needs. Let’s explore some key aspects to consider:
- Style and aesthetic: Determine the overall style and aesthetic you want to achieve in your bathroom. Are you looking for something modern and sleek, or do you prefer a more traditional and timeless look? Identifying your preferred style will help narrow down your options.
- Moisture resistance: Since the bathroom is a high-moisture environment, it’s crucial to choose a backsplash material that can withstand constant exposure to water and humidity. Opt for materials like porcelain, ceramic, or glass, which are known for their durability and resistance to moisture damage.
- Maintenance: Consider the level of maintenance required for each backsplash material. Some materials may require regular sealing or special cleaning products, while others are relatively low-maintenance. Choose a backsplash that fits into your lifestyle and upkeep preferences.
- Cost: Set a budget for your bathroom backsplash project. The cost of materials can vary significantly, so it’s essential to choose an option that aligns with your financial constraints.
Popular materials for bathroom backsplashes
Now that you have a better idea of the factors to consider, let’s explore some popular materials commonly used for bathroom backsplashes:
| Material | Description |
|---|---|
| Porcelain | Porcelain is a popular choice for bathroom backsplashes due to its water resistance, durability, and wide range of design options. |
| Ceramic | Ceramic is another versatile material that comes in various colors, shapes, and patterns. It’s relatively affordable and easy to clean. |
| Glass | Glass backsplashes can create a stunning focal point in your bathroom. They are easy to maintain and reflect light, making your space appear larger and brighter. |
| Natural Stone | Natural stone, such as marble or travertine, adds a touch of elegance and luxury to any bathroom. However, it requires regular sealing to protect it from moisture damage. |
These are just a few examples of the materials available for bathroom backsplashes. Each comes with its own set of advantages and considerations, so take your time to explore the options that best align with your style and needs.
Exploring different color and pattern options
When it comes to color and pattern, the possibilities are endless. The right choice depends on your personal taste and the overall design scheme of your bathroom. Here are a few points to keep in mind:
- Neutral colors like whites, creams, and grays are timeless and versatile, allowing you to change other elements of your bathroom without worrying about clashing with the backsplash.
- Bold colors and intricate patterns can add a striking visual element and make a statement in your bathroom. Just be mindful that they may require more care and could potentially be harder to match with future design changes.
- If you’re unsure about committing to a specific color or pattern, consider a mosaic backsplash that combines different colors and textures for a unique and visually appealing look.
By considering different color and pattern options, you can ensure that your bathroom backsplash complements the overall design of your space and creates the desired ambiance.
In conclusion, choosing the right bathroom backsplash involves considering various factors, including style, moisture resistance, maintenance, and cost. With an array of materials, colors, and patterns to choose from, you can create a backsplash that adds both functionality and visual appeal to your bathroom.
Preparing Your Bathroom For Backsplash Installation
Before you dive into installing a beautiful backsplash in your bathroom, it’s essential to prepare the space properly. Taking the time to assess the condition of your existing walls, clean and prep the wall surface, and measure and mark the area for installation will ensure a smooth and successful installation process. In this article, we will walk you through each step, providing you with the necessary guidance to prep your bathroom for backsplash installation.
Assessing the Condition of Your Existing Walls
Before you start any installation process, it’s crucial to assess the condition of your bathroom walls. This will help you identify any potential issues that need to be resolved before proceeding. Look for cracks, moisture damage, or uneven surfaces. If you spot any significant flaws, it might be necessary to repair or level the walls before continuing with the installation. Taking care of these repairs beforehand will ensure that your backsplash adheres properly and looks stunning.
Cleaning and Prepping the Wall Surface
Once you have assessed and addressed any necessary repairs, it’s time to move on to cleaning and prepping the wall surface. Cleaning the walls thoroughly is essential to remove any dust, grease, or grime that may hinder the adhesive’s performance. Begin by wiping the walls with a mild soap and water solution. For stubborn stains, you may need to use a gentle scrub brush. Rinse the walls with clean water and ensure they are completely dry before continuing.
After the walls are clean and dry, it’s time to prime the surface. Applying a layer of primer will help the adhesive bond effectively to the wall. Use a good quality primer suitable for your bathroom walls and follow the manufacturer’s instructions. Let the primer dry completely before moving on to the next step.
Measuring and Marking the Area for Installation
To ensure a precise and visually appealing backsplash, it’s crucial to measure and mark the area accurately. Measure the length and height of the wall area where you plan to install the backsplash. Using a pencil, mark these measurements on the wall, accounting for any outlets, switches, or other obstacles that may require adjustments in tile placement.
Once you have marked the area, it’s time to determine the tile layout. Consider the size and pattern of your tiles, ensuring a balanced and cohesive design. Use a level and a chalk line to create horizontal and vertical guidelines, which will serve as your reference points during installation.
Finally, plan the tile placement, starting from the center and working outwards. This will help you achieve a symmetrical and visually pleasing result. Use painter’s tape to outline the area where the backsplash will be installed, giving you a visual representation of the final look.
With your bathroom walls assessed, cleaned, prepped, and the area properly measured and marked, you are now ready to proceed with the exciting process of installing your bathroom backsplash. Stay tuned for our next article, where we will guide you through the step-by-step installation process.
Gather The Necessary Tools And Materials
Installing a backsplash in your bathroom can be a great way to enhance its aesthetic appeal and protect the walls from splashes and spills. To ensure a smooth and successful installation process, it’s important to gather all the necessary tools and materials beforehand. This will not only help you streamline the installation but also prevent any delays or interruptions. In this section, we will explore the essential tools needed for the installation process, selecting the appropriate adhesive and grout, as well as optional tools for more advanced installation methods.
Essential tools needed for the installation process
Before you begin installing your bathroom backsplash, it’s crucial to have the right tools at hand. Here are the essential tools you’ll need for a successful installation:
- Measuring tape
- Pencil
- Level
- Tile cutter or wet saw
- Tile nipper
- Notched trowel
- Grout float
- Bucket
- Mixing paddle
- Spacers
- Grout sponge
- Caulk gun
- Gloves and safety glasses
Having these essential tools will ensure that you have everything you need to measure, cut, install, and finish your bathroom backsplash.
Selecting the appropriate adhesive and grout
When it comes to selecting the adhesive and grout for your bathroom backsplash, there are a few factors to consider. The type of tile you choose will determine the appropriate adhesive and grout. Here are some common options:
| Tile Type | Adhesive | Grout |
|---|---|---|
| Ceramic | Thin-set mortar | Sanded or unsanded grout, depending on the grout joint size |
| Glass | Epoxy or urethane-based adhesive | Non-sanded grout |
| Natural stone | Thin-set mortar | Sanded or non-sanded grout, depending on the stone type and grout joint size |
Choosing the appropriate adhesive and grout will ensure a strong bond and a finished look that complements your bathroom aesthetics.
Optional tools for more advanced installation methods
In addition to the essential tools, there are a few optional tools that can come in handy for more advanced installation methods:
- Tile spacers with built-in leveling system
- Tile edge trim
- Tile hole saw
These optional tools can help you achieve more precise and professional-looking results, especially for intricate designs or edges.
By gathering all the necessary tools and materials, you’ll be well-prepared to install your bathroom backsplash with ease. In the next section, we will guide you through the process of preparing the surface for installation.
Step-By-Step Guide To Installing Bathroom Backsplash
Removing existing fixtures and hardware
Before you can begin installing your new bathroom backsplash, you’ll need to remove any existing fixtures and hardware that may be in the way. Start by turning off the water supply to the sink and disconnecting the plumbing. Next, remove any towel bars, soap dispensers, or other accessories that are attached to the wall. If there is an existing backsplash, use a putty knife or scraper to carefully pry it off the wall. Be sure to wear protective gloves and eyewear during this process.
Applying the adhesive onto the wall surface
Once you have a clean and smooth surface to work with, it’s time to apply the adhesive. Choose a high-quality adhesive that is recommended for use with backsplash tiles. Follow the manufacturer’s instructions for mixing and applying the adhesive, ensuring that you apply it evenly onto the wall surface. Use a notched trowel to create ridges in the adhesive, which will help the tiles adhere properly. Allow the adhesive to set according to the instructions before moving on to the next step.
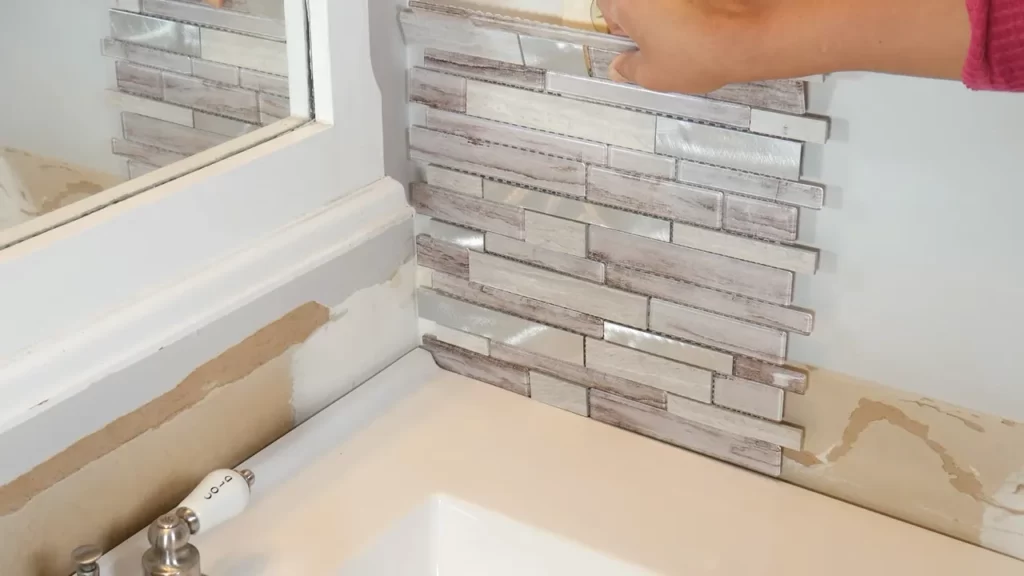
Placing and aligning the backsplash tiles
Now it’s time to start placing the backsplash tiles onto the adhesive. Starting at one corner or edge, carefully press each tile into place, making sure it is level and aligned with the adjacent tiles. Use tile spacers to create even gaps between the tiles for grout. If necessary, use a tile cutter or wet saw to trim any tiles to fit around fixtures or corners. Continue placing tiles until the entire backsplash is covered, periodically checking that everything is level and aligned.
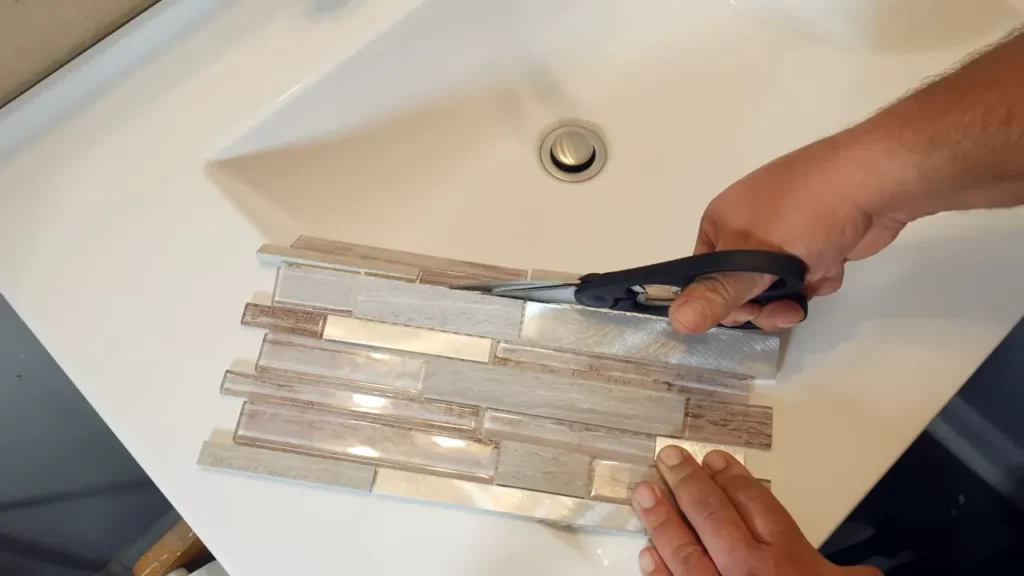
Cutting and fitting tiles to fill in gaps
When you reach the edges of the backsplash or encounter any gaps that need to be filled, you may need to cut and fit tiles accordingly. Measure the space that needs to be filled and mark the tile accordingly. Use a tile cutter or wet saw to carefully cut the tile along the marked line. Test the fit of the tile before applying adhesive and make any necessary adjustments. Once the tile fits properly, apply adhesive to the back and press it into place, ensuring it aligns with the surrounding tiles.
Mixing and applying grout to the tile joints
After the adhesive has fully cured, it’s time to mix and apply grout to the tile joints. Follow the manufacturer’s instructions for mixing the grout, making sure it has the right consistency. Use a grout float to apply the grout to the joints, spreading it diagonally to ensure full coverage. Press the grout firmly into the joints and remove any excess grout from the tile surface using a damp sponge. Allow the grout to dry for the recommended time before proceeding.
Cleaning and sealing the finished backsplash
Once the grout has fully dried, it’s important to clean the surface of the tiles and remove any grout haze. Use a clean, damp sponge to wipe away any residue, taking care not to disturb the grout lines. After the backsplash is clean and dry, you can apply a sealer to protect the tiles and grout from moisture and stains. Follow the manufacturer’s instructions for the sealer product you choose, applying it evenly and allowing it to dry completely before using the sink or shower.
Tips For A Successful Bathroom Backsplash Installation
Installing a bathroom backsplash is a great way to add a touch of style and elegance to your space. Whether you’re a DIY enthusiast or an experienced handyman, these tips will help ensure a successful installation. From proper tile alignment and spacing to dealing with curved or irregular walls, managing corners and edges, and even updating an outdated backsplash without a full replacement, we’ve got you covered!
Ensuring proper tile alignment and spacing
Nothing ruins the look of a backsplash more than crooked tiles or uneven spacing. To achieve a professional finish, follow these tips:
- Start by measuring and marking the centerline of your wall. This will serve as a guide for aligning your tiles.
- Use tile spacers to ensure consistent spacing between each tile. This will create a uniform and visually appealing pattern.
- Before applying adhesive, dry-fit your tiles to ensure proper alignment and adjust as needed. This step will save you time and frustration during the installation process.
- Be diligent when applying adhesive to each tile. A thin, even layer will ensure a secure bond and prevent any potential shifting.
Dealing with curved or irregular walls
Curved or irregular walls can present challenges during a backsplash installation, but with the right techniques, you can overcome them:
- If your walls are slightly curved, consider using smaller tiles. These can easily adapt to the wall’s curvature and create a seamless look.
- For more pronounced curves or irregularities, you may need to make partial cuts on the edge of each tile to achieve a proper fit.
- Using a flexible tile adhesive can also help accommodate the shape of the wall and prevent future cracking or lifting.
- Remember to regularly step back and assess the overall appearance as you go. This will allow you to make adjustments before the adhesive sets.
Managing corners and edges
Corners and edges require special attention to ensure a polished and cohesive finish. Follow these tips for a professional result:
- Create clean and precise cuts for tiles that meet at corners. A tile cutter or wet saw can help you achieve accurate cuts.
- Consider using bullnose tiles or edge trim to provide a smooth and rounded edge for a more finished look.
- Apply adhesive and grout carefully to the corners, making sure to fill any gaps or spaces completely. This will help protect against moisture and make cleaning easier.
- Regularly clean excess grout or adhesive around corners and edges to ensure a neat and flawless appearance.
Ways to update outdated backsplash without full replacement
Tired of your old, outdated backsplash but don’t want the hassle and expense of a full replacement? Try these simple updates:
- Painting or staining: A fresh coat of paint or stain can instantly transform the look of your backsplash. Choose a color that complements your bathroom decor.
- Peel-and-stick tiles: Easy to install and available in a variety of styles, peel-and-stick tiles offer a quick and affordable way to give your backsplash a new lease on life.
- Tile decals: Similar to peel-and-stick tiles, tile decals are adhesive stickers that can be applied directly over your existing tiles. They come in various designs and patterns, allowing you to create a whole new aesthetic.
- Stenciling: Get creative and add a personal touch with stencils. Use a contrasting color paint to create a unique pattern or design on your backsplash.
With these tips and techniques, you’ll be well-prepared to tackle your bathroom backsplash installation project. Remember to take your time, measure twice, and always strive for precision. The end result will be a beautiful and functional addition to your bathroom!
Maintaining And Cleaning Your Bathroom Backsplash
Regular cleaning routines for long-lasting appeal
Maintaining and cleaning your bathroom backsplash is essential in preserving its beauty and longevity. By establishing regular cleaning routines, you can prevent grime and stains from building up and ensure that your bathroom stays fresh and appealing. Here are a few tips for incorporating regular cleaning into your bathroom maintenance:
1. Daily wipe downs
Make it a habit to wipe down your bathroom backsplash daily using a mild cleaning solution and a soft, non-abrasive cloth. This will help remove any surface dust and prevent it from settling into the grout lines and causing discoloration over time.
2. Weekly deep clean
In addition to daily wipe downs, set aside time once a week for a more thorough cleaning. Use a multipurpose bathroom cleaner and a sponge or scrub brush to clean the backsplash surface, focusing on any stains or grime that may have accumulated. Rinse with clean water and dry with a microfiber cloth or towel.
Dealing with common stains and grime
Despite regular cleaning, sometimes stubborn stains and grime can still find their way onto your bathroom backsplash. Knowing how to deal with common issues can help you keep your backsplash looking pristine. Here are a few techniques for tackling specific stains and grime:
1. Soap scum
Soap scum is a common problem in bathrooms. To remove soap scum from your bathroom backsplash, create a paste by mixing baking soda and water. Apply the paste to the affected area and let it sit for a few minutes. Then, scrub the area with a non-abrasive sponge or brush and rinse thoroughly.
2. Hard water stains
Hard water stains can leave unsightly marks on your bathroom backsplash. To remove these stains, combine equal parts vinegar and water in a spray bottle. Spray the affected area and let it sit for a few minutes. Then, scrub gently with a sponge or brush and rinse thoroughly.
3. Grout discoloration
Over time, grout lines in your bathroom backsplash can become discolored. To tackle grout discoloration, create a paste by mixing hydrogen peroxide and baking soda. Apply the paste to the grout lines and let it sit for a few minutes. Scrub the grout lines with a toothbrush or grout brush, then rinse thoroughly.
Proper maintenance to prevent damage
Proper maintenance is crucial in preventing damage to your bathroom backsplash and ensuring its long-term durability. By adopting a few maintenance practices, you can keep your backsplash looking as good as new. Here are some maintenance tips to follow:
1. Regular sealing
Sealing your bathroom backsplash is an effective way to protect it from moisture damage and staining. Depending on the type of backsplash material, you may need to apply a sealant once or twice a year. Follow the manufacturer’s instructions for the specific sealant you are using.
2. Avoid harsh chemicals
Harsh chemicals can damage the surface of your bathroom backsplash. When cleaning, avoid using abrasive cleaners, bleach, or ammonia-based products. Instead, opt for mild cleaning solutions specifically formulated for bathroom surfaces.
3. Use coasters and trays
To prevent water and toiletry spills from causing damage, consider using coasters and trays on your bathroom backsplash. Place coasters under toiletry items like soap dispensers and toothbrush holders, and use trays under water-prone objects like cups or vases.
By following these cleaning and maintenance tips, you can ensure that your bathroom backsplash remains a focal point in your space. Take care of it, and it will continue to add beauty and functionality to your bathroom for years to come.
Enhancing Your Bathroom’S Visual Impact With Backsplash Accents
Enhancing Your Bathroom’s Visual Impact with Backsplash Accents
Your bathroom is not just a functional space; it is also an opportunity to showcase your personal style and creativity. One way to do this is by incorporating backsplash accents into your bathroom design. Backsplash accents can add texture, color, and visual interest to your bathroom walls, creating a stunning focal point that instantly elevates the overall aesthetic. In this article, we will explore three exciting ways to enhance your bathroom’s visual impact with backsplash accents.
Incorporating Decorative Border Tiles
One of the easiest and most effective ways to enhance your bathroom’s visual impact with backsplash accents is by incorporating decorative border tiles. These tiles can be placed along the edges of your backsplash to create a border that adds a touch of elegance and sophistication. Choose border tiles with intricate patterns or unique shapes to make a bold statement. Whether you prefer a classic or contemporary look, decorative border tiles can instantly transform your bathroom into a stylish and visually appealing space.
Creating Focal Points with Mosaic Designs
If you’re looking to make a statement, consider using mosaic designs as your backsplash accents. Mosaic tiles come in a wide range of colors, shapes, and sizes, allowing you to create beautiful patterns and designs. Whether you opt for a subtle gradient or a vibrant and bold mosaic, these accents can instantly become the focal point of your bathroom. By strategically placing mosaic designs behind your vanity or bathtub, you can draw attention to these areas and create a stunning visual impact that will leave a lasting impression.
Introducing Contrasting Colors and Textures
To add depth and visual interest to your bathroom, consider introducing contrasting colors and textures through your backsplash accents. For example, if your bathroom features neutral tones, you can create a striking contrast by incorporating a backsplash with bold and vibrant colors. Alternatively, you can play with textures by choosing tiles with a three-dimensional surface or a glossy finish. The contrasting colors and textures will not only enhance the visual appeal of your bathroom but also create a sense of depth and dimension that will make the space feel larger and more dynamic.
In conclusion, enhancing your bathroom’s visual impact with backsplash accents is an effective way to upgrade your space. By incorporating decorative border tiles, creating focal points with mosaic designs, and introducing contrasting colors and textures, you can transform your bathroom into a visually stunning oasis. Let your creativity shine and explore the endless possibilities that backsplash accents have to offer.
Frequently Asked Questions
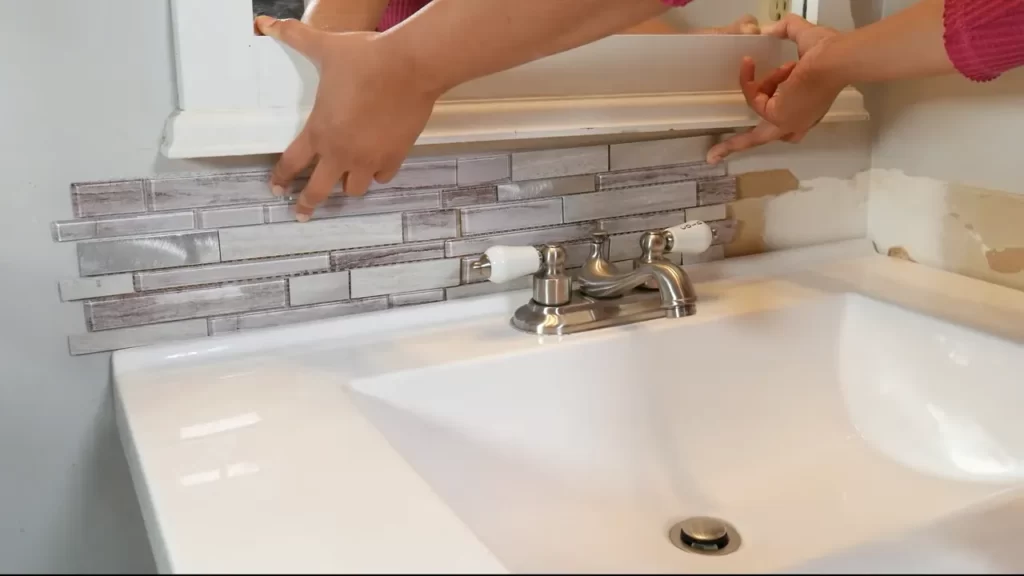
How Do You Attach A Backsplash To A Vanity?
To attach a backsplash to a vanity, follow these steps: 1. Measure and cut the backsplash material to fit. 2. Clean the vanity surface thoroughly. 3. Apply adhesive or construction adhesive to the back of the backsplash. 4. Press the backsplash firmly against the vanity, making sure it is level and aligned.
5. Allow the adhesive to dry completely before using the vanity.
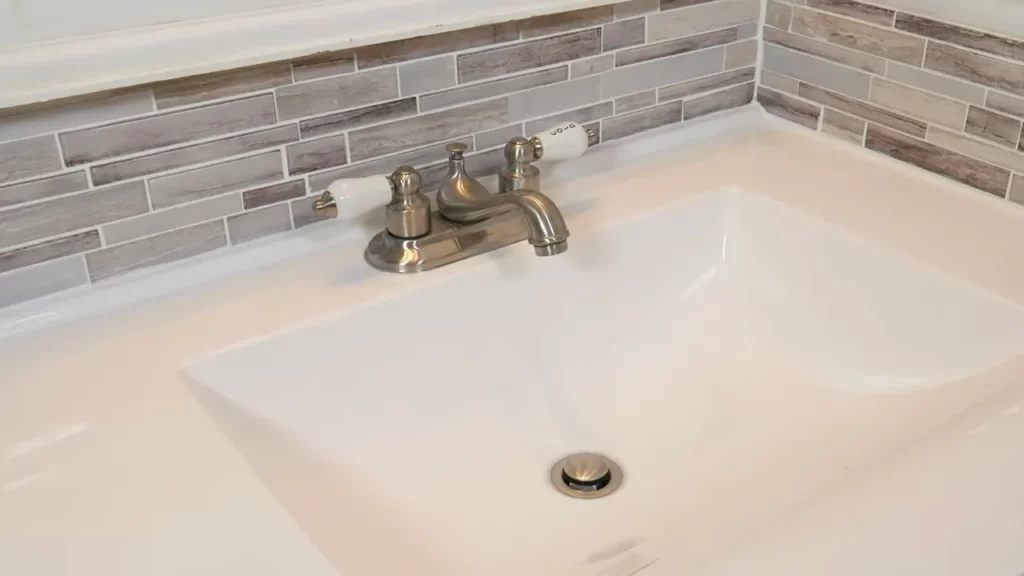
Should You Put A Backsplash In A Bathroom Counter?
Yes, it is recommended to have a backsplash for a bathroom counter. A backsplash protects the wall from water damage and adds a decorative touch to the space. It is a practical and stylish addition to any bathroom.
What Is The Easiest Backsplash To Install?
The easiest backsplash to install is peel and stick tiles. You can simply peel off the adhesive backing and stick them onto the wall. No mess or special tools required.
Is It Easy To Install Backsplash Yourself?
Yes, installing a backsplash yourself can be easy. With the right tools and materials, you can follow step-by-step instructions to accomplish the task. It saves money and gives you the freedom to customize your space. However, it requires some patience and attention to detail.
Conclusion
Installing a bathroom backsplash is a budget-friendly and rewarding DIY project that can elevate the look of your space. By following these simple steps and taking the time to choose the right materials, you’ll be able to achieve a stylish and functional backsplash that complements your bathroom decor.
Don’t be afraid to get creative and add your personal touch to make it truly unique. So, grab your tools and start transforming your bathroom today!