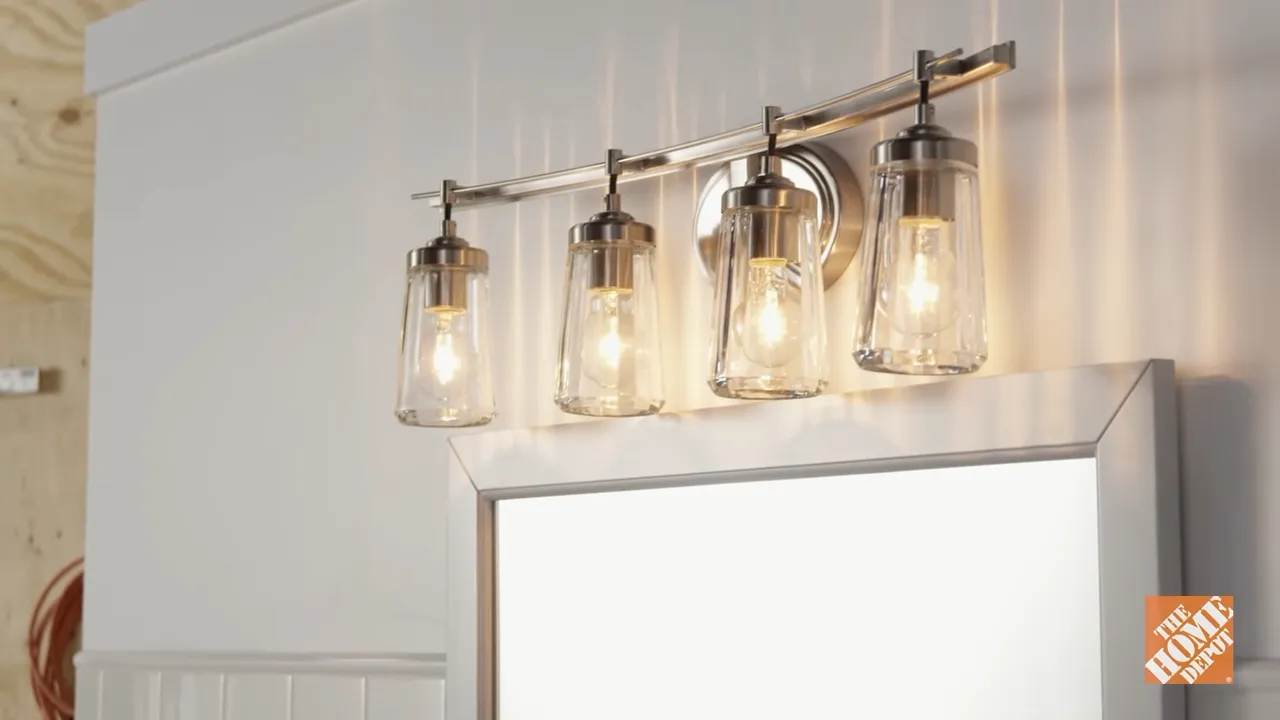
To install a bathroom vanity light, follow these steps: 1) Turn off the power supply. 2) Remove the old light fixture.
Installing a bathroom vanity light requires careful steps to ensure safety and proper functionality. Before beginning, make sure to turn off the power supply to the existing light fixture. To install the new light, start by removing the old fixture.
This will typically involve removing any decorative coverings and unscrewing the mounting plate from the wall. Once the old fixture is removed, you can proceed with installing the new vanity light.
Factors To Consider When Selecting A Vanity Light
Factors to Consider when Selecting a Vanity Light
When it comes to enhancing the overall aesthetics and functionality of your bathroom, selecting the right vanity light is crucial. The right lighting can create a warm and inviting atmosphere, while also providing ample illumination for your daily grooming routines. However, with so many options available in the market, it can be overwhelming to choose the perfect vanity light for your bathroom. To help you make the right decision, here are three key factors to consider when selecting a vanity light:
Size and Shape of the Light Fixture
The size and shape of the vanity light fixture plays a pivotal role in its overall visual impact and functionality within your bathroom. You’ll want to choose a light fixture that is proportionate to the size of your bathroom and the vanity it will be installed above. If you have a small bathroom or a narrow vanity, opt for a compact light fixture that won’t overwhelm the space. On the other hand, if you have a spacious bathroom or a large vanity, you can consider more elaborate and eye-catching light fixtures.
Style and Design of the Vanity Light
The style and design of the vanity light fixture should complement the overall aesthetic of your bathroom. Consider the existing design elements such as the bathroom hardware, faucets, and mirror frame to ensure a cohesive look. If your bathroom has a modern or minimalist theme, choose a vanity light with clean lines and a sleek finish. For a more traditional or vintage-inspired bathroom, opt for a light fixture that features ornate details and a classic finish. Remember, the vanity light should not only provide functional lighting but also add to the overall ambiance of the space.
Compatibility with the Bathroom Decor
The vanity light should seamlessly integrate with the existing decor of your bathroom. Consider the color palette and materials used in the bathroom and choose a light fixture that complements or contrasts with these elements. For example, if your bathroom has a predominantly white color scheme, a vanity light with a chrome or brushed nickel finish can add a touch of modern elegance. On the other hand, if your bathroom features warm earthy tones, a light fixture with a bronze or brass finish can enhance the cozy and inviting atmosphere.
Whether you are renovating your bathroom or simply looking to upgrade your vanity light, considering these factors will help you make an informed decision. Remember, the right size and shape, style and design, and compatibility with the bathroom decor should all be taken into account when selecting a vanity light. By carefully assessing these factors, you can ensure that your new vanity light not only illuminates your space effectively but also adds to the overall beauty and functionality of your bathroom.
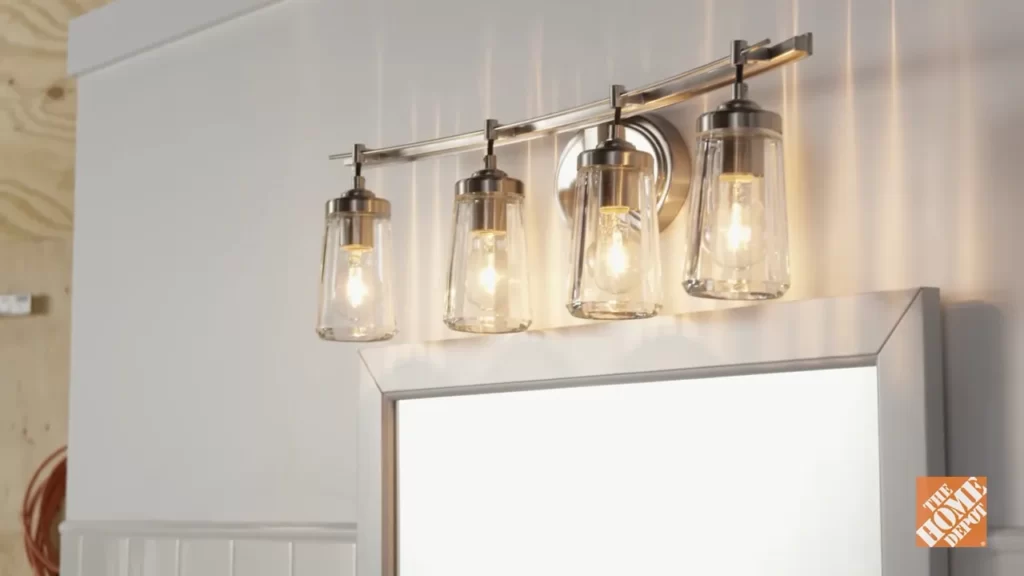
Determining The Correct Lighting For Your Bathroom
Installing a bathroom vanity light can greatly enhance the overall ambiance and functionality of your bathroom. However, choosing the right lighting for your space can be a bit overwhelming. With various options available, it’s important to determine the correct lighting that suits your needs and preferences. This section will guide you through the process of assessing the current lighting in your bathroom, understanding the different types of lighting, and considering the lighting needs in the vanity area.
Assessing the Current Lighting in the Bathroom
Before you embark on installing a vanity light, take some time to assess the current lighting situation in your bathroom. This will help you identify any existing issues or shortcomings that need to be addressed. Here are a few factors to consider:
- The brightness of the existing lighting: Is the lighting in your bathroom too bright or too dim? Does it create harsh shadows or uneven illumination?
- The placement of the current light fixtures: Are the current light fixtures positioned effectively to provide adequate lighting throughout the room?
- The color temperature of the light bulbs: Are the light bulbs warm or cool in tone? Do they create a soothing or harsh lighting effect?
- The functionality of the current lighting: Does the lighting in your bathroom meet your daily needs? Do you require additional task lighting or ambient lighting?
By evaluating these aspects, you can pinpoint areas where improvements are needed, allowing you to make more informed decisions when selecting a vanity light.
Understanding the Different Types of Lighting
Now that you have assessed the current lighting situation, it’s essential to acquaint yourself with the different types of lighting available for your bathroom:
| Type of Lighting | Description |
|---|---|
| Ambient Lighting | Provides overall illumination to the entire bathroom space. It is often achieved through ceiling-mounted fixtures or recessed lights. |
| Task Lighting | Offers focused lighting for specific activities such as applying makeup, shaving, or grooming. Wall sconces or pendant lights placed near the vanity area are commonly used for this purpose. |
| Accent Lighting | Highlights architectural features or decor elements in the bathroom, adding visual interest and depth. It can be achieved using spotlights, track lighting, or even LED strips. |
Understanding the different types of lighting will help you create a layered lighting scheme that combines various types to fulfill both functional and aesthetic requirements.
Considering the Lighting Needs in the Vanity Area
The vanity area is where precise lighting is particularly crucial. When installing a bathroom vanity light, it’s important to consider the following:
- The size and layout of the vanity: Is the vanity area large or small? Does it have one or multiple sinks? The size and shape of the vanity will determine the number of light fixtures needed and their placement.
- The desired lighting effect: Do you want the light to be evenly distributed or prefer a more dramatic effect? The positioning and direction of the light fixtures will play a significant role in achieving the desired outcome.
- The color of the light bulbs: The color temperature of the bulbs can greatly impact the appearance of your skin tone and the overall ambiance of the space. Consider using bulbs with a neutral or warm tone for a flattering effect.
By carefully considering the lighting needs in the vanity area, you can create a functional and visually appealing space.
Remember, determining the correct lighting for your bathroom is crucial to enhance its functionality and aesthetics. Assessing the current lighting, understanding different types of lighting, and considering the specific needs of the vanity area are essential steps in achieving the perfect lighting setup. Soon, you’ll be enjoying a beautifully illuminated bathroom that suits both your practical and aesthetic requirements.

Gathering The Necessary Tools And Materials
Before you begin installing a bathroom vanity light, it’s essential to gather all the necessary tools and materials. By having everything you need at hand, you can streamline the installation process and ensure a successful outcome. Here are the key items you will need:
Vanity Light Fixture
The first item on your list should be the vanity light fixture itself. Choose a fixture that complements the style and size of your bathroom. Whether you prefer a sleek and modern design or a more traditional look, make sure to select a fixture that fits your personal taste and the overall aesthetic of your bathroom space.
Screwdriver
A screwdriver is an essential tool for installing a bathroom vanity light. You may need both a flat-head and a Phillips-head screwdriver, depending on the type of screws used in your specific light fixture. Be sure to have a sturdy screwdriver on hand to ensure proper fitting and secure installation.
Wire Nuts
Wire nuts are small plastic caps used to connect and secure electrical wires together. These nuts come in various sizes, so it’s important to select the ones that match the gauge of your wires. Wire nuts create a safe and reliable connection, ensuring that your vanity light fixture operates correctly.
Electrical Tape
Electrical tape is another crucial item for installing a bathroom vanity light. This tape is used to insulate and protect exposed wires, reducing the risk of electrical shock or short circuits. Make sure to choose high-quality electrical tape that is suitable for use in wet bathroom environments.
Wire Strippers
Wire strippers are specialized tools designed to remove the insulation from electrical wires. They allow you to precisely strip the necessary length of wire, ensuring a clean and precise connection. Having wire strippers on hand will make the installation process much easier and more efficient.
Now that you know which tools and materials you will need to install a bathroom vanity light, you’re ready to move on to the next steps of the installation process. Having these items nearby will ensure a hassle-free and successful installation.
Turning Off The Electricity Supply
Before you start installing your new bathroom vanity light, it is absolutely crucial to ensure your safety by turning off the electricity supply. Working with live wires can be extremely dangerous, so taking the right precautions is essential. Follow these simple steps to turn off the power to the bathroom:
Locating the Circuit Breaker
Firstly, you will need to locate the circuit breaker that controls the power to your bathroom. The circuit breaker is typically found in the main electrical panel, which could be located in your basement, garage, or utility room. It is essential to know the exact location of your circuit breaker to ensure an accurate shutdown of the power supply.
Switching Off the Power to the Bathroom
Once you have located the circuit breaker, it’s time to switch off the power to the bathroom. Carefully open the electrical panel and look for the corresponding switch or breaker that controls the bathroom’s electricity. Typically, bathroom lights are connected to a specific breaker labeled as ‘bathroom’ or ‘lights.’ Flip the switch to the ‘off’ position or push the breaker handle to the ‘off’ position to cut off the power supply.
Verifying the Electricity is Off
Now that you have turned off the power supply, it’s important to double-check that the electricity is completely off before proceeding with the installation. Use a non-contact voltage tester or a multimeter to verify that there is no electric current in the wires. This step is necessary to ensure your safety and prevent any accidents.
Once you have verified that the electricity is off, you can confidently proceed with installing your bathroom vanity light. Remember, your safety should always be the top priority, so never overlook the importance of turning off the electricity supply before beginning any electrical work.
Removing The Old Vanity Light
When it’s time to update your bathroom vanity light, the first step is to remove the old fixture. This is an important task to ensure a successful installation of the new light. In this section, we will guide you through the process of removing the old vanity light, step by step.
Removing the Light Bulbs
Before you begin, make sure the power to the vanity light is turned off. Locate the switch or circuit breaker that controls the power to the fixture and switch it off. Once the power is off, you can safely remove the light bulbs from the old fixture. Twist the bulbs counterclockwise until they loosen and then carefully pull them out. Set the bulbs aside for later use or dispose of them properly if they are no longer working.
Taking off the Light Fixture Cover
After removing the light bulbs, the next step is to take off the light fixture cover. Most covers are held in place with screws or clips. Carefully inspect the cover to determine how it is secured. If there are screws, use a screwdriver to unscrew them, and if there are clips, squeeze them to release the cover. Once the screws or clips are loosened, gently pull the cover away from the wall to expose the mounting plate and wiring behind it.
Unscrewing the Mounting Plate
With the cover removed, the mounting plate of the old vanity light is now visible. It is typically attached to the wall with screws or bolts. Locate these fasteners and use a suitable tool, such as a screwdriver or wrench, to unscrew them. Remember to keep one hand supporting the light fixture as you remove the last screw or bolt to prevent it from falling. Once all the fasteners are loosened, carefully slide the old fixture away from the wall and disconnect any wiring connected to it.
By following these steps, you have successfully removed the old vanity light and are now ready to install the new bathroom vanity light. Keep in mind that it’s always a good idea to consult the manufacturer’s instructions for your specific light fixture for any additional steps or considerations. Now, let’s move on to the exciting part – installing the new vanity light!
Attaching The Mounting Plate
Attaching the mounting plate is a crucial step in the installation process of your bathroom vanity light. This plate serves as a stabilizing base for the light fixture and ensures that it is securely mounted to the wall. In this section, we will walk you through the steps to position, drill holes, and secure the mounting plate in place.
Positioning the Mounting Plate on the Wall
The first step in attaching the mounting plate is to position it correctly on the wall. Begin by determining the desired height for your vanity light. Keep in mind that the ideal height is typically around eye level, ensuring optimal illumination without causing harsh shadows.
Once you have determined the height, use a level and measuring tape to mark the desired position on the wall. Make sure to mark both the top and bottom edges of the mounting plate for accuracy.
Drilling Holes for the Mounting Screws
After positioning the mounting plate, it’s time to drill holes for the mounting screws. Using an electric drill and a drill bit appropriate for the job, carefully drill holes at the marked positions. Take caution to drill straight into the wall to ensure the screws will sit securely.
A helpful tip is to choose a drill bit size slightly smaller than the diameter of the mounting screws. This will provide a snug fit and prevent the screws from becoming loose over time.
Securing the Mounting Plate in Place
With the holes drilled, you are now ready to secure the mounting plate in place. Begin by inserting the mounting screws into the holes, making sure they are aligned with the mounting plate.
Using a screwdriver, turn the screws clockwise until they are firmly tightened against the wall. Avoid overtightening, as this may damage the wall or strip the screw threads.
Once all the screws are securely tightened, give the mounting plate a gentle tug to ensure it is stable and firmly attached to the wall. If it feels loose or wobbly, adjust the screws until it is securely in place.
Now that the mounting plate is properly attached, you can move on to the next step of installing your bathroom vanity light. Stay tuned for our next section on connecting the wires and attaching the light fixture!
Connecting The Wiring
Matching the Wires of the Light Fixture and the House
Before you can connect the wiring for your new bathroom vanity light, you’ll need to make sure that the wires from the light fixture and the house are properly matched. This ensures that the electrical connection is safe and reliable. To do this, you’ll need to identify the wires. Typically, the wires in your house will be color-coded: black for hot, white for neutral, and green or bare copper for ground. The light fixture wires may also be color-coded, but if they’re not, they should at least be labeled.
Twisting the Matching Wires Together
Once you’ve identified the matching wires, it’s time to twist them together. Start by stripping about half an inch of insulation from the end of each wire. This will expose the metal conductor underneath. Then, hold the matching wires side by side and twist them together in a clockwise direction. The twisting motion helps to create a secure and tight connection. Be sure to hold the wires firmly as you twist to ensure a solid connection. If the wires are too short to twist together, you may need to use wire connectors to join them.
| Wire Color | House Wire | Light Fixture Wire |
|---|---|---|
| Black | Hot | Hot |
| White | Neutral | Neutral |
| Green or bare copper | Ground | Ground |
Securing the Connection with Wire Nuts
After twisting the matching wires together, you’ll need to secure the connection using wire nuts. Wire nuts are small plastic caps with twist-on tops that are designed to hold the twisted wires together and protect the connection. To use a wire nut, simply place it over the twisted wires and twist it clockwise until it’s snug. Make sure all exposed wire is covered by the wire nut and that none of the wires are poking out. You can also use electrical tape to further secure the wire nut if desired.
Now that you’ve successfully connected the wiring for your bathroom vanity light, you can proceed with the rest of the installation. Remember to turn off the power at the breaker before working with any electrical connections, and always double-check your work to ensure a safe and reliable installation.
Installing The Vanity Light Fixture
Installing the Vanity Light Fixture
Installing a new vanity light fixture in your bathroom is a great way to upgrade the style and functionality of the space. Whether you’re replacing an old fixture or adding a new one, this step-by-step guide will walk you through the process. In this section, we will focus on the installation of the vanity light fixture.
Aligning the Light Fixture with the Mounting Plate
Before you begin, make sure you have turned off the power to the bathroom circuit by flipping the corresponding breaker switch in your electrical panel. Once the power is off, remove the existing light fixture by unscrewing the mounting screws and disconnecting the wires.
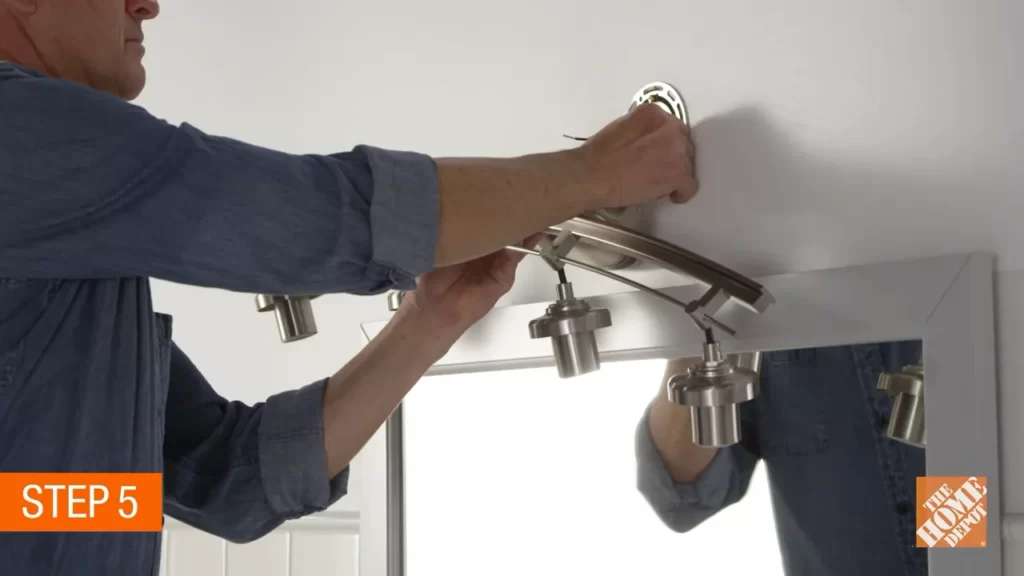
Begin by aligning the mounting plate with the electrical box in the wall. The mounting plate is typically a metal or plastic bracket that attaches to the electrical box and provides support for the light fixture. Use a level to ensure the plate is straight and adjust as needed.
Attaching the Fixture to the Mounting Plate
Once the mounting plate is aligned, it’s time to attach the new fixture. Carefully thread the wires from the fixture through the center hole of the mounting plate. Then, align the holes on the back of the fixture with the mounting screws on the plate.
Place the fixture onto the mounting plate and align the holes on the fixture with the mounting screws. Insert the screws into the holes and tighten them with a screwdriver. Make sure the fixture is securely attached to the mounting plate.
Tightening the Screws to Secure the Fixture
After attaching the fixture, it’s important to tighten the screws to ensure the fixture is securely mounted. Use a screwdriver to tighten each screw, starting with the top screw and working your way down. Ensure that the fixture is level and aligned properly with the wall.
Finally, restore power to the bathroom circuit by flipping the breaker switch back on. Test the vanity light to ensure it is functioning correctly.
Following these steps will help you successfully install a new vanity light fixture in your bathroom. Remember to always prioritize safety by working with the power turned off and consulting a professional if you are unsure about any step of the process.
Restoring The Power Supply
After successfully installing the bathroom vanity light, the next important step is to restore the power supply. Restoring the power is crucial to ensure that the vanity light is functioning properly and to avoid any potential electrical hazards. In this section, we will guide you through the process of switching on the power, checking the functionality of the vanity light, and ensuring proper electrical connections.
Switching On the Power to the Bathroom
To restore the power supply to your bathroom, follow these simple steps:
- Locate the main electrical panel in your home. It is usually found in the basement, garage, or utility room.
- Open the electrical panel door by removing the screws or simply lifting the latch, depending on the type of panel you have.
- Identify the circuit breaker that controls the bathroom’s power supply. The breaker should be labeled, but if it isn’t, you can switch off the main breaker to cut power to the entire house temporarily, and then turn it back on while someone in the bathroom checks which lights or outlets have lost power.
- Flip the circuit breaker switch for the bathroom power supply to the “on” position. You should hear a click as the breaker engages.
- Once the power is turned on, test the other lights and outlets in the bathroom to ensure that they are functioning properly.
Checking the Functionality of the Vanity Light
After restoring the power supply, it’s important to check the functionality of the newly installed vanity light. Here’s how:
- Stand at a safe distance from the vanity light, switch it on, and observe if it illuminates properly.
- If the vanity light doesn’t turn on, make sure the light bulbs are properly connected and not burned out. Replace any faulty bulbs if necessary.
- Check the wall switch to ensure it is in the “on” position. Sometimes, the switch may have been unintentionally turned off during the installation process.
- If the vanity light still doesn’t work, there may be an issue with the electrical connections. In that case, proceed to the next section to ensure proper electrical connection.
Ensuring Proper Electrical Connection
Proper electrical connection is vital to ensure the safety and functionality of the bathroom vanity light. Here are the steps to ensure a secure electrical connection:
- Double-check all electrical connections to ensure they are secure and properly insulated. Loose connections could lead to flickering lights or power issues.
- If you notice any loose or exposed wires, turn off the power supply at the circuit breaker before proceeding. Use electrical tape to fix any exposed wires and secure all wire nuts tightly.
- Check if the ground wire is connected securely. The ground wire is usually green and must be connected to the ground screw on the metal mounting plate.
- After ensuring all connections are secure, restore the power supply to the bathroom and test the vanity light again to ensure it is working correctly.
By carefully following these steps to restore the power supply, check the functionality, and ensure proper electrical connection, you can enjoy a well-lit and safe bathroom vanity space. Remember to always prioritize safety and consult a professional if you are unsure about any aspect of the installation process.
Reassembling The Vanity Area
Once you have successfully removed the old bathroom vanity light and installed the new one, it’s time to reassemble the vanity area to complete the transformation. This final step will bring everything together and leave you with a beautifully illuminated and functional space. In this section, we will walk you through the process of reattaching the light fixture cover, installing the light bulbs, and tidying up the vanity area.
Reattaching the Light Fixture Cover
Now that the light fixture is securely mounted to the wall, it’s time to reattach the light fixture cover. This cover not only adds a finished look to the vanity light but also helps protect the wiring inside. Follow these steps:
- Locate the light fixture cover that came with your vanity light. Ensure it is clean and free from any dust or debris.
- Align the cover with the base of the light fixture. Make sure the screw holes on the cover match up with the screw holes on the light fixture.
- Using a screwdriver, insert and tighten the screws to secure the cover in place. Be careful not to overtighten, as this may damage the cover or the light fixture.
- Once the screws are tightened, give the cover a gentle tug to ensure it is securely attached. If it feels loose, double-check the screws and tighten them if necessary.
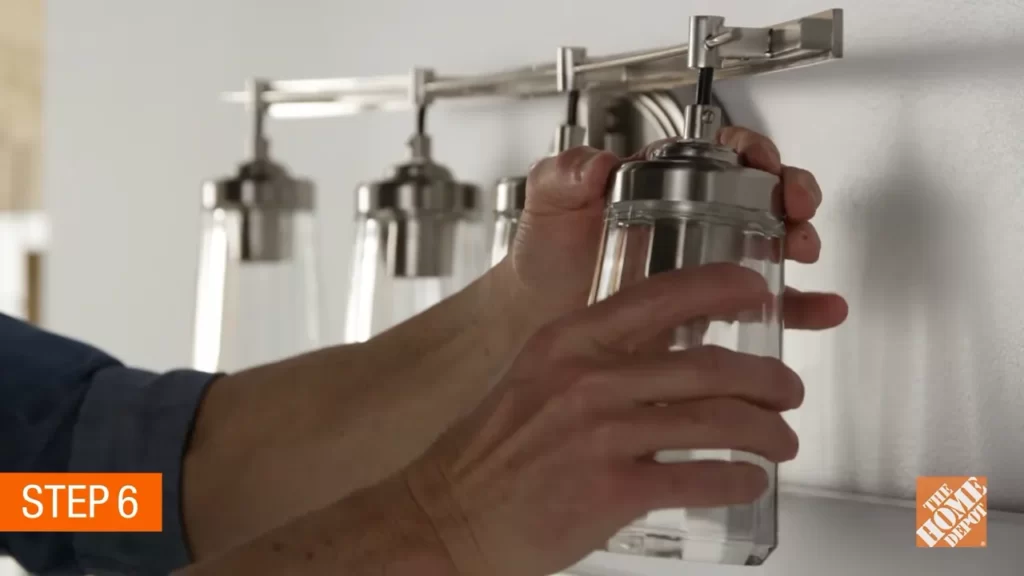
Installing the Light Bulbs
With the light fixture cover in place, it’s time to install the light bulbs. Follow these steps to ensure proper installation:
- Refer to the manufacturer’s instructions to determine the maximum wattage and type of light bulbs to use with your vanity light.
- Unpack the light bulbs from their packaging, making sure to handle them with care to avoid any breakage.
- Insert the light bulbs into the corresponding sockets on the light fixture. Twist them clockwise until they are securely in place.
- Turn on the light switch to test the bulbs. If they do not illuminate, double-check the installation and make sure the bulbs are correctly inserted.
Cleaning and Organizing the Vanity Area
Now that the bathroom vanity light is fully installed, take a moment to clean and organize the vanity area for a fresh and inviting look. Follow these tips:
- Remove any dust, dirt, or debris from the vanity countertop using a gentle cleanser and a microfiber cloth.
- Sort through your toiletries and organize them neatly in designated storage containers or baskets.
- Consider adding small organizers, such as drawer dividers or shelf risers, to maximize space and keep items easily accessible.
- Take the opportunity to declutter any unnecessary items and donate or dispose of them.
By reattaching the light fixture cover, installing the light bulbs correctly, and cleaning and organizing the vanity area, you have successfully completed the installation of your new bathroom vanity light. Enjoy your well-lit and revitalized space!
Frequently Asked Questions
How Do You Hook Up A Bathroom Vanity Light Fixture?
To hook up a bathroom vanity light fixture, follow these steps: 1. Turn off the power to the bathroom. 2. Remove the old light fixture. 3. Connect the wires from the new fixture to the corresponding wires in the wall.
4. Attach the fixture to the wall. 5. Turn on the power and test the light.
Are Vanity Lights Easy To Install?
Yes, vanity lights are easy to install. They come with clear instructions and typically require basic tools and basic knowledge of electrical connections.
Can I Install A Bathroom Light Myself?
Yes, you can install a bathroom light yourself. Just ensure you follow safety guidelines and have the necessary tools. Turn off the power, remove the old light, connect the wires of the new light following the manufacturer’s instructions, and securely mount the fixture.
Should Bathroom Vanity Light Hang Over Mirror?
Yes, bathroom vanity lights should hang over the mirror. It provides even and adequate lighting for grooming tasks, such as applying makeup or shaving. By placing the lights above the mirror, you can minimize shadows on your face and create a well-lit space in your bathroom.
Conclusion
To sum up, installing a bathroom vanity light is a manageable task that can make a significant impact on the overall look and functionality of your bathroom. By following these simple steps, you can transform your space with a beautiful and illuminated vanity area.
Remember to take the time to plan, gather the necessary tools, and follow safety precautions throughout the process. With a little patience and effort, you can achieve professional-looking results and enjoy the benefits of a properly lit bathroom.
