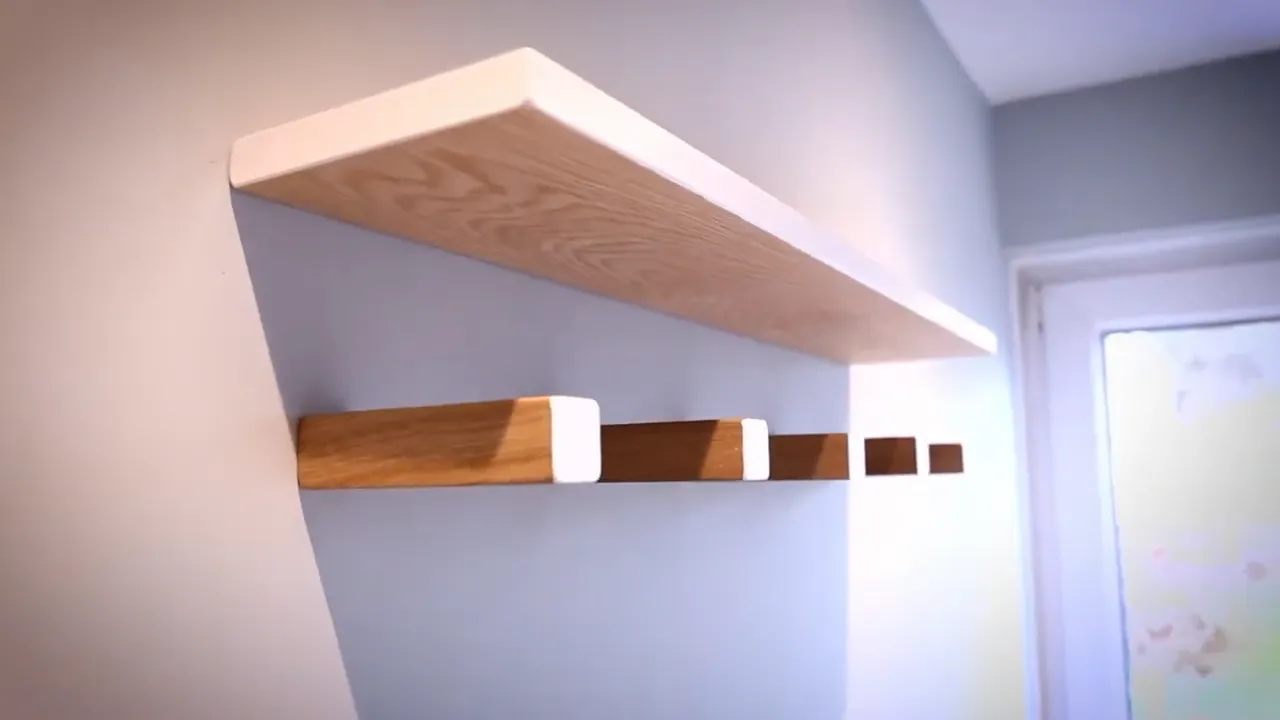
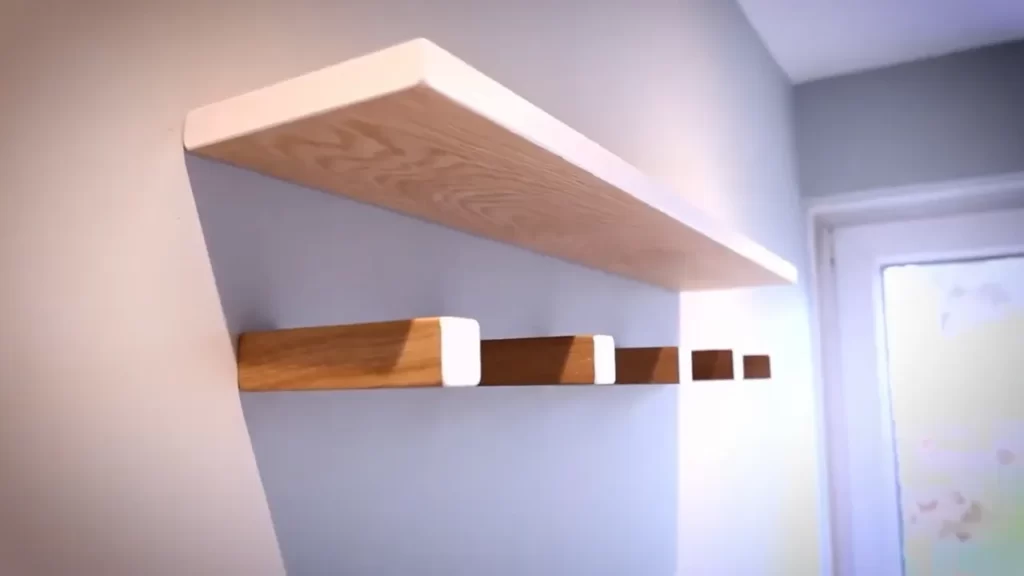
To install a floating mantel on drywall, first, locate the studs using a stud finder. Then, mark the desired height and line up the floating brackets with the stud marks.
Attach the brackets securely to the wall studs and slide the mantel onto the brackets for a sturdy and stylish installation. Introducing a floating mantel to your space can add beauty and functionality to any room. Whether you want to display cherished photographs, decorative items, or create a focal point above a fireplace, a floating mantel provides the perfect solution.
Installing a floating mantel on drywall is a relatively simple process that can be completed with a few basic tools and some careful attention to detail. In this guide, we will walk you through the step-by-step process of installing a floating mantel on drywall, ensuring a secure and appealing result. So let’s get started!
Tools And Materials Needed
To install a floating mantel on drywall, you will need a few essential tools and materials. These items will help ensure a smooth and secure installation, allowing you to enjoy your new mantel for years to come. Let’s take a look at what you’ll need:
Stud Finder
A stud finder is a must-have tool when installing a floating mantel on drywall. It allows you to locate the studs behind the drywall, which are crucial for providing the necessary support for the mantel. By finding and attaching the mantel to the studs, you can ensure its stability and prevent any accidents or damage.
Level
A level is another essential tool for this installation. It helps you ensure that the mantel is perfectly horizontal and straight. This is important for both the appearance and functionality of the mantel. A level will help you achieve a polished and professional look, making your mantel a focal point in the room.
Drill
A drill is necessary for drilling pilot holes into the drywall and the studs. These pilot holes will make it easier to insert the screws and anchors securely. Make sure to choose the right drill bit size according to the type of screws or anchors you will be using.
Screws
Screws are used to attach the mantel to the studs. It’s important to choose screws that are long enough to ensure a secure hold, but not too long that they penetrate through the drywall. Depending on the weight of your mantel and the type of wall you have, you may need different types and sizes of screws.
Wall Anchors (if necessary)
If you’re unable to attach the mantel directly to the studs, you may need to use wall anchors. These anchors provide additional support by gripping the drywall and distributing the weight of the mantel more evenly. Wall anchors come in various types and sizes, so be sure to select the ones that are suitable for your specific mantel and wall conditions.
Screwdriver
A screwdriver is required to drive the screws into the pilot holes. Select a screwdriver that matches the head type of your screws to ensure a snug fit. An electric screwdriver or drill with a screwdriver attachment can make the installation process faster and easier.
Tape Measure and Pencil
To ensure precise measurements and markings, a tape measure and pencil are essential. Measure the desired height and position of the mantel on the wall and mark the locations for the screws and anchors accordingly. A pencil will allow you to easily adjust your markings if needed.
Spirit Level
A spirit level is used to double-check that the mantel is perfectly level after installation. It ensures that the mantel is balanced and enhances its overall aesthetic appeal. Place the spirit level on top of the mantel to confirm that it is not slanted or tilted.
With these necessary tools and materials on hand, you’ll be well-prepared to install your floating mantel on drywall. Investing time and effort into a proper installation will ensure a beautiful and functional addition to your home.
Step 1: Finding The Ideal Location For The Floating Mantel
Before you embark on the journey of installing a floating mantel on drywall, it is crucial to determine the ideal location for it. This step ensures that your mantel will not only serve as a stylish focal point but also be securely attached to your wall. Here are a few essential considerations to help you find the perfect spot for your floating mantel:
Determining the desired height and position on the wall
Firstly, decide on the height and position of your floating mantel on the wall. This will dictate how it complements your existing decor and suits your personal preferences. Take into account the overall design aesthetic of the room and how the mantel will interact with other elements such as furniture, artwork, and lighting. A well-placed mantel can enhance the visual appeal of a space and provide a functional display area for decorative items or family photographs.
Locating the wall studs for a secure installation
Next, it is crucial to locate the wall studs to ensure a secure and stable installation. Wall studs provide the necessary support for your floating mantel, preventing it from falling or sagging over time. To find the studs, you can use a stud finder, a handy tool that detects the presence of wooden or metal studs hidden behind the drywall.
Tip: When using a stud finder, make sure to follow the manufacturer’s instructions carefully for accurate stud detection. It is also recommended to mark the stud locations with a pencil to make the installation process smoother.
Once you have located the studs, you can determine if the desired location for your floating mantel aligns with the stud positions. Ideally, you will want to position the mantel in a way that allows you to secure it directly into the studs for maximum stability.
| Benefits of Securing Mantel to the Studs |
|---|
|
If your desired mantel location does not align with the stud positions, you may need to consider alternative installation methods. These might involve using wall anchors or other appropriate hardware to provide the necessary support for your mantel.
Note: It is crucial to consult the manufacturer’s instructions or seek professional advice when determining the appropriate installation method for your particular floating mantel.
By following these steps and determining the ideal location for your floating mantel, you will be off to a great start in achieving a stunning and secure mantel installation.
Step 2: Measuring And Marking The Wall
Once you have gathered all the necessary tools and materials, it’s time to start measuring and marking the wall for the floating mantel installation. This step is crucial as it ensures that your mantel will be level and centered on the wall. Follow these simple steps to get started:
Measuring the desired length of the mantel
The first thing you need to do is measure the desired length of your mantel. Use a tape measure to determine the exact length you want the mantel to be. Make sure to take accurate measurements as this will determine the final appearance of your mantel.
Transferring the measurements onto the wall using a tape measure and pencil
Next, transfer the measurements from the tape measure onto the wall using a pencil. Start by marking the center point of where you want the mantel to be positioned. Then, measure and mark the corresponding points on each side of the center mark to indicate the full length of the mantel.
If you’re installing the mantel above a fireplace, it’s important to consider the fireplace opening and any other obstructions that may affect the placement of the mantel. Ensure that the measurements are adjusted accordingly to accommodate the specific requirements of your space.
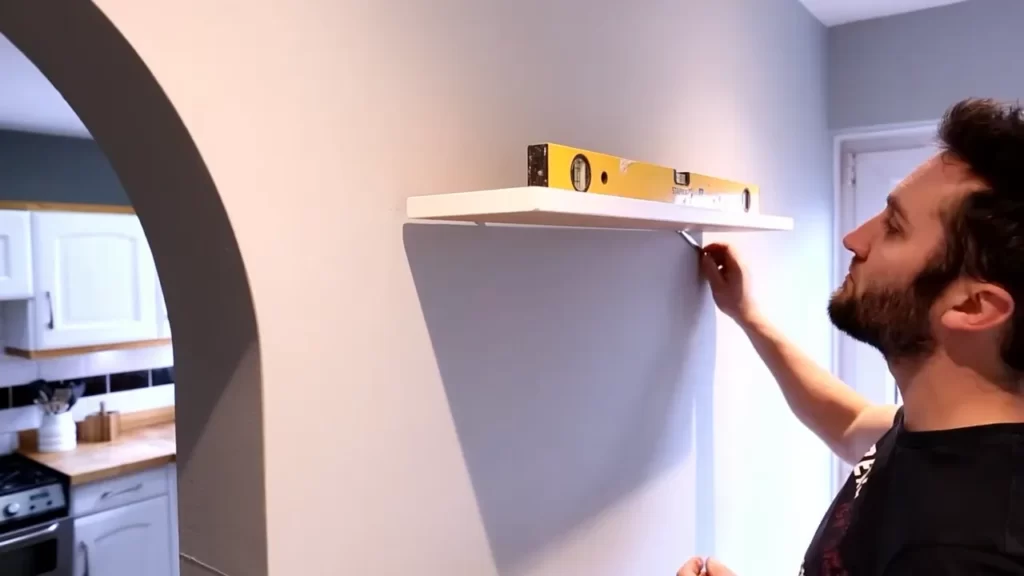
Using a level to ensure straight and even markings
One of the most important aspects of a floating mantel installation is ensuring that it is level and straight. To achieve this, use a level to check the accuracy of your markings. Place the level against the markings on the wall and make any necessary adjustments to ensure that the line is perfectly straight.
Take your time with this step, as it will greatly impact the final appearance of your mantel. A perfectly level and straight mantel will enhance the overall aesthetic and add a touch of professionalism to your installation.
By measuring and marking the wall accurately, you are setting yourself up for a successful floating mantel installation. With the proper measurements in place, you can move on to the next step of the installation process.
Step 3: Preparing The Mantel For Installation
Now that you have measured and marked the wall for the floating mantel installation, it’s time to prepare the mantel itself. This step ensures that the mantel looks its best and is ready for a seamless installation. There are a few crucial tasks to complete in order to achieve a professional finish.
Sanding any rough edges or imperfections on the mantel
Begin by carefully inspecting the mantel for any rough edges or imperfections. Even though the mantel may come pre-sanded, it’s important to double-check for any small bumps or rough spots. These imperfections can affect the overall appearance of the mantel once it’s installed on the wall. To remedy this, take a fine-grit sandpaper and gently sand the rough areas until they are smooth to the touch.
Applying a wood stain or paint, if desired
Next, consider if you would like to apply a wood stain or paint to the mantel. This step is optional and depends on your personal preference and the overall aesthetic of the room. If you choose to stain the mantel, select a high-quality wood stain that complements the existing décor. Alternatively, if you prefer a painted finish, choose a suitable paint color that pairs well with the rest of the room. Applying a wood stain or paint can enhance the beauty of the mantel and protect it from potential damage over time.
Allowing sufficient time for the finish to dry completely
Once you have sanded any rough edges and applied a wood stain or paint, it’s crucial to allow sufficient time for the finish to dry completely. This ensures a durable finish that will last for years to come. Refer to the manufacturer’s instructions for the recommended drying time, as it may vary depending on the specific product used. Avoid rushing this step, as improper drying can lead to a subpar finish or even damage to the mantel itself.
By following these steps and taking the time to properly prepare the mantel for installation, you are one step closer to achieving a stunning floating mantel in your space. Take pride in the attention to detail and enjoy the process of transforming your blank wall into a focal point that adds charm and character to your home.

Step 4: Mounting The Wall Anchors (If Needed)
Step 4: Mounting the Wall Anchors (if needed)
Now that you have determined the weight of your floating mantel, it’s time to move on to mounting the wall anchors. Wall anchors provide the necessary support and stability for your mantel, ensuring that it stays securely in place on your drywall. In this step, we will guide you through the process of choosing the appropriate wall anchors based on the weight of your mantel, pre-drilling holes for the wall anchors, and inserting them securely into the holes.
Choosing the appropriate wall anchors based on the weight of the mantel
First and foremost, it’s important to select the right wall anchors that can bear the weight of your mantel. Different wall anchors have different weight capacities, so you’ll want to choose ones that match or exceed the weight of your mantel. This will ensure that your mantel is properly supported and won’t pose any safety risks.
Pre-drilling holes for the wall anchors
To prepare your drywall for the wall anchors, you’ll need to pre-drill holes in the designated spots. Use a drill bit that is slightly smaller than the diameter of the wall anchors you’ve chosen. This will create a snug fit for the anchors, ensuring they stay securely in the wall. Make sure to measure and mark the spots where the holes need to be drilled, aligning them with the mounting brackets or holes on the back of your mantel.
Inserting the wall anchors securely into the holes
Once you’ve pre-drilled the holes, it’s time to insert the wall anchors. Take each wall anchor and line it up with the corresponding hole. With a firm grip, push the anchor into the hole until it is flush with the surface of the drywall. You can use a hammer or a mallet to gently tap the anchors in if needed. Ensure that each wall anchor is inserted securely and doesn’t wobble or move around in the hole.
If you have multiple wall anchors, make sure they are all inserted before moving on to the next step. This will ensure that your floating mantel is properly supported and won’t tilt or sag over time.
In conclusion, mounting the wall anchors is an important step in installing a floating mantel on drywall. By choosing the appropriate wall anchors based on the weight of your mantel, pre-drilling the holes accurately, and inserting the anchors securely into the holes, you can ensure that your mantel is safely installed and ready to enhance the aesthetic appeal of your space. Following these steps will provide you with a durable and reliable mounting solution for your floating mantel.
Step 5: Attaching The Mounting Bracket To The Wall
Now that you have marked the position of your floating mantel and pre-drilled the holes, it’s time to attach the mounting bracket to the wall. This step is crucial as it ensures the stability and safety of your floating mantel.
Holding the mounting bracket against the marked position on the wall
Take the mounting bracket and position it carefully against the marked spot on the wall. Make sure it aligns perfectly with the marks you made earlier. Use a level to ensure the bracket is straight and not tilted.
Using a level to ensure proper alignment
Using a level is essential to achieve a straight and leveled floating mantel. Place the level on top of the mounting bracket and adjust it until the bubble is centered. This will ensure that your mantel will be straight and visually appealing.
Marking the position of the screw holes on the wall with a pencil
Once the mounting bracket is in the correct position and level, it’s time to mark the position of the screw holes that will secure the bracket to the wall. Use a pencil to make small marks through the holes on the bracket onto the wall surface. These marks will serve as a guide when drilling the screws.
Ensure that the marks are clearly visible and aligned accurately with the bracket. This will help you avoid any mistakes while drilling, ensuring a secure attachment for your mantel.
By following these steps, you are now ready to move on to the next step, which involves drilling the pilot holes and attaching the screws to secure the mounting bracket to the wall.
Step 6: Installing The Floating Mantel Onto The Mounting Bracket
Now that you have successfully mounted the bracket onto the wall, it’s time to take the final step in the installation process – placing the mantel onto the bracket and securing it firmly in place. This step is crucial to ensure your floating mantel remains stable and safe for use. Let’s dive in and get started!
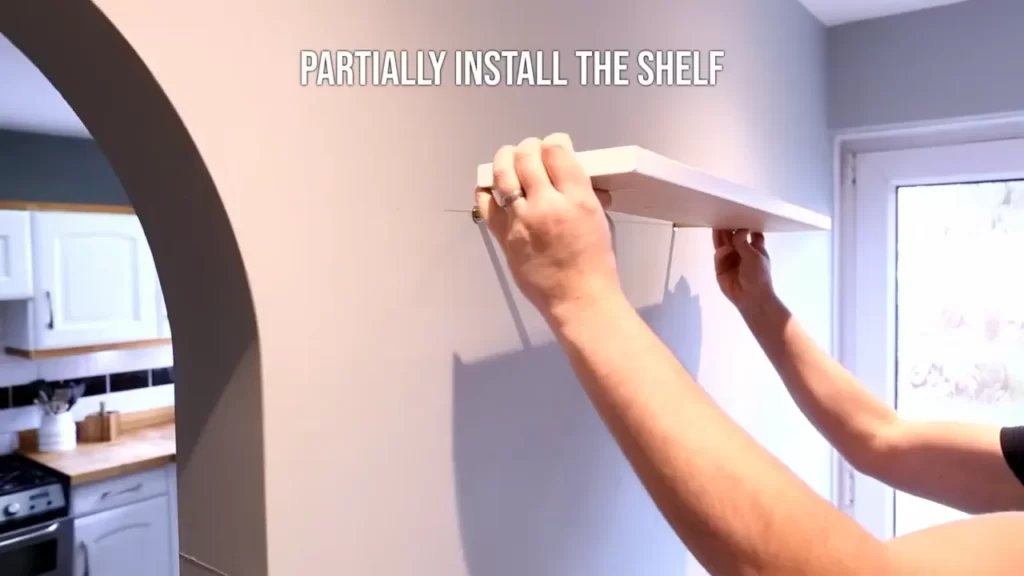
Placing the mantel onto the bracket, adjusting as necessary for proper fit
Begin by carefully lifting the floating mantel and positioning it directly above the mounting bracket. This step requires some precision, so take your time to ensure the mantel is aligned properly.
Lower the mantel onto the bracket, making sure it fits snugly. You may need to adjust the positioning slightly to achieve the desired fit. Gently slide the mantel back and forth or side to side until it aligns perfectly with the wall and the bracket. This adjustment process allows you to achieve a seamless and professional-looking installation.
Securing the mantel to the bracket using screws and a screwdriver
Once the mantel is properly placed and aligned, it’s time to secure it to the mounting bracket. Grab your screwdriver and the screws that came with the mantel.
- Starting at one end of the mantel, locate the pre-drilled holes on the underside of the mantel. These holes are specifically designed for attaching the mantel to the bracket.
- Align the holes with the corresponding holes on the bracket, ensuring they line up perfectly.
- Take one screw and insert it through the hole, attaching the mantel to the bracket. Repeat this process for each hole, using the appropriate number of screws provided.
- Tighten the screws securely, but be careful not to overtighten and risk damaging the mantel or the bracket.
Checking for level and making any necessary adjustments
With the mantel now attached to the bracket, it’s important to check for level. A level mantel adds to the overall aesthetic appeal and ensures it functions correctly.
Grab your level and place it on top of the mantel, checking it from different angles to ensure it is perfectly horizontal. If you notice any slight incline or decline, you can make minor adjustments by slightly loosening the screws and repositioning the mantel.
Once you have achieved a level position, tighten the screws securely to hold the mantel in place. Double-check for levelness before proceeding.
Voila! You have successfully installed your floating mantel onto the mounting bracket. Take a step back and admire your work. Not only does it serve as a practical addition to your space, but it also adds a touch of elegance and sophistication. Enjoy your beautifully installed floating mantel!
Step 7: Final Adjustments And Finishing Touches
After successfully installing your floating mantel on drywall, it’s time to move on to the final step. This step involves double-checking the level and alignment of the mantel, tightening any screws or making additional adjustments if needed, and cleaning and styling the mantel to enhance the overall aesthetic. Following these final adjustments and finishing touches will ensure that your floating mantel is not only secure but also a stunning focal point in your living space.
Double-checking the level and alignment of the mantel
Before making any final adjustments, it’s essential to check that your mantel is level and properly aligned. Use a level tool to ensure that it is straight and adjust as necessary. A level mantel will not only look aesthetically pleasing but also provide a stable surface for displaying your treasured items. Take your time with this step to achieve the perfect alignment for your floating mantel.
Tightening any screws or making additional adjustments if needed
As with any DIY project, it’s always a good idea to double-check the stability of your work. Take a close look at the screws you used to secure the mantel to the wall and make sure they are tight. If any screws are loose, tighten them using a suitable screwdriver or drill. Additionally, examine the mantel for any signs of instability or misalignment, and make any necessary adjustments to ensure its firm attachment to the drywall.
Cleaning and styling the mantel to enhance the overall aesthetic
With the mantel securely fastened and perfectly aligned, it’s time to focus on its aesthetic appeal. Start by wiping down the surface with a soft cloth to remove any dust or debris. Next, consider how you want to style your mantel. Whether you choose to display photos, artwork, or decorative pieces, carefully arrange them to create an eye-catching focal point. Play with different heights, textures, and colors to achieve a visually appealing and personalized display.
If your mantel has a natural wood finish, consider applying a coat of wood polish or wax to bring out its luster. This step will not only add shine but also help protect the wood from everyday wear and tear. Remember, the finishing touches you add to your mantel will be reflective of your personal style and taste, so feel free to get creative and make it your own.
By following these final adjustments and finishing touches, you can ensure that your floating mantel installation is not only successful but also visually captivating. With careful attention to detail and a focus on alignment and aesthetics, your mantel will become a standout feature in your home. Now, step back and appreciate the beauty and functionality of your newly installed floating mantel.
Frequently Asked Questions
How Do You Anchor A Mantle To Drywall?
To anchor a mantle to drywall, follow these steps: 1. Locate the studs behind the drywall using a stud finder. 2. Mark the locations of the studs on the mantle. 3. Pre-drill holes into the mantle at the marked stud locations.
4. Use screws long enough to penetrate the drywall and secure the mantle to the studs. 5. Ensure the mantle is level before tightening the screws.
How Do You Hang A Heavy Floating Mantel?
To hang a heavy floating mantel, follow these steps: 1. Locate the studs on the wall. 2. Install a bracket or a hanger on the wall, making sure it aligns with the studs. 3. Attach the bracket to the mantel securely.
4. Lift the mantel onto the bracket or hanger. 5. Double-check for stability before placing any items on the mantel.
How Do You Secure A Fireplace Mantel To The Wall?
Secure a fireplace mantel to the wall by following these steps: 1. Position the mantel against the wall. 2. Use a stud finder to locate and mark the wall studs. 3. Drill pilot holes into the studs. 4. Attach brackets or cleats to the wall and mantel.
5. Secure the mantel to the brackets or cleats using screws.
How Deep Should A Floating Mantel Be?
A floating mantel should typically be at least 6 inches deep to accommodate decorative items. However, the depth can be adjusted based on personal preference and the size of the mantel’s surroundings.
Conclusion
To sum it up, installing a floating mantel on drywall doesn’t have to be a daunting task. By following these simple steps and using the right tools, you can achieve a professional and stylish look for your living space. Remember to carefully measure and secure the mantle to ensure stability.
With a little bit of patience and attention to detail, you’ll have a beautiful addition to your home in no time. Happy DIY-ing!