
To install a hose bib, first, locate a suitable exterior wall and mark the spot where the bib will be installed. Then, drill a hole through the wall and attach the bib using a wrench.
Factors To Consider When Selecting A Hose Bib
Choosing the right hose bib is essential for ensuring smooth operation and longevity of your outdoor water supply system. There are several factors to consider before making a decision, such as water pressure requirements, type of hose bib, and material and construction quality. Understanding these factors will help you select a hose bib that suits your needs perfectly.
Water Pressure Requirements
One of the crucial factors to consider when selecting a hose bib is the water pressure requirements. Different applications demand different water pressures, so it’s essential to choose a hose bib that can handle the desired pressure level. In general, residential water systems range from 30 to 80 pounds per square inch (PSI). Make sure to check the specifications of the hose bib and ensure it can handle the required water pressure to avoid any performance issues or damages.
Type of Hose Bib (Frost-Free or Standard)
Another factor to consider is the type of hose bib you need – frost-free or standard. Frost-free hose bibs are designed to prevent freezing and the subsequent damage that can occur during colder months. They have a longer stem that is connected to the water supply inside your home, providing protection against freezing temperatures. On the other hand, standard hose bibs do not have this added frost protection feature. Consider your climate and the potential for freezing temperatures when deciding which type of hose bib is suitable for your needs.
Material and Construction Quality
The material and construction quality of a hose bib play a significant role in its durability and performance. Hose bibs are typically made from materials like brass, stainless steel, or plastic. Brass hose bibs are highly durable and resistant to corrosion, making them a popular choice. Stainless steel hose bibs offer excellent strength and longevity, while plastic hose bibs are lightweight and more affordable. Consider the quality and durability of the material, ensuring it will withstand outdoor conditions and frequent use without leaking or failing.
In addition to material choice, pay attention to the construction quality of the hose bib. Look for features like sturdy handles, tight seals, and smooth operation. A well-constructed hose bib will not only ensure efficient water flow but also minimize the risk of leaks and drips.
When selecting a hose bib, remember to consider the water pressure requirements, determine the type of hose bib suitable for your climate, and evaluate the material and construction quality. Taking these factors into account will help you make an informed decision and select a hose bib that will serve you well for years to come.
Essential Tools For Installing A Hose Bib
When it comes to installing a hose bib, having the right tools on hand is crucial to ensure a smooth and successful installation. Whether you’re a seasoned DIYer or a beginner, having these essential tools will help you get the job done efficiently. Here, we’ll explore the must-have tools you’ll need for installing a hose bib.
1. Adjustable wrench
An adjustable wrench is an indispensable tool for installing a hose bib. It allows you to easily tighten or loosen the nuts and bolts that connect the hose bib to the water supply line. Make sure to choose an adjustable wrench that fits the size of the nuts and bolts you’ll be working with. This will ensure a secure and leak-free connection.
2. Pipe cutter or hacksaw
A pipe cutter or hacksaw is essential for cutting the water supply pipe to the desired length. A pipe cutter works best for clean, precise cuts, while a hacksaw can be used if a pipe cutter is not available. Remember to measure and mark the pipe before making any cuts to ensure accuracy.
3. Teflon tape
Teflon tape, also known as plumber’s tape, is an important tool for preventing leaks in the threaded connections of the hose bib. Apply a few wraps of Teflon tape clockwise around the threads of the hose bib before connecting it to the supply line. This will create a watertight seal and prevent any leakage.
4. Pipe dope or thread sealant
In addition to Teflon tape, using pipe dope or thread sealant is highly recommended for extra protection against leaks. Apply a small amount of pipe dope or thread sealant to the threads of the hose bib before screwing it onto the supply pipe. This will provide an additional layer of sealing and ensure a secure connection.
By having these essential tools on hand, you’ll be well-equipped to tackle the installation of a hose bib with confidence. Remember to always follow proper safety precautions and consult a professional if you’re unsure. With the right tools and a bit of know-how, you’ll have your hose bib installed and ready to go in no time!
Locate And Close The Main Water Valve
Before beginning the installation process of a hose bib, it is crucial to locate and close the main water valve. This valve controls the water supply to your entire home, making it essential to shut it off to avoid any unexpected water flow or leaks during the installation. Follow the steps below to effortlessly find this valve and cut off the main water supply:
Finding the main water shutoff valve:
- Start by searching for the main water shutoff valve in your home. This valve is often located near the water meter or in the basement.
- Check the perimeter of your house, ensuring you inspect both the exterior and interior walls for access points or utility boxes.
- If you are having trouble locating the valve, consider referring to the blueprint or plumbing diagrams provided during the construction of your home.
- Once you have found the valve, be sure to clear the area around it to ensure easy access during the shutting off process.
Turning off the main water supply:
- Inspect the main water shutoff valve and identify the lever or knob used to control the water flow.
- If the valve has a lever, simply switch it to the “off” position, perpendicular to the pipe. If it has a knob, rotate it clockwise until it is fully closed.
- Confirm that the valve is closed by ensuring any faucets or fixtures in your home no longer have running water.
- Do a quick visual inspection for any leaks or drips around the valve or pipes.
- Pro tip: In case of an emergency or a need to shut off the water supply quickly, it is always recommended to educate yourself and other family members about the location of the main water valve.
By locating and closing the main water valve, you have successfully taken the essential first step in installing a hose bib. This not only ensures a smooth installation process but also prevents any potential water damage or accidents. Now that you have shut off the main water supply, you can move on to the next step of installing your new hose bib.
Clearing The Work Area And Removing Obstacles
Before you begin the installation of a hose bib, it is crucial to clear the work area and remove any obstacles that may impede the process. Proper preparation of the work area will ensure a smooth and efficient installation, saving you time and effort. In this section, we will guide you through the necessary steps to clean the area around the installation site and remove any plants or obstacles that may be in the way.
Cleaning the area around the installation site
The first step in clearing the work area is to clean the area around the installation site. This will help create a clean and safe working environment. Here are a few important steps to follow:
- Remove any debris or loose dirt from the ground. Use a broom or a garden rake to sweep away leaves, sticks, or other small obstructions that may be present.
- Inspect the area for any hazardous materials or sharp objects. Ensure that there are no glass shards, nails, or other potential hazards that could cause injuries during the installation process.
- If the area has been neglected for a while, you may consider using a pressure washer to remove stubborn dirt or grime. This can help create a clean and tidy work area, improving the overall aesthetics of the installation site.
- It’s essential to check for any existing cracks or damages in the ground. If you notice any cracks, repair them before proceeding with the installation. By doing so, you can prevent any potential damage to the hose bib and ensure a sturdy foundation.
Removing any plants or obstacles that may impede the installation process
Once the area around the installation site is clean, the next step is to remove any plants or obstacles that may hinder the installation process. Here are a few tips to help you with this step:
- Identify any plants, shrubs, or weeds that are located near the work area. Use gardening tools such as a shovel or pruners to carefully remove these plants. Be cautious not to damage any nearby plants that you wish to keep.
- If there are any large obstacles, such as rocks or tree stumps, that may interfere with the installation, you may need to hire professional help to remove them safely.
- Consider creating a temporary barrier, such as a plastic tarp or construction cones, to mark off the work area and prevent accidental damage during the installation process.
By clearing the work area and removing any obstacles, you are setting the stage for a successful hose bib installation. Taking the time to prepare the area properly will ensure that you have a smooth and hassle-free experience.
Determining The Ideal Placement And Height For The Hose Bib
When it comes to installing a hose bib, determining the ideal placement and height is crucial for convenience and accessibility. The placement of the hose bib should be strategic, ensuring that it is easily reachable and functional. Additionally, determining the correct height of the hose bib is essential to avoid back strain when operating the faucet. In this section, we will discuss how to measure and mark the desired location for the hose bib, as well as how to ensure proper height and accessibility for easy use.
Measuring and Marking the Desired Location for the Hose Bib
Before installing your hose bib, it’s important to carefully measure and mark the desired location. Here’s a step-by-step guide to help you with this crucial process:
- Identify the area where you will need water access. This is typically near your garden, lawn, or any other outdoor area where you will frequently use a hose.
- Consider the proximity to your water source, such as an outdoor water line or main plumbing line. The closer the hose bib is to the water source, the easier the installation process will be.
- Take into account any potential obstructions, such as landscaping features, fences, or walls. Ensure that there is enough space to install the hose bib without any hindrance.
- Once you have determined the ideal location, mark it using a measuring tape, chalk, or any other suitable marking tool. Make sure the marking is clear and visible.
Remember, the goal is to choose a location that provides easy access to water without sacrificing visual appeal or functionality.
Ensuring Proper Height and Accessibility for Easy Use
The height of the hose bib is another important factor to consider during installation. An optimal height will allow for comfortable use without causing any strain on your back or arms. Here are a few tips to help you ensure proper height and accessibility:
- Stand in a natural position and measure the height from the ground to your waist level. This measurement will serve as a starting point for choosing the ideal height for the hose bib.
- Keep in mind that the hose bib should be placed at a level that allows for easy attachment and detachment of hoses, making it effortless to connect and disconnect watering equipment.
- Consider any specific needs or preferences you may have. For example, if you have mobility issues or use a wheelchair, it’s important to install the hose bib at a height that is convenient for your particular situation.
By determining the ideal placement and height for your hose bib, you can ensure that it is functional, visually appealing, and easy to use. Take into account the specific requirements of your outdoor space and your individual needs to make the best choice for installing your hose bib.
Now that you’re ready with the ideal location and height, it’s time to move on to the next step of the installation process.
Selecting The Cutting Method And Making The Cut
Choosing between a pipe cutter or hacksaw
When it comes to selecting the cutting method for installing a hose bib, you have two options: a pipe cutter or a hacksaw. Both tools have their pros and cons, so it’s important to understand your specific needs before making a decision. Let’s take a closer look at each option.
Pipe Cutter
A pipe cutter is a popular choice for professionals and DIY enthusiasts alike. It offers precise cuts and is generally quicker and easier to use than a hacksaw. The rotating cutting wheel on the pipe cutter ensures a clean and even cut, reducing the risk of damaging the water supply line. This tool is especially useful if you’re working with copper or plastic pipes, as it provides a smooth finish without the need for extensive sanding or filing.
Hacksaw
On the other hand, a hacksaw is a more versatile cutting tool that can handle a wide range of materials, including metal and PVC pipes. It consists of a blade attached to a frame, which allows for more flexibility when cutting in tight or hard-to-reach spaces. However, using a hacksaw requires caution and precision to avoid rough or uneven cuts that can compromise the integrity of the water supply line. Additionally, you may need to file or sand the edges of the pipe after cutting with a hacksaw to ensure a smooth connection.
Ultimately, the choice between a pipe cutter and a hacksaw depends on your specific needs and level of expertise. If you value speed, precision, and ease of use, a pipe cutter may be the ideal tool for you. However, if you’re comfortable with using a hacksaw and need the versatility to work with different materials, it can be a suitable option as well. Whichever tool you choose, remember to prioritize safety and accuracy throughout the cutting process to ensure a successful installation.
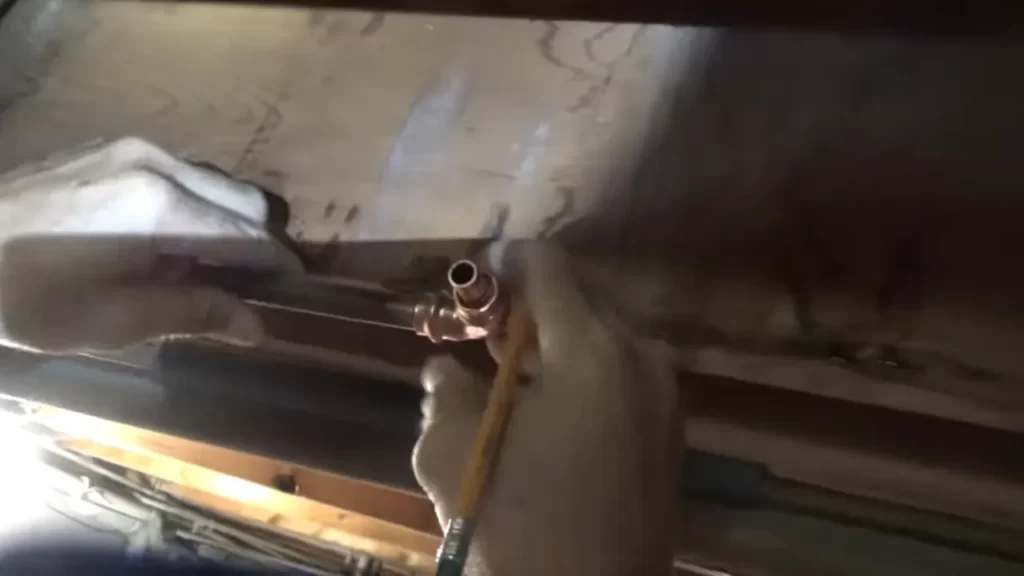
Safely cutting into the water supply line
Cutting into the water supply line is a crucial step in installing a hose bib, and it’s important to do it safely to avoid any accidents or damage. Follow these steps to ensure a smooth and secure cut:
- Before starting, make sure to turn off the main water supply to your home. This will prevent any water flow while you’re working, reducing the risk of leaks or water damage.
- Locate the section of the water supply line where you want to install the hose bib. Measure and mark the cutting point using a measuring tape and a marker.
- Using either a pipe cutter or a hacksaw, carefully make the cut at the marked point. Take your time and apply steady pressure to ensure a clean and even cut. If using a hacksaw, make sure to use a fresh blade and follow the manufacturer’s instructions.
- Once the cut is complete, carefully inspect the edges of the pipe for any roughness or burrs. Use sandpaper or a file if necessary to smooth out any imperfections.
Remember, safety should always be your top priority when working with water supply lines. Wear protective gloves and goggles to shield yourself from any potential hazards. Additionally, keep a bucket or towel nearby to catch any excess water that may leak during the cutting process. By following these steps and using the appropriate cutting tool, you can safely cut into the water supply line and proceed with the installation of your hose bib.
Attaching The Hose Bib To The Water Supply Line
Now that you have prepared the water supply line and the hose bib, it’s time to attach them together. This step is crucial in ensuring a secure and leak-free connection. By following a few simple steps, you can have your hose bib installed and ready to use in no time. In this section, we will discuss how to apply Teflon tape or pipe dope to the threads, as well as how to secure the hose bib to the water supply line using an adjustable wrench.
Applying Teflon tape or pipe dope to the threads
Before attaching the hose bib to the water supply line, it’s important to create a tight seal between the two components. One way to achieve this is by applying Teflon tape or pipe dope to the threads of the hose bib. Here’s how you can do it:
- Begin by cutting a small piece of Teflon tape or opening a container of pipe dope.
- Wrap the Teflon tape around the threads of the hose bib in a clockwise direction, making sure to cover all the threads.
- If you decide to use pipe dope, apply a thin layer to the threads using a brush or your finger, ensuring complete coverage.
- Make sure not to apply too much Teflon tape or pipe dope, as it can interfere with the proper connection of the hose bib.
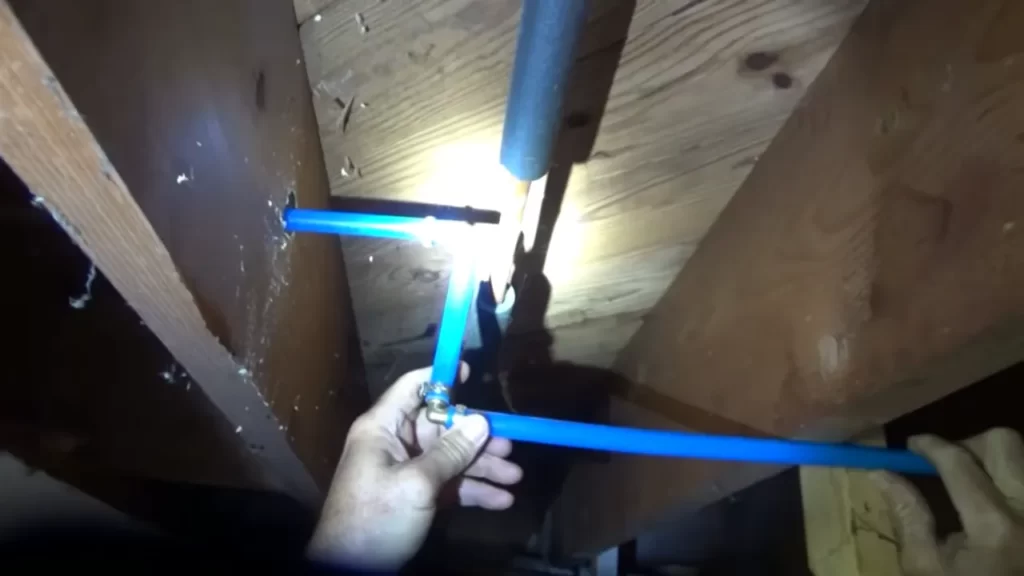
Securing the hose bib to the water supply line using an adjustable wrench
Now that the threads are prepared, it’s time to secure the hose bib to the water supply line. Follow these steps:
- Hold the hose bib in one hand and position it at the end of the water supply line.
- Using your other hand, take an adjustable wrench and grip the hexagonal nut on the hose bib.
- Tighten the hexagonal nut by turning it clockwise, ensuring a snug fit.
- Be careful not to overtighten, as it can damage the threads or cause leaks.
- Once the hose bib feels secure, use the adjustable wrench to give it a final, gentle turn to ensure a watertight connection.
With these steps, you have successfully attached the hose bib to the water supply line. Congratulations! Now you can enjoy the convenience of a readily accessible outdoor water source. Remember to check for any leaks or drips once you turn on the water supply. If any issues arise, don’t hesitate to double-check the connection or seek professional assistance. Now, it’s time to connect your hose and start watering your garden!
Ensuring Proper Functionality And Checking For Leaks
Turning on the main water supply and checking for leaks
After successfully installing your hose bib, the next crucial step is to turn on the main water supply and check for any leaks. This step is crucial to ensure that your hose bib functions properly and doesn’t cause any water wastage or potential damage.
To turn on the main water supply, locate the main shut-off valve for your property. This valve is usually located near the water meter or inside your home’s utility room. Turn the valve in a clockwise direction to open it fully, allowing water to flow into your plumbing system.
Once the main water supply is turned on, closely inspect the hose bib and surrounding area for any signs of leaks. Look out for dripping water, puddles, or wet spots on the ground or walls. Even a small leak can cause significant water wastage and potentially lead to water damage over time.
If you notice any leaks, you must act promptly to fix them. Start by tightening any loose connections or fittings using a wrench. In some cases, you may need to apply plumber’s tape or pipe thread sealant to create a watertight seal. If the leak persists, consider consulting a professional plumber to assess and resolve the issue.
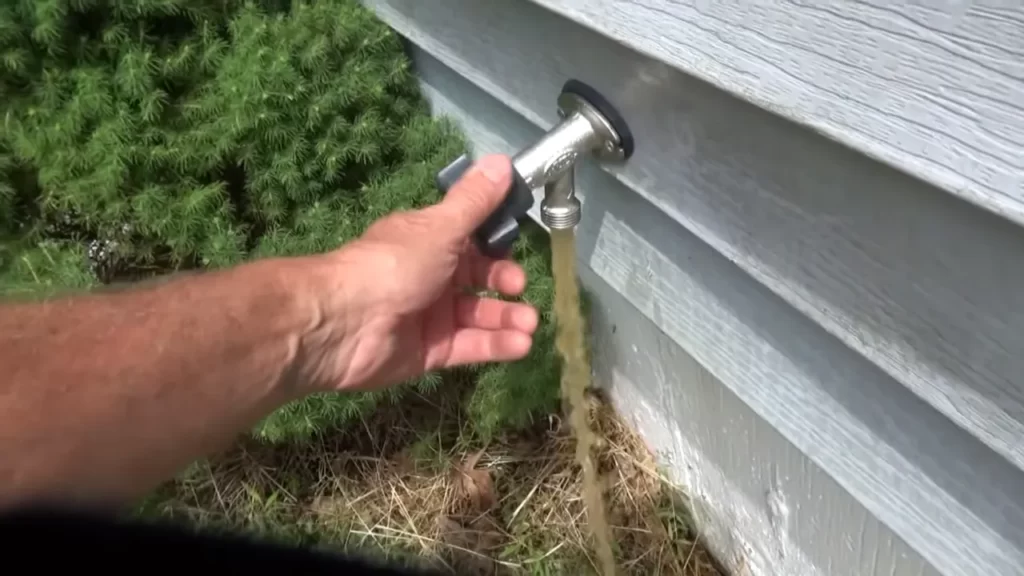
Testing the hose bib by attaching a hose and running water
To ensure the proper functionality of your hose bib, it’s essential to test it by attaching a hose and running water through it. This test will help you identify any further leaks or irregularities and ensure that the hose bib works as intended.
Start by attaching one end of a garden hose to the threaded outlet of the hose bib. Use a hose clamp or coupling to secure the connection and prevent any leaks. Ensure that the connection is tight and secure to avoid water wastage or sprays.
Once the hose is attached, turn on the water and let it flow through the hose bib. Check for any leaks at the hose bib connection, as well as along the hose itself. Inspect the entire length of the hose, paying close attention to any signs of water escaping or dripping.
If you notice any leaks, double-check the tightness of the connections and adjust them if necessary. You may also need to replace or repair the hose if it is damaged or worn out. Checking for leaks and addressing them promptly will help ensure that your hose bib functions efficiently and conserves water.
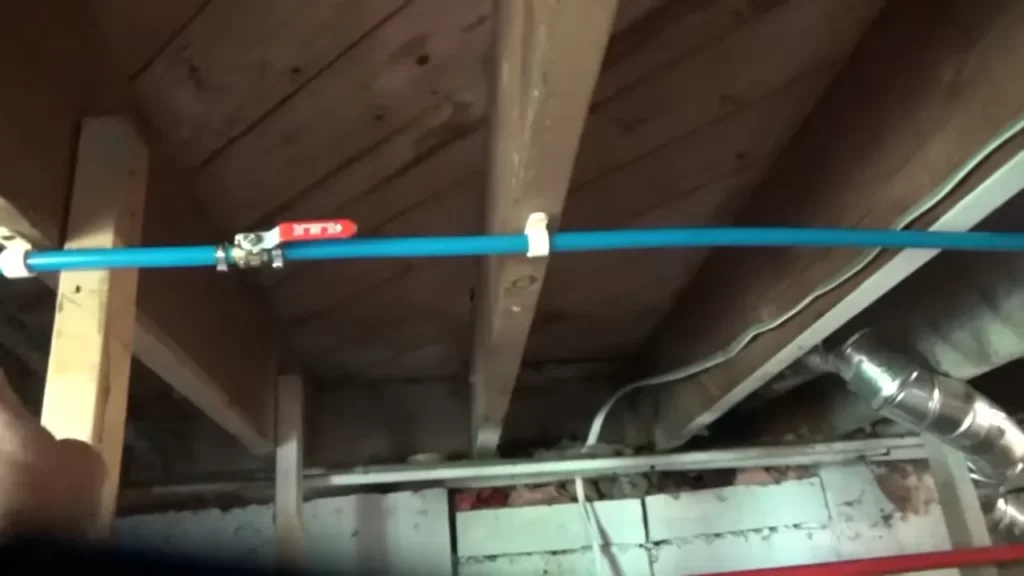
Securing And Sealing The Hose Bib
Tightening any loose connections
Before sealing the hose bib, it is important to ensure that all connections are tight and secure. This will prevent any leaks or water wastage in the future. Start by checking all the connections, including the hose bib itself, the pipe fittings, and the hose attachment. If you notice any loose connections, use a wrench or pliers to tighten them up. It is crucial to make sure everything is snugly fitted together to avoid any potential issues.
Sealing the hose bib with pipe dope or thread sealant
Once you have tightened all the connections, the next step is to seal the hose bib to ensure a leak-free installation. There are two commonly used methods for sealing the hose bib: pipe dope and thread sealant. Both options work effectively, so choose the one that you find most convenient or readily available.
1. Using pipe dope:
- Apply a small amount of pipe dope to the threads of the hose bib.
- Spread the pipe dope evenly, making sure to cover all the threads.
- Gently screw the hose bib into the pipe fittings, using a clockwise motion.
- Ensure that the hose bib is securely tightened, but be careful not to overtighten it, as this may cause damage.
2. Using thread sealant:
- Wrap several layers of thread sealant tape around the threads of the hose bib.
- Make sure to wrap the tape in a clockwise direction to prevent it from unraveling when screwing in the hose bib.
- Screw the hose bib into the pipe fittings, applying gentle pressure.
- Tighten the hose bib until it is secure, but avoid overtightening.
Both pipe dope and thread sealant provide an effective seal, preventing any water leakage from the hose bib. Ensure that you follow the manufacturer’s instructions for the specific product you are using. Remember, a properly sealed hose bib will prevent potential water damage and ensure a long-lasting, functional installation.
Proper Disposal Of Waste Materials And Tools
Cleaning up any debris or waste materials
Proper disposal of waste materials is an essential step to ensure a successful and efficient installation of a hose bib. After completing the installation, it’s important to clean up any debris or waste materials that may have accumulated during the process.
Start by gathering all the waste materials such as packaging, unused pipes, and any other debris. Place them in a designated trash bag or container. It’s important to avoid littering or leaving waste materials strewn around, as it not only contributes to a messy work area but can also be environmentally harmful.
Storing tools and unused materials in a safe and organized manner
Once the installation is complete and the waste materials have been properly disposed of, it’s time to think about the storage of tools and unused materials. Storing them in a safe and organized manner not only helps you easily locate them for future use but also prevents any accidents or damage.
Consider investing in a toolbox or a storage bin specifically designed for tools. This will allow you to keep everything in one place, reducing the chances of misplacing or losing small tools.
To further organize your tools, you can create sections within the toolbox or storage bin. Utilize dividers or small containers to separate different types of tools. This will make it easier to find the specific tool you need without having to rummage through a jumbled mess.
Unused materials such as pipes and fittings can also be stored in a similar manner. Keep them separated and labeled, so you can quickly identify the type and size of each item. This will save you time and effort when you need to replace or make adjustments to your hose bib in the future.
Proper disposal of waste materials and organizing the storage of tools and unused materials are crucial steps in the process of installing a hose bib. By following these guidelines, you not only ensure a clean and safe work area but also set yourself up for success when it comes to any future maintenance or repairs.
https://www.youtube.com/watch?v=TyhBePMG5jM&pp=ygUZSG93IHRvIEluc3RhbGwgYSBIb3NlIEJpYg%3D%3D
Frequently Asked Questions
How Do You Install A Garden Hose Bib?
To install a garden hose bib, follow these steps: 1. Locate an outdoor wall near a water source. 2. Mark the desired height for the bib and make sure it’s level. 3. Drill a hole using a proper-sized drill bit.
4. Apply Teflon tape to the threads of the bib. 5. Screw the bib into the hole and tighten it securely.
Can I Replace A Hose Bib Myself?
Yes, you can replace a hose bib yourself. Ensure to follow proper safety precautions and use the right tools for the job. Turn off the water supply, remove the old hose bib, and install the new one securely. If you’re unsure, it’s best to consult a professional.
How Much Does It Cost To Install An Outdoor Hose Bib?
Installing an outdoor hose bib typically costs around $150 to $300.
How Do You Connect To Hose Bib?
To connect to a hose bib, simply attach the hose to the bib’s threaded outlet. Tighten it with a wrench, making sure the connection is secure. Then turn on the water supply. Ensure the hose is free of kinks and leaks for optimal use.
Conclusion
To wrap up, installing a hose bib is a straightforward process that can transform your outdoor watering experience. By following the steps outlined in this guide, you’ll be able to enjoy the convenience and efficiency of a hose bib in no time.
Remember to gather all the necessary tools, shut off the water supply, and securely attach the bib to prevent leaks. With these simple instructions, you’ll have a functioning hose bib that will make watering your garden a breeze. Happy gardening!