
To install a soaker hose, dig a trench near your plants, lay the hose along the trench, cover with soil, and connect to a water source. Soaker hoses are a cost-effective and efficient way to water your garden as they deliver water directly to the root zone, minimizing evaporation and promoting better plant health.
By following a few simple steps, you can easily install a soaker hose and ensure that your plants receive the right amount of water without wasting any.
Why Install A Soaker Hose?
Benefits of using a soaker hose
1. Water Efficiency
A soaker hose is a cost-effective and efficient way to water your garden or landscape. Unlike traditional sprinkler systems, soaker hoses deliver water directly to the roots of your plants, minimizing water loss due to evaporation and runoff. This targeted watering method allows plants to absorb the water more easily, leading to healthier growth and reduced water waste.
2. Saves Time and Effort
Installing a soaker hose can save you time and effort. Once you have set up the hose properly, it can be left unattended to water your plants for longer periods. This means you no longer have to spend time manually watering your garden with a hose or watering can, giving you more time to enjoy the fruits of your labor.
3. Supports Plant Health
Soaker hoses provide a consistent and gentle watering experience, promoting healthier root growth and preventing diseases caused by overwatering. The slow and steady release of water allows the soil to absorb moisture gradually, eliminating the risk of waterlogging and allowing plants to thrive.
4. Weed Control
A soaker hose not only waters your plants but also helps in controlling weeds. By delivering water directly at the base of your plants, the surrounding soil stays relatively dry, making it difficult for weeds to establish and grow. This can reduce the need for manual weeding or the use of chemical weed killers.
5. Cost-effective
When compared to other irrigation systems or frequent hand-watering, soaker hoses are a budget-friendly option. They are relatively inexpensive to purchase and require minimal maintenance. Additionally, their water-saving feature can lead to reduced water bills in the long run, making them a cost-effective choice for gardeners and homeowners.
6. Versatility
Soaker hoses can be easily customized and adapted to fit various garden layouts. They can be snaked around plants, trees, and flower beds, ensuring that every part of your garden receives sufficient water coverage. Whether you have a small backyard garden or a sprawling landscape, soaker hoses offer versatility in watering needs.
7. Environmentally Friendly
By conserving water and reducing runoff, soaker hoses are environmentally friendly. They promote water efficiency and help to preserve this precious resource. Using a soaker hose also minimizes the need for harmful chemical fertilizers, as the slow release of water allows plants to absorb nutrients more effectively.
In summary, using a soaker hose provides numerous benefits including water efficiency, time and effort savings, supports plant health, weed control, cost-effectiveness, versatility, and an environmentally friendly alternative. With so many advantages to offer, installing a soaker hose is a wise choice for gardeners and homeowners alike.
Assessing Your Garden’S Needs
Before installing a soaker hose in your garden, it’s important to assess your garden’s watering requirements. Understanding the specific needs of your plants and soil type will help you choose the most suitable soaker hose and ensure effective watering. Here are some factors to consider:
Understanding your garden’s watering requirements
In order to choose the right soaker hose, you need to understand how much water your garden needs. Take into account factors such as the types of plants in your garden, their stage of growth, and the overall layout of your garden. Different plants have different water requirements, so it’s important to consider this when installing a soaker hose.
Consider whether your garden requires regular, deep watering or if it needs more frequent, shallow watering. This will help you determine the spacing and length of your soaker hose, ensuring that each plant receives the necessary amount of water.
Factors to consider when choosing a soaker hose
Choosing the right soaker hose for your garden involves considering a few key factors:
- Material: Soaker hoses come in various materials, including rubber and porous fabric. Rubber hoses are more durable and resistant to damage, while fabric hoses are lightweight and easy to maneuver. Consider which material best suits your garden’s needs.
- Size and length: The size and length of the soaker hose depend on the size of your garden and the number of plants you need to water. Measure the length required to cover the entire garden area, ensuring that each plant is within reach of the hose.
- Water flow rate: The flow rate of the soaker hose determines how quickly water is released. Consider the specific needs of your plants, as some may require a slower release of water to prevent root damage.
- Pressure compatibility: Ensure that the soaker hose you choose is compatible with the water pressure in your garden. Some hoses may require a certain level of pressure to function optimally.
- Additional features: Some soaker hoses come with additional features such as adjustable water flow or the ability to connect multiple hoses together. Consider these features based on your garden’s needs and your watering preferences.
By assessing your garden’s watering needs and considering these factors, you’ll be better equipped to choose the right soaker hose for your garden. Once you’ve made your selection, you’re ready to move on to the next steps of installing the soaker hose.
Gathering The Essential Tools And Materials
Before you begin installing a soaker hose in your garden, it is important to gather all the necessary tools and materials. Having everything on hand will save you time and ensure a smooth installation process. Here’s a breakdown of the tools and materials you’ll need:
List of tools and materials needed for the installation
1. Soaker Hose: The first and most important item on your list is a high-quality soaker hose. This porous hose allows water to seep through its surface, delivering moisture directly to the roots of your plants.
2. Measuring Tape: Accurate measurements are crucial for a successful installation. A measuring tape will help you determine the length of soaker hose needed for your garden beds.
3. Garden Hose: You’ll need a garden hose to supply water to your soaker hose system. Ensure that the garden hose is in good condition and long enough to reach the desired area.
4. Hose Connector: To connect the garden hose to the soaker hose, you’ll need a hose connector. Make sure it fits snugly and creates a watertight seal to avoid any leaks.
5. End Cap: An end cap is essential to prevent water from running out of the soaker hose’s open end. It ensures that all the water is directed to your plants, maximizing efficiency.
6. Pressure Regulator: A pressure regulator helps control and reduce the water pressure flowing into the soaker hose. This is important because high water pressure can cause damage to the hose or lead to uneven water distribution.
7. Mulch: Adding a layer of mulch over the soaker hose helps retain moisture, prevents weed growth, and protects the hose from damage. Choose organic mulch, such as wood chips or straw, for optimal results.
8. Stakes or U-shaped Pins: Stakes or U-shaped pins are used to secure the soaker hose in place and prevent it from shifting or getting tangled. Place the stakes at regular intervals to ensure even coverage.
9. Scissors or Utility Knife: You’ll need a pair of scissors or a utility knife to cut the soaker hose to the desired length. Make clean, straight cuts to ensure proper water distribution.
Tips for selecting high-quality soaker hoses
- Opt for hoses made from heavy-duty rubber or recycled rubber materials. These are durable and less prone to damage.
- Check the hose’s wall thickness. Thicker walls indicate better durability and longevity.
- Look for hoses labeled as “lead-free” to ensure the safety of your plants and the environment.
- Consider hoses with a UV-resistant coating to protect against sun damage.
- Read customer reviews and ratings to gain insights into the hose’s performance and durability.
By gathering all the essential tools and materials and selecting a high-quality soaker hose, you’ll be well-prepared to install a reliable and efficient watering system for your garden. In the next section, we’ll go over the step-by-step installation process to help you get started.

Preparing Your Garden For Soaker Hose Installation
Clearing the Area and Removing Any Obstacles
Before installing a soaker hose in your garden, it is essential to clear the area and remove any obstacles that may obstruct the hose’s effectiveness. By doing so, you create a clean and clutter-free space for optimal water distribution. Below are some steps to follow:
- Begin by removing any rocks, debris, or sharp objects from the designated area. These can puncture the soaker hose and cause leaks.
- Trim any overhanging branches or plants that could potentially obstruct the hose’s path. This ensures even water distribution throughout your garden.
- Take a moment to analyze the existing layout of your garden and identify any potential obstacles. These may include garden furniture, decorative elements, or other structures. Move or reposition these items, if possible, to create a clear path for the soaker hose.
Preparing the Soil for Optimal Water Absorption
Achieving optimal water absorption is crucial for maximizing the efficiency of your soaker hose. By preparing the soil properly, you can ensure that water is distributed evenly and efficiently to the roots of your plants. Here’s what you need to do:
- Loosen the top layer of soil using a garden rake or hoe. This will provide a better medium for water penetration and root growth.
- Remove any weeds or grass in the area where you plan to lay the soaker hose. These can compete with your plants for water and nutrients.
- Consider adding organic matter, such as compost, to improve the soil’s structure and water-holding capacity. This will promote healthier plant growth and reduce water wastage.
- Level the soil to ensure a consistent rate of water absorption. If needed, use a hand trowel or shovel to fill in any low spots or level out any uneven areas.
By following these steps, you can create an ideal environment for your soaker hose to be installed. Remember that proper preparation is key to achieving effective and efficient water distribution throughout your garden.
Planning The Layout
When it comes to installing a soaker hose in your garden, careful planning is key to ensure optimal water distribution and efficiency. Planning the layout of your soaker hose involves assessing the size and shape of your garden and creating a diagram to plan the hose placement. This step is crucial in maximizing the benefits of your soaker hose system.
Assessing the size and shape of your garden
Determining the size and shape of your garden is the first step in planning the layout of your soaker hose. By assessing the overall area, you can identify the number of soaker hoses you’ll need and the distance between each one. Take measurements of your garden, noting any irregular or curved areas that may require additional hose length.
Creating a diagram to plan the hose placement
Creating a diagram is an effective way to visualize the layout of your soaker hose system. It allows you to accurately map out the placement of each hose and ensures even water distribution throughout your garden. Start by sketching the shape of your garden on a piece of paper or using a simple design software.
Once you have the basic outline, mark the areas where you want to place your soaker hoses. Consider factors such as plant locations, proximity to water source, and specific watering needs of different areas. If you have separate zones in your garden, indicate them on the diagram for better organization.
Tip: To make your diagram more precise, you can use measurements from your garden assessment to scale the diagram accordingly. This will help you determine the exact length of hose needed for each section.
After marking the hose placement, review your diagram to ensure that each area of your garden is adequately covered. Adjust the position of the hoses if needed, making sure they reach all the plants and areas that require watering.
Tip: Consider marking any obstacles on your diagram, such as trees or structures, that may affect hose placement. This will help you plan the layout more efficiently.
Once you’re satisfied with the hose placement on your diagram, it’s time to move on to the actual installation of your soaker hose system. Gather the necessary materials and follow the manufacturer’s instructions for proper installation.
In conclusion, planning the layout of your soaker hose involves assessing the size and shape of your garden and creating a diagram to plan the hose placement. By carefully considering these factors, you can ensure efficient water distribution throughout your garden and maximize the benefits of your soaker hose system.
Step-By-Step Soaker Hose Installation Process
Installing a soaker hose in your garden can be a great way to ensure that your plants receive a steady supply of water directly at their roots. Soaker hoses are designed to deliver water slowly and evenly, minimizing wastage and promoting healthy growth. By following this step-by-step installation process, you can easily set up a soaker hose system in your garden:
Determining the nearest outdoor faucet
The first step is to find the outdoor faucet that is closest to the area you want to water. This will ensure that the hose does not have to stretch too far, minimizing the risk of water pressure drop and potential damage to the hose. Once you have located the faucet, make sure it is in good working condition and has the necessary connections.
Ensuring proper water pressure for the soaker hose
Before connecting the soaker hose, it’s important to ensure that you have the appropriate water pressure for it to function effectively. Soaker hoses typically require water pressure between 10 and 25 psi for optimal performance. You can measure the water pressure using a pressure gauge, which can be easily obtained from a local hardware store.
Measuring the required length of the hose
Next, measure the length of the area you want to water in your garden. This will help you determine the length of the soaker hose that you will need. It’s better to slightly overestimate the length to ensure that the entire area is covered adequately.
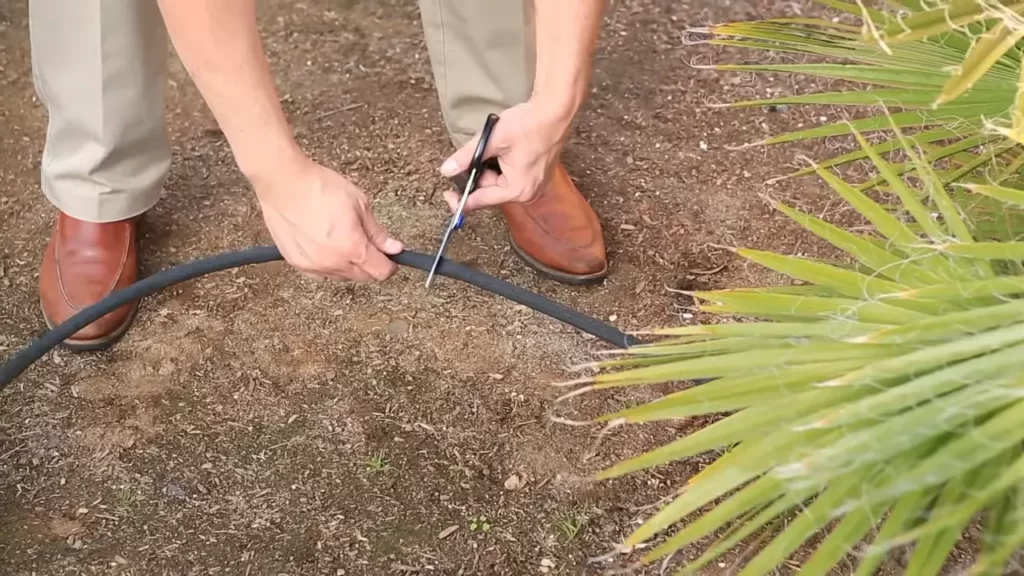
Cutting the soaker hose accurately
Using a sharp pair of scissors or a utility knife, cut the soaker hose to the required length. If you’re installing multiple sections of the hose, make sure to cut them accurately so that they fit together seamlessly. Take care not to cut the hose too short, as you may not be able to adjust the length later on.
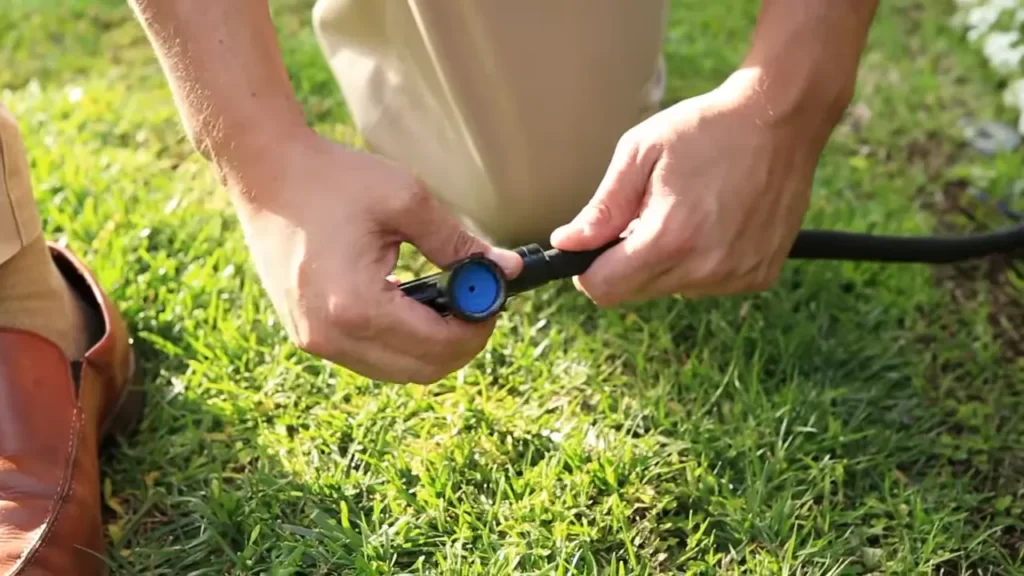
Attaching the hose to the outdoor faucet
Once you have cut the soaker hose, it’s time to attach it to the outdoor faucet. Use a hose washer to ensure a tight seal and prevent any leaks. Twist the hose onto the faucet in a clockwise direction until it is securely attached.
Using a connector or adapter if necessary
In some cases, you may need to use a connector or adapter to connect the soaker hose to the faucet. This is common when the faucet has a different thread size than the hose. Check the sizes and types of threads on both the faucet and the hose, and use the appropriate connector or adapter to create a secure connection.
Laying the hose along the desired areas in the garden
Now, it’s time to lay the soaker hose along the desired areas in your garden. Take care to position the hose close to the plants or shrubs that you want to water. Avoid placing the hose too close to the stems or trunks, as this can lead to excess moisture and potential rot or disease.
Securing the hose with stakes or landscape fabric pins
To keep the soaker hose in place, you can use stakes or landscape fabric pins. These will help secure the hose and prevent it from moving around or getting damaged. Place the stakes or pins at regular intervals along the length of the hose, ensuring that it is held firmly along the desired areas.
Sealing the end of the hose to prevent water wastage
To prevent water from escaping at the end of the soaker hose, you can use a hose cap or plug. This will seal off the hose and prevent any water wastage. Make sure the cap or plug is tightly secured to ensure that no water leaks out.
Turning on the water supply and checking for leaks
With the installation complete, it’s time to turn on the water supply and check for any leaks or issues. Slowly turn on the faucet and inspect the entire length of the soaker hose for any signs of leakage. Pay close attention to the connections and the sealed end to ensure everything is watertight.
Adjusting the water flow for optimal soaking
Once you have confirmed that there are no leaks, you can adjust the water flow to achieve optimal soaking. This can be done using the faucet’s valve or a flow control valve, if your hose is equipped with one. Experiment with different water flow rates until you find the right balance that allows the water to slowly seep out and reach the roots of your plants effectively.
By following these simple steps, you can easily install a soaker hose in your garden and provide your plants with the water they need for healthy growth.
Maintaining And Troubleshooting Soaker Hose Systems
Regular Maintenance Tips to Ensure Longevity
Maintaining your soaker hose system is crucial to ensure its longevity and optimal performance. By following these regular maintenance tips, you can keep your soaker hose system in top shape:
- Inspect for leaks: Regularly check your soaker hose system for any leaks or visible damage. This can be done by turning on the water supply and visually inspecting the hose for any drips or escaping water. If you notice any leaks, repair them immediately using hose repair connectors.
- Clean the system: Over time, your soaker hose may become clogged with dirt or debris, affecting its performance. To clean your soaker hose, disconnect it from the water source, remove any attachments or sprayers, and then gently run water through the hose to flush out any obstructions.
- Store properly: When not in use, it’s important to store your soaker hose properly to protect it from damage. Avoid leaving it exposed to harsh weather conditions or direct sunlight for prolonged periods. Instead, coil it up neatly and store it in a shed or garage.
- Check water pressure: Ensure that the water pressure in your soaker hose system is within the recommended range. Excessive pressure can cause the hose to burst, while low pressure may result in inadequate water distribution. Use a pressure gauge to measure the water pressure and make necessary adjustments.
Common Problems and Solutions for Soaker Hose Systems
While soaker hose systems are generally reliable, they can occasionally encounter issues. Here are some common problems you might face and their solutions:
| Problem | Solution |
|---|---|
| Hose kinking or tangling | Make sure that the hose is properly laid out and not twisted. Using hose guides or stakes can help prevent kinks and tangles. |
| Uneven water distribution | Check for clogs or obstructions in the hose and clean it as mentioned earlier. Additionally, ensure that the water pressure is balanced throughout the system. |
| Water spraying instead of soaking | This can occur if the water pressure is too high. Adjust the water pressure to the recommended level, and if the issue persists, consider using a pressure regulator. |
| Hose connection leaks | Tighten the connections between the soaker hose and any fittings or faucets. If the leaks persist, replace worn-out washers or gaskets. |
By being proactive with regular maintenance and troubleshooting, you can enjoy the benefits of a properly functioning soaker hose system that efficiently waters your plants and helps preserve water resources.
Additional Tips And Tricks
Installing a soaker hose is a great way to efficiently water your garden and save water. However, there are a few additional tips and tricks that can further enhance the effectiveness and convenience of your soaker hose system. From automating the watering schedule to improving efficiency through mulching, these tips will help you make the most of your soaker hose. Here are two important tricks you can try:
Adding a Timer for Automated Watering
One of the most convenient ways to use a soaker hose system is by adding a timer. With a timer, you can automate the watering schedule and ensure that your plants are consistently and adequately watered, even if you are away or busy with other tasks. Adding a timer to your soaker hose setup is relatively simple. Here’s how you can do it:
- Start by selecting a high-quality timer that is suitable for outdoor use. Look for one that is weather-resistant and has multiple settings to accommodate different watering needs.
- Attach the timer to the faucet that supplies water to your soaker hose. Make sure it is secure and tightly connected.
- Connect the soaker hose to the timer, ensuring a proper seal to prevent any leaks.
- Set the desired watering schedule on the timer. Most timers allow you to program specific days and times for watering.
- Test the timer by running a short watering cycle to ensure everything is working properly.
By adding a timer to your soaker hose system, you can have peace of mind knowing that your plants will receive the right amount of water at the right time, without having to manually turn on and off the water.
Mulching to Enhance the Efficiency of the Soaker Hose
Mulching is another effective technique that can significantly improve the efficiency of your soaker hose. By adding a layer of mulch around your plants, you can help retain moisture in the soil, minimize evaporation, and reduce weed growth. Here’s how you can use mulching to enhance the effectiveness of your soaker hose:
- Choose a suitable mulch material, such as wood chips, straw, or compost.
- Carefully spread a layer of mulch around your plants, leaving a small space around the base to prevent any contact with the stems.
- Ensure the mulch layer is at least 2-3 inches thick to effectively retain moisture.
- Adjust the position of the soaker hose, if necessary, to ensure it is placed under the mulch layer and in contact with the soil.
- Regularly monitor the moisture levels in the soil to determine the optimal watering schedule. Mulching helps keep the soil consistently moist, reducing the frequency of watering.
By mulching around your plants, you can create a more efficient and water-saving environment for your soaker hose system. The mulch acts as a barrier, preventing water loss and promoting healthier plant growth.
With these additional tips and tricks, you can maximize the benefits of your soaker hose system. By automating the watering schedule with a timer and enhancing efficiency through mulching, you’ll have a well-watered garden with minimal effort and water waste.
Frequently Asked Questions
What Is The Best Way To Install A Soaker Hose?
To install a soaker hose effectively, follow these steps: 1. Lay the hose along your plants or garden beds. 2. Connect it to a water source using a hose connector. 3. Adjust the water flow to a slow, steady drip.
4. Cover the hose with mulch or soil to help retain moisture. 5. Regularly check the hose for leaks or clogs.
Do You Have To Bury A Soaker Hose?
Yes, it is recommended to bury a soaker hose. Burying it helps to prevent tripping hazards and keeps the hose from moving or being damaged. Bury it about 2-6 inches deep, depending on your needs. Burying also allows for better water distribution to the plants.
How Close Should A Soaker Hose Be To The House?
Position a soaker hose 12-18 inches away from the foundation of your house. This helps distribute water evenly without risking water damage to the structure.
How Long Do You Leave A Soaker Hose On?
Leave a soaker hose on for around 30 minutes to 1 hour at a time. This allows the water to deeply penetrate the soil without causing waterlogging. Adjust the duration based on your plants’ needs and the soil type. Regularly monitor your garden to ensure proper moisture levels.
Conclusion
Installing a soaker hose can greatly simplify irrigation and promote efficient water usage in your garden. By following the step-by-step guide outlined in this blog post, you can easily set up a soaker hose system that delivers water directly to the base of your plants.
With a little bit of effort, you can ensure your plants receive the moisture they need, while reducing water waste. Start enjoying the benefits of a soaker hose today!