To install a needle valve, ensure the area is clear and shut off the supply before tightening the valve in place. Needle valves are essential in controlling the flow of fluids in various industrial applications.
Whether you are a plumber, engineer, or simply a DIY enthusiast, understanding how to install a needle valve is a valuable skill. This compact valve offers precise regulation of fluid flow through a small port. It can be used in a wide range of systems, including water supply lines, gas appliances, and hydraulic machinery.
By following a few simple steps and taking necessary precautions, you can successfully install a needle valve and ensure efficient flow control. This guide will walk you through the process, enabling you to tackle this task with confidence. So, let’s dive in!
Factors To Consider When Selecting A Needle Valve
When it comes to installing a needle valve, there are several factors that need to be considered to ensure its optimal performance and longevity. From material compatibility to pressure rating and flow control requirements, each aspect plays a crucial role in determining the effectiveness of a needle valve. Let’s take a closer look at these factors:
Material Compatibility
One of the most important factors to consider when selecting a needle valve is its compatibility with the materials it will be used with. Different applications require different materials, and using the wrong material can lead to corrosion, leakage, or other issues. It is essential to choose a needle valve that is made from a material that is resistant to the specific chemicals, gases, or fluids it will come into contact with. Some commonly used materials for needle valves include stainless steel, brass, and carbon steel.
Pressure Rating
Another crucial factor to consider is the pressure rating of the needle valve. This refers to the maximum amount of pressure that the valve can effectively handle without experiencing any damage or malfunction. It is important to choose a needle valve with a pressure rating that meets or exceeds the requirements of the application. Failure to do so can result in valve failure or even potential accidents. Taking into account factors such as system pressure, temperature fluctuations, and potential pressure spikes is essential to ensure the needle valve is capable of handling the workload.
Flow Control Requirements
Flow control is a critical aspect of needle valve selection. It refers to the ability of the valve to regulate and control the rate of flow through the system. Depending on the specific application, different flow control requirements may be necessary. This can include the need for precise control, high flow rates, or minimal pressure drop. Understanding the specific flow control requirements is crucial in choosing the right needle valve to achieve the desired results.
By considering these factors – material compatibility, pressure rating, and flow control requirements – when selecting a needle valve, you can ensure that your installation is successful and that the valve will perform optimally in its intended application.
Gathering The Necessary Tools And Materials
Before you can begin installing a needle valve, it’s essential to gather all the necessary tools and materials. Having everything you need at hand will make the installation process much smoother and more efficient. In this section, we will discuss the specific tools and materials you need to have ready before starting the installation. Let’s dive in!
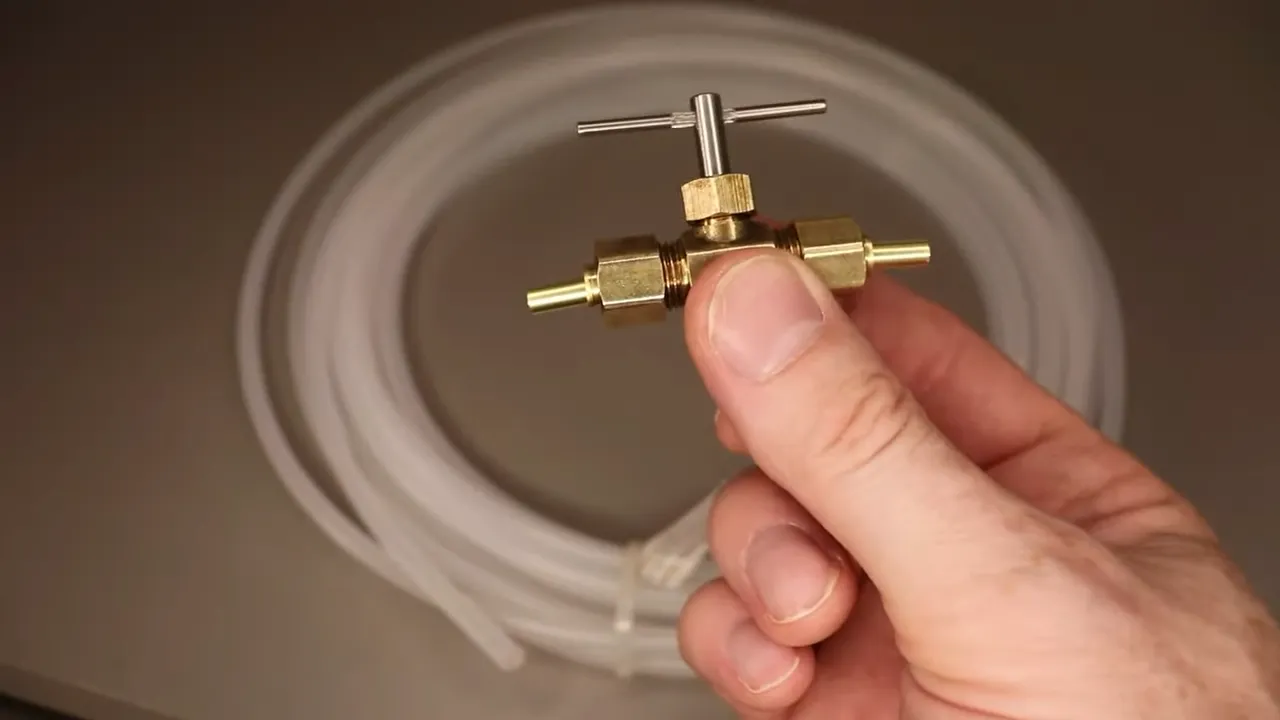
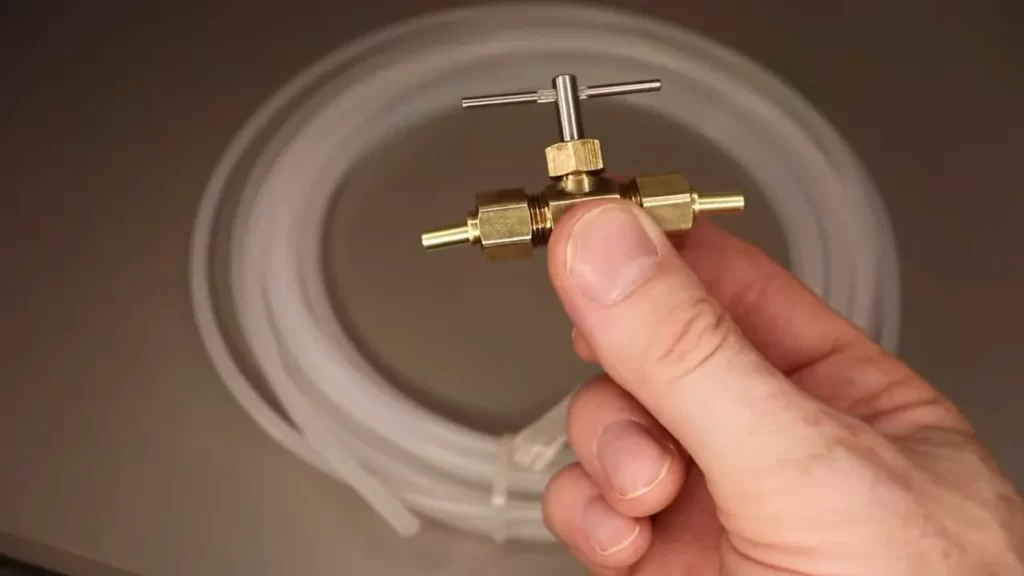
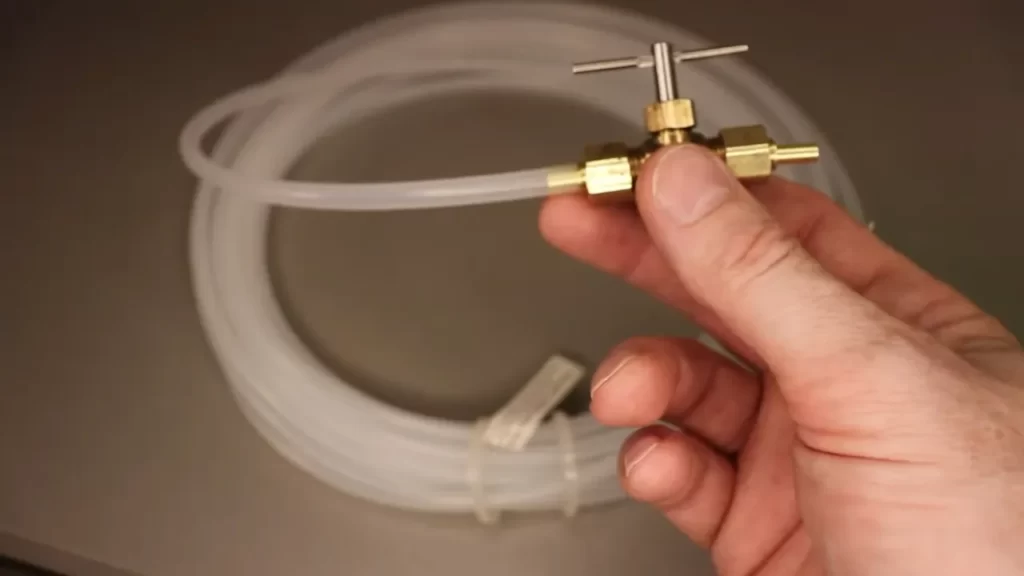
Needle Valve
The most important item you need for installing a needle valve is, of course, the needle valve itself. Make sure you have the appropriate size of needle valve that matches your specific application. Whether you’re working with gas or liquid, it’s crucial to choose a needle valve that is suitable for the pressure and flow requirements.
Pipe Wrench
A pipe wrench is an indispensable tool when it comes to installing a needle valve. It is used for gripping pipes securely, allowing you to tighten or loosen fittings effectively. A good-quality pipe wrench with adjustable jaws will ensure a tight and leak-free connection. Make sure you have the right size pipe wrench for the pipe or fitting you are working with.
Teflon Tape
Teflon tape, also known as plumber’s tape, is a handy material that helps create a watertight seal between threaded connections. It is essential for preventing leaks and ensuring the proper functioning of the needle valve. Apply the Teflon tape clockwise around the male threads of the pipe or fitting before screwing them together. Be sure to cover all the threads for a secure and leak-free connection.
Adjustable Wrench
An adjustable wrench is another tool you will need during the installation process. It is used to loosen or tighten nuts and bolts that secure the needle valve or other components in place. Having an adjustable wrench with a comfortable grip and smooth operation will make the task easier and more efficient. Ensure you have the right size adjustable wrench for the nuts or bolts you will be working with.
With these necessary tools and materials at your disposal, you are now ready to move on to the next steps of installing a needle valve. Be sure to have a clean and well-lit workspace, and follow the manufacturer’s instructions for precise installation. Taking your time and paying attention to detail will result in a successful and long-lasting needle valve installation.
Removing The Existing Valve
Before installing a new needle valve, it’s crucial to remove the existing valve properly. This ensures a clean and efficient installation process. In this section, we will walk you through the steps to remove the valve smoothly.
Loosening the Connections
The first step in removing the existing valve is to loosen the connections. Start by identifying the nuts or bolts securing the valve to the system. Using the appropriate tool, such as an adjustable wrench or a socket wrench, turn the nuts counterclockwise to loosen them. It is essential to ensure a secure grip on the fittings while loosening them to prevent any damage or leaks.
Removing the Valve
Once the connections are loosened, it’s time to remove the valve. Depending on the type of valve and its placement, you may need to apply additional measures for its removal. Here is a step-by-step guide:
- Begin by detaching the valve from the system by gently pulling it away. If there are any retaining clips or brackets holding the valve in place, remove them using pliers or a screwdriver.
- Inspect the valve for any additional components, such as washers or o-rings. Take note of their position, as they might need to be transferred to the new valve.
- If the valve seems stuck or difficult to remove, apply a penetrating oil or a rust loosener to the threaded portions. Allow it to sit for a few minutes to loosen any corrosion or debris.
- With a firm grip, twist the valve counterclockwise to unscrew it completely. If necessary, use a valve removal tool to assist in applying leverage.
Make sure to clean the area where the valve was installed to remove any residue or debris that may interfere with the installation of the new needle valve. It’s also a good idea to inspect the surrounding pipes and fittings for any signs of damage or wear and address them accordingly.
By following these simple steps, you will be able to remove the existing valve efficiently and prepare for the installation of your new needle valve smoothly.
Preparing The Valve For Installation
Before installing a needle valve, it’s important to properly prepare the valve to ensure a secure and leak-free connection. In this section, we will discuss the steps involved in preparing the valve for installation.
Applying Teflon Tape
One crucial step in preparing the valve for installation is applying Teflon tape to the threads. Teflon tape is a thin, white tape made from polytetrafluoroethylene (PTFE) that helps create a tight seal between the valve and the pipe, preventing leakage. Here’s how to apply Teflon tape:
- Before applying Teflon tape, make sure to clean the threads on both the valve and the pipe to remove any dirt or debris.
- Hold the end of the Teflon tape against the threads of the valve and start wrapping it clockwise around the threads. Make sure to apply enough tension to ensure that the tape adheres properly.
- Wrap the tape around the threads several times, overlapping each wrap slightly. This will help create a thicker barrier and improve the seal.
- Once you have wrapped the entire length of the threads, tear the tape off and press the end firmly against the valve to secure it in place.
Remember to apply Teflon tape only to the male threads of the valve and avoid covering the first few threads at the tip. This will prevent any loose tape from entering the flow and causing blockage or damage.
Inspecting the Threads
Before proceeding with the installation, it’s essential to inspect the threads of both the valve and the pipe to ensure they are in good condition. Here’s how to inspect the threads:
- Closely examine the threads on the valve and the pipe for any signs of damage, such as nicks, burrs, or corrosion. If you notice any issues, it’s important to address them before moving forward with the installation.
- Use a wire brush or a thread cleaning tool to remove any dirt, debris, or old Teflon tape from the threads. This will help ensure a proper fit and prevent leaks.
- If the threads are heavily damaged or worn, consider replacing the valve or consulting a professional for assistance.
By applying Teflon tape correctly and inspecting the threads, you can ensure a secure and leak-free installation of the needle valve. Taking the time to properly prepare the valve will help avoid any future issues and ensure optimal performance.
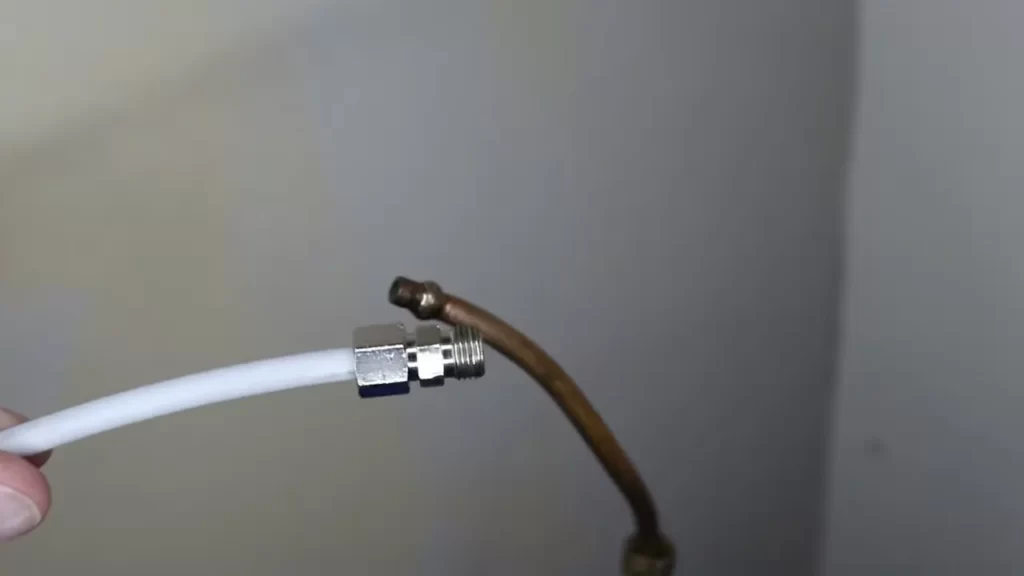
Installing The Needle Valve
When it comes to installing a needle valve, it is important to follow the proper steps to ensure it is securely attached and functioning correctly. This guide will walk you through the process, from attaching the valve to the pipe to tightening the connections.
Attaching the Valve to the Pipe
To begin the installation process, you will need a few tools and materials:
- Needle valve
- Pipe
- Wrench
- Teflon tape
Once you have gathered these items, follow the steps below:
- Start by preparing the pipe. Ensure that it is clean and free from any debris or obstructions. This will help create a tight seal with the valve.
- Wrap the threaded end of the pipe with Teflon tape. This will provide an additional layer of sealant to prevent leaks.
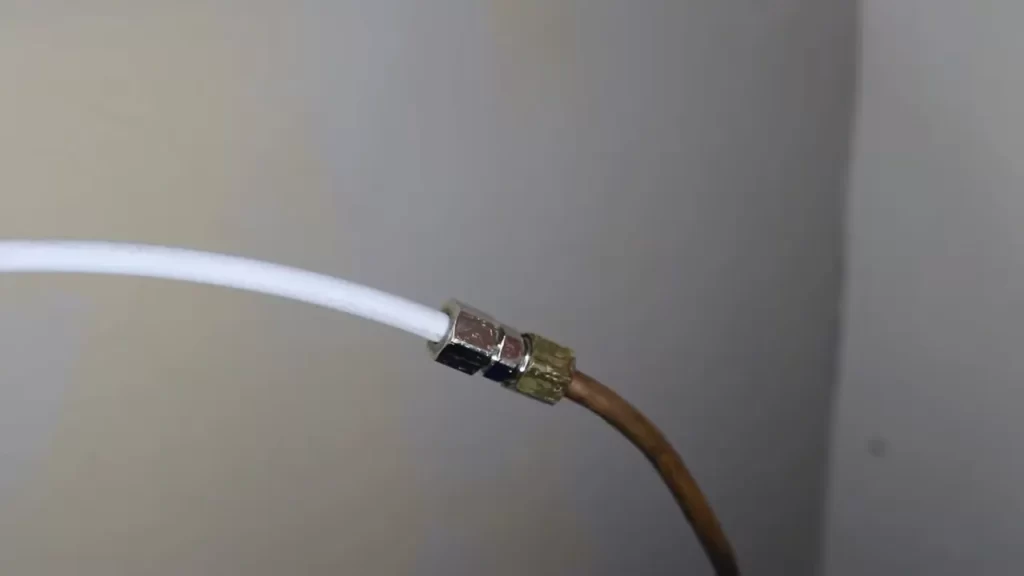
- Next, take the needle valve and carefully thread it onto the pipe. Use a wrench to tighten it securely, ensuring it is aligned properly.
Tightening the Connections
Once you have attached the needle valve to the pipe, it is important to tighten the connections properly. This will help prevent any leaks or issues down the line. Follow these steps:
- Using a wrench, gently tighten the valve onto the pipe. Be careful not to overtighten, as this could damage the threads and cause leaks.
- Inspect the connection to ensure it is secure. You should not be able to twist or turn the valve easily. If you notice any looseness, use the wrench to tighten it further.
- Once you are satisfied with the tightness of the connection, turn on the supply of gas or liquid to test for any leaks. Apply a mixture of soap and water to the connection and look for any bubbles. If bubbles appear, it indicates a leak, and you should revisit the tightening process.
By following these steps, you can successfully install a needle valve and ensure it is securely attached to the pipe. Remember to take your time during the installation process and double-check all connections to prevent any issues in the future.
Testing The Newly Installed Valve
Once you have successfully installed a needle valve, it is important to test it to ensure that it is functioning properly. This step is crucial as it helps you identify any potential issues or leaks before they become major problems. In this section, we will go over the steps to test your newly installed valve, so you can have peace of mind knowing that it is working efficiently.
Turning on the Water Supply
The first step in testing your newly installed needle valve is to turn on the water supply. To do this, locate the main water valve and turn it on in a clockwise direction until it is fully open. This will allow water to flow through the pipes and ultimately reach the needle valve that you have just installed.
Note: If you had to turn off the water supply during the installation process, ensure that all other valves in your plumbing system are closed before turning on the main water valve. This will prevent any water from escaping into areas where you might not want it.
Checking for Leaks
Once the water supply has been turned on, the next step is to check for any leaks around the newly installed needle valve. Leaks can result in wasted water, damage to your property, and costly repairs. Therefore, it is crucial to conduct a thorough inspection to mitigate any potential leaks.
To check for leaks, carefully examine all connections and joints surrounding the needle valve. Look for any signs of water dripping, pooling, or moisture accumulation. Additionally, run your fingers along the connections to feel for any wetness or dampness. If you do notice any leaks, it is important to address them immediately to prevent further damage.
Pro tip: If you are having trouble detecting leaks visually, you can use a water detection solution or a soapy water mixture. Apply this solution to the connections and joints and look for any bubbles or foaming, which indicates a leak. Take note of any areas where leaks are found for necessary repairs.
By conducting a thorough inspection, you can identify any leaks early on and take the necessary steps to fix them. This will help ensure that your newly installed needle valve operates efficiently and prevents any potential water damage or wastage.
Leak Detection And Repair
When it comes to needle valve installation, it is important to pay attention to leak detection and repair. A leaking valve can not only cause operational issues but also lead to wastage of resources and potential hazards. In this section, we will discuss how to identify the source of the leak, repair small leaks, and replace the valve if necessary.
Identifying the Source of the Leak
If you notice any leakage from your needle valve, the first step is to identify the source of the leak. This can be done by observing the valve and the surrounding area for any signs of moisture or dripping. Additionally, you can use a soapy water solution to apply on the valve and check for any bubbling, which indicates a leak.
Repairing Small Leaks
Once you have identified the source of the leak, you may be able to fix small leaks without replacing the entire valve. Here are the steps to follow:
- Turn off the supply: Before starting any repair work, ensure that the flow of fluid is turned off to prevent any accidents.
- Clean the area: Use a clean cloth or paper towel to wipe off any dirt or debris around the leaking area. This will help you have a clearer view and prevent any contamination.
- Tighten the fittings: Use a wrench or pliers to tighten the fittings of the needle valve. Be careful not to overtighten, as this may cause damage or further leaks.
- Apply sealant: If tightening the fittings doesn’t resolve the leak, you can apply a small amount of thread sealant or tape on the fittings to create a better seal.
Replacing the Valve if Necessary
If the leak persists or the valve is severely damaged, it may be necessary to replace the needle valve. Here’s what you should do:
- Turn off the supply: As with repairing small leaks, start by turning off the flow of fluid to the valve.
- Remove the old valve: Use a wrench to loosen and disconnect the fittings of the old needle valve. Be gentle to avoid damaging the surrounding components.
- Clean the area: Wipe off any remaining residue or debris from the previous valve’s installation.
- Install the new valve: Follow the manufacturer’s instructions to install the new needle valve. Ensure that the fittings are tightened securely but not overtightened. Utilize any provided gaskets or sealants to ensure a proper seal.
- Turn on the supply: Turn on the flow of fluid and check for any leaks. If there are no signs of leakage, you have successfully installed the new needle valve.
By following these steps, you can effectively detect and repair leaks in your needle valve. Remember to regularly inspect your valves to prevent any potential leaks or issues from causing further damage.
Frequently Asked Questions
How Do You Install A Compression Needle Valve?
To install a compression needle valve: 1. Shut off the flow of the fluid or gas. 2. Use a wrench to loosen the compression nut on the valve. 3. Insert the compression fitting into the valve and tighten the nut. 4.
Ensure the fitting is secure and leaks are sealed. 5. Turn on the flow and test for proper functioning.
How Do You Put A Needle Valve On A Carburetor?
To put a needle valve on a carburetor, follow these steps: 1) Locate the fuel bowl on the carburetor. 2) Remove the fuel bowl screws and take off the bowl. 3) Locate the existing needle valve and remove it. 4) Install the new needle valve.
5) Reassemble the fuel bowl and screws. It’s that simple!
Do Needle Valves Have A Flow Direction?
Yes, needle valves have a flow direction. They are designed to control the flow of fluid in one direction and minimize flow in the opposite direction.
What Is The Difference Between A Pin Valve And A Needle Valve?
A pin valve controls gas flow by adjusting the height of a pin, while a needle valve controls flow by adjusting the position of a needle-shaped plunger. Both valves are used in different applications to regulate gas flow with pinpoint precision.
Conclusion
To sum it up, installing a needle valve can seem like a daunting task, but with the right tools and a step-by-step approach, it becomes manageable. By following our detailed guide, you’ll be able to successfully complete the installation process and enjoy the benefits of a properly functioning needle valve.
Remember to double-check all connections and pay attention to safety precautions. With a little patience and persistence, you’ll have your needle valve up and running in no time. Happy installing!