
To install subway tile backsplash edges, measure and cut the tiles to fit the corners and edges, apply adhesive to the back of each tile, and press them firmly in place. The installation process may require additional steps such as applying grout and sealing the tile.
Subway tile backsplashes are a popular choice for many kitchens and bathrooms as they provide a timeless and clean look. Whether you are a DIY enthusiast or a professional, installing subway tile backsplash edges can be a relatively simple and rewarding project.
We will provide a step-by-step guide to help you achieve a professional and polished finish for your subway tile backsplash edges.
Gathering Materials And Tools
Before you dive into installing a subway tile backsplash, it’s important to gather all the necessary materials and tools. This will help ensure a smooth and efficient installation process. Here’s a list of items you’ll need to get started:
List of materials
To install subway tile backsplash edges, you’ll need the following materials:
- Subway tiles
- Tile adhesive
- Grout
- Tile spacers
- Tile edging
- Level
- Measuring tape
- Pencil
- Tile saw or tile cutter
- Grout float
- Sponge
- Buckets for mixing grout and cleaning
- Protective gloves
Tools needed
In addition to the materials, you’ll also need the following tools:
- Notched trowel
- Margin trowel
- Tile nipper
- Level
- Wet saw or tile cutter
- Grout float
- Sponge
- Buckets for mixing grout and cleaning
Make sure you have all the necessary materials and tools ready before you start the installation process. Having everything on hand will save you time and effort, allowing you to focus on creating a stunning subway tile backsplash for your kitchen or bathroom.
Measuring The Space
To ensure a precise and professional-looking installation of your subway tile backsplash edges, taking accurate measurements is paramount. Proper measurements will not only help you determine the amount of tile needed but also allow you to plan for any obstacles that may be present in your space. In this guide, we will go over the steps to take when measuring your backsplash area and accounting for any obstacles in the way.
Taking Accurate Measurements
Before diving into any home improvement project, it’s crucial to start with accurate measurements. In the case of installing a subway tile backsplash, measuring the space is no exception. Here are the steps to follow:
- Clear your backsplash area of any items that may obstruct your measurements.
- Using a measuring tape, measure the width of your backsplash area from one end to the other. Write down this measurement.
- Next, measure the height of your backsplash area from top to bottom. Again, record this measurement.
- If your backsplash area is not a perfectly rectangular shape, measure any additional sections separately. For instance, if you have a window or outlet in the middle of your backsplash, measure the width and height of that specific section.
Accounting for Obstacles
When taking measurements for your subway tile backsplash edges, it’s important to account for any obstacles that may be present. These obstacles can include electrical outlets, switches, windows, and cabinets. By incorporating the necessary adjustments into your measurements, you can ensure a seamless installation. Here’s how:
| Obstacle | How to Account for it |
|---|---|
| Electrical Outlet | Measure the width and height of the outlet and subtract these measurements from the total width and height of the backsplash area. |
| Switch | Measure the width and height of the switch and subtract these measurements from the total width and height of the backsplash area. |
| Window | Measure the width and height of the window and subtract these measurements from the total width and height of the backsplash area. |
| Cabinet | If your backsplash area is adjacent to a cabinet, measure the width and height of the cabinet and subtract these measurements from the total width and height of the backsplash area. |
By carefully measuring the space and accounting for obstacles, you will have the necessary information to purchase the right amount of subway tile and complete your backsplash installation with precision and confidence. Now that you have your measurements ready, it’s time to move on to the next step: preparing the surface for tiling.
Preparing The Surface
Cleaning the wall
Before installing your subway tile backsplash, it is crucial to ensure that the wall surface is clean and free from any dirt, grease, or debris. Cleaning the wall thoroughly will guarantee that the adhesive adheres properly and creates a strong bond.
To clean the wall, you can follow these simple steps:
- Start by removing any loose dirt or dust using a soft cloth or vacuum cleaner. This will prevent any particles from getting trapped under the tile.
- Mix a mild detergent, such as dish soap, with warm water in a bucket.
- Using a sponge or soft-bristle brush, scrub the wall gently in a circular motion to remove any grease or grime.
- Rinse the wall with clean water to remove any soap residue.
- Allow the wall to dry completely before proceeding with the installation.
Removing any existing backsplash
If you have an existing backsplash that needs to be removed before installing the subway tile, it’s important to take this step carefully to avoid damaging the wall.
Here are the steps to safely remove the existing backsplash:
- Start by turning off the power supply to any electrical outlets near the backsplash.
- Using a utility knife, carefully cut along the edges of the existing backsplash to loosen it from the wall.
- Using a putty knife or scraper, gently pry the backsplash away from the wall.
- Be mindful of any electrical wires or plumbing fixtures that may be hidden behind the backsplash.
- Once the backsplash is completely removed, clean the wall surface as mentioned earlier to prepare it for the installation of the new subway tile.
By following these steps and ensuring that the surface is properly prepared, you can be confident that your subway tile backsplash installation will be successful and long-lasting.
Applying The Thinset
When it comes to installing subway tile backsplash edges, one crucial step is applying the thinset. The thinset mortar acts as a bonding agent between the tile and the wall, ensuring a strong and durable installation. In this section, we will guide you through the process of mixing the thinset mortar and applying a skim coat of thinset before installing the subway tile backsplash edges.
Mixing the Thinset Mortar
To begin, you need to mix the thinset mortar according to the manufacturer’s instructions. It’s crucial to follow these instructions carefully to ensure the correct consistency. Generally, you will need to mix the dry thinset powder with water in a clean bucket using a mixing paddle attached to a power drill.
- Gather the required materials: a clean bucket, the thinset powder, water, and a mixing paddle.
- Pour the appropriate amount of water into the bucket, following the manufacturer’s recommendations. It’s best to start with a smaller amount of water and gradually add more if needed.
- Slowly add the thinset powder to the bucket while continuously mixing with the paddle attachment. This will help to prevent clumps and ensure a smooth and consistent mixture.
- Continue mixing until the thinset has a creamy and spreadable consistency. Avoid making the mixture too thin or too thick, as it can affect the bonding strength.
Applying a Skim Coat of Thinset
After successfully mixing the thinset mortar, the next step is to apply a skim coat to the wall surface. This will create a smooth and even base for the subway tile backsplash edges. Here’s how to do it:
- Clean the wall surface thoroughly to remove any dirt, grease, or debris that can affect the bonding strength of the thinset.
- Using a notched trowel, apply a thin layer of mixed thinset to the wall surface. Hold the trowel at a 45-degree angle and spread the thinset in an even manner.
- Make sure to work in small sections to prevent the thinset from drying out before tile installation. It’s recommended to cover approximately one square foot of the wall at a time.
- After spreading the thinset, use the notched side of the trowel to create ridges or grooves in the thinset. This helps to improve adhesion and enables the tiles to have a strong grip on the wall.
- Continue applying the skim coat of thinset and creating ridges until the entire area where the subway tile backsplash edges will be installed is covered.
Now that the thinset mortar has been mixed and a skim coat has been applied, you are ready to move on to the next step of installing the subway tile backsplash edges. Be sure to let the thinset cure according to the manufacturer’s instructions before proceeding with the tile installation. This will ensure a secure and long-lasting installation for your subway tile backsplash edges
Laying The Tiles
Laying the Tiles
When it comes to installing a subway tile backsplash, laying the tiles is a crucial step that requires precision and attention to detail. In this section, we will go through the process of creating a tile layout plan and spreading the thinset on the wall. Let’s get started!
Creating a Tile Layout Plan
Before you begin installing the subway tiles, it’s essential to create a tile layout plan. This step will help you determine the best arrangement for your backsplash and ensure that the edges look clean and professional. Here’s how to create a tile layout plan:
- Measure the Wall: Start by measuring the length and height of the wall where you will install the backsplash. This will give you an idea of how many tiles you will need.
- Divide the Wall: Divide the wall into sections using a measuring tape and level. This will help you create a straight and even layout.
- Dry Layout: Place the tiles on the wall without adhesive to visualize how they will look. Make any necessary adjustments to ensure a balanced and aesthetically pleasing layout.
- Mark Guidelines: Use a pencil and level to mark guidelines on the wall. These guidelines will serve as a reference point when installing the tiles.
Spreading the Thinset on the Wall
Once you have created a tile layout plan, it’s time to spread the thinset on the wall. Thinset is a specialized adhesive that will secure the subway tiles in place. Follow these steps:
- Prepare the Thinset: Mix the thinset according to the manufacturer’s instructions. Use a trowel to achieve a smooth and consistent texture.
- Start from the Center: Begin spreading the thinset on the wall, starting from the centerline marked in the tile layout plan. Use the notched side of the trowel to create ridges in the thinset.
- Work in Small Sections: It’s important to work in small sections to ensure that the thinset does not dry out before you have a chance to install the tiles. Aim to cover an area that you can tile within 15-20 minutes.
- Apply the Tiles: Press the subway tiles firmly into the thinset, aligning them with the marked guidelines. Use tile spacers to maintain consistent spacing between the tiles.
- Check for Level: Regularly use a level to ensure that the tiles are straight and even. Adjust them if necessary before the thinset dries.
- Clean Excess Thinset: Wipe off any excess thinset from the surface of the tiles using a damp sponge. Be careful not to disturb the alignment of the tiles.
By following these steps, you will be able to lay the subway tiles for your backsplash with confidence and precision. Remember to allow the thinset to cure before grouting, ensuring a durable and long-lasting installation. Happy tiling!
Cutting And Fitting Tiles
When it comes to installing a subway tile backsplash, cutting and fitting the tiles to fit around edges and corners is a crucial step. This is where precision and attention to detail come into play, ensuring a flawless and professional finish. In this section, we will walk you through the process of marking and measuring for cuts, as well as cutting tiles with a wet saw.
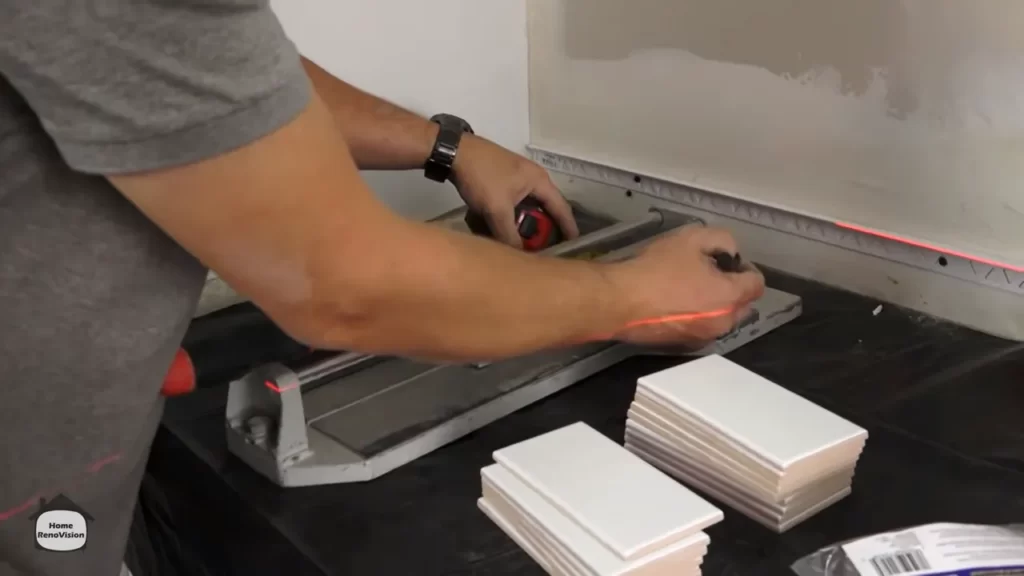
Marking and Measuring for Cuts
Before cutting any tiles, it’s important to accurately measure the space where the tiles need to fit. You don’t want to end up with uneven or misaligned tiles that can ruin the overall look of your backsplash.
Here’s a step-by-step guide to marking and measuring for cuts:
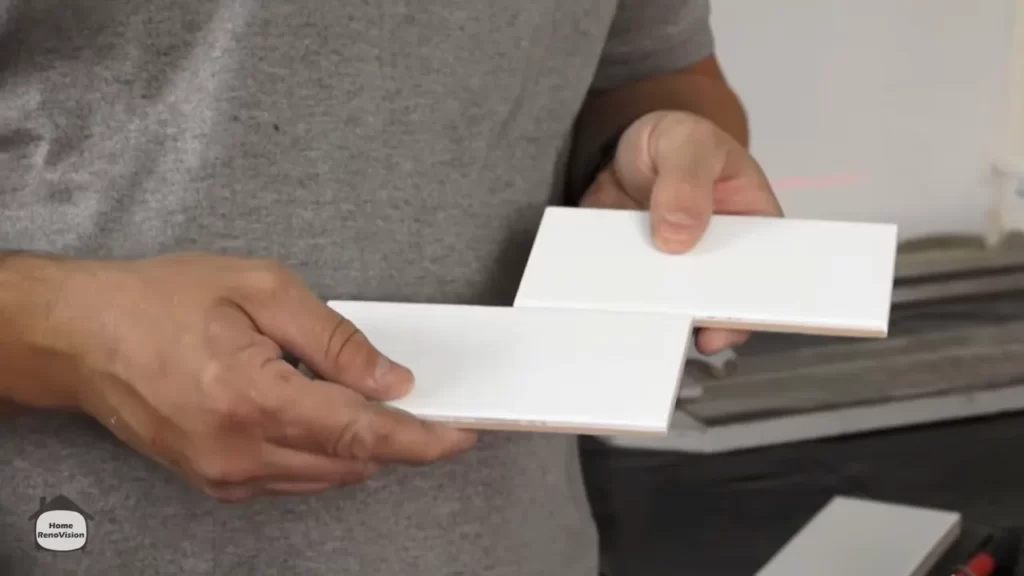
- Start by placing a full tile against the wall, leaving a small gap between the tile and any nearby edges or corners. This gap will later be filled with grout.
- Using a pencil or a marker, mark the tile where it needs to be cut to fit the desired size and shape. Make sure to account for any obstacles like outlets or switches.
- Measure the distance between the marked line and the edge of the tile. This measurement will help you determine the size of the cut.
- Repeat this process for all the tiles that require cutting.
By carefully marking and measuring your tiles, you can ensure a seamless fit that enhances the overall appearance of your backsplash.
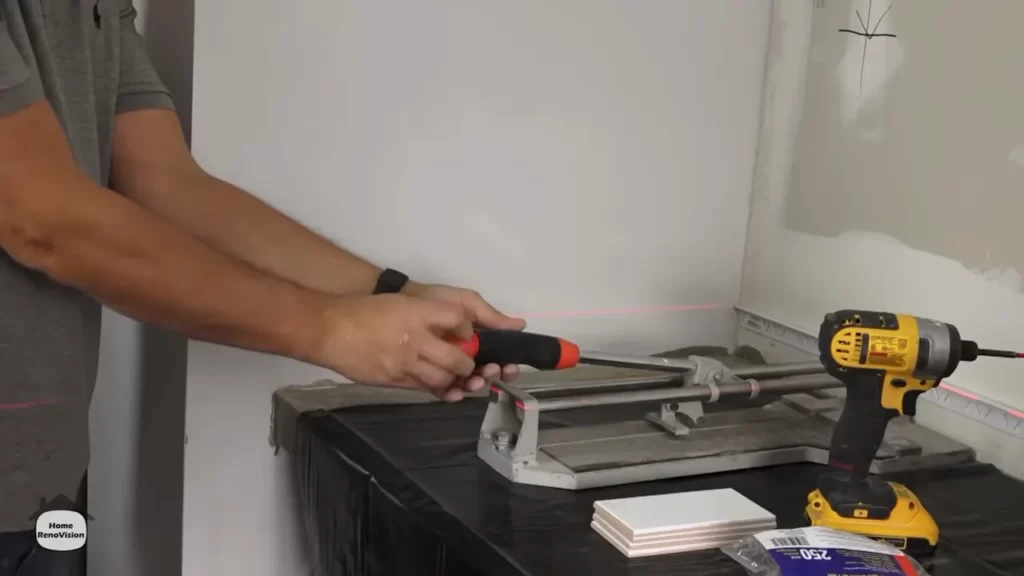
Cutting Tiles with a Wet Saw
When it comes to cutting tiles, especially those made of ceramic or porcelain, a wet saw is the tool of choice. A wet saw uses a diamond blade that cuts through tiles with precision and ease.
Follow these steps to cut tiles with a wet saw:
- Wear safety goggles and gloves to protect yourself from any potential hazards.
- Set up the wet saw according to the manufacturer’s instructions.
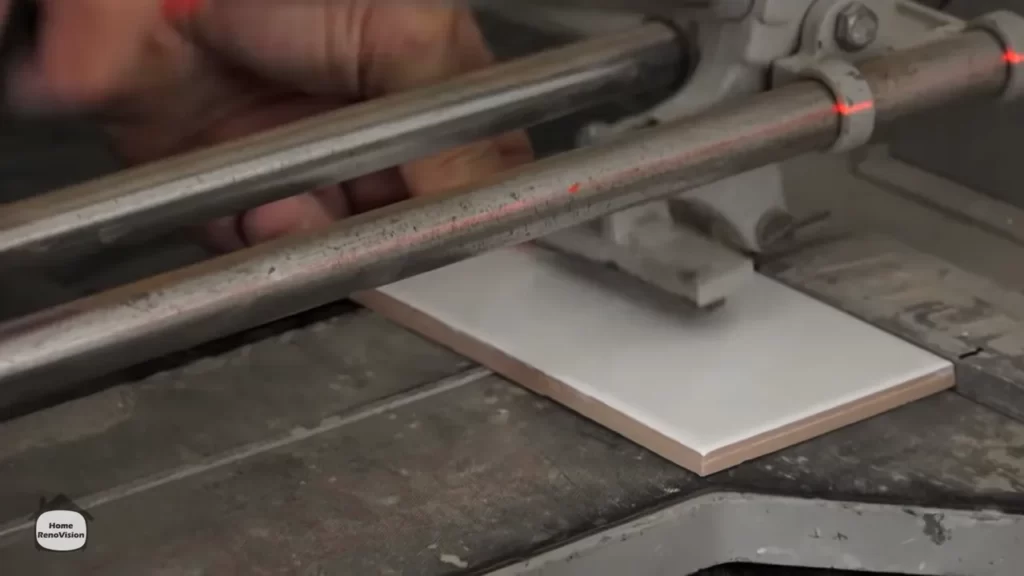
- Align the marked line on the tile with the saw’s blade.
- Slowly and steadily push the tile into the blade, allowing the saw to do the work. Avoid applying too much pressure, as it can cause the tile to crack or break.
- Once the cut is complete, remove the tile from the saw and inspect the edge for any roughness or unevenness.
- If needed, use a tile file or sandpaper to smooth out the cut edge.
Remember to take your time and work with caution when using a wet saw. It’s always a good idea to practice on spare tiles before making any cuts on your actual backsplash tiles.
Now that you know how to mark, measure, and cut tiles, you’re ready to tackle the edges of your subway tile backsplash with confidence. With a little patience and the right tools, you can achieve a professional-looking installation that will surely impress!
Installing The Edges
Installing the edges of your subway tile backsplash is the final touch that gives it a polished and professional look. Follow these simple steps to ensure a seamless installation.
Applying thinset to the edge tiles
Before you can install the edge tiles, you need to apply a layer of thinset adhesive to the back of each tile. Thinset adhesive is a cement-based mortar that provides a strong bond between the tile and the wall surface. Here’s how to do it:
- Clean the back of the edge tiles to remove any dust or debris.
- Using a notched trowel, spread a thin layer of thinset adhesive onto the back of the tile.
- Make sure to apply an even coat, covering the entire surface of the tile.
- Hold the trowel at a 45-degree angle to create ridges in the adhesive.
- This will help ensure proper adhesion between the tile and the wall.
Pressing the edge tiles into place
After applying the thinset adhesive, it’s time to press the edge tiles into place. Follow these steps to ensure a secure and clean installation:
- Starting at one end of the backsplash, carefully press the first edge tile onto the wall.
- Make sure it is aligned with the bottom row of subway tiles.
- Press firmly and evenly to ensure proper adhesion.
- Continue installing the remaining edge tiles in the same manner, working your way across the backsplash.
- Use a level to ensure that each tile is straight and aligned with the adjacent tiles.
- Make any necessary adjustments before the thinset adhesive dries.
- Repeat the process for the second row of edge tiles, if applicable.
By following these steps, you can install the edges of your subway tile backsplash with confidence. Take your time and ensure each tile is properly aligned and firmly pressed into place. Once the thinset adhesive is dry, you can grout the edges to complete the installation.
Preparing The Grout
Mixing the Grout
Before you start applying the grout to your subway tile backsplash edges, it’s important to mix it properly. Follow these simple steps to ensure a smooth and consistent grout mixture:
- Gather all the necessary tools and materials, including a grout mixing bucket, a margin trowel, and your grout.
- Read the instructions on the grout packaging to determine the appropriate water-to-grout ratio.
- Pour the recommended amount of water into the grout mixing bucket.
- Add the grout powder slowly into the water, using the margin trowel to stir and mix the mixture.
- Continue mixing until the grout reaches a thick, paste-like consistency with no lumps.
Letting the Grout Cure
After applying the grout to your subway tile backsplash edges, it’s crucial to let it cure properly to achieve the best results. Here are some steps to ensure the grout cures effectively:
- Allow the grout to sit undisturbed for the recommended curing time mentioned on the grout packaging.
- Avoid any contact or exposure to water or moisture during the curing process.
- Ensure the area is well-ventilated to aid in the drying and curing process.
- Use a grout sealer to protect the cured grout from stains and discoloration, following the manufacturer’s instructions.
Applying The Grout
After placing your subway tiles on the backsplash and allowing them to set, it’s time to move on to the next step – applying the grout. The grout not only secures the tiles in place but also adds a finishing touch to the overall look of your backsplash. Here’s a step-by-step guide on how to spread the grout over the tiles and remove any excess, ensuring a professional result.
Spreading the grout over the tiles
To start spreading the grout, you’ll need a grout float and a rubber grout float pad. It’s important to choose a grout color that complements your tiles, enhancing their appearance. With these essentials in hand, follow these simple steps:
- Carefully scoop a generous amount of grout onto the grout float. Make sure you’re using enough grout to fill the gaps between the tiles but avoid spreading it too thickly.
- Hold the grout float at a 45-degree angle and use it to spread the grout over the tiles, holding it firmly against the surface. Start from one edge and work your way across, making sure to cover all the gaps as evenly as possible.
- Apply gentle pressure as you move the grout float back and forth, ensuring the grout fills the gaps completely. This process helps to achieve a smooth and consistent application.
- Once you’ve spread the grout over a small section, use the edge of the grout float to carefully scrape off any excess grout from the tiles’ surface. Keep in mind that removing excess grout while it’s still relatively moist makes the cleanup process easier later on.
Repeat these steps section by section until you’ve applied the grout to the entire backsplash. Take your time to ensure that every gap is filled and the tiles are evenly coated.
Removing excess grout, ensuring a clean finish
After applying the grout, it’s necessary to remove any excess before it fully sets. This step is crucial for achieving a clean and polished look. Follow these steps to remove excess grout:
- Wait for the grout to dry for about 15-30 minutes or until it becomes tacky to the touch. This waiting period allows the excess grout to be easier to remove.
- Using a clean, damp sponge, gently wipe the surface of the tiles at a 45-degree angle. Be careful not to press too hard, as this can remove the grout from the gaps.
- Rinse the sponge frequently and continue wiping the tiles until the excess grout is completely removed. Make sure to clean the sponge regularly to avoid smearing grout residue over the tiles.
- Once you’ve removed the excess grout, let the grout cure according to the manufacturer’s instructions. Avoid touching or disturbing the grout until it’s fully dried, usually within 24 to 48 hours.
By diligently spreading the grout and removing any excess, you’ll achieve a subway tile backsplash with crisp, seamless edges that elevate the overall aesthetic of your space. Don’t rush the process and be sure to follow the manufacturer’s instructions for the best results.
Cleaning And Sealing
Cleaning and sealing your subway tile backsplash edges is an essential step to maintain their beauty and durability. Properly cleaning and sealing the tiles and grout not only helps prevent stains and water damage but also prolongs the lifespan of your backsplash. In this section, we will guide you through the process of wiping down the tiles and applying a sealer to the grout.
Wiping down the tiles
To start the cleaning process, you will need a mild detergent, warm water, and a soft sponge or cloth. Follow these steps to wipe down your subway tiles:
1. Fill a bucket with warm water.
2. Add a small amount of mild detergent to create a soapy solution.
3. Dip the sponge or cloth into the soapy solution and wring out any excess water.
4. Gently wipe the surface of the tiles, moving in a circular motion.
5. Pay extra attention to any stubborn stains or grime, using a moderate amount of pressure to remove them.
6. Rinse the sponge or cloth frequently in the bucket of clean water, ensuring you do not spread dirt or debris onto the tiles.
7. Once you have finished wiping down the entire backsplash, use a clean, damp cloth to rinse off any remaining soap residue.
8. Finally, dry the tiles thoroughly with a clean, lint-free cloth.
Applying a sealer to the grout
With the tiles cleaned, it’s time to protect the grout with a sealer. Follow these steps to apply the sealer to the grout lines:
1. Choose a high-quality grout sealer that is suitable for your subway tile backsplash. There are various types available, such as spray-on sealers or brush-on sealers.
2. Start by ensuring the grout lines are completely dry before applying the sealer. This will ensure optimal adhesion and prevent trapped moisture.
3. Using an applicator of your choice, such as a brush or sponge, apply the sealer to the grout lines. Be careful not to get the sealer on the tiles, as it can leave a residue.
4. Work in small sections, applying an even coat of the sealer, and allow it to penetrate into the grout for the recommended time mentioned on the sealer’s instructions.
5. After the specified time, wipe off any excess sealer from the tiles using a clean, dry cloth.
6. Repeat the process for the remaining sections until all grout lines are adequately sealed.
7. Allow the sealer to fully dry and cure, following the manufacturer’s instructions. This usually takes a few hours.
8. Once the sealer is dry, you can give your subway tile backsplash a final wipe-down with a clean, damp cloth, removing any smudges or fingerprints left during the sealing process.
By regularly cleaning and sealing your subway tile backsplash edges, you can maintain their shine and protect them from everyday wear and tear. Remember to follow these guidelines to ensure a successful cleaning and sealing process, leaving you with a beautiful and long-lasting backsplash.
Tips For A Successful Installation
Working in Small Sections
When it comes to installing a subway tile backsplash, working in small sections is key to achieving a successful installation. By breaking the process down into manageable parts, you can ensure precise and accurate placement of each tile. Here are some tips to help you navigate this process smoothly:
- Start by measuring the size of the area you plan to tile. This will help you determine how many tiles you will need and give you an idea of how to divide the space into smaller sections.
- Divide the area into smaller grids using a pencil and a level. This will act as a guideline for placing the tiles and will ensure a straight and even installation. Make sure the grids are well spaced to allow room for grout lines.
- Apply a suitable adhesive or thin-set mortar to the first small section using a notched trowel. Spread the adhesive evenly, making sure to create grooves for better adhesion.
- Place the first tile at the corner of the grid and press it firmly into the adhesive. Ensure the tile is aligned with the grid lines and level with the surrounding tiles. Use a tile spacer to maintain consistent spacing between tiles.
- Continue placing tiles in the first small section, following the grid lines and using tile spacers to ensure consistent spacing. Work in a linear fashion, moving from one row to the next, until the section is complete.
- Once the section is complete, allow the adhesive to dry according to the manufacturer’s instructions before moving on to the next section. This will prevent the tiles from shifting or becoming uneven.
Using Tile Spacers for Consistent Spacing
Consistent spacing between tiles is crucial for a professional-looking subway tile backsplash. Tile spacers are small plastic or rubber tools that help maintain consistent spacing and ensure a clean and polished outcome. Follow these tips when using tile spacers:
- Choose the appropriate size of tile spacers for your desired grout line width. Common sizes include 1/8 inch, 1/16 inch, and 3/16 inch.
- Place the tile spacer at each corner of the tile, ensuring it is fully inserted and snug against the neighboring tile. This will create an even gap for grout.
- Continue placing tile spacers between adjacent tiles, working your way across the section. Adjust the position of the spacers as needed to maintain consistent spacing.
- Regularly check that the tiles are level with each other and aligned with the grid lines. Adjust as needed before the adhesive dries.
- After completing a section, carefully remove the tile spacers before the adhesive dries. Gently pull them out in an upward motion to avoid disturbing the tiles.
By following these tips and working in small sections with the help of tile spacers, you can ensure a successful installation of your subway tile backsplash. Take your time, be patient, and enjoy the process of transforming your kitchen or bathroom into a stylish and functional space.
Troubleshooting Common Issues
When installing a subway tile backsplash, it’s not uncommon to run into a few common issues along the way. Troubleshooting these problems can help ensure a seamless installation and a beautiful end result. In this section, we’ll discuss two common issues that may arise during the installation process: tiles not sticking to the wall and uneven grout lines.
Tiles not sticking to the wall
If you find that your subway tiles are not sticking to the wall properly, don’t panic. This issue can usually be easily resolved by making a few adjustments to your installation technique. Here are some troubleshooting tips to help you get those tiles to adhere securely:
- Ensure that the wall surface is clean and dry before applying the adhesive. Any dirt or moisture on the wall can prevent the tiles from sticking properly.
- Check the expiration date on your adhesive. Using expired or improperly stored adhesive can lead to poor adhesion.
- Apply the adhesive evenly using a notched trowel. Make sure to create consistent ridges in the adhesive to create a strong bond between the tiles and the wall.
- Press the tiles firmly onto the adhesive, using a slight twisting motion to help them settle into place.
- Consider using tile spacers to ensure even spacing between the tiles. This can help prevent them from sliding out of place while the adhesive sets.
- If you’re still having trouble getting the tiles to stick, you may need to switch to a different type of adhesive or consult a professional for further assistance.
Uneven grout lines
Uneven grout lines can detract from the overall appearance of your subway tile backsplash. Fortunately, there are a few strategies you can employ to troubleshoot this issue and achieve beautiful, uniform grout lines:
- Start by selecting the right grout consistency. If your grout is too dry or too wet, it can make it difficult to achieve smooth, even lines. Follow the manufacturer’s instructions for the best results.
- Use a grout float to apply the grout, ensuring that it is evenly spread across the tile surface.
- Wipe away excess grout with a damp sponge at a 45-degree angle, being careful not to remove too much grout from the lines.
- Allow the grout to set for the recommended amount of time before giving it a final clean with a clean, damp sponge.
- If you notice any particularly uneven areas, you can use a grout scraper or a small brush to gently remove excess grout and create more even lines.
Tackling common issues that may arise during the installation of your subway tile backsplash can help ensure a successful and visually appealing result. With the troubleshooting tips provided above, you’ll be better equipped to address any problems that come your way and achieve a stunning backsplash that enhances the beauty of your space.
Enjoying Your New Subway Tile Backsplash
Admiring the Finished Result
Once you have successfully installed your subway tile backsplash, it’s time to step back and admire the stunning transformation it has brought to your kitchen or bathroom. The clean lines and classic look of subway tiles add a touch of timeless elegance to any space. The contrasting grout lines create a visual interest that enhances the overall aesthetic appeal of your backsplash.
Take a moment to appreciate:
- The smooth and sleek surface of the tiles
- The way the tiles seamlessly blend with your existing decor
- The bright and refreshing feel it adds to the room
The satisfaction of a job well done is undeniable. Whether you tackled the installation yourself or hired a professional, the effort you put into creating your subway tile backsplash is evident in the finished result. This stylish addition is sure to become the focal point of your kitchen or bathroom.
Maintaining the Backsplash for Longevity
To ensure the longevity of your subway tile backsplash, it’s essential to implement proper maintenance practices. With regular care and attention, you can keep your backsplash looking pristine for years to come. Here are some tips to maintain the beauty of your installation:
- Wipe down the tiles regularly with a damp cloth to remove any splatters or spills that may occur during cooking or daily use.
- Avoid using harsh abrasive cleaners that can damage the tiles or erode the grout. Instead, opt for a mild, non-abrasive cleaner specifically designed for tile surfaces.
- Periodically check the grout lines for any signs of cracking or discoloration. If needed, apply a grout sealer to protect the grout and prevent water penetration.
- Be cautious when placing heavy objects or sharp utensils near the backsplash to prevent any accidental damage.
- Consider using a tile and grout cleaner to deep clean the backsplash at least once a year, removing any built-up dirt or stains.
By following these simple maintenance tips, you can extend the life and beauty of your subway tile backsplash, ensuring it continues to impress for years to come.
Frequently Asked Questions
How Do You Finish The Edge Of A Subway Tile Backsplash?
To finish the edge of a subway tile backsplash, you can use bullnose tiles. They have a rounded edge that gives a finished look. Another option is to use metal or PVC edge trim. This provides a sleek and clean finish to your backsplash.
Do You Need An Edge For Subway Tile?
No, subway tile does not require an edge.
Where Do You Start A Subway Tile Backsplash?
Start a subway tile backsplash by finding the centerline of your wall, using a level to draw a vertical guideline, and applying thinset adhesive. Begin tiling from the bottom and work your way up, using tile spacers to ensure even spacing.
Apply grout and seal the tiles for a finished look.
Where Do You End A Subway Tile Backsplash?
The subway tile backsplash should end at a corner or an edge, creating a finished and clean look. Avoid leaving open edges or abrupt stops for a polished aesthetic.
Conclusion
Installing subway tile backsplash edges is a straightforward process that adds a polished look to any kitchen or bathroom. With proper tools and careful measurement, you can achieve professional-looking results. Remember to follow the steps precisely and take your time to ensure an accurate installation.
Whether you’re a DIY enthusiast or a professional contractor, this guide will help you bring a touch of elegance to your home. So, get ready to transform your space with beautiful subway tile backsplash edges.