To install a glass shower wall, measure the width and height of the wall, then mark the location for installation. Remove any existing wall and patch the area if necessary.
Apply adhesive to the glass panels and carefully attach them to the wall. Allow the adhesive to dry completely before using the shower.
Factors To Consider Before Installing A Glass Shower Wall
Factors to Consider Before Installing a Glass Shower Wall
Installing a glass shower wall can add a touch of elegance and sophistication to your bathroom. It can create a spacious and open feel, allowing natural light to flow through and enhancing the overall aesthetic of the space. However, before embarking on this project, there are several important factors to consider to ensure a successful installation. Here are three key aspects that need to be taken into account.
Measuring the Available Space and Determining the Dimensions
As with any home improvement project, precise measurements are crucial when installing a glass shower wall. Start by measuring the available space in your bathroom to determine the dimensions of the shower wall. Consider the height, width, and depth of the area where the wall will be installed. Taking accurate measurements will help you choose the right size and ensure a seamless fit. Keep in mind that glass panels can be customized to fit specific dimensions, so be sure to consult with a professional to determine the exact measurements.
Choosing the Appropriate Type of Glass for the Shower Wall
When it comes to glass shower walls, the type of glass you choose can greatly impact both the functionality and aesthetics of the installation. There are various options available, each with its own unique features. Consider factors such as privacy, maintenance, and durability when selecting the type of glass. Some popular choices include clear glass, frosted glass, and patterned glass. Clear glass can create a minimalistic and open look, while frosted glass provides greater privacy. Patterned glass can add an artistic flair to your bathroom. Take into account your personal preferences and the overall theme of your bathroom to make an informed decision.
Assessing the Structural Integrity of the Bathroom Walls
Prior to installing a glass shower wall, it is important to assess the structural integrity of the bathroom walls. The walls should be sturdy enough to support the weight of the glass panels. Cracks, water damage, or weak spots in the walls can compromise the installation and pose a safety risk. If any issues are detected, they should be addressed and resolved before proceeding with the installation. It is recommended to consult with a professional contractor or a structural engineer to ensure that the walls are in optimal condition to support the glass shower wall securely.

Essential Tools For Installing A Glass Shower Wall
Essential Tools for Installing a Glass Shower Wall
Installing a glass shower wall is not only a functional addition to your bathroom but also a stylish one. With its sleek and modern look, a glass shower wall can instantly elevate the overall aesthetic of your space. However, before you embark on this project, it’s important to ensure that you have the essential tools at hand to make the installation process smooth and seamless. Here are the must-have tools for installing a glass shower wall:
Measuring Tape
A measuring tape is an indispensable tool when installing a glass shower wall. It allows you to accurately measure the dimensions of your space, ensuring that your glass panels fit perfectly. When using the measuring tape, be sure to measure both the height and width of the shower area, as well as any alcoves or niches that may affect the placement of the glass panels.
Level
A level is essential for ensuring that your glass shower wall is perfectly straight and level. Before beginning the installation, check that your level is in good working condition, as any inaccuracies could result in an uneven installation. Use the level to confirm that the floor and walls are level, and adjust as necessary before proceeding.
Drill with Appropriate Bits
In order to secure the glass panels to the walls, you’ll need a drill with the appropriate bits. Glass is a delicate material, so it’s important to use the correct drill bit to avoid cracking or shattering the panels. Consult the manufacturer’s instructions or seek advice from a professional to determine the appropriate drill bit for your specific glass shower wall installation.
Screwdriver
A screwdriver is necessary for tightening the screws that secure the glass panels in place. Opt for a screwdriver with a comfortable grip, as this will make the installation process easier and more efficient. Using the appropriate screwdriver, carefully insert the screws into the pre-drilled holes and tighten them securely, but be cautious not to overtighten and damage the glass panels.
Silicone Caulking Gun
Finally, a silicone caulking gun is essential for creating a watertight seal between the glass panels and the surrounding walls. Silicone caulk is a flexible and waterproof material that helps to prevent leaks and water damage. Load the silicone caulking gun with the appropriate tube of silicone caulk, and apply a thin and even bead along the edges of the glass panels and where they meet the walls.
With these essential tools at your disposal, you’re well-equipped to successfully install a glass shower wall in your bathroom. Remember to take your time and work carefully, following the manufacturer’s instructions and seeking professional guidance if needed. Soon enough, you’ll have a stunning and functional glass shower wall that adds a touch of elegance to your bathroom space.
Required Materials For Installing A Glass Shower Wall
Installing a glass shower wall can instantly transform the look of your bathroom, creating a stylish and modern space. Before you begin the installation process, it is important to gather all the necessary materials to ensure a smooth and successful project. In this section, we will cover the required materials for installing a glass shower wall, including glass panels, wall mounts or brackets, screws, anchors, silicone caulk, and glass cleaner.
Glass Panels
One of the primary components needed for installing a glass shower wall are the glass panels. These panels come in various shapes, sizes, and thicknesses, allowing you to customize your shower enclosure according to your preferences. It is essential to measure the dimensions of your shower area accurately to ensure that you purchase the correct size glass panels. Additionally, consider the type of glass you want, such as clear, frosted, or textured, to achieve the desired level of privacy and aesthetics.
Wall Mounts or Brackets
To securely attach the glass panels to your bathroom walls, you will need wall mounts or brackets. These hardware pieces act as a support system for the glass panels and ensure their stability. When selecting wall mounts or brackets, consider the weight and size of your glass panels to choose the appropriate ones that can withstand the load. It is crucial to follow the manufacturer’s instructions while installing wall mounts or brackets to guarantee a sturdy and safe shower enclosure.
Screws
Screws play a vital role in securing the wall mounts or brackets to the walls. High-quality screws that are suitable for your specific wall type, such as drywall or tile, are important for proper installation. It is recommended to use corrosion-resistant screws to prevent rusting and maintain the integrity of the installation over time. Be sure to choose the correct screw size and length to provide maximum support for the glass panels and ensure a long-lasting shower enclosure.
Anchors
In some cases, the use of anchors is necessary to provide additional support when installing a glass shower wall. Anchors are typically used when attaching the wall mounts or brackets to materials such as concrete or stone walls. They help distribute the weight of the glass panels evenly and strengthen the installation. Make sure to choose anchors that are suitable for the specific material and load capacity, ensuring a stable and secure glass shower wall.
Silicone Caulk
Silicone caulk is an essential material for sealing the gaps between the glass panels and the walls, ensuring a watertight and moisture-resistant shower enclosure. It helps prevent water leakage and protects the walls from damage caused by moisture. Choose a high-quality silicone caulk that is specifically formulated for bathrooms and is resistant to mold and mildew. Proper application of silicone caulk is crucial for a professional-looking finish and a durable glass shower wall.
Glass Cleaner
Once your glass shower wall is installed, it is important to keep it clean and sparkling. Regular maintenance and cleaning are essential to preserve the beauty and clarity of the glass panels. Using a suitable glass cleaner specifically designed for shower enclosures will help remove soap scum, water spots, and other residues, leaving your glass shower wall looking pristine. Be sure to follow the instructions provided by the glass cleaner manufacturer to achieve the best results and maintain the longevity of your glass shower wall.
Step 1: Prepare The Walls And Floor For Installation
Before you can begin the installation of your glass shower wall, it is essential to properly prepare the walls and floor. This will ensure a smooth and successful installation process. In this step, we will guide you through the necessary tasks to complete this preparation phase.
Remove any existing shower doors or barriers
If you currently have any shower doors or barriers in place, it is important to remove them before proceeding with the installation of your glass shower wall. Removing these obstacles will create a clean and open space for the new wall to be installed.
Clean the walls and floor thoroughly
Once any existing shower doors or barriers have been removed, thoroughly cleaning the walls and floor is crucial. By doing so, you will create an ideal surface for the adhesive to bond with, ensuring a secure and long-lasting installation. Use a mild detergent and warm water to remove any dirt, grime, or existing adhesive residue. Rinse the surfaces well and allow them to dry completely before moving on to the next step.
Mark the desired height for the glass shower wall
Before proceeding with the installation, it is important to mark the desired height for your glass shower wall. This will ensure that the wall is installed at the correct height, providing the perfect balance between privacy and aesthetic appeal. Use a measuring tape and a level to determine the ideal height, and mark it on the walls. Take time to double-check your measurements to avoid any later adjustments or issues during the installation process.
In conclusion, the preparation of the walls and floor is a crucial step in the installation of a glass shower wall. By removing any existing doors or barriers, cleaning the surfaces thoroughly, and marking the desired height, you will be ready to move on to the next steps of the installation process with confidence and ease.
Step 2: Install The Wall Mounts Or Brackets
Once you have measured and marked the positions for the wall mounts or brackets, it’s time to move on to the installation process. This step is crucial as it will determine the stability and strength of your glass shower wall. Follow the steps below to ensure a secure and sturdy installation.
Measure and mark the positions for the wall mounts or brackets
Before drilling any holes in your bathroom walls, take precise measurements and mark the positions for the wall mounts or brackets. Use a tape measure to determine the exact height and width where you want to place your glass shower wall. Consider the dimensions of your glass panels and make sure there is enough space for a seamless fit.
Once you have the measurements, mark the positions on the walls using a pencil or marker. Ensure that the marks are level and aligned correctly, as any deviation can result in a misaligned installation.
Drill pilot holes for the screws
With the marked positions ready, it’s time to drill pilot holes for the screws that will hold the wall mounts or brackets in place. Use an appropriate drill bit based on the type of wall you have. For tiled walls, a carbide-tipped drill bit is recommended.
Start by selecting the drill bit size that matches the diameter of the screws you will be using. Place the drill bit at the marked position and drill slowly at a perpendicular angle to the wall. Apply gentle pressure and use caution not to damage the wall or the tiles. Repeat this process for all the marked positions.
Attach the wall mounts or brackets securely to the walls
Once the pilot holes are drilled, it’s time to attach the wall mounts or brackets. Begin by aligning the mounts or brackets with the drilled holes and insert the screws through them. Use a screwdriver or a power drill to secure the mounts or brackets tightly to the walls.
Ensure that each screw is tightened properly, but be cautious not to overtighten as it may damage the wall or crack the tiles. Check the stability of the mounts or brackets by giving them a slight push or tug. If they feel loose, reinforce them by tightening the screws further. Repeat this process for all the wall mounts or brackets.
By following these steps, you will successfully install the wall mounts or brackets for your glass shower wall. This sturdy foundation will provide the necessary support for your glass panels, creating a safe and beautiful shower experience. With the wall mounts or brackets securely in place, you are now ready for the next step in the installation process.
Step 3: Install The Glass Panels
Now that you have prepared the wall mounts or brackets in the previous step, it is time to move on to the exciting part of the glass shower wall installation – installing the glass panels. Follow these steps to ensure a smooth and successful installation:
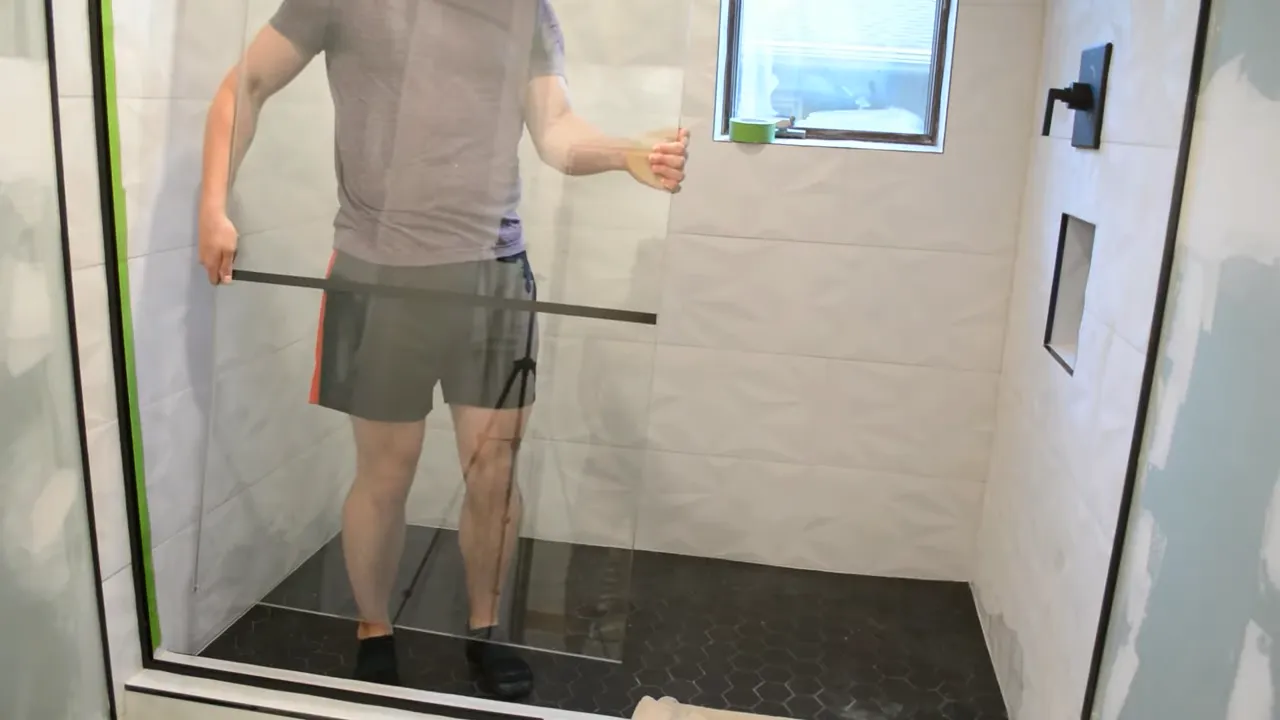
Carefully lift and position the glass panels onto the wall mounts or brackets
Firstly, you need to carefully lift the glass panels and position them onto the wall mounts or brackets. It is important to handle the glass panels with care to avoid any damage. Enlist the help of a friend or family member to assist you in maneuvering the larger and heavier panels into place.
Place each glass panel onto the corresponding wall mount or bracket, ensuring that it sits securely and snugly. Take your time to make sure you align each panel correctly before proceeding to the next step.
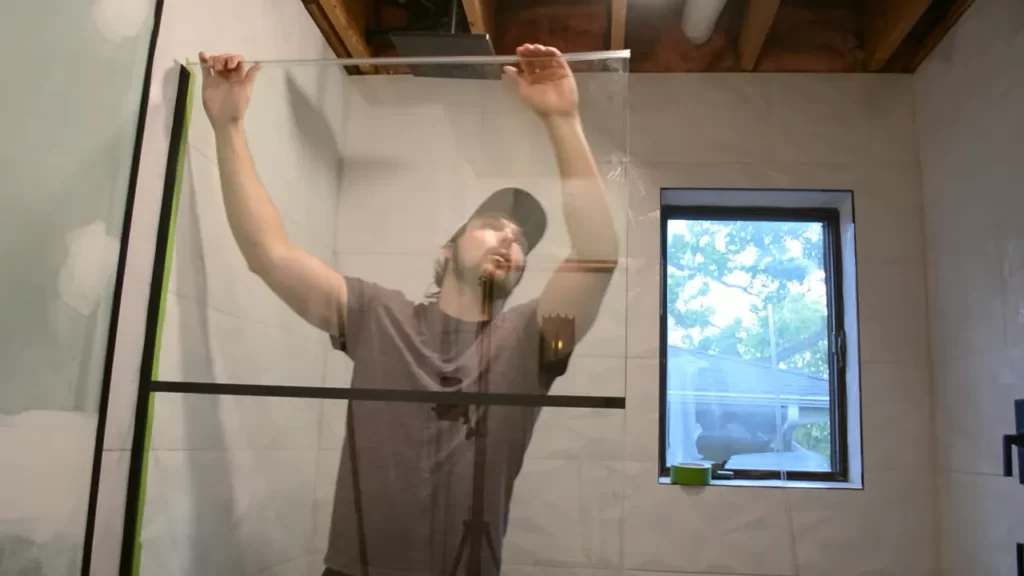
Ensure the panels are level and plumb
Once the glass panels are in position, it is crucial to ensure that they are level and plumb. Use a level tool to check both the horizontal and vertical alignment of each panel. Adjust the positioning as necessary to achieve a perfectly level and plumb installation. This step is essential to not only ensure the aesthetic appeal of your glass shower wall but also to prevent any leakage issues in the future.
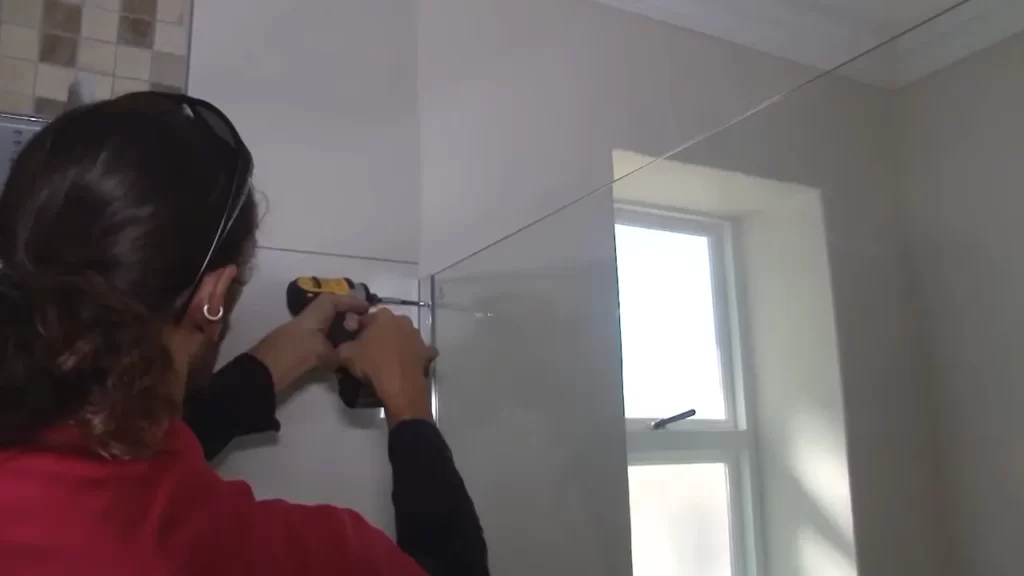
Secure the panels to the wall mounts or brackets using screws
With the glass panels in the correct position and aligned properly, the final step is to secure them to the wall mounts or brackets using screws. This will provide the necessary stability and support for your glass shower wall. Carefully drill pilot holes into the wall mounts or brackets, and then insert the screws to secure the panels in place. Take care not to overtighten the screws, as this could lead to cracks or damage in the glass. Use a wrench or screwdriver to ensure a secure but gentle fastening.
Repeat this process for each glass panel until the installation is complete. Make sure to double-check the alignment and stability of each panel before moving on to the next one.
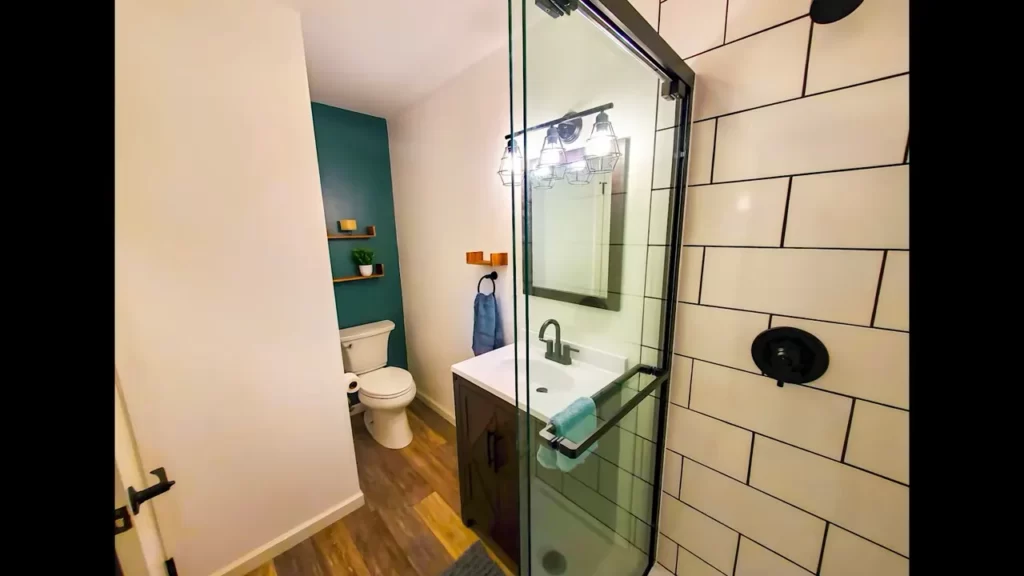
Follow these steps diligently, and soon you will have successfully installed your glass shower wall panels. With their sleek and modern appearance, these glass panels will transform your bathroom into a stunning and refreshing space.
Next Step: Seal the edges and clean the glass shower wall
With the glass panels securely installed, the next step is to seal the edges and clean the glass shower wall. This will ensure a watertight and polished finish. Stay tuned for our next article where we will guide you through the necessary steps to complete your glass shower wall installation project.
Step 4: Seal The Edges And Gaps
Sealing the edges and gaps of your glass shower wall is crucial to prevent water leakage and ensure a sturdy installation. By properly sealing these areas, you can maintain the integrity of your shower enclosure and keep your bathroom dry.
Apply silicone caulk along the edges of the glass panels
To start the sealing process, carefully apply silicone caulk along the edges of the glass panels. Silicone caulk is a flexible sealant that provides excellent adhesion and waterproofing properties. Use a caulk gun to dispense the caulk smoothly and evenly along the edges.
Smooth out the caulk using a caulk tool or finger
Once the caulk is applied, use a caulk tool or your finger to smooth out the caulk. This step is important as it helps to create a neat and professional finish. Ensure that the caulk is evenly distributed and there are no lumps or gaps left behind. Smoothing out the caulk also ensures better adhesion and sealing.
Fill any gaps between the panels and the walls with silicone caulk
Next, inspect the gaps between the glass panels and the walls of your shower enclosure. If there are any visible gaps, fill them with silicone caulk. This will prevent water from seeping through the gaps and causing damage to the surrounding areas. Make sure to apply the caulk in a continuous and even manner, covering the entire length of the gap.
Remember to choose a silicone caulk that is specifically designed for bathroom and shower applications. This type of caulk is resistant to mold and mildew, ensuring long-lasting protection for your glass shower wall.
Step 5: Clean And Maintain The Glass Shower Wall
Once the glass shower wall is installed, it’s important to keep it clean and well-maintained to ensure it stays looking pristine for years to come. Regular cleaning and maintenance will not only enhance its aesthetic appeal but also prolong its durability. Here are the essential steps to follow:
Remove any excess caulk or residue
Before cleaning the glass panels, it’s crucial to remove any excess caulk or residue that may have been left behind during the installation process. This can be done using a scraper or putty knife, making sure to use gentle strokes to avoid scratching the glass.
Clean the glass panels using a glass cleaner
After removing any caulk or residue, it’s time to clean the glass panels using a high-quality glass cleaner. Choose a non-abrasive cleaner specifically designed for glass surfaces to avoid any potential damage. Spray the cleaner onto the glass and wipe it clean using a soft, lint-free cloth or a sponge. Make sure to reach all areas, including the corners and edges.
Regularly inspect and maintain the seals and hardware
In addition to cleaning the glass panels, it’s essential to regularly inspect and maintain the seals and hardware of your glass shower wall. Over time, seals and hardware can become loose or worn out, leading to potential water leaks or other issues. Inspect the seals and hardware regularly to ensure they are in good condition. Tighten any loose screws or bolts and replace any worn-out seals promptly. This will help to maintain the integrity and functionality of your glass shower wall.
By following these simple steps, you can keep your glass shower wall clean, sparkling, and well-maintained. Regular cleaning and maintenance will not only preserve its beauty but also ensure it continues to provide a luxurious and modern addition to your bathroom for years to come.
Safety Precautions When Installing A Glass Shower Wall
Safety Precautions When Installing a Glass Shower Wall
When installing a glass shower wall, it is essential to prioritize safety to ensure a successful and accident-free installation. Proper precautions must be taken to minimize the risk of injuries and breakage. Here are some key safety measures to keep in mind:
Use Protective Gloves and Eyewear
Wearing protective gloves and eyewear is vital when handling glass panels. These serve as a barrier against sharp edges and potential eye injuries from flying debris. Make sure to choose gloves that fit well and allow for a secure grip on the glass panels. Safety goggles or glasses with impact-resistant lenses should be worn to shield the eyes from any possible hazards.
Handle the Glass Panels with Care to Avoid Breakage
Glass shower walls can be fragile, especially during installation. To prevent breakage, it is important to handle the glass panels with caution. Avoid placing excessive pressure on any one area of the glass and take care not to drop or strike the panels against hard surfaces. When moving the glass, use two hands to distribute the weight evenly and minimize the risk of accidents.
Follow the Manufacturer’s Instructions and Guidelines
To ensure a safe and successful installation, it is crucial to adhere to the manufacturer’s instructions and guidelines. These instructions are specifically designed to provide the best practices for handling and installing the glass shower wall effectively. Carefully read through the provided documentation, paying attention to weight limits, installation methods, and any special requirements. Following these instructions will help avoid unnecessary risks and potential damage to the glass panels.
In conclusion, safety precautions play a crucial role in the installation of a glass shower wall. Using protective gloves and eyewear, handling the glass panels with care, and following the manufacturer’s instructions are vital steps to ensure a safe and successful installation process. By taking these precautions, you can minimize the risk of injuries and breakage, creating a beautiful and secure glass shower wall for your bathroom.
Tips For A Successful Glass Shower Wall Installation
Double-check all measurements before drilling or cutting
Accurate measurements are crucial when it comes to installing a glass shower wall. Any mistakes made during the measuring process can lead to a less-than-perfect fit, which may compromise the overall look and functionality of your shower. To ensure precision, take the time to double-check all measurements before proceeding with any drilling or cutting.
Tips:
- Use a measuring tape or laser level to measure the dimensions of your shower area. Measure the height, width, and depth to determine the size of the glass panels needed.
- Pay attention to any obstacles such as fixtures or tiles that may affect the measurements. Make adjustments for these obstacles to ensure a seamless installation.
- Write down your measurements and refer to them throughout the installation process to avoid any errors.
- Remember: Measure twice, cut or drill once!
Take your time and work patiently to ensure accuracy
Installing a glass shower wall requires patience and precision. Rushing through the process may result in mistakes that can be costly and time-consuming to fix. Take your time and follow each step carefully to ensure a successful installation.
Tips:
- Plan Ahead: Familiarize yourself with the installation instructions provided by the manufacturer. Understand the sequence of steps and gather all the necessary tools and materials beforehand.
- Work in a well-lit area to easily see what you’re doing.
- Follow the manufacturer’s guidelines for cutting or drilling the glass. Use the appropriate tools and techniques to prevent damage or injury.
- Secure the glass: Use suction cups or clamps to hold the glass panels in place while you work on them. This will prevent them from shifting or falling during the installation process.
- Check your work frequently to ensure everything is lining up correctly and adjust as needed.
- Remember: Precision and patience are key to achieving a flawless glass shower wall installation.
Seek professional assistance if unsure about any step or safety concern
While installing a glass shower wall can be a rewarding DIY project, there may be instances where seeking professional assistance is necessary. If you are unsure about any step in the installation process or have concerns regarding safety, it is best to consult a professional.
Tips:
- Know your limitations: If you lack experience or knowledge in working with glass or construction, it’s important to recognize when it’s time to call in a professional installer.
- Reach out to reputable glass shower wall installation companies or contractors for advice or assistance.
- If you have any concerns about safety, such as working at heights or handling heavy glass panels, prioritize your well-being and seek expert help.
- Remember: Your safety and the proper installation of your glass shower wall should always take precedence over any DIY aspirations.
Frequently Asked Questions
Does Shower Glass Need A Stud?
Yes, shower glass needs a stud for proper installation and support. The stud provides stability and strength to hold the weight of the glass, ensuring a secure and durable installation.
What Holds Shower Glass In Place?
Shower glass is held in place by various methods, such as metal brackets, hinges, and clips. These components are securely attached to the walls or surrounding structure, ensuring stability and support for the glass panels.
Can You Install Shower Glass Yourself?
Yes, it is possible to install shower glass yourself. However, it requires carefulness, proper tools, and accurate measurements.
How High Should Glass Shower Wall Be?
The height of a glass shower wall can vary, but typically it is recommended to be at least 72 inches (6 feet). This ensures privacy and prevents water from splashing out of the shower area. However, the exact height depends on personal preference and the specific design of the shower.
Conclusion
Installing a glass shower wall can greatly enhance the aesthetic appeal and functionality of your bathroom. By carefully following the steps outlined in this guide, you can successfully complete the installation process. It is important to prioritize safety, measure accurately, and seek professional assistance if needed.
With the right tools and techniques, you can create a beautiful and modern shower space that will last for years to come.