To install shelves in a pantry, measure the desired height and width of the shelves. Then, mark the locations for the shelf brackets, drill pilot holes, attach the brackets, and place the shelves on top.
Essential Tools And Supplies Required For The Installation Process
Essential Tools and Supplies Required for the Installation Process
When it comes to installing shelves in your pantry, having the right tools and supplies is essential for a successful and hassle-free process. Before you begin, make sure you have the following items on hand:
Shelf Brackets
Shelf brackets play a crucial role in providing support and stability to your pantry shelves. These metal or wooden brackets come in various sizes and styles. Make sure to choose brackets that are suitable for the weight and size of the shelves you plan to install.
Shelf Boards
Shelf boards are the actual surfaces where you can store your pantry items. They come in different materials such as wood, melamine, or wire. Consider the style and durability you desire when selecting the right shelf boards for your pantry.
Measuring Tape
Accurate measurements are crucial for a snug and functional fit of your pantry shelves. Using a measuring tape, carefully measure the width, depth, and height of the desired shelf areas in your pantry. This will ensure that you purchase the correct size of shelf boards and brackets.
Level
A level is essential for ensuring that your shelves are properly aligned. This tool helps you determine if your shelves are perfectly horizontal or vertical. Maintaining a level installation not only improves the aesthetic appeal but also ensures your pantry items won’t slide or fall off the shelves.
Pencil
A pencil is a simple yet important tool for marking the positions where you plan to install the shelf brackets. This will serve as a guide during the installation process, helping you achieve an accurate and attractive result.
Drill
A drill is necessary for creating pilot holes in the wall or pantry cabinets where the shelf brackets will be attached. It allows you to securely fasten the brackets, preventing any wobbling or instability.
Screws
Screws are used to attach the shelf brackets to the wall or pantry cabinets. Opt for sturdy screws that are suitable for the material you are drilling into. They should be long enough to provide a secure hold but not too long to penetrate the other side.
Wall Anchors (if necessary)
In some cases, wall anchors may be required for added support and stability, especially if you are installing shelves on drywall or other less sturdy surfaces. Wall anchors help to distribute the weight evenly and prevent any potential damage.
Remember, having the right tools and supplies not only makes the installation process easier but also ensures a long-lasting and functional pantry shelving system. So gather these essential items before you begin and get ready to transform your pantry into an organized and efficient space.
Assessing Your Pantry Space
Assessing your pantry space
If you’re looking to add some organization to your pantry, installing shelves is a great place to start. Before you dive into the installation process, it’s important to assess the space in your pantry to determine the dimensions and layout that will work best for your needs. Taking the time to do this initial assessment will ensure that you create a functional and efficient storage solution that maximizes the available space.
Determining the dimensions
One of the first steps in assessing your pantry space is determining the dimensions of the area where you plan to install the shelves. Grab a tape measure and measure the width, height, and depth of your pantry. This will give you a clear understanding of the space you have to work with and help you choose the right size shelves.
Layout of your pantry
Next, consider the layout of your pantry. Take note of where the existing shelves, racks, or drawers are located, as well as any obstructions such as pipes or electrical outlets. This information will help you plan the placement of your new shelves to ensure they fit seamlessly into the space without impeding functionality.
If you’re looking for some inspiration, you can create a simple layout diagram of your pantry on a piece of paper or using a digital tool. This will help you visualize how the shelves will be arranged and ensure that they are strategically positioned to make the most of your pantry space.
Utilizing vertical space
When installing shelves in your pantry, it’s important to make the most of the available vertical space. Consider installing taller shelves or adding an additional tier to effectively utilize the height of your pantry. This will allow you to store more items and keep your pantry organized. To maximize accessibility, keep frequently used items at eye level and reserve the higher shelves for less frequently used items or those that are taller.
Additionally, don’t forget about the space above the pantry door. This area can be a valuable storage space for items that are not used as often. Consider adding a shelf or installing a hanging organizer to take advantage of this often overlooked space.
In conclusion, assessing your pantry space is an essential step in installing shelves. By determining the dimensions and layout of your pantry and utilizing vertical space effectively, you can create a functional and organized storage solution that will make meal preparation and finding ingredients a breeze.

Measuring And Marking The Spots For Shelves
Before installing shelves in your pantry, it is important to measure and mark the spots where the shelves will be placed. This ensures that the shelves will be installed at the desired height and width, providing an organized and efficient storage solution for your pantry items. In this section, we will explore two key steps: using a measuring tape to determine the desired height and width of the shelves, and marking the spots on the walls where the brackets will be installed.
Using a measuring tape to determine the desired height and width of the shelves
1. Start by measuring the height of the items you plan to store on the shelves. Consider the height of the tallest item, as well as any clearance needed between the item and the shelf above. This will help you determine an appropriate height for the shelves.
2. Next, measure the width of your pantry space to determine the maximum width for the shelves. Take into account any existing fixtures or obstacles that may affect the available width.
3. Use the measurements obtained to determine the ideal height and width for your shelves. Keep in mind that it is better to have shelves that are slightly shorter or narrower than needed, rather than too large.
Marking the spots on the walls where the brackets will be installed
1. With the desired measurements in mind, use a pencil to mark the spots on the walls where the brackets will be installed. Start at the desired height for the first shelf and use a level to ensure the marks are straight and even.
2. Measure and mark additional spots for any additional shelves, maintaining consistent spacing between each shelf.
3. Double-check your marks to ensure they align with your measurements and desired shelf placement.
4. Once you are satisfied with the markings, it’s time to move on to the next step of installing the brackets and shelves.
Choosing The Right Type Of Shelf Brackets
When it comes to installing shelves in your pantry, choosing the right type of shelf brackets is crucial. These brackets not only provide support and stability to your shelves but also contribute to the overall aesthetic appeal of your pantry. Considering factors such as weight capacity and style is important to ensure you select the right brackets that meet your pantry storage needs.
Considering the weight capacity of the shelf brackets
Before you start installing shelves in your pantry, it is essential to consider the weight capacity of the shelf brackets. Understanding the weight-bearing capabilities of the brackets will enable you to choose the most suitable option based on the items you plan to store. Different brackets have varying weight limits, so it’s important to assess the potential load that your shelves might bear. This will help prevent any accidents or shelf collapse due to overloading.
Exploring different types such as L-shaped brackets or decorative brackets
When it comes to shelf brackets, there are various types available on the market. Two popular options to consider are L-shaped brackets and decorative brackets. L-shaped brackets, as the name suggests, have a simple L-shaped design and are known for their sturdy support. They are commonly used for heavy-duty storage needs and can withstand significant weight.
On the other hand, decorative brackets offer a combination of functionality and style. These brackets come in various intricate designs, making them a visually appealing addition to your pantry. However, it is important to ensure that the decorative brackets you choose also have a high weight capacity, as some designs may prioritize aesthetics over strength.
By exploring different types of shelf brackets, you can find the perfect balance between functionality and style for your pantry shelves. Consider the weight capacity and style of the brackets before making a final decision. Remember, it’s essential to choose brackets that not only support your storage needs but also enhance the overall aesthetic appeal of your pantry.
Aligning And Attaching The Brackets
When it comes to installing shelves in a pantry, aligning and attaching the brackets is a crucial step in ensuring stability and functionality. By following these simple guidelines, you can seamlessly complete this task and create a well-organized pantry that meets your needs. Here’s what you need to do:
Using a level to ensure the brackets are straight
Before attaching the brackets, it’s important to ensure they are straight and level. This helps to maintain the overall balance and stability of the shelves. To do this, you’ll need a level, which is a handy tool that helps you determine whether a surface is horizontally or vertically straight. Follow these steps:
- Place the level horizontally on top of the first bracket.
- Adjust the position of the bracket until the bubble in the level is centered.
- Use a pencil to mark the screw holes on the wall. This will serve as a guide when attaching the brackets securely.
- Repeat the process for the remaining brackets, ensuring each one is level.
Pre-drilling holes for the screws
Pre-drilling holes for the screws is an essential step to prevent any damage to the brackets or walls during the installation process. It also helps to ensure a secure and durable attachment. Follow these steps to pre-drill holes:
- Select an appropriate drill bit size based on the screws provided with the brackets.
- Attach the drill bit to the drill.
- Position the drill bit on the marked screw hole.
- Hold the drill firmly and apply gentle pressure to create a hole. Be sure to avoid drilling too deep.
- Repeat the process for all the marked screw holes.
Attaching the brackets securely to the wall
Once you’ve completed the alignment and pre-drilling process, it’s time to attach the brackets securely to the wall. This step ensures the shelves can support the weight of items placed on them without any concerns. Follow these steps for a secure attachment:
- Position the brackets against the wall, aligning the pre-drilled holes with the marked spots.
- Insert the screws provided with the brackets into the pre-drilled holes.
- Using a screwdriver or drill, tighten the screws clockwise until the brackets are securely attached to the wall. Be careful not to overtighten and damage the brackets or wall.
- Ensure each bracket is firmly attached before proceeding to the next bracket.
Congratulations! You have successfully aligned and attached the brackets for your pantry shelves. This meticulous process sets the foundation for a sturdy and functional pantry storage solution. Hang tight for the next steps in installing shelves in your pantry!
Cutting The Shelf Boards To Size
Measuring and marking the desired length of the shelf boards
When it comes to installing shelves in your pantry, cutting the shelf boards to the correct size is an important step in achieving a neat and functional space. In this section, we will guide you through the process of measuring and marking the desired length of the shelf boards.
Firstly, you need to measure the width and depth of your pantry shelves. Use a measuring tape to determine the exact dimensions needed for each shelf. Take note of these measurements as it will be crucial in ensuring a precise fit.
Once you have obtained the measurements, it’s time to mark the desired length on your shelf boards. You can do this by using a pencil or a marker. Make sure to mark the measurements on both ends of the board for accuracy.
To make the process easier, you can also use a straight edge or a ruler to create straight and even lines. This will help you achieve precise cuts when it comes to the next step of cutting the boards.
Using a saw or having them cut at a hardware store
Now that you have measured and marked the desired length of your shelf boards, it’s time to cut them to size. There are two options for this: using a saw or having them cut at a hardware store.
If you have the necessary tools and experience, using a saw can be a cost-effective and convenient option. A circular saw or a miter saw would be ideal for this task. Ensure that the blades are sharp and suitable for cutting through your chosen material.
However, if you don’t have access to the right tools or prefer a hassle-free alternative, you can have the shelf boards cut at a hardware store. Most hardware stores offer cutting services for a small fee. Simply provide them with the measurements and they will cut the boards accurately to your specifications.
Having your shelf boards cut at a hardware store can save you time and effort. It also ensures that the cuts are done professionally, resulting in precise and clean edges.
Remember, safety should always be a priority when working with saws. Use proper safety gear such as goggles and gloves, and follow the manufacturer’s instructions for your specific saw.
In conclusion, measuring and marking the desired length of the shelf boards is an essential step in installing shelves in your pantry. Whether you choose to cut the boards yourself using a saw or have them cut at a hardware store, make sure to double-check the measurements and always prioritize safety. With accurate cuts, your pantry shelves will fit perfectly and provide a functional and organized space for all your storage needs.
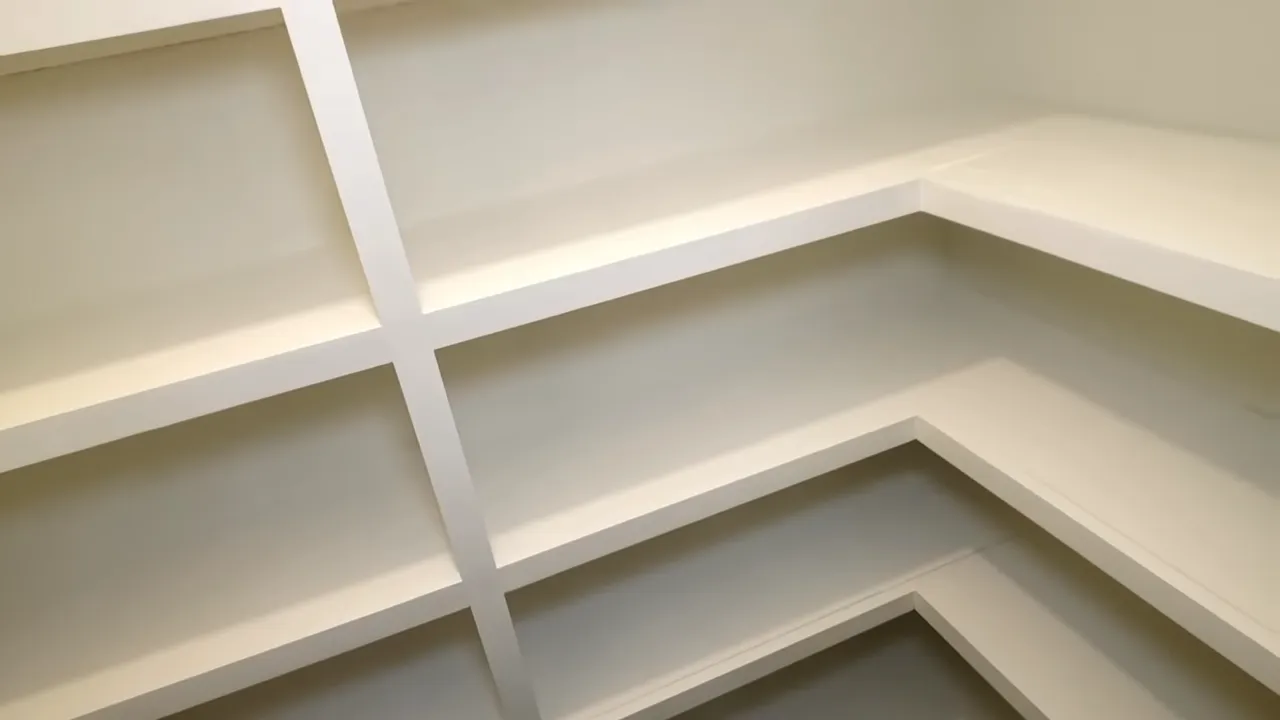
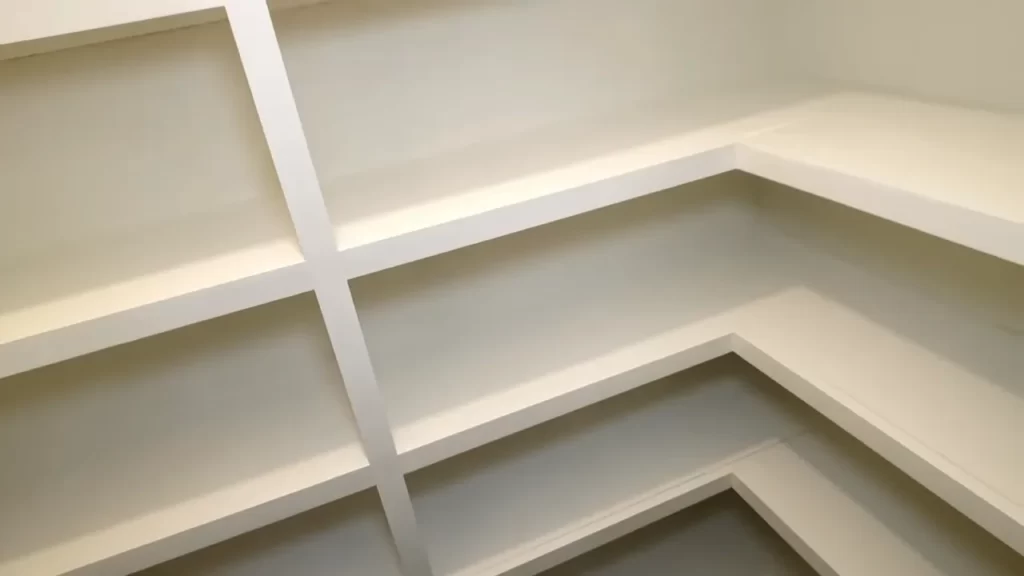
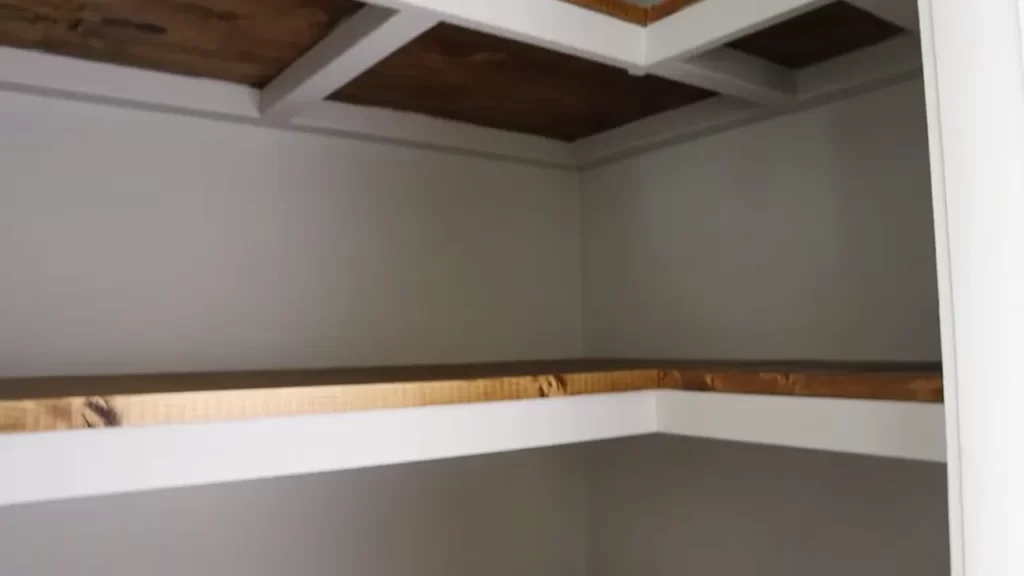
Placing The Shelf Boards On The Brackets
Aligning the shelf boards on top of the brackets
When it comes to installing shelves in your pantry, properly aligning the shelf boards on top of the brackets is crucial. This ensures that your shelves are level, sturdy, and able to hold the weight of your pantry items without any concern. Follow these steps to get the perfect alignment:
- Measure the distance between the two brackets. This will help you determine the exact size of the shelf boards you need. Remember to account for any desired overhang.
- Using a saw, cut the shelf boards to the appropriate length based on your measurements. Make sure to wear protective goggles and follow all safety precautions while cutting.
- Once you have your shelf boards ready, place them on top of the brackets. Start by positioning the first board on one side of the pantry, making sure it sits securely on the brackets.
- Using a leveling tool, check if the shelf board is perfectly horizontal. Adjust as necessary by adding shims or adjusting the brackets if needed.
- Once the first board is aligned, repeat the process for the remaining shelves, ensuring each board is level and securely positioned on the brackets.
- It’s also important to make sure there is enough space between the shelves to accommodate the items you plan to store in your pantry. Consider the height of your tallest items, such as cereal boxes or jars, and leave enough clearance.
Securing them in place with screws or other fasteners
After aligning the shelf boards on top of the brackets, it’s time to secure them in place to ensure they stay put. Follow these steps to properly secure your shelves:
- Using a drill, create pilot holes through the shelf boards and into the brackets. This will prevent the wood from splitting when you insert the screws.
- Choose an appropriate screw length based on the thickness of your shelf boards and the type of brackets you’re using. Make sure the screws are long enough to securely fasten the boards to the brackets without going all the way through.
- Insert the screws through the pilot holes and carefully tighten them using a screwdriver or a drill with a screwdriver bit. Be cautious not to overtighten and damage the wood.
- Repeat this process for each bracket and shelf board, ensuring all screws are securely in place.
- If your brackets have additional holes or slots designed for shelf clips or other fasteners, use them to further enhance the stability and security of your shelves.
With the shelf boards properly aligned and securely fastened, your pantry shelves are now ready to hold all your favorite ingredients and kitchen essentials. Enjoy the organized and functional space you’ve created with your own DIY shelving installation!
Ensuring Stability And Levelness
Checking that the shelves are level using a level
Before installing shelves in your pantry, it is important to ensure that they are level. This will not only give your pantry a professional and clean look, but it will also make it easier to organize and access your items. One of the best tools to use for this is a level.
A level is a simple yet effective tool that helps you determine if a surface is straight and even. To check the levelness of your shelves, follow these steps:
- Start by placing the level on top of the shelf. Make sure it is centered and extends across the entire width of the shelf.
- Check the bubble indicator in the level. If it is centered between the two lines, this means that the shelf is perfectly level. If the bubble is off to one side, this means that the shelf is not level and some adjustments need to be made.
- Repeat this process for each shelf that you are installing in your pantry.
Making any necessary adjustments to ensure stability
Once you have determined that a shelf is not level, it’s time to make the necessary adjustments to ensure stability. Here are some steps you can follow:
- If the shelf is slightly off level, you can try adding shims to the side that is lower. Shims are small wedges that can be inserted under the shelf to raise it up and level it out. Use a hammer or mallet to gently tap the shims into place until the shelf is level.
- If the shelf is significantly off level, you may need to remove it completely and start over. Carefully remove any screws or brackets holding the shelf in place and readjust the position. Use a level to check the levelness before securing the shelf again.
- Ensure that all brackets or supports are securely attached to the wall or pantry framework. Loose brackets can cause instability and make it difficult to maintain a level shelf.
- Double-check the levelness of the shelf once all adjustments have been made. It is better to spend a little extra time ensuring stability and levelness now rather than having to redo the installation later.
By taking the time to check the levelness of your shelves and making any necessary adjustments, you can ensure that your pantry is not only functional but also aesthetically pleasing. A level and a few simple adjustments can make all the difference in the finished product, allowing you to fully enjoy your organized pantry space.
Organizing And Styling Your Pantry Shelves
Organizing your pantry shelves not only helps you find what you need quickly but also gives your kitchen a visually appealing look. A well-organized pantry not only streamlines your cooking experience but also maximizes your storage space. Additionally, adding decorative elements and storage solutions can elevate the style of your pantry, making it a functional and aesthetically pleasing space. In this article, we will discuss the steps to arrange your pantry items in a neat and organized manner and introduce ideas for adding decorative elements and storage solutions to transform your pantry shelves into a Pinterest-worthy storage space.
Arranging your pantry items in a neat and organized manner
Arranging your pantry items in an organized manner plays a crucial role in creating a functional and efficient storage space. Here are some tips to help you achieve a well-organized pantry:
- Categorize your items: Begin by categorizing your pantry items into groups such as canned goods, dry goods, spices, snacks, etc. This will help you visualize how much space each category requires and determine the most efficient way to organize them.
- Utilize storage containers: Invest in clear storage containers, bins, or jars to store items such as pasta, rice, flour, and cereals. These containers not only keep your pantry looking neat and uniform but also help in preserving the freshness of your food items.
- Label everything: Labeling your storage containers and shelves not only adds a professional touch but also helps you easily identify and locate your pantry items. Use a label maker or simply handwrite labels for a personalized touch.
- Consider shelf organizers: Adjustable shelf organizers or risers can be a game-changer when it comes to maximizing storage space. These organizers allow you to utilize vertical space effectively and create separate levels for different categories of items.
- Keep frequently used items at eye level: Arrange your frequently used items at eye level for easy access. This will save you time and effort when you’re in a rush or simply needing a quick snack.
Adding decorative elements and storage solutions as desired
Creating a visually appealing pantry not only makes it a joy to use but also adds a touch of personal style to your kitchen. Here are some ideas to help you add decorative elements and storage solutions to your pantry:
- Use baskets or bins: Incorporate decorative baskets or bins to store snacks, fruits, or vegetables. This not only adds a touch of rustic charm but also keeps your pantry looking tidy.
- Display glass jars: Invest in a set of glass jars and showcase your colorful spices, pasta, or baking ingredients on the shelves. Not only will this add visual interest, but it will also make it easier to see when you are running low on a particular item.
- Install a chalkboard or whiteboard: Paint one side of a pantry door with chalkboard or whiteboard paint. This allows you to jot down grocery lists, recipe ideas, or simply leave messages for your family members.
- Add lighting: Illuminate your pantry shelves with under-cabinet lighting or LED strip lights to create a warm and inviting ambiance. This also makes it easier to locate items, especially in dimly lit kitchens.
In conclusion, organizing and styling your pantry shelves is a fun and rewarding project that enhances the functionality and aesthetics of your kitchen. By arranging your pantry items in a neat and organized manner and incorporating decorative elements and storage solutions, you can create a visually appealing space that makes cooking and meal planning a breeze.
Regular Cleaning And Upkeep Of Pantry Shelves
Regular cleaning and upkeep are essential to keep your pantry shelves organized, tidy, and free from any potential mess. By following proper maintenance practices, you can ensure that your shelves remain functional and maximize your pantry’s storage space. In this section, we’ll discuss the necessary steps to achieve a clean and well-maintained pantry. Let’s dive right in!
Removing items to thoroughly clean the shelves
To properly clean your pantry shelves, the first step is removing all the items placed on them. This allows you to have full access to the shelves and ensures that no area is left uncleaned. Before removing the items, it’s advisable to group similar items together, making it easier to put them back in an organized manner later on.
When removing items, take the opportunity to inspect each one. Check for expired products or any signs of leakage or damage. Discard anything that is no longer safe for consumption or has exceeded its shelf life. This will not only help you declutter your pantry but also maintain a healthy and hygienic environment for your food items.
Wiping down the shelves to remove dust and spills
Once you’ve cleared the shelves, it’s time to wipe them down to remove any dust, spills, or residue that may have accumulated over time. Start by using a microfiber cloth or a soft, damp cloth to wipe the surfaces. This will effectively capture the dust particles without scratching the shelves.
Make sure to clean all the nooks and crannies, paying special attention to corners and edges where dirt tends to accumulate. For stubborn stains or sticky spills, you can lightly dampen the cloth with a mild cleaning solution or a mixture of warm water and gentle dish soap. Avoid using abrasive cleaners or rough scrub brushes, as they can damage the surface of your shelves.
After wiping down the shelves, allow them to air dry completely before returning the items. This helps prevent any moisture buildup that could lead to mold or mildew.
In conclusion
Regular cleaning and upkeep of your pantry shelves are crucial for maintaining a well-organized and hygienic storage space. By removing items to thoroughly clean the shelves and wiping them down to remove dust and spills, you can ensure that your pantry remains a functional and pleasant area to work with. Remember to inspect your items and discard any expired or damaged products during the cleaning process. Implementing these practices will not only keep your pantry shelves in top condition but also help you optimize your overall pantry organization.
Monitoring And Addressing Any Issues
Keeping an eye out for signs of damage or wear
When it comes to installing shelves in your pantry, it’s important to not only properly install them, but also to monitor and address any issues that may arise over time. By keeping an eye out for signs of damage or wear, you can ensure the longevity and functionality of your pantry shelves.
One of the most common signs of damage is sagging or bowing shelves. Over time, the weight of items placed on the shelves can cause them to weaken and lose their structural integrity. This can result in shelves that no longer hold items properly or even worse, shelves that collapse under the weight. To prevent this from happening, regularly inspect your pantry shelves for any signs of sagging or bowing.
Another issue to watch out for is water damage. Pantries are often located near sinks or plumbing fixtures, making them susceptible to leaks and spills. Water can seep into the wood or laminate material of the shelves, causing them to warp or rot. Make it a habit to check for any signs of water damage, such as discoloration, mold, or a musty smell. If you notice any of these signs, it’s important to address the issue immediately to prevent further damage to your pantry shelves.
Repairing or replacing any damaged components as needed
If you do come across any signs of damage or wear during your monitoring, it’s crucial to take action and repair or replace any damaged components as needed. Ignoring these issues can lead to further damage and potential safety hazards. Here are some steps to follow when addressing damage:
- Assess the extent of the damage: Take a closer look at the affected shelves and determine the severity of the damage. Is it a minor issue that can be easily repaired, or is a complete replacement necessary?
- Gather the necessary tools and materials: Depending on the type and extent of the damage, you may need various tools such as a screwdriver, hammer, or replacement shelf materials.
- Repair or replace: For minor damage, such as a loose shelf or a small crack, you can often fix it yourself. Secure any loose components, apply wood glue to cracks, and use clamps to hold everything in place until the glue dries. In cases where the damage is extensive or irreparable, it’s best to replace the damaged shelf entirely.
- Ensure proper installation: When installing a new shelf, follow the manufacturer’s instructions carefully. Use the right hardware and ensure it is securely attached to the pantry walls or supports. This will prevent future damage and ensure the stability and functionality of the shelves.
By actively monitoring and promptly addressing any signs of damage or wear in your pantry shelves, you can ensure that they remain sturdy and reliable for years to come. Regular inspections and necessary repairs or replacements will not only maintain the organization and efficiency of your pantry but also contribute to the overall safety of your home.
Frequently Asked Questions
Where Should Shelves Be Placed In A Pantry?
Shelves in a pantry should be placed with convenience in mind. Consider placing them at accessible heights and organizing items by frequency of use. Maximizing vertical space and using adjustable shelves can help accommodate various items. Regularly decluttering and organizing your pantry will optimize functionality.
How Do You Support Wood Pantry Shelves?
To support wood pantry shelves, use sturdy brackets or metal shelf supports. Attach them securely to the wall studs or use heavy-duty anchors for added stability. Ensure the shelves are level and evenly distributed weight-wise. Regularly check and tighten any loose fittings to maintain their support.
What Can I Use For Shelves In Pantry?
You can use adjustable wire racks or wooden shelves for your pantry. They provide flexibility and durability for storing different sizes of items.
How Do You Attach Shelves To A Wall Without Brackets?
To attach shelves to a wall without brackets, you can use several methods. One option is to use adhesive strips strong enough to hold the weight of the shelf. Another option is to use hidden brackets, which can be attached to the back of the shelf and then secured to the wall.
A third option is to use anchor screws directly into the wall and then attach the shelf to the screws.
Conclusion
Installing shelves in your pantry can transform it from a cluttered space to an organized storage haven. By following the step-by-step instructions in this blog post, you can easily create additional storage and maximize the functionality of your pantry. With a few simple tools and materials, you’ll be on your way to a neatly organized pantry in no time.
Don’t let a disorganized pantry hold you back – take charge and create a space that is both visually appealing and functional. Happy organizing!