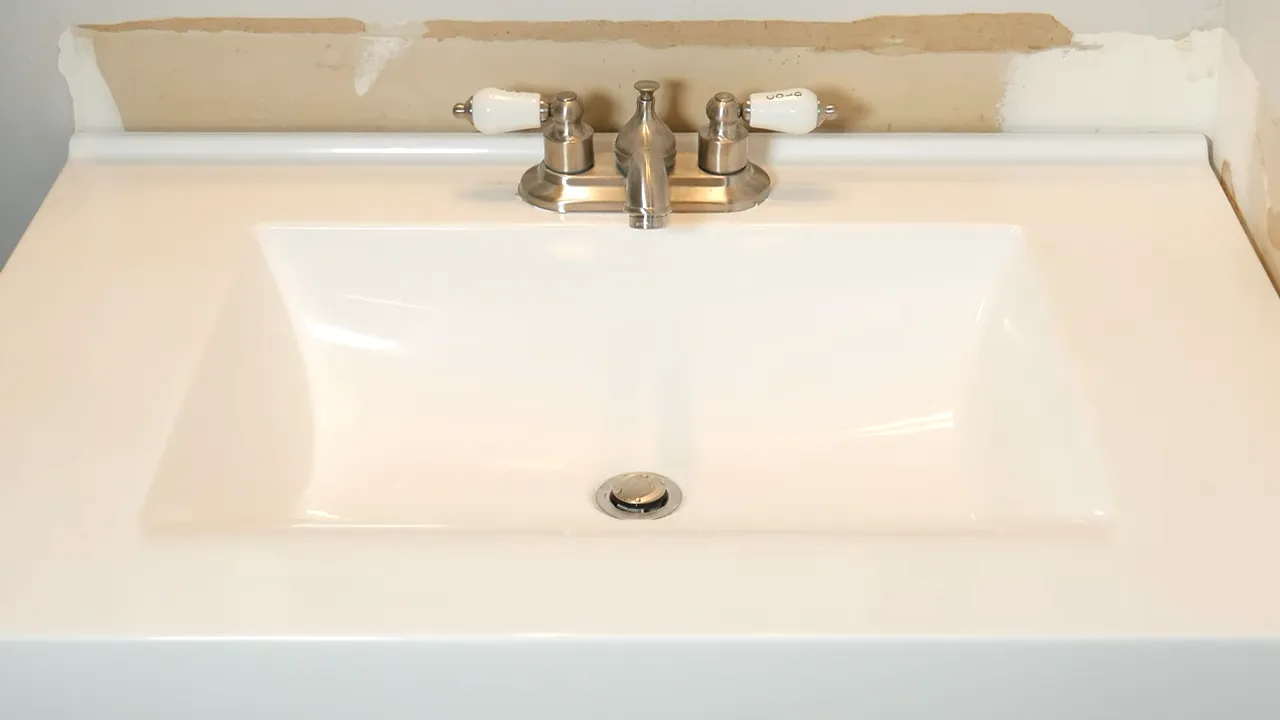
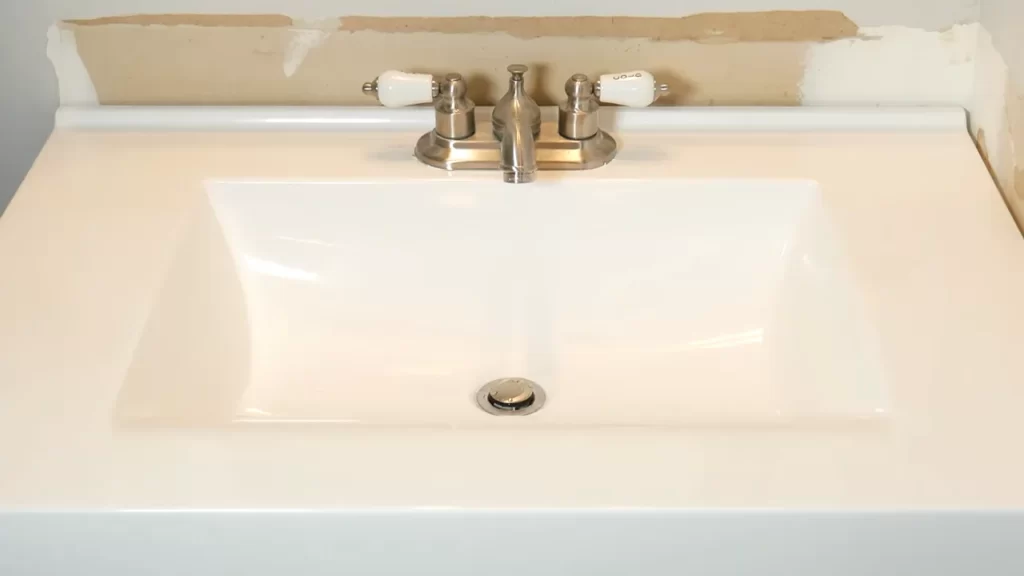
To install a bathroom countertop, start by measuring the area and selecting a countertop that fits those dimensions. Then, remove the old countertop, install the new one, and secure it in place with adhesive.
Finally, seal the edges to prevent water damage. Installing a bathroom countertop involves measuring the area, removing the old countertop, installing the new one, securing it with adhesive, and sealing the edges to protect against water damage.
Choosing The Right Bathroom Countertop Material
When it comes to picking the perfect countertop material for your bathroom, it’s important to consider both aesthetic appeal and practicality. The countertop is a key element in the overall design of your bathroom, and it serves as a functional surface for daily activities.
Factors to consider when choosing a bathroom countertop material
Before making a decision, you need to take into account several factors that will impact your choice of bathroom countertop material:
- Water resistance: Bathrooms are highly prone to moisture and water splashes, so it’s crucial to choose a countertop material that can withstand humidity and is resistant to water damage.
- Durability: The bathroom is one of the busiest areas in your home, so the countertop material should be durable enough to handle daily use and potential impact.
- Maintenance: Consider the level of maintenance required for each countertop material. Some materials may require regular sealing or special cleaning agents.
- Style and aesthetic: The countertop material should complement the overall style and design of your bathroom. Whether you prefer a modern, traditional, or minimalist look, there are various materials available to suit your taste.
- Budget: Set a budget for your bathroom countertop project and explore materials that fit within your financial constraints.
Benefits and drawbacks of different countertop materials for bathrooms
Now that you’re equipped with the important factors to consider, let’s explore the benefits and drawbacks of different countertop materials commonly used in bathrooms:
Laminate Countertops
Laminate countertops are an affordable option, making them a popular choice for many homeowners. They come in a wide range of designs and colors, allowing you to achieve the desired aesthetic for your bathroom. However, laminate countertops may not be as durable as other materials and are more prone to scratches and heat damage.
Quartz Countertops
Quartz countertops are engineered stone surfaces that offer both beauty and durability. They are heat and stain-resistant, making them ideal for bathroom use. Quartz countertops also require minimal maintenance and are available in a vast array of colors and patterns. However, they can be more expensive compared to other materials.
Granite Countertops
Granite countertops are known for their natural beauty and durability. They are heat-resistant, scratch-resistant, and can withstand the test of time. With a wide range of colors and patterns, granite countertops add elegance and luxury to any bathroom. However, they can be quite costly and require periodic sealing to maintain their quality.
Marble Countertops
Marble countertops exude elegance and sophistication, making them a sought-after choice for bathroom design. They are heat and water-resistant, although marble is a porous material and may require regular sealing to prevent staining. Marble countertops are considered a high-end option and are more prone to scratches and etching.
Solid Surface Countertops
Solid surface countertops offer a seamless and hygienic surface with no visible seams or joints. They are resistant to stains, mold, and mildew, making them a practical choice for bathrooms. Solid surface materials are available in various colors and can be easily repaired if scratched. However, they may not be as heat-resistant as other materials and can be costly.
In conclusion, carefully considering the factors mentioned above will help you choose the right countertop material for your bathroom. Whether you prioritize water resistance, durability, maintenance, style, or budget, there is a countertop material that suits your needs and enhances the functionality and aesthetics of your bathroom.
Preparing For Installation
Gathering the necessary tools and materials
Before you begin the installation process of your new bathroom countertop, it’s essential to gather all the necessary tools and materials. This ensures that you have everything within reach and saves you time and effort. Below is a list of tools and materials you will need:
| Tools | Materials |
|---|---|
| – Tape measure | – Bathroom countertop |
| – Pencil | – Sink |
| – Level | – Faucet |
| – Screwdriver | – Silicone caulk |
| – Adjustable wrench | – Mounting brackets |
| – Safety glasses | – Screws |
With all these tools and materials at your disposal, you’re well-prepared to move forward with the installation process.
Measuring the bathroom countertop space accurately
Accurate measurement is crucial when installing a bathroom countertop. Taking precise measurements ensures that the countertop will fit perfectly and eliminates any potential issues during the installation. Follow the steps below to measure your bathroom countertop space:
- Clear the area: Remove any objects or clutter from the countertop space to ensure an unobstructed measurement process.
- Measure the length: Use a tape measure to measure the length of the countertop space, from one end to the other. Write down this measurement.
- Measure the width: Measure the width of the countertop space, from the front edge to the back wall. Write down this measurement as well.
- Consider overhang: If you want a countertop with an overhang, determine the desired length of the overhang and add it to your length measurement.
By following these steps, you can ensure that your bathroom countertop will fit perfectly into the designated space.
Removing The Old Countertop
Before installing a new bathroom countertop, it is essential to remove the old one. This step may seem intimidating, but with the right tools and approach, it can be done safely and efficiently. In this section, we will guide you through the process of removing the existing bathroom countertop in a few simple steps.
Steps to safely and efficiently remove the existing bathroom countertop:
- Gather the necessary tools for the job, including a utility knife, screwdriver, adjustable wrench, and pliers.
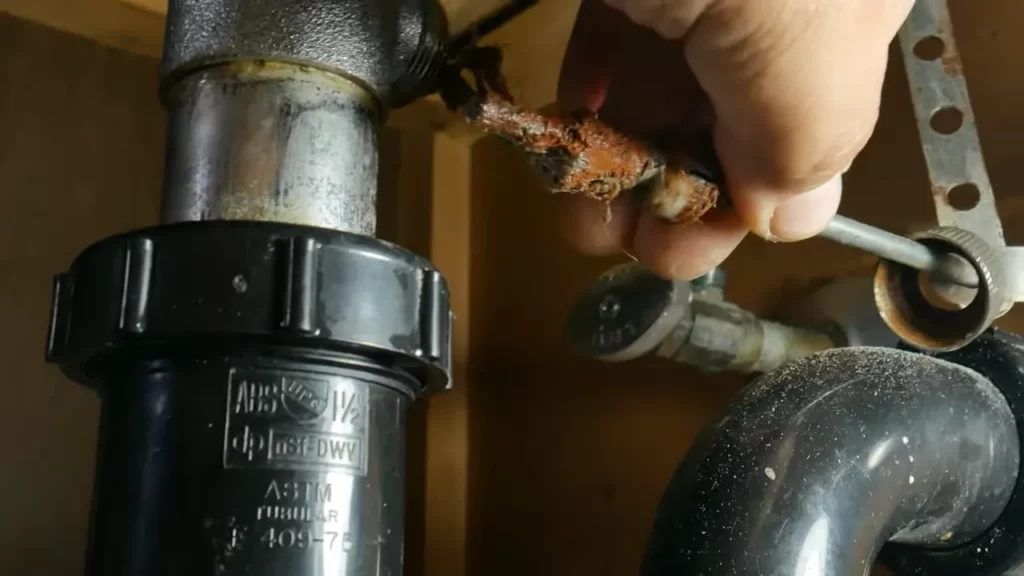
- Start by clearing the countertop of any personal items and removing the sink if it is attached to the countertop. Use the utility knife to cut through any caulk or adhesive securing the sink to the countertop. Be cautious and take your time when doing this step.
- Once the sink is detached, locate the screws or clips fastening the countertop to the vanity or supporting structure. Use the screwdriver or adjustable wrench to remove these fasteners. Carefully set them aside, as you may need them for the installation of the new countertop.
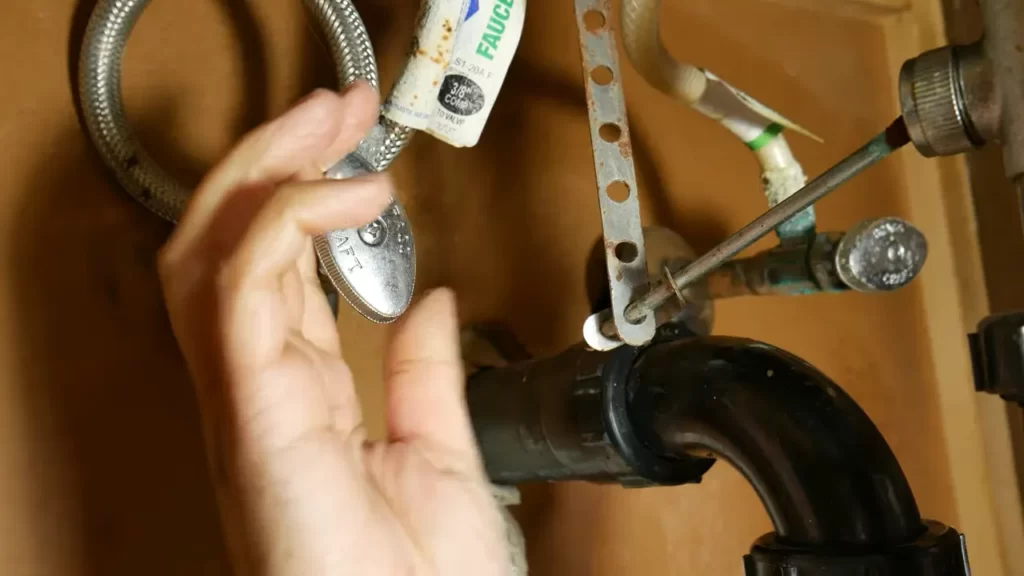
- If your bathroom countertop has a faucet, now is the time to disconnect it. Turn off the water supply to the faucet and place a bucket or towel beneath to catch any water that may come out. Use the pliers to loosen the nuts connecting the water supply lines to the faucet. Once loosened, remove the supply lines and set them aside.
- With the sink, faucet, and fasteners removed, you can now gently lift the old countertop off the vanity or supporting structure. It may be helpful to have a second person assist you in this step, especially if the countertop is heavy or awkwardly shaped. Take care not to damage any surrounding tiles or walls during the removal.
- Once the old countertop is removed, inspect the vanity or supporting structure for any damage or repairs that may be required. This is also an ideal time to clean and prepare the area for the installation of the new countertop.
By following these steps, you can safely and efficiently remove the existing bathroom countertop. Remember to be patient and take your time during each step to avoid any unnecessary damage or complications. With the old countertop removed, you are now ready to move on to the next phase – installing the new bathroom countertop.
Installing The New Bathroom Countertop
Once you have removed the old bathroom countertop, it’s time to install the new one. This step-by-step guide will walk you through the process of installing your new bathroom countertop in a way that ensures proper alignment and secure attachment.
Step-by-step guide to installing the new countertop
Follow these steps to successfully install your bathroom countertop:
- Measure and cut the countertop: Start by measuring the dimensions of your bathroom vanity cabinet. Use a tape measure and mark the dimensions on your new countertop material. Use a circular saw or a jigsaw to cut the countertop along the marks.
- Prepare the vanity cabinet: Clean and level the top surface of the vanity cabinet to ensure a smooth and even base for the new countertop. Remove any old adhesive or caulk residue using a scraper or sandpaper.
- Apply adhesive: Apply a bead of construction adhesive along the top edges of the vanity cabinet. This will help create a strong bond between the countertop and the cabinet. Make sure to leave enough space for the sink and faucet installation.
- Place the countertop: Carefully place the countertop onto the vanity cabinet, aligning it with the edges of the cabinet. Press down firmly to ensure good contact between the adhesive and the countertop.
- Secure the countertop: Use screws to secure the countertop to the vanity cabinet from underneath. Place the screws near the corners and edges of the countertop, making sure to avoid the areas where the sink and faucet will be installed.
- Install the sink and faucet: Follow the manufacturer’s instructions to install the sink and faucet on the countertop. Make sure to properly seal the connections to prevent leaks.
- Check for alignment: Use a level to check if the countertop is level and aligned with the vanity cabinet. Make any necessary adjustments by loosening the screws and repositioning the countertop.
- Finish the installation: Once the countertop is properly aligned, tighten the screws to secure it in place. Apply silicone caulk along the edges of the countertop to seal the gap between the countertop and the vanity cabinet.
By following these steps, you can successfully install your new bathroom countertop with proper alignment and secure attachment. Enjoy your refreshed bathroom space!
Connecting Plumbing Fixtures
Reconnecting the sink and faucet to the new countertop
Now that you have successfully installed your new bathroom countertop, it’s time to reconnect the sink and faucet to complete the plumbing fixtures. This step is crucial to ensure that everything functions properly and you can enjoy a leak-free bathroom.
To reconnect the sink and faucet, follow these simple steps:
- Start by aligning the sink with the pre-cut hole in the countertop. Ensure that it fits snugly and is centered.
- Next, apply a thin layer of silicone caulk around the edges of the sink hole. This will help create a watertight seal and prevent any water from leaking.
- Carefully lower the sink into place and press it firmly against the countertop. Wipe off any excess caulk that may have oozed out.
- Once the sink is in position, it’s time to reattach the faucet. Begin by connecting the supply lines to the faucet. Ensure that they are hand-tightened but not overly tight, as this could damage the connections.
- If your faucet has a separate sprayer or soap dispenser, now is the time to connect those as well. Follow the manufacturer’s instructions for each component.
- Double-check all connections to make sure they are secure and tight. You can use a wrench to give them a gentle twist if needed.
Ensuring proper sealing and preventing leaks
Proper sealing is essential to prevent leaks and water damage in your bathroom. To ensure a watertight seal, follow these additional steps:
- Inspect the silicone caulk around the sink edges, faucet base, and any other joints. Make sure there are no gaps or cracks.
- If you notice any damaged or deteriorating caulk, remove it carefully with a putty knife and reapply a fresh bead of silicone caulk.
- Allow the caulk to dry and cure according to the manufacturer’s instructions. This will typically take a few hours to a day.
- Once the caulk is fully cured, run water in the sink and check for any signs of leakage. Pay close attention to the connection points and the underside of the sink.
- If you detect any leaks or drips, tighten the connections or reapply caulk as necessary until the issue is resolved.
By following these steps and ensuring proper sealing, you can rest assured that your new bathroom countertop is securely connected and ready for use. Enjoy your newly renovated space without the worry of leaks!
Finishing Touches And Cleanup
Once the bathroom countertop is installed, it’s time to move on to the finishing touches and cleanup. This step is crucial to ensure that your countertop not only looks great but also performs well for years to come.
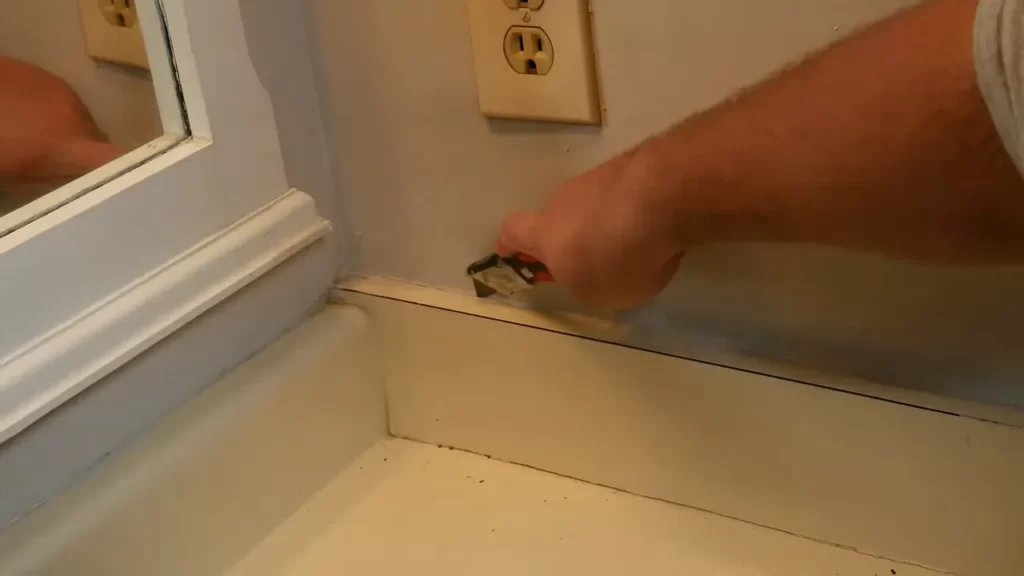
Applying Caulking and Filling Any Gaps
One of the most important tasks to complete during the finishing stage is the application of caulking. Caulking is essential to seal any gaps between the countertop and the wall, preventing moisture and water from seeping in and causing damage.
To apply caulking, follow these steps:
- Cut the tip of the caulking tube at a 45-degree angle using a utility knife.
- Insert the tube into a caulking gun and apply a thin and even bead of caulk along the gap between the countertop and the wall.
- Using your finger or a caulk tool, smooth the caulk to create a neat and professional finish.
- Wipe away any excess caulk with a damp cloth.
Remember to let the caulk dry completely before using the countertop or exposing it to water.
Cleaning Up the Installation Area and Removing Debris
After the caulking is applied, it’s important to thoroughly clean up the installation area and remove any debris. This will give your bathroom countertop a clean and polished look.
Here’s how you can effectively clean up and remove debris:
- Use a vacuum cleaner or a broom to remove any loose debris, dust, or particles around the countertop area.
- Wipe down the countertop surface with a mild cleaner or soap and water solution to remove any dirt or grime.
- Dry the countertop with a clean and lint-free cloth to prevent water spots or streaks.
- Dispose of any leftover packaging materials or trash properly.
By following these steps, you can ensure that your bathroom countertop installation is completed with a professional touch and that your bathroom is clean and ready to use.
Maintenance And Care Tips
Proper maintenance and regular care are essential for keeping your bathroom countertop clean and in good condition. By following these simple tips, you can ensure that your countertop stays sparkling and lasts for years to come.
Tips on how to keep the bathroom countertop clean and in good condition
Keeping your bathroom countertop clean is not only important for aesthetics but also for hygiene. Here are some tips to help you maintain a pristine countertop:
- Wipe up spills immediately: Accidents happen, but it’s crucial to clean up any spills on your countertop as soon as they occur. Use a soft cloth and a mild cleaning agent to gently wipe away the residue.
- Avoid using abrasive cleaners: Harsh chemicals and abrasive cleaners can damage the surface of your countertop. Stick to mild, non-abrasive cleaners that are specifically designed for your countertop material.
- Use a cutting board: To prevent scratches and cuts, always use a cutting board when slicing or chopping on your countertop. This will protect the surface and keep it looking its best.
- Take care of the grout: If your countertop has grout lines, it’s essential to keep them clean and free from mold or mildew. Regularly scrub the grout using a gentle brush and a mild cleaning solution.
- Keep it dry: Excess moisture can lead to mold and mildew growth. After using the sink or countertop, make sure to dry the surface thoroughly to prevent any water damage.
Recommended cleaning products and techniques
To clean your bathroom countertop effectively, consider these recommended cleaning products and techniques:
| Cleaning Product | Recommended for Countertop Material |
|---|---|
| Mild soap and water | Laminate, quartz, solid surface |
| Vinegar and water solution | Granite, marble, natural stone |
| Non-abrasive surface cleaner | Any countertop material |
| Baking soda paste | Stains and stubborn grime |
When cleaning your countertop, always use a soft cloth or sponge to avoid scratching the surface. Apply the cleaning solution and gently scrub the countertop in a circular motion. Rinse thoroughly and dry the surface with a clean cloth.
By following these maintenance and care tips, you can ensure that your bathroom countertop remains clean, beautiful, and free from damage. Regular maintenance and gentle cleaning will help preserve its longevity and keep it looking as good as new.
Enhancing The Appearance Of The Countertop
One of the key aspects of installing a bathroom countertop is enhancing its appearance. A well-designed and visually appealing countertop can instantly transform the overall look of your bathroom. By incorporating decorative elements such as backsplashes or edging, and choosing the right accessories that complement the countertop, you can create a stunning focal point in your bathroom.
Adding Decorative Elements
Adding decorative elements to your bathroom countertop is an excellent way to elevate its aesthetic appeal. Backsplashes and edging are two popular options that can dramatically enhance the overall look of your countertop.
Backsplashes not only protect the wall behind the countertop from water damage but also add a touch of elegance and style. You can choose from a wide range of materials, such as ceramic tiles, glass, or natural stone, to create a backsplash that complements your countertop design. Whether you opt for a sleek and modern look or a more classic and intricate design, a well-chosen backsplash can tie the whole bathroom together.
In addition to backsplashes, adding decorative edging to your countertop can be a game-changer. Edging not only provides a polished and finished look but can also create a visual transition between the countertop and the surrounding elements. Whether you prefer a simple and clean edge or a more decorative and ornate one, there are various options available to suit your style and preferences.
Choosing the Right Accessories
Choosing the right accessories to complement your bathroom countertop is crucial in creating a cohesive and harmonious design. Accessories such as soap dispensers, toothbrush holders, and towel racks can add both functionality and style to your countertop.
When selecting accessories, consider the material, color, and design of your countertop. If you have a natural stone countertop, for example, choosing accessories in earthy tones or metallic finishes can create a harmonious look. On the other hand, if your countertop features bold colors or patterns, opting for simple and minimalist accessories can balance the overall aesthetic.
In addition to functionality and aesthetics, also consider the size and placement of the accessories. Cluttering the countertop with too many items can disrupt the visual flow and make it appear crowded. Instead, focus on selecting a few key accessories that serve your needs and enhance the overall look of the countertop.
By incorporating decorative elements such as backsplashes or edging and choosing the right accessories to complement your bathroom countertop, you can achieve a beautiful and visually appealing space. Remember to consider the overall style and design of your bathroom and select elements that harmonize with the existing décor. With careful attention to detail, your bathroom countertop can become a standout feature that enhances the overall ambiance of your bathroom.
Final Checklist And Troubleshooting
Once you have completed the installation process of your bathroom countertop, it is essential to do a final check to ensure everything is in place and functioning properly. Additionally, it is crucial to be aware of common issues that may arise during the installation and troubleshoot them effectively. Let’s go through a final checklist and troubleshoot some common problems that you may encounter:
Ensuring all installation steps have been completed correctly
Before finalizing your bathroom countertop installation, it is important to ensure that all the steps have been completed accurately. Here is a checklist to help you verify the installation:
| Step | Check |
| 1. Measure the countertop | Ensure the measurements are accurate and match your bathroom dimensions. |
| 2. Choose the countertop material | Ensure you have selected a high-quality material that suits your style and preferences. |
| 3. Remove the old countertop | Make sure the old countertop has been entirely removed, leaving behind a clean surface. |
| 4. Install the new countertop | Ensure the countertop is properly aligned and secured in place. |
| 5. Connect the plumbing | Check that the plumbing connections are tight and there are no leaks. |
| 6. Seal the countertop | Apply an appropriate sealant to protect the countertop from moisture and stains. |
| 7. Clean up | Remove any excess debris, dust, or adhesive from the installation process. |
By ensuring each step has been completed correctly, you can avoid facing unnecessary complications in the future.
Troubleshooting common issues during bathroom countertop installation
During the installation process, you may encounter some common issues. Here are the troubleshooting techniques to help you overcome them:
- Uneven countertop surface: If you notice an uneven countertop surface after installation, you can use shims or leveling compound to achieve a level surface.
- Leaking plumbing connections: If you detect any leaks in the plumbing connections, make sure to tighten them securely. If the leaks persist, it may be necessary to replace the faulty components.
- Cracking or chipping: If you discover any cracks or chips in the countertop, it is essential to address them promptly. Depending on the severity, you can repair them using epoxy or consult a professional for assistance.
- Inadequate stability: In case the countertop feels unstable or wobbly, double-check that all the fasteners and brackets are properly tightened. Adding additional support, such as angle brackets, can also enhance stability.
- Improper alignment: If the countertop is not aligned correctly, you can carefully readjust it by loosening the screws and gently shifting it into the desired position.
By troubleshooting these common issues and following the necessary steps, you can ensure a successful bathroom countertop installation without any major setbacks.
Frequently Asked Questions
How Do You Attach A Bathroom Countertop?
To attach a bathroom countertop, follow these steps: 1. Measure the area and cut the countertop accordingly. 2. Apply construction adhesive on the base cabinets. 3. Place the countertop on the cabinets, ensuring it aligns correctly. 4. Secure the countertop using screws or brackets.
5. Apply a silicone sealant along the edges for a finished look.
Can You Just Replace Bathroom Countertop?
Yes, you can easily replace a bathroom countertop.
How Much Does It Cost To Install A Countertop In A Bathroom?
The cost of installing a bathroom countertop varies depending on the material and size. On average, it can range from $500 to $3,000. However, prices can go higher for luxurious materials or custom designs.
What Kind Of Adhesive To Use For Sink To Vanity?
For adhering a sink to a vanity, use a strong adhesive specifically designed for bathroom fixtures. This ensures a secure and durable bond between the sink and the vanity.
Conclusion
To sum up, installing a bathroom countertop can be a manageable project with the right tools and guidance. By following the step-by-step instructions provided in this blog post, you can easily transform your bathroom into a stylish and functional space.
Remember to choose a countertop material that suits your needs and preferences, and ensure proper measurements and installation techniques for a successful outcome. Enjoy the satisfaction and beauty of your newly installed bathroom countertop!