To install peel and stick tile over ceramic tile, first ensure that the ceramic tile surface is clean and smooth. Then, peel off the backing of the tile and firmly press it onto the ceramic tile, starting from one corner and working your way across.
Preparing The Ceramic Tile Surface
Before you can install peel and stick tile over ceramic tile, it’s important to properly prepare the surface. Taking the time to clean, sand, and fill in any cracks or chips will ensure better adhesion and a successful installation. Here are the steps you need to follow:
Clean the ceramic tile surface thoroughly
To ensure proper adhesion, it’s crucial to clean the ceramic tile surface thoroughly. Start by removing any dirt, grime, or grease using a mild detergent and water. Scrub the tiles with a soft brush or sponge, paying special attention to the grout lines. Rinse the tiles with clean water to remove any residue from the cleaning solution and allow them to dry completely before proceeding.
Sand the ceramic tile surface for better adhesion
Sanding the ceramic tile surface will help create a rough texture, providing better adhesion for the peel and stick tiles. Use a medium-grit sandpaper and sand the surface in a circular motion. Take care not to apply too much pressure, as this can damage the tiles. After sanding, wipe away any sanding dust with a damp cloth and allow the tiles to dry.
Fill in any cracks or chips in the ceramic tile
Prior to installing the peel and stick tiles, make sure to fill in any cracks or chips in the ceramic tile. This will ensure a smooth and even surface for the new tiles. Use a ceramic tile filler or epoxy resin to fill in the damaged areas. Follow the manufacturer’s instructions for proper application and allow the filler to dry completely before moving on to the next step.
By following these steps to prepare the ceramic tile surface, you’ll create an ideal foundation for installing peel and stick tiles. Taking the time to clean, sand, and fill in any cracks or chips will ensure better adhesion and a long-lasting, professional-looking result. Now that the ceramic tile surface is ready, you’re one step closer to transforming your space with peel and stick tiles.
Applying The Peel And Stick Tile
Applying peel and stick tile over ceramic tile is a great way to give your floors or walls a fresh, updated look. This DIY project is relatively easy and can be completed in just a few steps. In this article, we will guide you through the process of applying the peel and stick tiles, from measuring and marking the center point of the ceramic tile to trimming the tiles to fit the edges and corners. Let’s get started!
Measure and mark the center point of the ceramic tile
Before you begin laying the peel and stick tiles, it’s important to locate the center point of the ceramic tile. This will ensure that your finished project looks symmetrical and professional. To find the center point, use a measuring tape to measure the width and height of the ceramic tile. Then, divide each measurement in half. Using a pencil, make a small mark at the center point on the tile. This will serve as your starting point for laying the peel and stick tiles.
Start from the center and lay the first peel and stick tile
Starting from the center point marked on the ceramic tile, peel off the backing from the first tile. Carefully place the tile on top of the ceramic tile, aligning it with the center point. Press down firmly to secure the tile in place. Make sure it is level and straight before moving on to the next tile. This first tile will serve as the anchor for the rest of the installation, so take your time to ensure it is properly positioned.
Continue laying the peel and stick tiles in a straight line
After successfully laying the first tile, continue the installation by placing the next tile directly beside it. Make sure to align the edges of the tiles, creating a straight line. Peel off the backing and press the second tile firmly onto the ceramic tile. Repeat this process, laying each tile tightly against the previous one until you reach the end of the row. To maintain consistency, it’s a good idea to periodically check that the tiles are still level and straight.
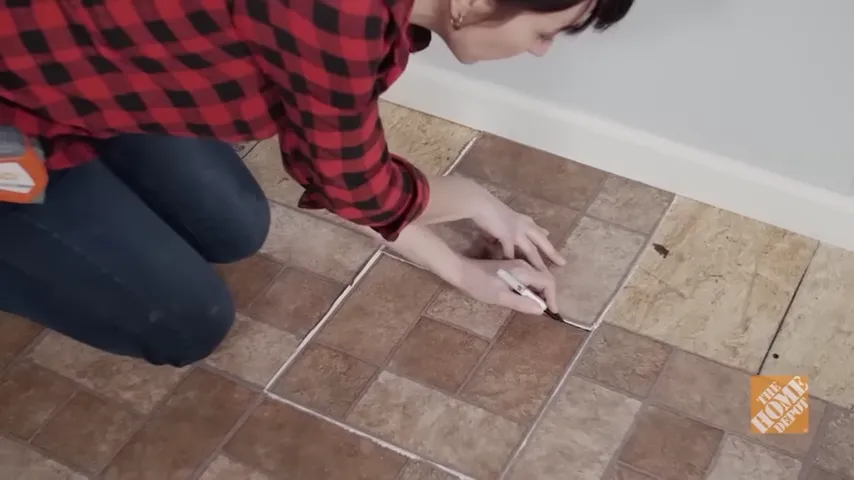
Trim the tiles to fit the edges and corners
As you reach the edges and corners of the surface, you will likely need to trim some tiles to achieve a perfect fit. Measure the area that needs to be trimmed and mark the tile accordingly. Use a utility knife or a tile cutter to carefully cut the tile along the marked line. Once the tile is trimmed, press it into place, ensuring a snug fit against the edge or corner. Continue this process for all remaining edges and corners.
Congratulations! You have successfully applied peel and stick tile over ceramic tile. By following these steps and taking your time with each tile, you can achieve a professional-looking installation. Remember to maintain the symmetry by starting from the center and laying the tiles in straight lines. Don’t forget to trim the tiles to fit the edges and corners for a clean finish. Enjoy your new and improved space!
Finishing Touches And Maintenance
Now that you have successfully installed peel and stick tiles over your ceramic tiles, it’s time to focus on the important final steps: pressing down firmly, sealing the edges, and regular maintenance. These finishing touches will not only enhance the overall look of your new floor but also ensure its longevity. Follow the steps below to complete the installation process and keep your peel and stick tiles looking their best for years to come.
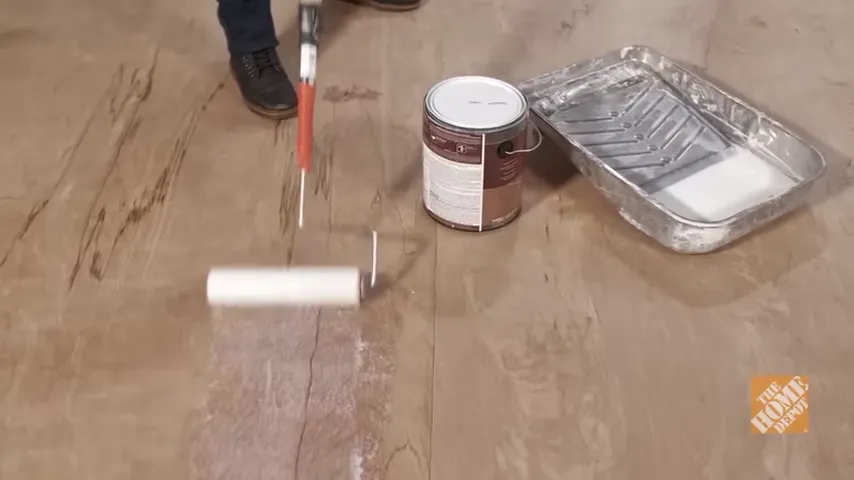
Press down firmly on the tiles to ensure proper adhesion
One crucial step in installing peel and stick tiles is to press them down firmly on the surface. This ensures that the adhesive backing sticks securely to the ceramic tiles underneath. By pressing down, you eliminate any air bubbles that could potentially cause the tiles to lift or come loose. Additionally, this step helps to create a smooth and professional-looking finish.
To achieve proper adhesion, carefully walk over the installed tiles, applying even pressure. You can also use a rolling pin or a heavy object to press down firmly on each tile. Pay close attention to the edges and corners, as they tend to be more prone to lifting. By giving adequate pressure to every tile, you can be confident that your new floor will be durable and long-lasting.
Seal the edges of the peel and stick tiles
Another important step in finishing off your beautiful new peel and stick tile floor is to seal the edges. Sealing acts as a protective barrier, preventing moisture and dirt from seeping beneath the tiles and causing damage. It also adds a professional touch to your installation, giving your floor a polished and seamless appearance.
To seal the edges of the peel and stick tiles, you can use a clear, waterproof caulk. Carefully apply the caulk along the perimeter of the room, ensuring it fills the gaps between the tiles. Use a caulk gun or a small putty knife to achieve a neat and precise application. After applying the caulk, use a damp cloth to smooth out any excess and create a clean finish.
Clean and maintain the peel and stick tiles regularly
To keep your peel and stick tiles looking their best, regular cleaning and maintenance are essential. By following a few simple steps, you can preserve the aesthetics and lifespan of your new floor.
- Sweep or vacuum the floor regularly to remove loose dirt and debris.
- Use a mild detergent or specialized cleaner designed for vinyl flooring to mop the tiles. Avoid using harsh chemicals or abrasive cleaners that could damage the surface.
- Wipe up any spills or stains immediately to prevent them from settling into the tiles.
- Avoid dragging heavy furniture or sharp objects across the floor, as this may cause scratches or damage to the tiles.
- Place felt pads under furniture legs to prevent them from scratching the surface of the tiles.
By following these cleaning and maintenance tips, you can enjoy a fresh and pristine peel and stick tile floor for years to come. Remember, regular upkeep is the key to keeping your flooring looking as good as new!
Frequently Asked Questions
Can Peel And Stick Tiles Be Put Over Ceramic Tile?
Yes, peel and stick tiles can be placed over ceramic tile.
Can You Stick Vinyl Tiles On Ceramic Tiles?
Yes, you can stick vinyl tiles on ceramic tiles.
Can You Put Peel And Stick Tile Over Uneven Tile?
Yes, you can put peel and stick tile over uneven tile surfaces. The peel and stick tiles are flexible and can conform to minor irregularities. However, for best results, it is recommended to level the surface as much as possible before installing the peel and stick tiles.
Should I Glue Down Peel And Stick Tile?
Gluing down peel and stick tile is not recommended. The adhesive backing on the tiles is designed to stick to the floor without additional adhesive. Therefore, using glue may not provide better results and could cause damage to the floor.
Conclusion
Installing peel and stick tile over ceramic tile is a cost-effective and convenient way to update your space. With the right preparation and tools, you can achieve a professional-looking result without the hassle of removing the existing tile. By following the step-by-step guide outlined in this blog post, you can transform your room in no time.
So why wait? Start your peel and stick tile installation project today and enjoy a beautiful, durable floor or backsplash that will enhance the overall aesthetic of your space.