To install peel and stick tile on plywood, clean the surface, measure and cut the tiles to fit, and then press them firmly onto the plywood, making sure to remove any air bubbles. Installing peel and stick tiles on plywood is a simple and affordable way to update your flooring.
With a few easy steps, you can transform your plywood into a stylish and durable surface. In this guide, we will walk you through the process of installing peel and stick tiles on plywood, providing you with the necessary steps and tips to achieve a professional-looking result.
So, let’s dive in and learn how to install peel and stick tile on plywood!
Assessing The Condition Of The Plywood
Assessing the condition of the plywood is a crucial step before installing peel and stick tile. This step ensures that your tile will adhere properly and provide a smooth, durable surface for years to come. There are two main factors to consider when assessing the condition of the plywood: checking for any damage or unevenness and determining the moisture level of the plywood.
Checking for any damage or unevenness
Before starting the installation process, carefully inspect the plywood for any signs of damage or unevenness. Here are a few key areas to focus on:
- Check for cracks or splintering: Examine the surface of the plywood for any cracks, splintering, or other damage. These imperfections can affect the adhesion of the peel and stick tile and may need to be repaired before proceeding.
- Evaluate the stability: Walk across the plywood to feel for any areas that are unstable or give a spongy feel. These areas may need to be reinforced or replaced to ensure a sturdy foundation for your tile installation.
- Leveling the surface: If you notice any areas that are uneven, use a leveling compound to create a smooth surface. Uneven plywood can cause the peel and stick tile to lift or crack over time, so it’s essential to address any unevenness before proceeding.
Determining the moisture level of the plywood
Moisture can be a significant issue when it comes to installing peel and stick tile on plywood. Excessive moisture can weaken the adhesive and lead to tile failure. To determine the moisture level of the plywood, follow these steps:
- Perform a visual inspection: Look for any visible signs of moisture, such as discoloration, warping, or mold growth. If you notice any of these signs, it’s important to resolve the moisture issue before proceeding with the tile installation.
- Moisture testing: Use a moisture meter to measure the moisture content of the plywood. This tool will provide an accurate reading and help determine if the plywood is within an acceptable moisture range for tile installation. Ideally, the moisture content should be below 12% for a successful installation.
- Allow for proper ventilation: If the moisture content is too high, ensure proper ventilation in the room to allow the plywood to dry out. Consider using dehumidifiers or fans to expedite the drying process.
- Apply a moisture barrier: In cases where the moisture level cannot be adequately controlled, it is recommended to apply a moisture barrier on the plywood surface. This will create a barrier between the moisture and the peel and stick tile, ensuring a longer-lasting installation.
By taking the time to assess the condition of the plywood, you are setting the stage for a successful peel and stick tile installation. Addressing any damage or unevenness and ensuring proper moisture levels will help you achieve a beautiful and durable finished floor.
Cleaning The Plywood Surface
When it comes to installing peel-and-stick tiles on plywood, cleaning the surface is crucial for a successful and long-lasting installation. Before you begin the installation process, take the time to clean the plywood surface thoroughly. This will ensure that the adhesive on the back of the tiles adheres properly, creating a durable bond.
Removing any debris or dust
To start, remove any debris or dust from the plywood surface. This can be done using a broom or vacuum cleaner. Make sure to remove all loose particles, as they can interfere with the adhesive bond. Remember to pay special attention to the corners and edges, as these areas tend to accumulate more debris.
Using a suitable cleaning solution
After removing the debris, it’s time to use a suitable cleaning solution to thoroughly clean the plywood surface. Choose a mild detergent that is safe for wood surfaces. Dilute the detergent with water according to the manufacturer’s instructions. You can use a bucket and sponge or a spray bottle to apply the cleaning solution.
| Steps to clean the plywood surface |
|---|
| 1. Start by wetting the sponge or spray bottle with the cleaning solution. |
| 2. Gently scrub the plywood surface using the sponge or spray the cleaning solution directly on the surface. |
| 3. Make sure to cover the entire surface, paying attention to any stains or dirt spots. |
| 4. Allow the cleaning solution to sit on the surface for a few minutes to loosen any stubborn dirt or grime. |
| 5. Rinse the surface with clean water to remove the cleaning solution. |
Once the surface is clean, use a clean towel or mop to dry it thoroughly. It’s essential to have a completely dry surface before proceeding with the installation. Moisture can compromise the adhesive bond, leading to tiles that may not adhere properly or may peel over time. Take the time to ensure the surface is completely dry; this will help maximize the adhesion of the peel-and-stick tiles.
By following these steps and cleaning the plywood surface thoroughly, you will have a clean and ready-to-go surface for installing peel-and-stick tiles. Taking the time to clean the surface will ensure a smooth and successful installation that will stand the test of time.
Tips For Proper Adhesive Application
Installing peel and stick tiles on plywood can be a simple and cost-effective way to update your space. However, ensuring proper adhesive application is crucial for a successful installation that will last for years. In this section, we will discuss the key tips to follow when applying the adhesive to your plywood surface.
Choosing the right adhesive for the job
When it comes to peel and stick tile installation, choosing the right adhesive is vital. Not all adhesives are suitable for plywood surfaces, so it’s essential to select an adhesive explicitly designed for this material. Look for adhesives that are moisture-resistant and have a strong bond to ensure the tiles adhere firmly to the plywood.
To make your selection easier, consider consulting with a professional or the manufacturer’s recommendations for the specific peel and stick tile you are using. They can provide valuable insights into which adhesive will be most effective for your project and ensure long-lasting results.
Applying the adhesive evenly
Once you have selected the appropriate adhesive, the next step is to apply it evenly to the plywood surface. Proper application ensures a secure bond between the adhesive and the tiles, preventing them from peeling or shifting over time. Here are some essential tips to apply the adhesive evenly:
- Start by preparing your plywood surface, ensuring it is clean and free from any dust or debris. Use a broom or vacuum cleaner to remove loose particles, and wipe the surface with a damp cloth to remove any dirt or grease.
- Using a trowel or putty knife, scoop a small amount of adhesive onto the tool. Begin spreading the adhesive onto the plywood, working in small sections.
- Hold the trowel at a 45-degree angle and apply even pressure to create a consistent layer of adhesive. The goal is to distribute the adhesive evenly across the plywood, ensuring complete coverage without any gaps or excess adhesive.
- If you notice any areas where the adhesive is thicker or thinner, use the trowel to redistribute the adhesive and create a uniform layer.
- Continue this process, working section by section, until the entire plywood surface is covered with adhesive.
By following these steps and taking your time to ensure even application, you can create a strong bond between the adhesive and peel and stick tiles, resulting in a durable and visually appealing flooring solution.
Proper Tile Placement
Starting in the Center and Working Outward
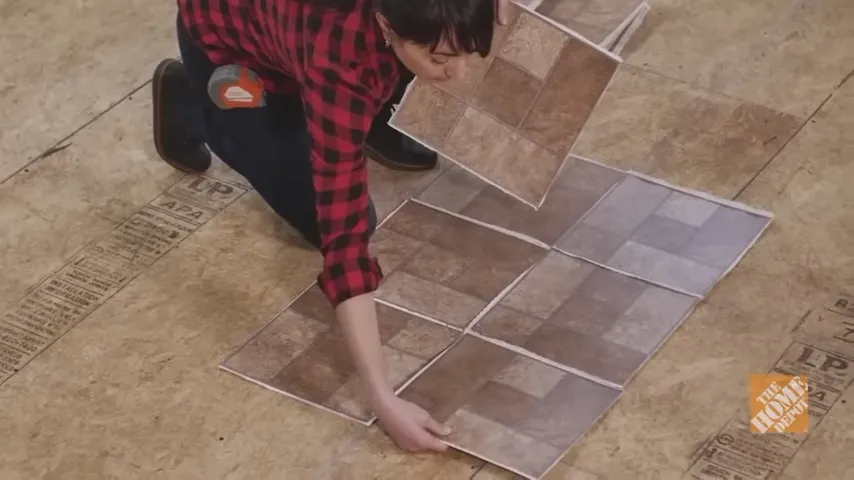
Proper tile placement is crucial when installing peel and stick tiles on plywood. One important aspect of this process is starting in the center and working outward. By beginning in the center of the room instead of starting at one of the walls, you can ensure that the tiles are evenly distributed and aligned.
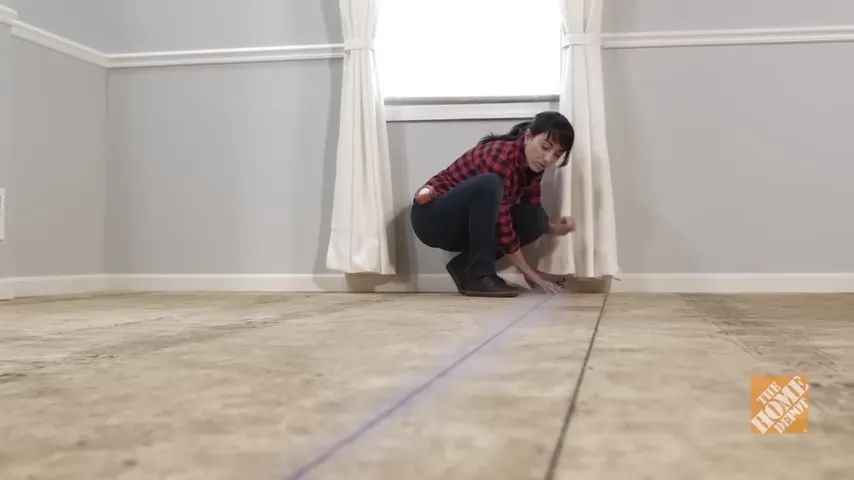
When starting in the center, you should first find the center point of the room. Measure the length and width of the room and mark the midpoint on both sides. Then, using a tape measure and chalk line, create a perpendicular line that intersects the two midpoint markers. This will be your starting point for installing the tiles.
Ensuring Proper Alignment and Spacing
To achieve a professional and polished look, it’s important to ensure proper alignment and spacing between the peel and stick tiles. This can be done by following a few simple steps:
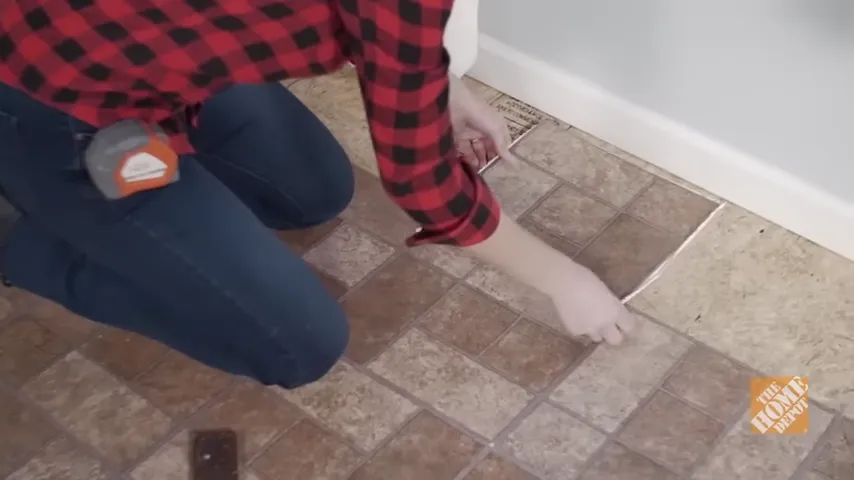
- Start by placing the first tile at the intersection of the chalk lines you created earlier. Press it firmly onto the plywood, ensuring it is level.
- Continue placing the tiles, adhering to the same process and working your way out from the center. Use a tile spacer between each tile to maintain consistent spacing.
- If you encounter any irregularly shaped areas or corners, you may need to cut some tiles to fit properly. Measure the space carefully and use a straight edge and utility knife to make precise cuts.
- As you work your way toward the edges of the room, you may need to cut tiles to fit. Measure the space carefully and use a straight edge and utility knife to make precise cuts.
By following these steps, you can ensure that your peel and stick tiles are properly aligned and evenly spaced, resulting in a professional-looking installation on your plywood surface.
Cutting Tiles To Fit
Once you have measured and marked your tiles, it’s time to cut them to fit the desired area. Cutting peel and stick tiles may seem intimidating, but with the right tools and technique, it can be a breeze. In this section, we will walk you through the steps to make precise cuts using a sharp utility knife, ensuring your tiles fit perfectly on the plywood surface.
Measuring and Marking the Tiles
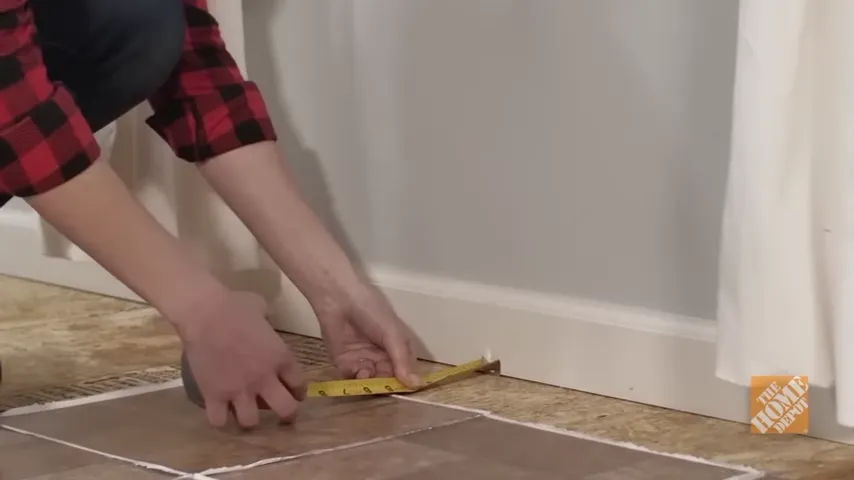
Before you begin cutting the tiles, it’s crucial to measure and mark them accurately. Take a moment to double-check your measurements, as precision is key when it comes to achieving a professional-looking installation. Here’s how you can do it:
- Place the tile on the plywood, aligning it with the edge or corner.
- Using a measuring tape, measure the space where the tile needs to be cut. Ensure you account for any gaps or overlaps that may be necessary.
- Make small markings along the edge of the tile to indicate the cutting line.
By measuring and marking the tiles before cutting, you’ll have a clear guideline to follow, minimizing the risk of errors and ensuring a seamless installation.
Using a Sharp Utility Knife to Make Precise Cuts
Now that you have your tiles measured and marked, it’s time to make the actual cuts. A sharp utility knife is the ideal tool for this task, as it allows for precise and controlled cutting. Follow these steps:
- Hold the tile firmly and align the blade of the utility knife with the cutting line you marked earlier.
- Apply gentle pressure and score the tile along the cutting line. Make sure the blade is sharp for clean and accurate cuts.
- Repeat the scoring motion a few times, gradually increasing the pressure until the tile is completely scored.
- Hold the tile at the scored line and gently apply pressure to snap it along the scored line.
- Smooth any rough edges with sandpaper or a sanding block, ensuring the cut edges are clean and even.
To achieve a professional finish, it’s essential to take your time and make precise cuts. Remember to always prioritize safety by wearing protective gloves and following proper cutting techniques.
Once you have mastered the art of cutting peel and stick tiles, you’ll be well on your way to successfully installing them on plywood surfaces. With careful measurements, accurate markings, and clean cuts, your project will result in a stunning transformation.
Using A Roller For Proper Adhesion
One of the key steps in installing peel and stick tile on plywood is using a roller for proper adhesion. This simple tool can make a big difference in ensuring that your tiles are securely attached to the plywood and will stay in place for years to come. In this section, we will explore the importance of applying even pressure using a tile roller and provide some tips to help you achieve a successful installation.
Applying even pressure using a tile roller
To achieve proper adhesion, it is crucial to apply even pressure to each tile using a tile roller. This will help to eliminate air bubbles and ensure that the tiles bond securely to the plywood surface. Here’s how to do it:
- Start from the center: Begin by placing the tile in the center of the plywood surface. This will allow you to work outward in a systematic manner, applying even pressure as you go.
- Use gentle, consistent strokes: As you roll the tile roller over the tile, apply gentle but firm pressure. Avoid using excessive force, as this can damage the tile or cause it to shift out of place. Use consistent strokes to cover the entire surface of the tile.
- Overlap each stroke: To ensure complete coverage, overlap each stroke slightly with the previous one. This will help to ensure that the roller has passed over every part of the tile and maximizes the adhesive’s contact with the plywood.
- Repeat the process: Continue applying even pressure and rolling the tile roller over each tile until the entire installation is complete. Take your time to ensure that each tile has been properly adhered to the plywood surface.
Conclusion
Using a roller for proper adhesion is a crucial step in installing peel and stick tile on plywood. By applying even pressure and using consistent strokes, you can ensure that your tiles are securely attached and will provide a long-lasting flooring solution. Take your time and follow these tips to achieve a successful installation that will transform your space.
Removing Air Bubbles
When installing peel and stick tiles on plywood, one common challenge that many DIYers face is dealing with air bubbles. These pesky bubbles can result in an uneven and unprofessional looking floor. However, with the right techniques and attention to detail, you can easily eliminate trapped air bubbles and ensure a smooth, seamless finish. In this section, we will discuss different techniques to remove air bubbles and achieve a flawless installation.
Techniques for eliminating trapped air
1. Start by thoroughly cleaning the plywood surface. Any dirt, dust, or debris can create barriers between the tile adhesive and the plywood, leading to the formation of air bubbles. Use a broom or a vacuum cleaner to remove loose particles. Follow this with a thorough mop or wipe down with a damp cloth to eliminate any remaining residue.
2. Once the surface is clean and dry, it’s crucial to ensure proper adhesion. Peel back a small section of the protective backing on the tile and place it firmly on the plywood. Use a tile roller or a clean, sturdy object, such as a rolling pin, to press down on the tile and eliminate any trapped air. Roll from the center outwards, applying even pressure to ensure maximum contact between the tile adhesive and the plywood.
3. For any remaining air bubbles, a simple technique involves using a pin or a needle. Carefully poke a small hole in the center of the bubble without damaging the tile. Gently press down on the tile surrounding the bubble to release the trapped air. Then, use your roller or rolling pin to flatten the area.
4. Another effective method is applying heat to the tiles. Use a hairdryer or a heat gun on a low setting to warm up the tiles and the adhesive. This heat will soften the adhesive, making it more pliable and allowing trapped air to escape. Once heated, press down firmly on the tiles to flatten them. Be cautious not to overheat the tiles, as this can cause damage or discoloration.
5. If you are dealing with multiple air bubbles or larger areas, consider using a self-leveling floor patch before installing the tiles. This product helps smooth out any imperfections on the plywood surface, reducing the chances of air bubbles forming. Follow the manufacturer’s instructions for mixing and applying the floor patch, and make sure it is completely dry before installing the peel and stick tiles.
By following these techniques, you can ensure that air bubbles are eliminated during the installation of peel and stick tiles on plywood. Remember to take your time, work in small sections, and use the appropriate tools to achieve a professional-looking and bubble-free finished floor.
Allowing Sufficient Time For Adhesive To Cure
Following the Manufacturer’s Instructions for Curing Time
Once you have successfully installed peel and stick tiles on plywood, it is crucial to allow sufficient time for the adhesive to cure. The curing process ensures that the tiles firmly adhere to the plywood, providing a long-lasting and durable flooring solution.
To determine the exact curing time for the adhesive, it is important to refer to the manufacturer’s instructions. Different adhesive brands may have different curing times, so it’s important to follow their specific guidelines. The manufacturer’s instructions will provide you with valuable information on how long the adhesive needs to dry and cure before it can be subject to normal use.
Typically, the manufacturer’s instructions will outline the minimum required curing time. However, it’s always a good idea to allow for additional time to ensure the adhesive has fully cured. Rushing the process may compromise the integrity of the installation and lead to tiles coming loose or not adhering properly.
Ensuring Successful Curing Process
While following the manufacturer’s instructions is essential, there are a few additional steps you can take to ensure a successful curing process:
- Avoid extreme temperature fluctuations: Keep the room temperature consistent during the curing process. Extreme temperature variations can affect the adhesive’s ability to properly cure. Maintain a stable temperature between 60°F to 80°F (15°C to 27°C).
- Minimize foot traffic: To prevent any unnecessary stress on the adhesive, it is advisable to minimize foot traffic on the newly installed tiles during the curing period. This will give the adhesive ample time to set and bond with the plywood.
- Avoid moisture exposure: Water or excessive moisture can hinder the curing process and compromise the adhesive’s effectiveness. Avoid mopping or getting the tiles excessively wet during the initial curing period. Also, be cautious of any potential leaks in the vicinity that may introduce moisture to the installation area.
- Allow proper ventilation: Adequate airflow is crucial for the adhesive to cure effectively. Make sure the installation area has proper ventilation by opening windows or using fans. This allows any excess moisture to evaporate, helping the adhesive cure properly.
By following these steps and allowing sufficient time for the adhesive to cure, you can ensure a successful peel and stick tile installation on plywood. Taking these precautions will help to maximize the longevity and durability of your flooring, providing you with a beautiful and functional space for years to come.
Grouting And Sealing The Tiles
Now that you have successfully installed your peel and stick tiles on the plywood, it’s time to give your flooring project the finishing touch. In this section, we will discuss the importance of grouting and sealing the tiles. Applying grout to the gaps between tiles and sealing the tiles not only enhances the aesthetic appeal but also provides extra protection against moisture and everyday wear and tear.
Applying grout to the gaps between tiles
Once you have installed the peel and stick tiles, it’s imperative to fill in the gaps between them with grout to achieve a seamless finish. Grout not only helps to reinforce the tiles but also prevents dirt, grime, and water from accumulating in between. To apply grout, follow these simple steps:
- Clean and prepare the tiles: Before applying grout, ensure that the tiles are clean and free from any adhesive residues. Use a mild cleaner and a sponge to wipe the tiles, making sure they are thoroughly dry before proceeding.
- Mix the grout: Follow the instructions on the grout packaging to mix the grout and water in the right proportions. You can use a trowel or a grout float to achieve a smooth, consistent mixture.
- Apply the grout: Using the grout float, spread the mixed grout diagonally across the tiles, pressing it into the gaps firmly. Make sure the grout completely fills each gap.
- Remove excess grout: After applying the grout, use a clean, damp sponge to wipe off any excess grout from the surface of the tiles. Rinse the sponge regularly to prevent smearing the grout.
- Allow the grout to cure: Let the grout cure for the recommended time specified on the packaging. This usually takes around 24-48 hours.
- Seal the grout: To ensure the longevity of the grout and to protect it from stains and moisture, consider applying a grout sealer. Follow the manufacturer’s instructions to apply the sealer evenly and allow it to dry completely.
Sealing the tiles for extra protection
While the peel and stick tiles provide a certain degree of protection against spills and stains, sealing them adds an extra layer of defense. Sealing the tiles helps to extend their lifespan and maintain their original luster. Here’s how you can seal your peel and stick tiles effectively:
- Ensure clean tiles: Before sealing the tiles, make sure they are clean and free from any debris. It’s important to remove any dirt, dust, or grime using a mild cleaner and a soft cloth.
- Choose the right sealer: There are various types of sealers available, such as penetrating sealers and topical sealers. Choose a sealer that is compatible with the material of your peel and stick tiles.
- Apply the sealer: Follow the manufacturer’s instructions to apply the sealer evenly on the tiles. You can use a clean cloth or a paint roller to ensure a smooth and uniform application.
- Allow the sealer to dry: Give the sealer ample time to dry completely before walking or placing any objects on the tiles. This drying process usually takes between 24-48 hours, depending on the product.
- Maintain regular sealing schedule: To maintain the protective coating on your peel and stick tiles, it’s recommended to reapply the sealer periodically. This will help to keep the tiles in optimal condition for a longer period.
By following these simple steps, you can ensure that your peel and stick tile installation on plywood is not only visually appealing but also durable and long-lasting. Grouting and sealing your tiles will protect them from potential damage and provide you with a beautiful, functional flooring solution for years to come.
Regular Cleaning And Maintenance
Regular cleaning and maintenance are essential for keeping your peel and stick tile flooring on plywood looking its best and ensuring its longevity. By following some simple cleaning techniques and taking preventative measures, you can protect your flooring from damage and wear. In this section, we will discuss the recommended cleaning products and techniques as well as how to prevent and address any potential damage or wear.
Recommended Cleaning Products and Techniques
Keeping your peel and stick tile flooring clean is crucial for maintaining its appearance and durability. Here are some recommended cleaning products and techniques to use:
1. Vinegar and Water Solution:
A simple and effective homemade cleaning solution can be made by mixing equal parts of vinegar and water. This solution is gentle yet powerful enough to remove dirt and stains from your peel and stick tiles.
2. Mild Dish Soap and Water:
If you prefer using a commercial cleaner, opt for a mild dish soap mixed with water. Avoid using harsh chemicals or abrasive cleaners as they can damage the surface and adhesive of your peel and stick tiles.
3. Soft Bristle Broom or Vacuum Cleaner:
Regularly sweeping or vacuuming your peel and stick tile flooring is essential for removing any loose dirt and debris. Use a soft bristle broom or a vacuum cleaner with a hard floor attachment to avoid scratching the tiles.
4. Microfiber Mop or Damp Cloth:
For a deeper cleaning, use a microfiber mop or a damp cloth moistened with your chosen cleaning solution. Ensure the mop or cloth is not overly wet to prevent excess moisture seeping into the tiles or the plywood subfloor.
Preventing and Addressing Damage or Wear
Taking preventative measures and addressing any signs of damage or wear promptly is crucial for maintaining the longevity of your peel and stick tile flooring. Here are some tips for preventing and addressing damage or wear:
1. Place Protective Mats or Rugs:
Use protective mats or rugs in high-traffic areas or in front of sinks and appliances to prevent excessive wear and tear on your peel and stick tiles. Make sure the mats or rugs have a non-slip backing to avoid slipping hazards.
2. Promptly Clean Spills and Stains:
Accidents happen, and spills are inevitable. However, it is important to clean up any spills or stains on your peel and stick tiles promptly. Leaving them for a prolonged period can result in discoloration or damage to the adhesive.
3. Avoid Excessive Moisture Exposure:
While peel and stick tiles are water-resistant, excessive moisture exposure can still lead to damage. Avoid excessive moisture by promptly wiping up any water spills and avoiding steam mops or excessive use of water during cleaning.
4. Address Loose or Damaged Tiles Immediately:
If you notice any loose or damaged tiles, it is crucial to address them immediately. Remove the damaged tile carefully and replace it with a new one. This will prevent further damage and maintain the overall integrity of your flooring.
By following these recommended cleaning products and techniques and taking preventative measures, you can keep your peel and stick tile flooring on plywood looking its best. Regular maintenance will ensure its durability and provide you with a clean and visually appealing floor for years to come.
Repairing And Replacing Damaged Tiles
When installing peel and stick tile on plywood, it’s essential to know how to repair and replace any damaged tiles to maintain the beauty and functionality of your flooring. Whether you accidentally damaged a tile during installation or discovered a worn-out tile over time, being able to remove and replace individual tiles will save you time and money.
Steps for Removing and Replacing Individual Tiles
Here are the step-by-step instructions to help you remove and replace individual tiles on your peel and stick tile floor:
- Start by carefully inspecting the damaged tile. Look for any signs of looseness or cracks. If the tile is loose, you can skip to step 4.
- If the tile is intact but cracked, use a putty knife or a similar tool to carefully chip away and remove the damaged tile. Be cautious not to damage the surrounding tiles.
- Once you have removed the damaged tile, clean the area thoroughly. Remove any adhesive residue or debris to ensure proper adhesion of the new tile.
- If the damaged tile was loose, clean the area around it as well. This step is crucial to ensure the new tile adheres properly to the plywood.
- Select a replacement tile that matches the existing tiles in design and color. It’s important to maintain a consistent look across your floor.
- Carefully peel off the backing from the new tile, exposing the adhesive side.
- Align the new tile with the surrounding tiles, ensuring a seamless fit. Press it firmly onto the plywood, starting from one edge and gradually working your way towards the other edge.
- Using a roller or a clean towel, apply pressure to the entire surface of the new tile to ensure it adheres firmly to the plywood. This will help eliminate any air bubbles and create a strong bond.
- Allow the adhesive to set according to the manufacturer’s instructions before walking on or placing any heavy objects on the repaired tile.
By following these steps, you’ll be able to remove and replace damaged tiles on your peel and stick tile floor with ease. Remember to take your time and be careful during the process to achieve professional-looking results.
Frequently Asked Questions
Can You Put Peel And Stick Tile On Plywood?
Yes, you can install peel and stick tiles on plywood. It is important to ensure that the plywood is clean, dry, and smooth before applying the tiles. Additionally, make sure to follow the manufacturer’s instructions for proper installation to ensure a secure and long-lasting bond.
Can You Put Peel And Stick Tile Over Subfloor?
Yes, you can put peel and stick tile over a subfloor. It is a convenient and easy-to-install option for DIY projects. Just make sure the subfloor is clean, dry, and in good condition. Remove any loose or damaged material before applying the peel and stick tiles.
What Goes Under Peel And Stick Tile?
Peel and stick tiles can be applied directly onto clean and smooth surfaces without any underlayment. Make sure the existing floor is free of dust, grease, and debris. Common surfaces include plywood, concrete, vinyl, and even existing tile floors.
Does Peel And Stick Tile Need Underlayment?
Peel and stick tile does not typically require underlayment. It is designed to adhere directly to the existing flooring surface. Just make sure the surface is clean, dry, and smooth before installation.
Conclusion
Installing peel and stick tile on plywood is a simple and cost-effective way to upgrade your flooring. By following the steps outlined in this guide, you can achieve professional-looking results without the need for professional help. From proper preparation to accurate measurements, each stage plays a crucial role in ensuring a successful installation.
So, grab your tools and get ready to transform your space with beautiful and durable peel and stick tile on plywood.