
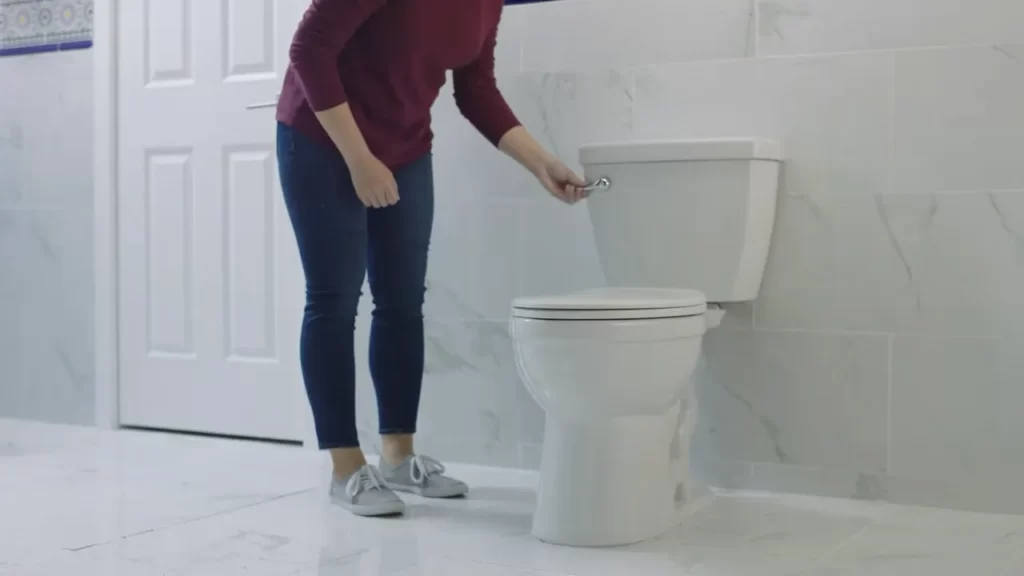
To install a toilet handle, first, remove the old handle by unscrewing the retaining nut, then slide the new handle into place and secure it with the retaining nut. Are you experiencing difficulty with your toilet handle?
The toilet handle is an essential component that allows you to flush the toilet effortlessly. Over time, handles can become worn or damaged, leading to problems with flushing. Don’t panic! This step-by-step guide will walk you through the process of installing a new toilet handle.
By following these instructions, you’ll have a fully functional toilet handle in no time. Say goodbye to frustrating flushes and hello to seamless, effortless flushing. Let’s get started with this quick and easy DIY project.
Gather The Necessary Tools And Materials
Before you begin the process of installing a new toilet handle, you need to ensure you have all the required tools and materials at your disposal. Having everything ready beforehand will save you time and frustration later on. Here are the essential items you’ll need:
Wrench
A wrench will be necessary to loosen and tighten the nuts and bolts that secure the toilet handle in place. Make sure you have an adjustable wrench that can fit the size of the bolts on your toilet handle.
New toilet handle
In order to replace your current toilet handle, you will need to have a new one on hand. When purchasing a new toilet handle, make sure it is compatible with your toilet model. You can find a wide variety of options available at your local hardware store or online.
Replacement nut and bolt
Often, replacing a toilet handle requires replacing the nut and bolt that secure the handle to the toilet tank. Check to see if your new toilet handle comes with a replacement nut and bolt. If not, make sure to have a compatible replacement set available.
Adjustable pliers
Having a pair of adjustable pliers will come in handy when tightening or loosening stubborn bolts or nuts. Make sure they are in good working condition before you start.
Now that you have all the necessary tools and materials, you are ready to move on to the next step of the installation process.
Prepare The Toilet Tank For Installation
Before installing a new toilet handle, it is important to prepare the toilet tank for the installation process. This involves turning off the water supply, flushing the toilet to empty the tank, and removing the tank lid. By following these simple steps, you can ensure a smooth and hassle-free installation.
Turn off the water supply
In order to safely install the new toilet handle, it is essential to turn off the water supply to the toilet tank. Locate the water shut-off valve, usually located near the base of the toilet, and turn it clockwise until it is fully closed. This will prevent any water from flowing into the tank during the installation process.
Flush the toilet to empty the tank
After turning off the water supply, the next step is to flush the toilet to empty the tank. Simply press down on the flush handle, which will activate the flush mechanism and drain the water from the tank. It is important to ensure that the tank is completely emptied before proceeding with the installation.
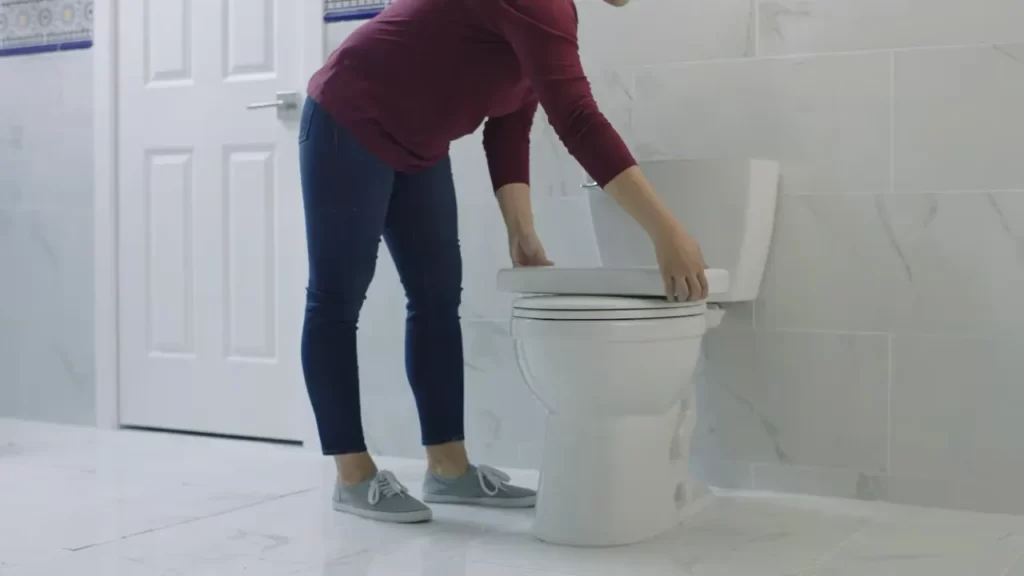
Remove the tank lid
Once the tank is empty, it is time to remove the tank lid. Carefully lift the lid from the tank, and set it aside in a safe place. Be cautious while handling the lid as it may be heavy or fragile. Removing the lid will provide easier access to the inside of the tank, making it easier to install the new toilet handle.
By following these three simple steps – turning off the water supply, flushing the toilet to empty the tank, and removing the tank lid – you can effectively prepare the toilet tank for the installation of a new handle. This will ensure a smooth and successful installation process, allowing you to enjoy a fully functioning and convenient toilet.
Remove The Old Toilet Handle
In order to install a new toilet handle, you first need to remove the old one. This process may seem daunting, but it is actually quite simple. By following a few easy steps, you can have your old handle removed and your new one installed in no time. In this section, we will discuss how to remove the old toilet handle.
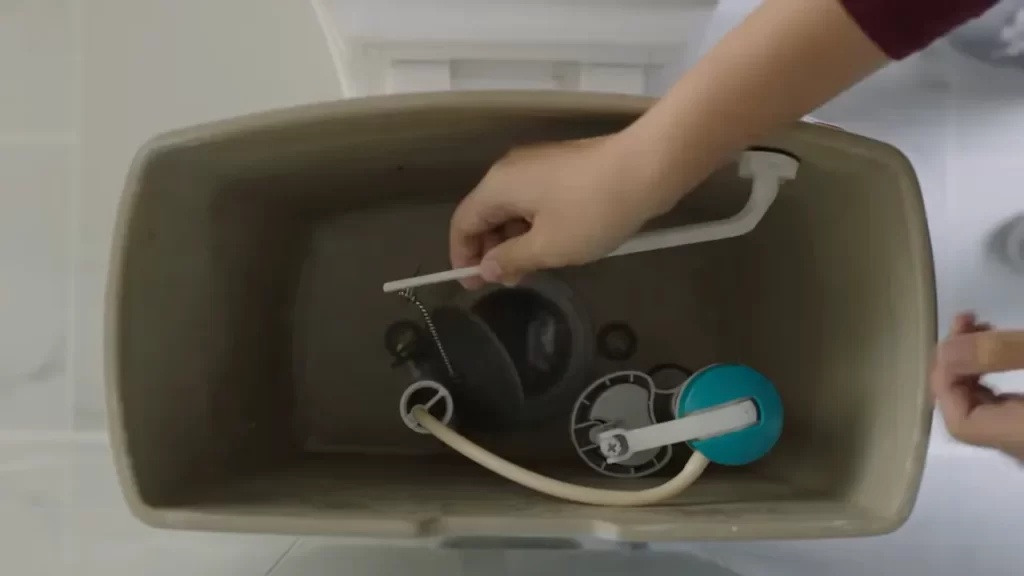
Disconnect the chain or rod from the handle
If your toilet handle is connected to a chain or rod, you will need to disconnect it before removing the old handle. Simply locate the chain or rod inside the tank and disconnect it from the handle. This can usually be done by unhooking the chain or unscrewing the rod.
Unscrew the nut securing the old handle
Once the chain or rod is disconnected, you can now proceed to unscrew the nut that is securing the old handle to the toilet tank. This nut is typically located on the inside of the tank, just behind the handle. Use a wrench or pliers to loosen and remove the nut.
Remove the old handle from the tank
With the nut removed, you can now easily pull the old handle out of the tank. Remember to hold onto the handle firmly as you pull it out to avoid any unnecessary splashing or damage to the toilet.
Install The New Toilet Handle
Installing a new toilet handle can be a simple and straightforward process. This step-by-step guide will ensure that you can complete this task with ease.
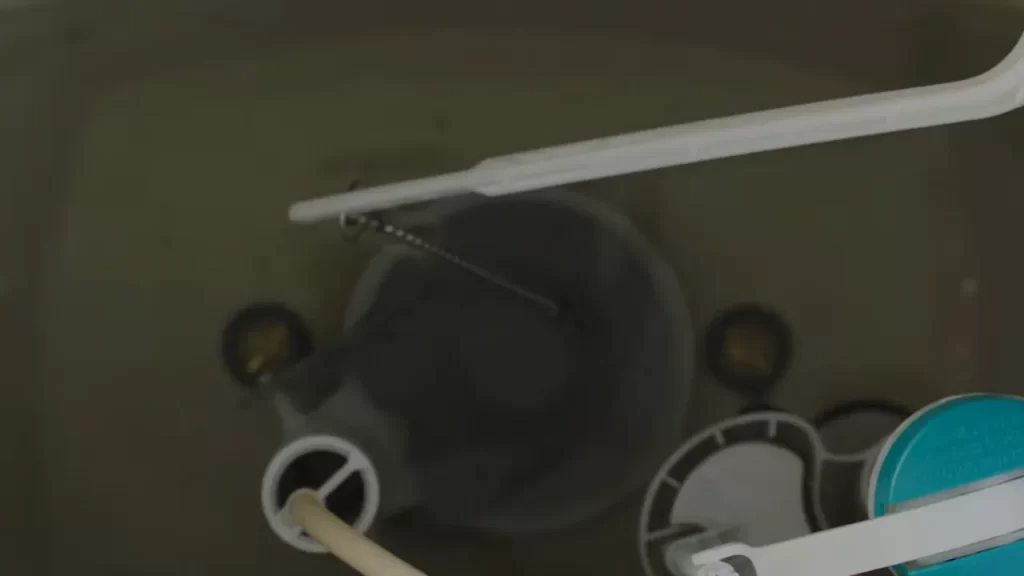
Insert the new handle into the hole on the tank
The first step in installing a new toilet handle is to insert the handle into the hole on the tank. Locate the hole on the side of the tank and carefully insert the new handle into it. Make sure that the handle is aligned properly and fits securely into the hole. This will ensure that it operates smoothly and effectively.
Secure the handle with the replacement nut
Once the handle is inserted into the hole, it’s time to secure it in place. Take the replacement nut that came with the new handle and place it onto the threaded part of the handle inside the tank. Use a wrench or pliers to tighten the nut securely. Be careful not to overtighten it, as it could potentially damage the handle or the tank.
Reattach the chain or rod to the handle
After securing the handle, it’s important to reattach the chain or rod that is responsible for flushing the toilet. Locate the chain or rod that was previously connected to the old handle and reattach it to the new handle. Make sure that it is securely fastened, as a loose connection could cause the toilet to malfunction.
Adjust the chain length if necessary
Once the chain or rod is reattached, it’s important to check the length and adjust it if necessary. The chain should have just enough slack to allow the handle to return to its original position after flushing. If the chain is too long, it can get caught or tangled, causing issues with flushing. If it’s too short, the handle may not return to its proper position. Adjust the length of the chain by hooking it onto a different link to achieve the desired slack.
Following these simple steps will ensure that you can install a new toilet handle effectively and efficiently. Remember to take your time and double-check your work to avoid any potential issues. With a properly installed toilet handle, you can enjoy a fully functional and reliable flushing system in your bathroom.
Test The New Toilet Handle
Turn on the water supply
Once you have successfully installed the new toilet handle, the next step is to test it out. To do this, first, locate the water shut-off valve behind the toilet. Turn the valve clockwise to open it and allow water to flow into the tank. Take note that it may take a few moments for the tank to fill up completely before you can proceed with the next step.
Flush the toilet and ensure the handle functions properly
Once the tank is full, it’s time to put the new handle to the test. Simply press the handle down and release it to flush the toilet. Observe the flushing mechanism and ensure that the handle is functioning as expected. Look out for any resistance or hesitation in the mechanism and ensure that the handle returns to its original position after flushing. If you notice any issues, you may need to make some adjustments.
Make any necessary adjustments, ensuring each H3 heading adheres to HTML syntax
- Check the positioning of the handle and ensure it is aligned properly with the flush valve.
- If the handle feels loose or wobbly, you may need to tighten the mounting nut located inside the tank. Use a wrench or pliers to secure it firmly.
- On the other hand, if the handle feels too tight or difficult to press, you may need to loosen the mounting nut slightly. This will allow for smoother operation.
- Ensure that the chain or rod connecting the handle to the flush valve is properly adjusted. It should have enough slack to allow the handle to move freely without being too loose or too tight.
- Test the handle again after making any adjustments to ensure it is functioning smoothly.
By following these steps, you can successfully install a new toilet handle and ensure that it functions properly. Regularly testing and maintaining your toilet handle will help prevent any future issues and provide you with a smooth flush every time.
Troubleshooting Tips
If the handle is loose, tighten the nut further
If you notice that your toilet handle is loose and wobbly, it’s important to tighten it promptly to avoid any inconvenience or potential damage. Loose handles can cause difficulties in flushing and may even lead to a complete failure of the flushing mechanism if left unattended. To fix this issue, you’ll need to locate the nut that holds the handle in place. Typically, you’ll find this nut inside the tank, behind the handle. Using a wrench or pliers, turn the nut clockwise to tighten it. Be careful not to overtighten, as this can cause damage to the handle or the flushing mechanism. Once the nut is tightened securely, test the handle to ensure it is stable and functioning properly.
If the handle sticks or doesn’t return to its original position, adjust the chain length
Sometimes, after installing a new handle or performing maintenance on an existing one, you may notice that the handle sticks or fails to return to its original position after flushing. This can be a frustrating problem, but fortunately, it’s often a simple fix. In most toilets, there is a chain that connects the handle to the flapper inside the tank. If the chain is too short, it can cause the handle to stick or not return properly. On the other hand, if the chain is too long, it can get tangled or caught on other parts of the flushing mechanism. To adjust the chain length, simply unclip it from the flush arm and reattach it to a different hole, either higher or lower, until you find the right length. Test the handle multiple times to ensure smooth and effortless flushing.
Check for any leaks around the handle area and fix as necessary
After installing or making adjustments to your toilet handle, it’s important to check for any leaks around the handle area. Even the smallest leaks can waste water and potentially cause damage to your bathroom floor and surrounding areas. To check for leaks, carefully inspect the area around the handle and look for any signs of water seeping or dripping. If you notice a leak, you’ll need to troubleshoot and fix it promptly. Start by checking the seal between the tank and the handle to ensure it is tight and secure. If the seal is loose or damaged, it may need to be replaced. Additionally, check the connection points where the handle meets the tank and tighten any loose screws or bolts. Finally, double-check that all connections and fittings are properly sealed and tightened to prevent water leakage.
In conclusion, troubleshooting common issues with your toilet handle doesn’t have to be a complicated task. By following these troubleshooting tips, you can easily fix a loose handle, adjust the chain length if the handle sticks, and ensure there are no leaks around the handle area. Taking care of these issues promptly will help keep your toilet functioning properly and avoid any unnecessary inconvenience.
Additional Considerations
Consider upgrading to a dual-flush toilet handle for water-saving benefits
When it comes to installing a toilet handle, there are additional considerations that can enhance your overall experience. One of these considerations is whether to upgrade to a dual-flush toilet handle. The dual-flush system allows you to choose between a low-volume flush for liquid waste and a high-volume flush for solid waste, thereby helping you save water and reduce your environmental impact.
If you are looking to conserve water and promote sustainability, upgrading to a dual-flush toilet handle is a sensible choice. By installing this innovative handle, you can actively contribute towards water conservation without compromising on the effectiveness of your toilet flushing system.
Consult the toilet manufacturer’s instructions for specific installation guidelines and warranty information
Before embarking on the installation process, it is crucial to consult the toilet manufacturer’s instructions. These guidelines provide the specific details and steps required for a successful installation. Additionally, the manufacturer’s instructions may also contain important warranty information that ensures the longevity and reliability of your new toilet handle.
Each toilet model may have its own unique requirements, so it is vital to adhere to the manufacturer’s instructions diligently. Failure to do so may result in improper installation, which can lead to a range of issues such as wobbly handles or suboptimal flushing performance.
By following the manufacturer’s instructions, you can ensure a smooth installation process and guarantee the satisfaction of a properly functioning toilet handle.
Frequently Asked Questions
Are Toilet Handles Easy To Install?
Toilet handles are easy to install. Simply follow the instructions provided and use basic tools. It should only take a few minutes to complete the installation process.
How Do You Replace A Toilet Flush Lever?
To replace a toilet flush lever, follow these steps: 1. First, turn off the water supply. 2. Remove the tank lid and disconnect the chain from the lever. 3. Unscrew and remove the old lever. 4. Install the new lever by screwing it into place.
5. Reconnect the chain and turn the water supply back on.
How Do You Replace A Broken Flush Handle?
To replace a broken flush handle, follow these steps: 1. Shut off the water supply to the toilet. 2. Remove the lid of the toilet tank. 3. Detach the chain or lever connecting the handle to the flush valve. 4.
Unscrew and remove the old handle. 5. Install the new handle and reattach the chain or lever.
How Do You Install A Toilet Handle Without A Chain?
To install a toilet handle without a chain, follow these steps: 1. Remove the old handle by unscrewing it. 2. Attach the new handle using the provided screws. 3. Adjust the handle to the desired position. 4. Test the handle by flushing the toilet.
5. Make any necessary adjustments for proper functioning.
Conclusion
Installing a toilet handle doesn’t have to be a daunting task. By following these simple steps, you can easily replace the handle and restore the full functionality of your toilet. Remember to gather the necessary tools, shut off the water supply, and take your time to ensure everything is properly aligned.
With a little patience and effort, you’ll have your toilet working smoothly in no time. So, why wait? Get started on this easy DIY project and enjoy the convenience of a fully functioning toilet handle.