
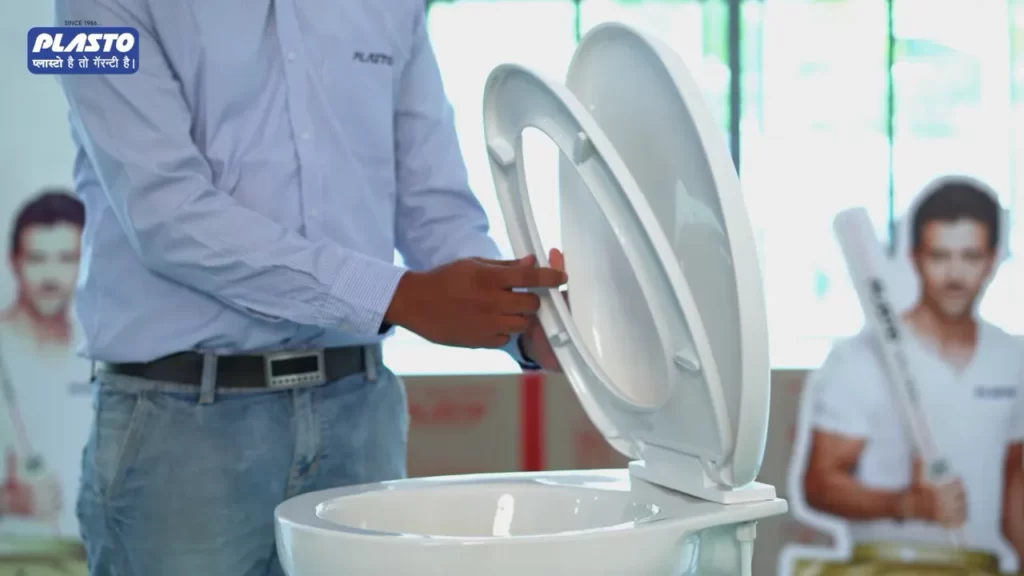
Installing a toilet seat cover requires aligning the seat with the holes in the toilet bowl and securing it in place using the provided bolts and nuts. To begin, position the seat on top of the bowl ensuring the screw holes line up.
Secure the seat in place by fitting the bolts through the holes and tightening the nuts underneath the bowl until the seat is firmly attached. Now, let’s delve into the details of how to install a toilet seat cover for a clean and comfortable bathroom experience.
A toilet seat cover not only adds an aesthetic touch to your bathroom but also provides hygienic benefits. Installing a seat cover is a quick and straightforward task, as long as you have the necessary tools and follow the correct steps. By following these simple instructions, you can easily install a toilet seat cover and improve the overall functionality and comfort of your bathroom.
Understanding The Purpose Of A Toilet Seat Cover
When it comes to maintaining hygiene and sanitation in public restrooms, the installation of a toilet seat cover is essential. Not only does it provide a barrier between you and the surface, but it also serves several important functions that ensure a clean and safe experience.
Hygiene and Sanitation Benefits
A toilet seat cover offers numerous hygiene and sanitation benefits. By placing a disposable cover on the seat before use, you create a protective layer that separates you from any potential germs or bacteria left behind by previous users.
Avoiding direct contact with the seat surface not only eliminates the discomfort of sitting on a cold or wet seat; it also significantly reduces the risk of contracting infections or diseases. This simple act of using a toilet seat cover is a proactive step towards safeguarding your health.
Protection against Germs and Bacteria
Germs and bacteria thrive in moist environments, making toilet seats a breeding ground for harmful microorganisms. By utilizing a toilet seat cover, you effectively block their access to your skin, preventing potential infections or diseases that can be easily transmitted through contact.
Toilet seat covers act as a protective shield that acts as a barrier, inhibiting the growth and spread of germs and bacteria. By taking this precautionary measure, you actively reduce the risk of contracting illnesses such as urinary tract infections, gastroenteritis, and other common restroom-related ailments.
Preventing the Spread of Diseases
In addition to personal protection, the use of a toilet seat cover also contributes to the public health sphere. By using a toilet seat cover, you play a significant role in preventing the spread of diseases to other restroom users.
When someone infected with a contagious illness uses a public restroom without using a seat cover, they unknowingly leave behind bacteria or viruses on the seat. Subsequent users who come into contact with these contaminated surfaces can then become carriers of the disease, unknowingly spreading it to others in their personal and public networks.
| Using a toilet seat cover: | Not using a toilet seat cover: |
|---|---|
| • Provides a protective barrier • Minimizes the risk of infections • Ensures personal hygiene |
• Exposes you to germs and bacteria • Increases the risk of infections • Compromises personal hygiene |
By using a toilet seat cover, you act responsibly by preventing the potential spread of diseases and protecting the well-being of both yourself and others who will use the restroom after you.
Choosing The Right Type Of Toilet Seat Cover
When it comes to selecting a toilet seat cover, there are several factors to consider. From different materials and options available to various designs and styles, choosing the right type of toilet seat cover can make a big difference in both comfort and aesthetics. In this section, we will explore the different aspects to keep in mind as you embark on your quest for the perfect toilet seat cover.
Different Materials and Options Available
One of the first decisions you need to make when selecting a toilet seat cover is the material it is made of. Toilet seat covers are typically made from plastic, wood, or cushioned material. Each material has its own advantages and considerations to keep in mind.
Plastic: Plastic toilet seat covers are a popular choice due to their affordability and durability. They are easy to clean, resistant to staining, and come in a wide range of colors and textures. Whether you prefer a sleek, smooth surface or a textured grip, plastic covers offer various options to suit your preference.
Wood: If you want to add a touch of elegance and warmth to your bathroom, a wooden toilet seat cover might be the right choice for you. Wood covers are known for their natural beauty and durability. They are available in different types of wood finishes, allowing you to find one that matches your bathroom decor. It’s important to note that wood covers require regular maintenance to avoid warping and discoloration.
Cushioned Material: For those seeking maximum comfort and padding, a cushioned material toilet seat cover is the way to go. These covers provide a soft and plush feel, ideal for individuals who spend a lot of time sitting on the toilet seat. Cushioned covers are typically made from foam or gel and come in various thicknesses to ensure a comfortable experience.
Factors to Consider When Selecting a Toilet Seat Cover
When selecting a toilet seat cover, it’s essential to consider factors beyond the material. Here are some important considerations to help you make an informed decision:
- Size and Compatibility: Ensure that the toilet seat cover you choose is compatible with your toilet bowl. Measure the dimensions of your toilet seat to ensure a proper fit.
- Attachment Mechanism: Consider the attachment mechanism of the toilet seat cover. Some covers use simple screws, while others require a more intricate installation process.
- Easy to Clean: Look for a toilet seat cover that is easy to clean and maintain. This will ensure proper hygiene and longevity.
Exploring Different Designs and Styles
In addition to materials and practical considerations, exploring different designs and styles is also important when choosing a toilet seat cover. This is an opportunity to add a personal touch and enhance the overall aesthetic of your bathroom. Whether you prefer a classic solid color, sophisticated patterns, or even fun and quirky designs, there is a plethora of options to choose from.
Keep in mind the existing decor of your bathroom when selecting a design. Matching the toilet seat cover with the overall theme can create a cohesive and visually appealing look.
Remember, the right type of toilet seat cover not only adds comfort but also enhances the overall appearance of your bathroom. By considering the various materials, practical factors, and design options, you can select a toilet seat cover that best meets your needs and complements your bathroom decor.
Gathering The Necessary Tools And Equipment
Before you embark on installing a toilet seat cover, it’s essential to gather all the necessary tools and equipment. Having everything at hand will ensure a smooth and efficient installation process. In this section, we will cover the list of essential tools needed, additional equipment for specific types of toilet seat covers, and safety precautions to keep in mind.
List of Essential Tools Needed for Installation
To install a toilet seat cover, you will need the following tools:
- Adjustable wrench
- Phillips-head screwdriver
- Flat-head screwdriver
- Measuring tape
- Pencil or marker
- Utility knife
- Optional: Power screwdriver for faster installation
Additional Equipment for Specific Types of Toilet Seat Covers
Depending on the type of toilet seat cover you have, you may require additional equipment. Here are a few examples:
1. Plastic Seat Cover
If you are installing a plastic seat cover, you might need:
- Plastic seat cover mounting bolts
- Nylon washers
2. Wooden Seat Cover
For a wooden seat cover installation, consider having:
- Wooden seat cover mounting bolts
- Metal washers
- Wrench or pliers for additional tightening
3. Bidet Seat Cover
If you are planning to install a bidet seat cover, some additional equipment may include:
- Bidet attachment kit
- Teflon tape for secure connections
- Adjustable water supply line
Safety Precautions to Keep in Mind
While installing a toilet seat cover, it is crucial to prioritize safety. Follow these precautions to ensure a safe installation process:
- Wear protective gloves to prevent injuries and maintain hygiene.
- Turn off the water supply to the toilet to avoid any water leaks or accidents.
- Handle the tools with care and keep them away from children’s reach.
- Follow the manufacturer’s instructions for installation and ensure proper alignment.
- Use caution when tightening the bolts to prevent overtightening and potential damage.
- Dispose of any packaging materials safely to prevent tripping hazards.
Step 1: Removing The Old Toilet Seat
Before you can install a new toilet seat cover, the first step is to remove the old one. This might seem like a simple task, but if done improperly, it can lead to unnecessary frustration and even damage to your toilet. In this section, we will guide you through the process of removing the old toilet seat, making sure you do it safely and efficiently.
Assessing the condition of the existing seat
Before diving into the removal process, take a moment to assess the condition of the existing toilet seat. Look for any signs of wear and tear, cracks, or loose parts. If you notice any significant damage, it might be time to replace the entire toilet seat rather than just the cover. However, if the seat is in good condition and only the cover needs to be changed, proceed to the next steps.
Tools required for the removal process
Having the right tools on hand can make the removal process a breeze. Here are the essential tools you’ll need:
- Screwdriver: The type of screwdriver required will depend on the screws used to attach the toilet seat to the toilet bowl. Most toilet seats have either a flathead or Phillips head screws, so make sure you have the appropriate screwdriver for the job.
- Adjustable wrench or pliers: In some cases, the toilet seat may also be secured with nuts or bolts. An adjustable wrench or pliers will be handy for loosening and removing these fasteners.
- Towel or rag: To protect the toilet bowl and catch any potential water drips, have a towel or rag ready during the removal process.
Proper techniques for uninstalling the old seat
Now that you have assessed the condition of the existing seat and gathered the necessary tools, it’s time to remove the old toilet seat. Follow these steps for a smooth and hassle-free removal:
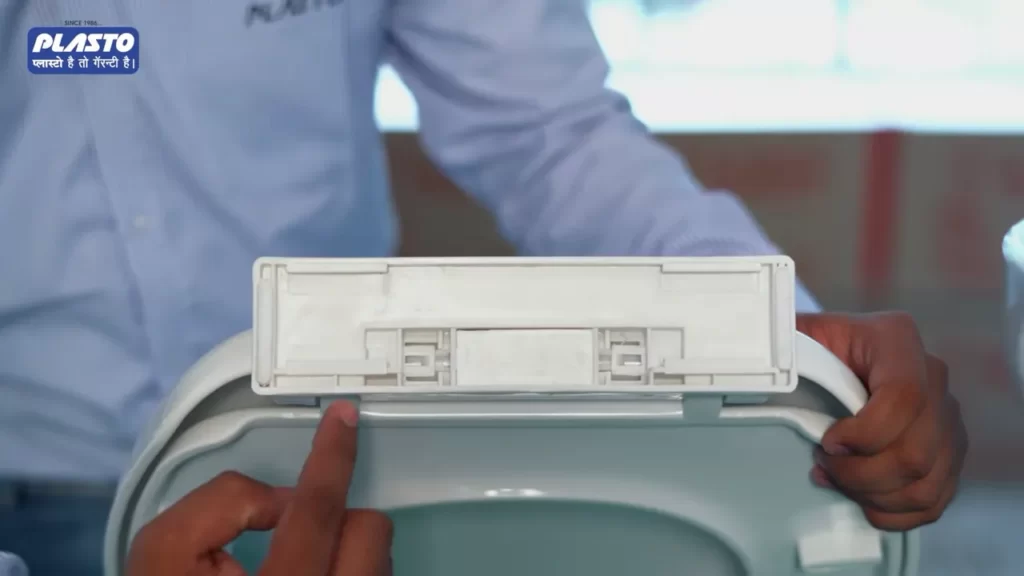
- Locate the screws or nuts: Flip open the hinge caps on the back of the toilet seat to expose the screws or nuts securing it to the toilet bowl. These caps are typically located at the rear of the seat.
- Loosen the screws or nuts: Using the appropriate tool, loosen the screws or nuts by turning them counterclockwise. Keep in mind that they may be tight, so some effort may be required. Be careful not to apply too much force to avoid unnecessary damage.
- Remove the seat: Once the screws or nuts are sufficiently loosened, lift the old toilet seat and cover assembly off the toilet bowl. Set it aside for disposal.
- Clean the toilet bowl: Now that the old seat is removed, take the opportunity to clean the toilet bowl thoroughly. Use a mild cleaner and a scrub brush for effective cleaning.
With the old toilet seat successfully removed, you are now ready to move on to the next step—installing the new toilet seat cover. Stay tuned for our upcoming blog post to learn how to properly install a new toilet seat cover and complete the transformation of your bathroom.
Step 2: Cleaning The Toilet Bowl
The cleanliness of your toilet bowl plays a crucial role in ensuring the longevity and proper functioning of your toilet seat cover. Before installing a new toilet seat cover, it is essential to thoroughly clean the toilet bowl. This step not only removes dirt and stains but also ensures that the surface is clean and sanitized, providing a hygienic environment for you and your family. In this section, we will discuss the importance of thorough cleaning, recommended cleaning products and techniques, and how to ensure a clean and sanitized surface for your toilet seat cover.
Importance of thorough cleaning before installation
Thoroughly cleaning your toilet bowl before installing a new toilet seat cover is vital for several reasons. Firstly, it helps to remove any dirt, grime, and residue that may have accumulated over time. This buildup not only affects the aesthetics of the toilet bowl but also creates an unsanitary environment. By ensuring a clean surface, you can prevent the growth of bacteria, fungi, and other harmful microorganisms.
Secondly, cleaning the toilet bowl allows you to inspect for any cracks, chips, or damages that may have occurred. Identifying these issues beforehand will save you from potential problems in the future, such as leaks or instability of the toilet seat cover.
Recommended cleaning products and techniques
When it comes to cleaning your toilet bowl, it is essential to use the right products and techniques to achieve optimal results. Here are some recommended products and techniques:
- Toilet bowl cleaner: Choose a reliable toilet bowl cleaner that is specifically designed to remove stains, disinfect, and deodorize. Look for a product that is effective against tough stains without causing damage to the surface.
- Toilet brush: A good-quality toilet brush with firm bristles is essential for effective cleaning. Make sure to clean the brush thoroughly after each use to prevent the spread of germs.
- Vinegar: Vinegar is a natural and eco-friendly cleaning agent that can be used to remove stubborn stains and eliminate unpleasant odors. Mix equal parts of vinegar and water, and use this solution to scrub the toilet bowl.
- Baking soda: Baking soda is another versatile cleaning agent that can help remove stains and deodorize. Sprinkle baking soda inside the toilet bowl, let it sit for a few minutes, and scrub it with a toilet brush.
Ensuring a clean and sanitized surface
Before installing the toilet seat cover, it is crucial to ensure that the surface of the toilet bowl is clean and sanitized. Here are some steps to follow:
- Apply the selected toilet bowl cleaner to the inside of the bowl, making sure to cover the entire surface.
- Use a toilet brush to scrub the bowl thoroughly, paying attention to the rim, under the rim, and the sides of the bowl.
- Rinse the bowl with clean water, ensuring that all traces of the cleaner are removed.
- If there are any stubborn stains, you can use vinegar or baking soda mentioned earlier as an additional step.
- Dry the bowl with a clean cloth or allow it to air dry.
- Once the surface is clean and dry, you can proceed with the installation of the toilet seat cover.
By following these steps, you can ensure that your toilet bowl is clean, sanitized, and ready for the installation of your new toilet seat cover. Taking the time to clean the toilet bowl thoroughly not only promotes hygiene but also contributes to the overall aesthetics and functionality of your bathroom.
Step 3: Measuring And Adjusting The Toilet Seat Cover
When it comes to installing a toilet seat cover, measuring and adjusting it correctly is crucial to ensure a perfect fit. By following a few simple steps, you can easily customize the seat cover according to the dimensions of your toilet.
Determining the correct size for a perfect fit
In order to determine the correct size of your toilet seat cover, you need to measure the width and length of your toilet bowl. Use a measuring tape to accurately measure these dimensions:
- Measure the width of the toilet bowl by placing the measuring tape across the widest part of the bowl.
- Next, measure the length of the toilet bowl by placing the measuring tape from the front edge of the bowl to the back edge.
Once you have these measurements, you can choose a seat cover that matches the dimensions of your toilet bowl. Refer to the packaging or product description to ensure that the seat cover you select is compatible with your toilet.
Adjusting the seat cover according to toilet dimensions
After selecting a seat cover that matches your toilet bowl dimensions, you may need to make some adjustments to ensure a perfect fit.
Start by placing the seat cover on top of the toilet bowl, aligning it with the holes for the bolts. It’s important to note that some seat covers come with adjustable hinges that allow you to adjust the position and alignment of the cover.
If your seat cover has adjustable hinges, use a screwdriver or a wrench to loosen the screws on the hinges. This will allow you to adjust the position of the seat cover and align it properly with the toilet bowl.
Once you have aligned the seat cover properly, tighten the screws on the hinges to secure the cover in place. Make sure not to overtighten the screws, as this may cause damage to the seat cover or the toilet bowl.
Ensuring proper alignment and stability
Proper alignment and stability are essential for a functional and comfortable toilet seat cover. After adjusting the seat cover according to the toilet dimensions, follow these additional steps to ensure proper alignment and stability:
- Ensure that the seat cover is centered properly on the toilet bowl and there are no gaps or misalignments.
- Check the stability of the seat cover by sitting on it and applying gentle pressure. It should feel secure and not wobble or shift.
- If necessary, make any additional adjustments to the hinges or screws to achieve the desired alignment and stability.
By following these steps for measuring and adjusting the toilet seat cover, you can ensure a perfect fit and comfortable experience every time you use the toilet.
Step 4: Attaching The Toilet Seat Cover
Step 4: Attaching the Toilet Seat Cover
Different attachment methods (hinges, bolts, etc.)
There are various attachment methods available when it comes to installing a toilet seat cover. The most common ones include hinges, bolts, and clamps.
Detailed instructions for each attachment method
Hinges:
To attach a toilet seat cover using hinges, follow these steps:
- Clean the toilet bowl and seat surface thoroughly.
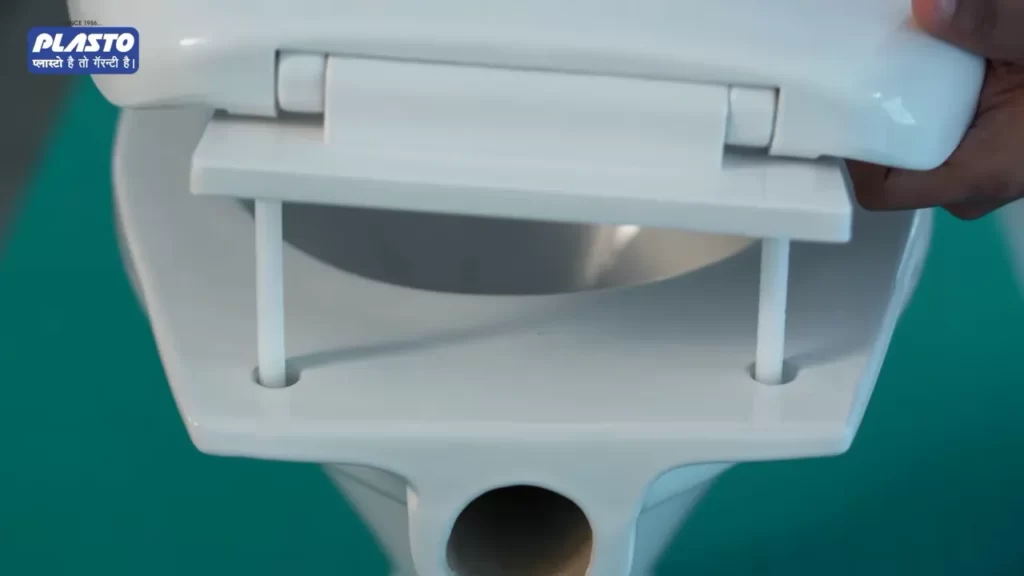
- Position the seat cover on the toilet bowl, aligning the hinges with the seat mounting holes.
- Insert the hinge pins into the seat mounting holes.
- Tighten the hinge nuts using a wrench or screwdriver, ensuring they are snug but not over-tightened.
- Check the alignment of the seat cover and adjust if necessary.
- Test the seat to ensure it is securely attached and does not wobble.
Bolts:
Attaching a toilet seat cover with bolts requires the following steps:
- Remove the existing bolts, if any, from the toilet bowl.
- Place the seat cover on the bowl, aligning the bolt holes.
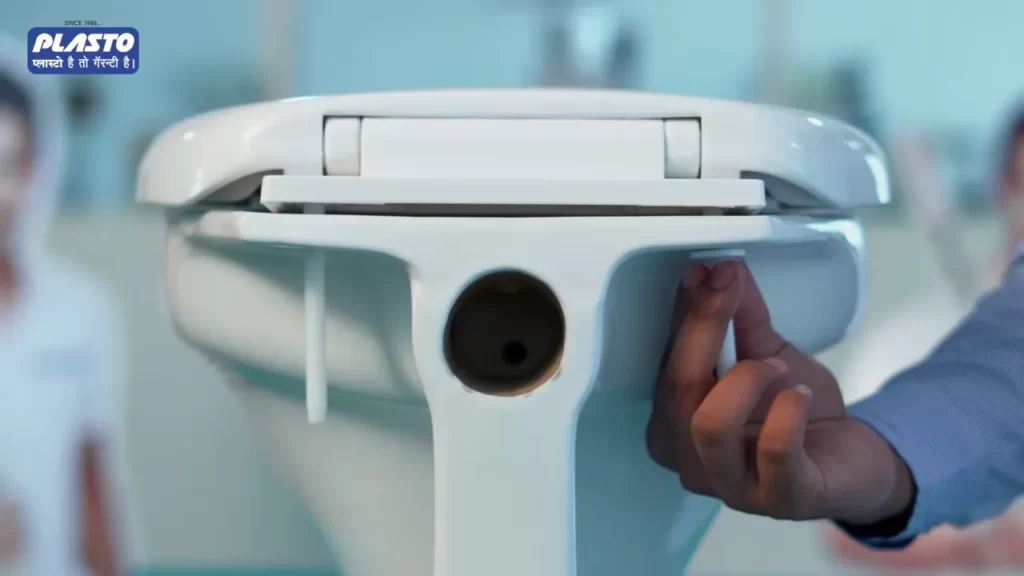
- Insert the new bolts through the seat mounting holes and into the pre-drilled holes in the toilet bowl.
- Secure the bolts in place using the provided nuts, tightening them just enough to ensure a secure fit without causing damage.
- Ensure the seat cover is level and adjust as needed.
- Test the seat to ensure a stable fit and no movement.
Common troubleshooting tips and techniques
If you encounter any issues during the installation process, try the following troubleshooting tips:
- If the seat cover feels loose, double-check that all nuts, bolts, or hinges are securely tightened.
- If the seat cover wobbles, adjust the alignment and tighten the screws or nuts further.
- If the seat cover constantly shifts, consider using rubber bumpers or adhesive pads to provide additional stability.
- If the seat cover is not level, make sure the bolts or hinges are evenly tightened on both sides.
- If you are unsure about the installation, refer to the manufacturer’s instructions or seek professional assistance.
Step 5: Testing And Finalizing The Installation
Now that you have successfully installed the toilet seat cover, it’s time to ensure that it is stable and securely attached. This will guarantee a long-lasting and comfortable experience for anyone using the toilet. In this step, we will check for stability and secure attachment, test the seat’s functionality and comfort, and make any necessary adjustments for optimal performance.
Checking for stability and secure attachment
Once the toilet seat cover is in place, you need to make sure it is stable and securely attached to the toilet bowl. Start by gently wiggling the seat from side to side. If you notice any looseness or movement, tighten the bolts or screws that secure the seat to the bowl. Take care not to overtighten, as this could damage the seat or the toilet bowl.
If you have a metal hinge attachment, check if it is securely fastened. Look for any signs of damage or wear and replace any worn-out parts if necessary. For a plastic hinge attachment, inspect the tabs or brackets that hold the seat in place. Ensure that they are intact and not broken. If you find any issues, follow the manufacturer’s instructions for repairing or replacing the parts.
Testing the seat’s functionality and comfort
Next, it’s time to test the toilet seat’s functionality and comfort. Sit on the seat and check if it feels stable and supportive. Make sure it can withstand your weight without wobbling or shifting. Lean back and forth slightly to see if the seat moves or slides. If you experience any instability, go back and tighten the bolts or screws further. This will provide a secure and comfortable seating experience for anyone using the toilet.
Furthermore, test the opening and closing mechanism of the seat. Ensure that it operates smoothly and without any obstructions. If the seat slams shut, you may need to adjust the tension of the hinge or consider installing soft-close hinges for added convenience and noise reduction.
Making necessary adjustments for optimal performance
If you encounter any issues during the stability or functionality testing, it’s crucial to make the necessary adjustments. This could include tightening or loosening the bolts or screws, replacing damaged parts, or even considering a different type of toilet seat cover altogether.
Take note of any discomfort or inconvenience experienced during the testing phase. Does the seat pinch or put pressure on your legs? Is there enough room or too much gap between the seat and the toilet bowl? Address these concerns by adjusting the position of the seat or opting for a different style that better suits your needs.
Remember, the key is to ensure a comfortable and secure toilet seat cover installation that meets your requirements. Take the time to test and finalize the installation to enjoy a stress-free experience every time you use the toilet.
Cleaning And Sanitizing The Seat Cover
Recommended Cleaning Schedule and Techniques
Proper cleaning and sanitizing of the toilet seat cover is essential to maintain a hygienic bathroom. Having a regular cleaning schedule will help prevent the buildup of germs and bacteria. It is recommended to clean the toilet seat cover at least once a week, or more frequently if it is heavily used or visibly dirty.
Start by removing the toilet seat cover from the toilet and taking it to a sink or bathtub for cleaning. Use warm water and mild soap to gently scrub the cover, ensuring that you clean both the upper and lower surfaces. It is important to pay extra attention to the areas where the cover attaches to the seat, as these can be breeding grounds for bacteria.
After scrubbing the cover, rinse it thoroughly with warm water to remove any remaining soap residue. Make sure to dry it completely before reinstalling it on the toilet. This will help prevent the growth of mold and mildew.
Using Disinfectants and Antibacterial Products
In addition to regular cleaning, using disinfectants and antibacterial products can provide an extra level of protection against germs and bacteria. When choosing a disinfectant, look for one that is specifically formulated for use on toilet seat covers. These products are designed to kill bacteria and viruses, ensuring a clean and germ-free surface.
Before applying the disinfectant, make sure to read the instructions on the product label. Follow the recommended guidelines for application and contact time to ensure effective sanitization. It is important to note that some disinfectants may require dilution with water, so be sure to mix the solution according to the instructions provided.
Apply the disinfectant to the toilet seat cover, covering all surfaces thoroughly. Allow the product to sit on the cover for the recommended contact time, usually a few minutes. This will allow the disinfectant to effectively kill any remaining germs and bacteria. After the contact time has elapsed, rinse the cover with warm water and dry it thoroughly.
Tips for Maintaining a Hygienic Toilet Seat Cover
Ensuring the cleanliness and hygiene of your toilet seat cover is not only important for your health but for the overall cleanliness of your bathroom. Here are some additional tips to help you maintain a hygienic toilet seat cover:
- Encourage everyone in your household or workplace to practice good hygiene habits, such as washing their hands thoroughly after using the toilet.
- Regularly inspect the toilet seat cover for any signs of damage or wear. If the cover is cracked or damaged, it should be replaced to ensure proper hygiene.
- Consider using disposable toilet seat covers in public restrooms or high-traffic areas to minimize contact with germs and bacteria.
- Keep a supply of cleaning products specifically designed for toilet seat covers on hand for regular maintenance.
- If you have guests or visitors, provide them with a clean and sanitized toilet seat cover to ensure their comfort and hygiene.
Addressing Common Issues And Repairs
When it comes to installing a toilet seat cover, it is essential to address any common issues and repairs that may arise. By doing so, you can ensure that your toilet seat cover functions properly and provides the comfort and convenience you desire. In this section, we will identify common problems that may occur with toilet seat covers, provide troubleshooting techniques and solutions that you can try on your own, and discuss when it may be necessary to seek professional assistance.
Identifying common problems with toilet seat covers
Even though toilet seat covers are relatively simple and sturdy accessories, they can still encounter issues that need to be addressed. Here are some common problems you may come across:
- Loose or wobbly seat cover
- Broken hinges or mounting hardware
- Cracked or damaged seat cover
- Difficulty in removing or replacing the seat cover
DIY troubleshooting techniques and solutions
If you encounter any of the aforementioned issues with your toilet seat cover, there are a few troubleshooting techniques and solutions that you can try on your own to fix them:
-
- Tightening loose or wobbly seat cover:
First, ensure that the mounting hardware or hinge screws underneath the seat cover are properly tightened. Use a screwdriver if necessary, but be careful not to overtighten and risk damaging the seat cover or the porcelain toilet.
Another method is to add rubber bushings or washers between the seat cover and the toilet bowl to provide extra stability.
If the hinges themselves are loose, you may need to replace them with new ones.
-
- Repairing broken hinges or mounting hardware:
If the hinges or mounting hardware are broken, inspect them to determine the extent of the damage. In some cases, you may be able to replace individual components instead of the entire seat cover.
Consult the user manual or contact the manufacturer to find the appropriate replacement parts.
-
- Replacing a cracked or damaged seat cover:
If your seat cover is cracked or otherwise damaged, it is best to replace it entirely to ensure proper functionality and hygiene. Measure the dimensions of your current seat cover to purchase a suitable replacement.
Follow the manufacturer’s instructions to remove the old seat cover and install the new one. It typically involves unscrewing the hinges and removing the bolts.
-
- Removing or replacing the seat cover:
If you simply need to remove or replace the seat cover for cleaning or other purposes, look for quick-release or easy-installation mechanisms provided by the manufacturer.
These mechanisms usually involve pressing buttons or releasing clips to detach the seat cover from the hinges and mounting hardware.
When to seek professional assistance
While many issues with toilet seat covers can be resolved with DIY troubleshooting techniques, there are certain situations where it is best to seek professional assistance. Consider the following scenarios:
- Extensive damage or irreparable cracks in the toilet bowl or seat cover
- Difficulties in accessing or working with the mounting hardware or hinges
- Inability to identify the cause or solution to the problem
In these cases, it is advisable to contact a professional plumber or bathroom fixture specialist who can assess the situation and provide the necessary expertise and tools to resolve the issue safely and effectively.
Replacing A Worn Or Damaged Toilet Seat Cover
One of the often overlooked components in a bathroom is the toilet seat cover. Over time, it may become worn, cracked, or damaged, compromising both functionality and appearance. If you’ve noticed signs indicating the need for a replacement or simply want to explore new options and designs, this step-by-step guide will walk you through the process of replacing your toilet seat cover. Let’s take a closer look at the signs you should look out for, followed by a detailed guide on how to replace your toilet seat cover.
Signs Indicating the Need for Replacement
Over time, your toilet seat cover may show signs of wear and tear, which signal the need for a replacement. Here are some indicators to keep an eye out for:
| Indicator | Description |
| Cracks | Visible cracks on the seat cover |
| Discoloration | Fading or discoloration that cannot be cleaned |
| Loose or Wobbly | Instability when seated due to loose hinges or connections |
| Broken Hinges | Damaged or broken hinges that no longer function properly |
| Mold or Mildew | Persistent mold or mildew growth that cannot be removed |
Step-by-step Guide for Replacing a Toilet Seat Cover
Now that you’ve identified the signs indicating the need for a replacement, let’s proceed with the step-by-step guide to effectively replace your toilet seat cover:
- Gather the necessary tools: Before you begin, ensure you have a screwdriver, pliers, and a replacement toilet seat cover.
- Remove the old toilet seat cover: Using a screwdriver, carefully unscrew the nuts holding the seat cover in place. Once loosened, gently lift the cover upwards, detaching it from the toilet.
- Clean the toilet area: Take the opportunity to thoroughly clean the toilet area, removing any debris or residues.
- Install the new toilet seat cover: Place the new cover over the toilet, aligning the mounting holes with the bolts on the toilet. Insert the bolts and hand-tighten the nuts, ensuring the seat cover is securely fastened.
- Tighten the nuts: Use a screwdriver and pliers, if necessary, to tighten the nuts on the bolts, firmly securing the seat cover in place.
- Test for stability: Give the seat cover a gentle shake to ensure it is stable and doesn’t wobble. If necessary, make further adjustments to ensure a snug fit.
Exploring New Options and Designs
If you’re considering replacing your toilet seat cover due to wear or damage, why not take the opportunity to explore new options and designs? With a myriad of choices available, you can enhance both the comfort and visual appeal of your bathroom. Whether you prefer a standard seat, a soft-closing seat, or a decorative design, there are numerous options to choose from to suit your personal taste and needs.
By following these simple steps to replace your toilet seat cover, you can restore functionality and freshness to your bathroom. Don’t forget to explore the exciting choices available to enhance your bathroom’s overall aesthetic. Happy toilet seat cover replacement!
Frequently Asked Questions
What Is The Correct Way To Put A Toilet Seat Cover On?
To correctly put on a toilet seat cover, follow these steps: 1. Identify the tear-off flap that allows for easy removal. 2. Unfold the cover and place it over the toilet seat, ensuring the flap hangs at the front. 3. Smooth out any wrinkles or air bubbles by pressing down firmly.
4. Once finished, dispose of the cover properly after use. 5. Remember to wash your hands.
How Do You Replace A Hidden Bolt On A Toilet Seat?
To replace a hidden bolt on a toilet seat, follow these steps: 1. Locate the bolt under the seat. 2. Use a wrench to loosen and remove the bolt. 3. Insert the new bolt into the same position. 4. Tighten the bolt securely.
5. Test the seat to ensure it is stable.
Why Do Toilet Seat Covers Have A Middle Part?
Toilet seat covers have a middle part to prevent the toilet water from touching your skin. It helps to create a barrier and keeps you clean and protected.
What Are The Different Types Of Toilet Seat Fittings?
There are mainly two types of toilet seat fittings: top fixing and bottom fixing. Top fixing seats are attached from above using bolts and nuts. Bottom fixing seats are secured from underneath using a bolt and a nut.
Conclusion
To sum up, installing a toilet seat cover is a simple and practical task that can be done in just a few steps. By following the guidelines and using the necessary tools, you can ensure a secure and comfortable seat for your toilet.
Remember to clean the seat regularly and replace it when necessary for hygiene purposes. With a well-installed toilet seat cover, you can enhance the functionality and cleanliness of your bathroom. So, go ahead and give it a try!