
To install a bathroom faucet and drain, follow these steps: Remove the old faucet and drain, clean the sink, assemble the new faucet and drain, and connect them to the water supply and drain pipes. A bathroom faucet and drain installation can be a DIY project that updates the look and functionality of your bathroom.
Whether you’re replacing an outdated faucet or installing a new one, this guide will walk you through the process. By following these steps, you can effortlessly remove the old faucet and drain, clean the sink thoroughly, assemble the new components, and connect them to the water supply and drain pipes.
With a little bit of patience and the right tools, you’ll have a new faucet and drain installed in no time. So let’s get started!
Choosing The Right Faucet And Drain: A Buyer’S Guide
When it comes to installing a new bathroom faucet and drain, there are several factors to consider. One of the most important decisions you’ll need to make is choosing the right faucet and drain for your bathroom. With a wide variety of options available in the market, it can be overwhelming to find the perfect fit. In this buyer’s guide, we will walk you through the different types of faucets and drains available, the factors to consider when selecting one, and the popular finishes and styles to choose from.
Different types of faucets and drains available
Before you dive into the world of bathroom faucets and drains, it’s important to understand the different types available. By familiarizing yourself with the options, you can narrow down your search and find the perfect match for your bathroom.
Here are some common types of faucets and drains:
| Faucet Type | Description |
|---|---|
| Single-handle | A faucet with one handle to control both hot and cold water. |
| Double-handle | A faucet with separate handles for hot and cold water. |
| Widespread | A faucet with separate hot and cold handles and a spout. |
| Wall-mounted | A faucet that is mounted onto the wall rather than on the sink or countertop. |
When it comes to drains, you have options like pop-up drains, grid drains, and push-button drains. Each type offers its own unique features and functions, so consider your preferences and the overall style of your bathroom when selecting.
Factors to consider when selecting a faucet and drain
Choosing the right faucet and drain goes beyond just the type. There are a few key factors to consider to ensure that your selection meets your needs and preferences.
- Compatibility with your sink or countertop: Ensure that the faucet and drain you choose are compatible with your sink or countertop. Check the specifications to ensure a proper fit.
- Quality and durability: Look for faucets and drains made from high-quality materials such as solid brass or stainless steel. These materials are not only durable but also resistant to corrosion and tarnishing, ensuring the longevity of your fixtures.
- Water efficiency: Consider faucets that are WaterSense certified, as they are designed to conserve water without sacrificing performance. This can help you save on your water bills in the long run.
- Ease of installation: Opt for faucets and drains that come with easy installation instructions and include all the necessary hardware. This will make the installation process smoother and hassle-free.
Popular finishes and styles to choose from
Now that you have a better understanding of the types of faucets and drains available and the factors to consider, let’s explore the popular finishes and styles you can choose from. The finish and style of your faucet and drain can greatly contribute to the overall aesthetic of your bathroom, so it’s important to select something that complements your existing decor.
Here are some popular finishes and styles:
- Chrome: A classic and versatile finish that complements any bathroom style.
- Brushed nickel: Offers a modern and sleek look, perfect for contemporary bathrooms.
- Oil rubbed bronze: Adds a touch of vintage elegance to your bathroom.
- Matte black: Creates a bold and dramatic statement, ideal for a modern or industrial aesthetic.
When it comes to styles, you can choose from traditional, transitional, and modern designs. Traditional faucets often feature intricate detailing, while transitional faucets offer a blend of traditional and contemporary elements. Modern faucets are characterized by sleek lines and minimalistic designs.
By considering your personal preferences, bathroom decor, and the overall functionality you desire, you can choose a faucet and drain that perfectly suits your needs and enhances the beauty of your bathroom.
Preparing For The Installation: Tools And Materials Needed
Preparing for the Installation: Tools and Materials Needed
Installing a bathroom faucet and drain may seem like a daunting task, but with the right tools and materials, the process can be smooth and hassle-free. In this section, we will discuss the essential tools required for the installation process, the additional materials needed for a seamless installation, and safety precautions to keep in mind.
Essential tools required for the installation process
Before getting started, it is crucial to gather the necessary tools to ensure a successful installation. These tools include:
- Adjustable wrench
- Phillips and flathead screwdrivers
- Teflon tape
- Plumber’s putty or silicone caulk
- Basin wrench
- Bucket or towels for water containment
- Plumbers’ tape measure
- Plumbers’ grease
Additional materials needed for a smooth installation
In addition to the essential tools, there are a few additional materials that will help ensure a smooth installation:
- New bathroom faucet and drain
- Water supply lines
- Plumber’s putty or silicone caulk (depending on the type of faucet)
- Plumbers’ tape
- Plastic or metal shims (if needed for leveling)
- Replacement parts (if replacing an existing faucet)
- Bucket or container (for old parts disposal)
Safety precautions to keep in mind
When working with plumbing fixtures and tools, it is crucial to prioritize safety. Here are some safety precautions to keep in mind:
- Always turn off the water supply before starting the installation.
- Take extra care when handling sharp tools to avoid any injuries.
- Ensure proper ventilation to prevent exposure to harmful chemicals.
- Use gloves when applying plumber’s putty or silicone caulk.
- Follow the manufacturer’s instructions and guidelines for each tool and material.
By having the essential tools and materials ready and adhering to safety precautions, you can proceed with confidence in installing your new bathroom faucet and drain.
Step-By-Step Installation Guide For A Bathroom Faucet And Drain
Installing a new bathroom faucet and drain can give your bathroom a fresh and updated look. Whether you’re replacing an old and worn-out fixture or simply want to upgrade to a more stylish option, this step-by-step guide will walk you through the installation process. From shutting off the water supply and removing the old faucet to attaching the new drain and testing for leaks, we’ve got you covered.
Shutting off the water supply and removing the old faucet
The first step in installing a new bathroom faucet and drain is to shut off the water supply. Locate the shut-off valves, usually located underneath the sink. Turn the valves clockwise until the water flow stops. This will ensure that no water flows while you work on the installation.
Next, remove the old faucet. Start by disconnecting the supply lines using an adjustable wrench. Carefully loosen the nuts and disconnect the lines from the valves. Once the lines are detached, remove the old faucet by unscrewing the mounting nuts that hold it in place. Be sure to have a bucket or towel handy to catch any water that may have remained in the lines.
Installing the new faucet: connecting the water supply lines
Now that you have removed the old faucet, it’s time to install the new one. Start by placing a new rubber or plastic gasket on the bottom of the faucet. This gasket will help create a watertight seal when the faucet is installed.
Position the new faucet on the sink and secure it in place using the mounting nuts provided. Tighten the nuts firmly but avoid over-tightening, as it may cause damage to the faucet or sink.
Next, connect the water supply lines to the new faucet. Ensure that the hot water line is connected to the hot water valve and the cold water line to the cold water valve. Use an adjustable wrench to tighten the nuts securely, but again, avoid over-tightening.
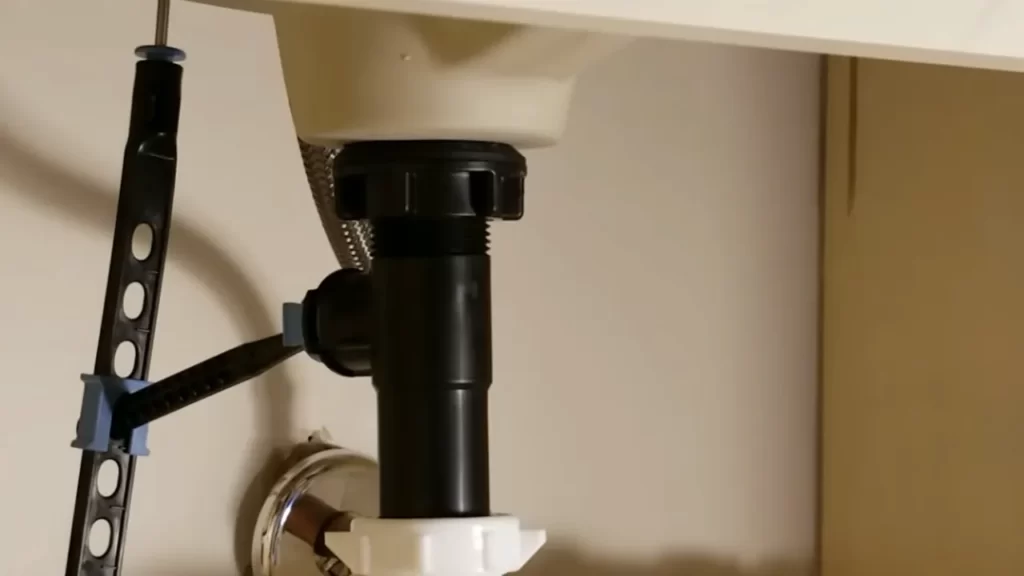
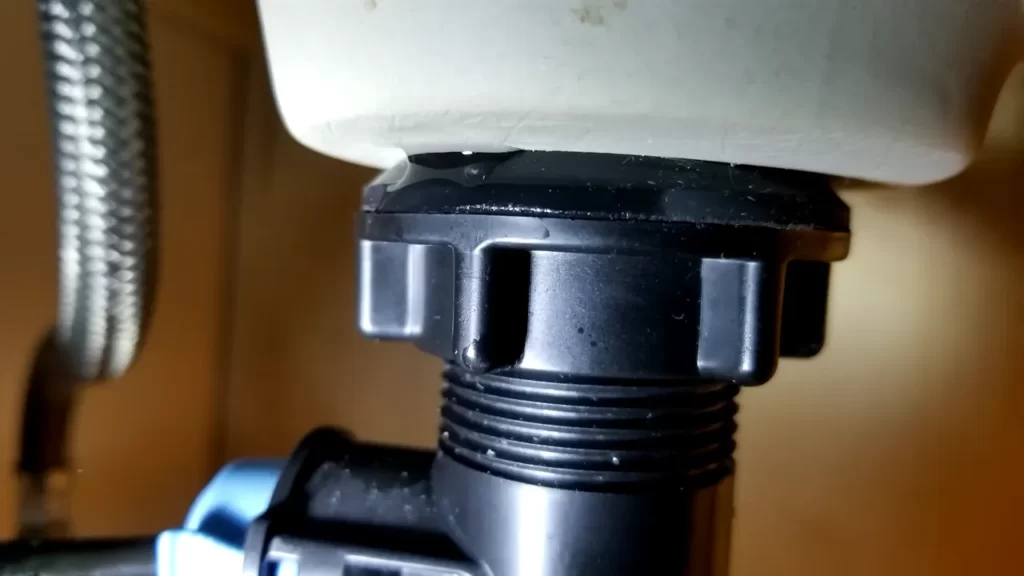
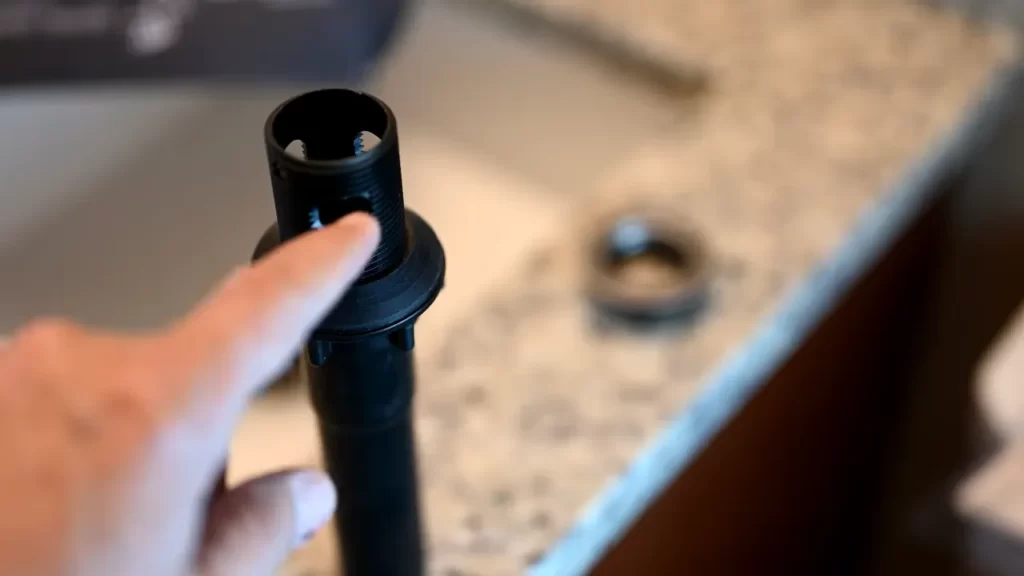
Attaching the new drain: connecting it to the sink and plumbing system
With the new faucet installed, it’s time to attach the new drain. Start by placing the rubber or plastic gasket on the underside of the sink, ensuring it fits snugly around the drain opening. This gasket will help create a watertight seal.
Attach the drain pipe to the bottom of the sink drain by inserting it through the gasket and tightening the nut and washer provided. Use an adjustable wrench to secure the connection, but avoid over-tightening.
Connect the other end of the drain pipe to the plumbing system, whether it’s a trap or a P-trap. Ensure that the connections are tight and secure, but be careful not to over-tighten, as it may cause leaks or damage to the pipes.
Testing for leaks and ensuring proper functionality
Once the faucet and drain are securely installed, it’s important to test for leaks and ensure that everything is functioning properly. Turn on the water supply by gradually opening the shut-off valves. Check all connections, including the supply lines, faucet, and drain, for any signs of leakage.
If you notice any leaks, tighten the connections slightly until the leaks stop. Be careful not to overtighten, as it can damage the fittings or cause further leaks. Additionally, check that the faucet handles and stopper operate smoothly and without any issues.
Congratulations! You have successfully installed a new bathroom faucet and drain. Enjoy your updated bathroom and the refreshed look it brings!
Troubleshooting Common Issues And Tips For A Successful Installation
During the installation of a bathroom faucet and drain, you may encounter some common issues that can hinder the process. However, with a few troubleshooting techniques and proper maintenance, you can ensure a successful installation that will last for years to come. In this section, we will discuss how to deal with corroded or stuck parts, properly align and tighten connections, and provide tips for maintaining and prolonging the lifespan of your faucet and drain.
Dealing with corroded or stuck parts
Corroded or stuck parts can be a common challenge when installing a bathroom faucet and drain. The accumulation of mineral deposits or debris over time can make it difficult to remove or adjust certain components. Here are some tips to address this issue:
- Use penetrating oil: If you encounter a corroded or stuck part, applying a small amount of penetrating oil like WD-40 can help loosen it up. Let it sit for a few minutes, then try again to remove or adjust the part.
- Apply heat: In some cases, applying heat to the affected area can help break the corrosion or loosen stuck parts. You can use a hairdryer or heat gun on a low setting to gently warm the area before attempting to remove or adjust the part.
- Use pliers or a wrench: If the part is still difficult to remove or adjust, you can try using pliers or a wrench to provide extra leverage. However, be cautious not to apply too much force, as it can cause damage to the part or surrounding area.
Properly aligning and tightening connections
Proper alignment and tightening of connections are crucial for a leak-free and durable installation. Follow these steps to ensure a secure connection:
- Check alignment: Before tightening any connections, make sure all components are properly aligned. This includes the faucet, drain, and any associated pipes or fittings. Proper alignment will minimize the risk of leaks or other issues down the line.
- Hand-tighten first: Begin by hand-tightening the connections, making sure they are snug but not overly tight. This will allow you to make adjustments if necessary before fully securing the connections.
- Use tools for final tightening: Once all connections are hand-tightened, use an adjustable wrench or pliers to give them a final snug. Be careful not to overtighten, as it can cause damage or compromise the integrity of the connections.
Tips for maintaining and prolonging the lifespan of your faucet and drain
Maintaining your bathroom faucet and drain properly is essential for prolonging their lifespan and preventing common issues. Here are some tips to keep them in optimal condition:
- Regular cleaning: Clean your faucet and drain regularly to remove any soap scum, mineral deposits, or debris that can accumulate over time. Use a mild cleaner and a soft cloth or sponge to avoid scratching or damaging the finish.
- Check for leaks: Periodically check for leaks around the faucet and drain. If you notice any dripping or pooling water, address it promptly to prevent further damage or water wastage.
- Avoid harsh chemicals: Steer clear of harsh chemicals or abrasive cleaners when cleaning your faucet and drain. These can damage the finish and may even cause leaks or other issues.
- Inspect and replace components: Regularly inspect the components of your faucet and drain for signs of wear or damage. If you notice any dripping, leaking, or malfunctioning parts, it’s important to address them promptly by either repairing or replacing the affected components.
- Follow manufacturer’s guidelines: Lastly, always refer to the manufacturer’s guidelines and instructions for any specific maintenance or care requirements. Different faucets and drains may have unique considerations, so follow their recommendations to prolong their lifespan.
By troubleshooting common issues, properly aligning and tightening connections, and implementing regular maintenance, you can ensure a successful installation of your bathroom faucet and drain. Following these tips will not only make your installation hassle-free but also help you enjoy a long-lasting and efficient bathroom fixture.
Frequently Asked Questions
Can I Install Bathroom Faucet Myself?
Yes, you can install a bathroom faucet yourself. It is a simple process that requires basic tools and some DIY knowledge. Just follow the manufacturer’s instructions, turn off the water supply, remove the old faucet, and install the new one.
Make sure to tighten all connections properly and test for leaks.
How Do You Install A Bathroom Sink Drain Plug?
To install a bathroom sink drain plug, first remove the old one if necessary. Then, apply plumber’s putty around the drain opening and insert the plug. Tighten the retaining nut underneath the sink until secure. Test the plug’s effectiveness by filling the sink with water.
How Do You Connect A Bathroom Sink Drain To Plumbing?
To connect a bathroom sink drain to plumbing, you’ll need to follow these steps. First, assemble the drain assembly and place it into the sink’s drain hole. Then, connect the P-trap to the drain outlet and the wall pipe. Tighten all connections securely using a pipe wrench.
Finally, check for any leaks and make necessary adjustments.
Does A Faucet Have To Be Over The Drain?
Yes, a faucet should be positioned over the drain to ensure proper water flow and drainage.
Conclusion
Installing a bathroom faucet and drain may seem like a challenging task, but with the right guidance, it can be a breeze. By following the step-by-step instructions provided in this blog post, you can confidently embark on this DIY project.
Remember to gather all the necessary tools and materials before starting, and take your time to ensure a proper installation. With a little patience and effort, you’ll have a stylish and functional faucet and drain in no time. Happy installing!