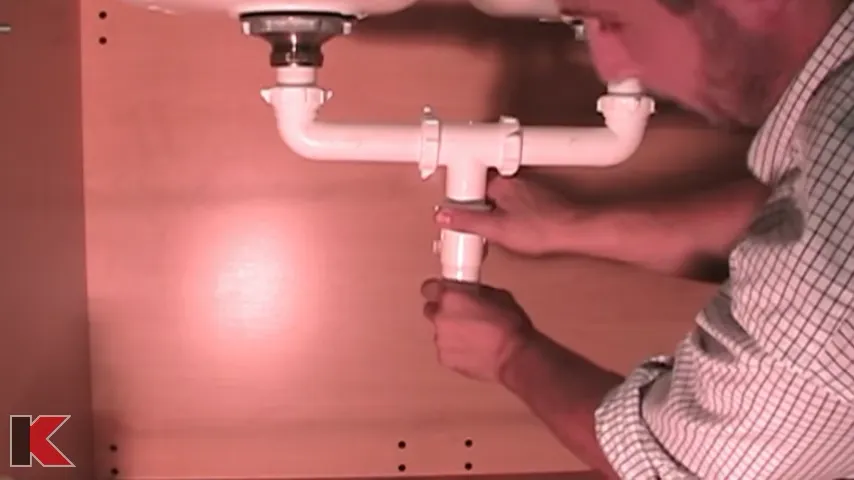
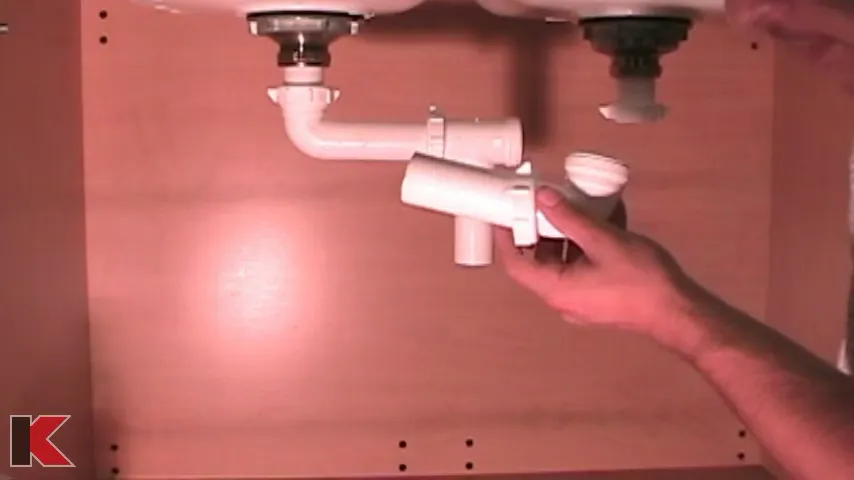
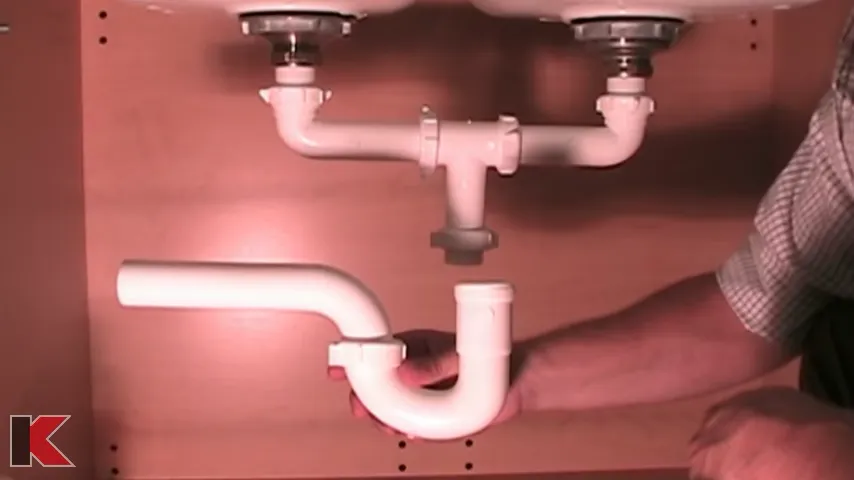
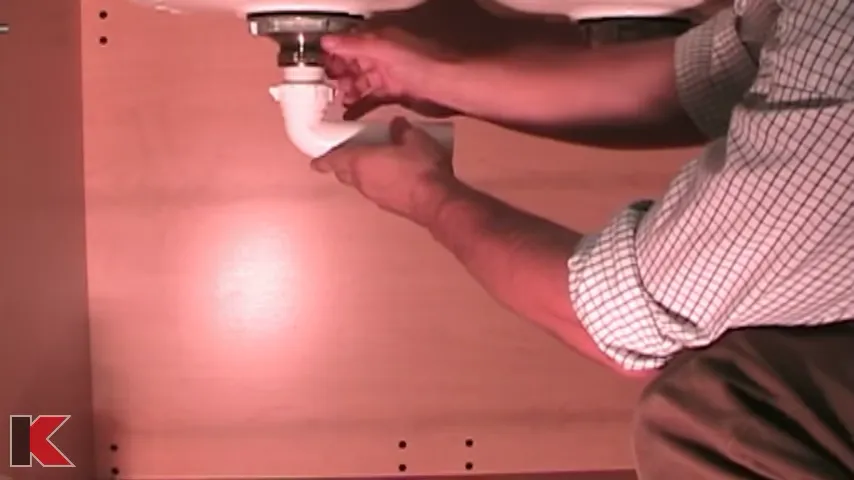
To install double sink plumbing, you need to measure and cut the drain and water supply lines, connect the lines to the new sink, and secure the sink in place. Installing double sink plumbing involves several steps.
First, measure and cut the drain and water supply lines according to the sink’s dimensions. Next, connect the drain and water supply lines to the new sink using appropriate fittings. Once the connections are secure, position the sink in the desired location and mark its outline on the counter.
Apply a thin bead of silicone adhesive around the edge of the sink, and carefully lower it into place. Finally, secure the sink to the counter using mounting hardware. With these steps, you can successfully install double sink plumbing in your kitchen or bathroom.
Planning Your Double Sink Plumbing Installation
Installing a double sink in your kitchen or bathroom can greatly improve functionality and make everyday tasks easier. However, before you start the installation process, it’s important to carefully plan your double sink plumbing to ensure everything goes smoothly. This involves measuring and assessing your space, determining the placement of your double sink, and choosing the right materials and tools for the job. In this article, we’ll take you through each step in detail, so you can confidently tackle your double sink plumbing installation project.
Measuring and Assessing Your Space
Before you begin installing your double sink plumbing, it’s crucial to accurately measure and assess your space. This will help you determine if your chosen double sink will fit comfortably in the available area and allow for proper functionality. Here are the steps to follow:
- Measure the width, depth, and height of the cabinet or countertop where you plan to install your double sink.
- Take note of any obstacles such as pipes, electrical outlets, or plumbing fixtures that may affect the placement of your double sink.
- Consider the functionality of the space and how you’ll be using the double sink. Do you need additional counter space or storage?
Determining the Placement of Your Double Sink
Once you have assessed your space, it’s time to determine the optimal placement for your double sink. Consider the following factors:
- Plumbing Connections: Choose a location that allows for easy access to the existing plumbing connections.
- Countertop Layout: Ensure the placement of your double sink complements the overall layout of your countertop and other fixtures.
- Functionality: Place your double sink in a position that maximizes convenience and efficiency during everyday use.
Choosing the Right Materials and Tools
When it comes to double sink plumbing, using the right materials and tools is essential for a successful installation. Here’s what you’ll need:
| Materials | Tools |
|---|---|
| P-trap | Wrench set |
| Sink drain assembly | Screwdriver |
| Flexible supply lines | Plumber’s putty |
| Teflon tape | Hacksaw |
| Plumber’s tape | Level |
By gathering these materials and tools in advance, you’ll be prepared to tackle your double sink plumbing installation with confidence and efficiency.
Now that you understand the importance of planning your double sink plumbing installation, it’s time to put these steps into action. Remember to measure and assess your space, determine the placement of your double sink, and gather the necessary materials and tools. By following these guidelines, you’ll be well on your way to a successful double sink plumbing installation that enhances the functionality and aesthetics of your kitchen or bathroom.

Preparing For The Installation
Before you begin the process of installing double sink plumbing, it is important to properly prepare for the installation. This step is crucial for ensuring a successful and efficient installation process by minimizing the risk of any issues or complications.
Shutting Off the Water Supply
The first step in preparing for the installation is to shut off the water supply. This is vital to prevent any unnecessary water leakage or damage during the installation process. To do this, locate the shut-off valve for your plumbing system. It is typically found underneath the sink or near the main water supply line. Turn the valve clockwise until it is completely closed.
Removing the Existing Sink and Plumbing
Once the water supply is shut off, you can proceed with removing the existing sink and plumbing. Start by clearing the area around the sink, ensuring there are no obstructions that could hinder the process. Next, disconnect the water supply lines by unscrewing them from the faucet and shut-off valves.
After that, it is time to remove the drain pipes. Loosen the slip nuts connecting the drain pipe to the sink’s plumbing system, using pliers if necessary. Carefully detach the drain pipe and remove it from the sink.
Evaluating the Plumbing System
Now that the old sink and plumbing have been removed, it is crucial to evaluate the plumbing system to ensure it is intact and in good condition. Inspect the pipes, connectors, and valves for any signs of damage such as leaks, corrosion, or wear and tear.
If you identify any issues during the evaluation, it is recommended to address them before proceeding with the installation. This may involve replacing damaged components or contacting a professional plumber for assistance.
In conclusion, preparing for the installation of double sink plumbing involves shutting off the water supply, removing the existing sink and plumbing, and evaluating the plumbing system. Taking the time to properly prepare will help to ensure a smooth and successful installation process.

Installing The Drainage Pipes
Installing the drainage pipes for your double sink is an essential step in the plumbing process. Proper installation ensures efficient water flow and prevents any potential leaks or clogs. In this section, we will guide you through the necessary steps to connect the drainage pipes to the main line, install a P-trap for each sink, and ensure proper ventilation and airflow.
Connecting the Drainage Pipes to the Main Line
To begin, you will need to locate the main drain line in your home. This line is typically found in the basement or crawl space. Once located, ensure the main drain line is clean and free of any obstructions or debris.
Next, measure the distance between the main drain line and the area where you plan to install your double sink. Use this measurement to cut the appropriate length of drain pipe. Remember to leave enough room for any necessary fittings and connections.
Attach one end of the drain pipe to the main drain line using a rubber coupling or a sanitary tee fitting. Make sure the connection is secure, and tighten any clamps or screws as needed.
Installing a P-trap for Each Sink
A P-trap is a crucial component of your double sink plumbing as it helps to prevent sewer gases from entering your home. For each sink, you will need to install a separate P-trap.
Begin by determining the appropriate height for the P-trap, typically around 18-20 inches from the floor. Cut the necessary length of drain pipe for each sink and attach it to the drain outlet of the sink using a slip-nut and washer.
Connect the other end of the drain pipe to the inlet of the P-trap. Ensure the connections are tight and secure to prevent any leaks. Finally, attach the P-trap to the drain pipe using another slip-nut and washer. You may also consider using a PVC cement to create a more permanent seal.
Ensuring Proper Ventilation and Airflow
Proper ventilation is crucial to maintain the functionality of your double sink plumbing. Without proper airflow, water may not drain efficiently, leading to clogs and potential backups.
To ensure adequate ventilation, you will need to install a vent pipe. This pipe connects to the drain pipe and extends vertically, allowing air to escape and pressure to equalize.
Install the vent pipe by attaching one end to the drain pipe using a sanitary tee or a specially designed vent fitting. Ensure the vent pipe extends above the highest point of your sink, typically around 6 inches above the flood level rim.
Check for any leaks or loose connections, and tighten as necessary. It is also a good practice to test the drainage system by running water through the sinks and checking for any backups or slow flow.
By following these steps and properly installing the drainage pipes, P-traps, and ventilation system, you can ensure the efficient and hassle-free operation of your double sink plumbing. Now that you have successfully completed this crucial step, you can move on to the next stage of your double sink installation process.

Connecting The Water Supply Lines
Connecting the water supply lines is a crucial step in installing double sink plumbing. It ensures that clean water flows smoothly and efficiently to both faucets. In this section, we will guide you through the process of installing shut-off valves, connecting the water supply lines to the faucets, and checking for leaks and proper water flow.
Installing Shut-off Valves
Before connecting the water supply lines, it is highly recommended to install shut-off valves. Shut-off valves allow you to easily control the water flow to each sink and make future repairs or maintenance much easier. Here’s how you can install shut-off valves:
- Locate the existing water supply lines under the sink.
- Turn off the main water supply to your house.
- Using a pipe cutter or a hacksaw, carefully cut the water supply lines.
- Attach the shut-off valves to the cut ends of the supply lines, ensuring a secure fit.
- Tighten the compression nuts using a wrench to create a watertight seal.
- Turn on the main water supply to check if the shut-off valves are working properly.
Installing shut-off valves provides added convenience and control, allowing you to easily turn off the water supply to the sinks while keeping the rest of your plumbing system operational.
Connecting the Water Supply Lines to the Faucets
Once the shut-off valves are in place, you can proceed to connect the water supply lines to the faucets. Follow these steps to ensure a secure and leak-free connection:
- Locate the water supply inlets on the back or bottom of the faucets.
- Attach one end of a flexible water supply line to each faucet inlet.
- Tighten the connection by hand and then use a wrench to ensure a snug fit, taking care not to overtighten.
- Connect the other end of the supply lines to the shut-off valves, ensuring proper alignment.
- Secure the connection by tightening the compression nuts with a wrench.
Connecting the water supply lines to the faucets completes the plumbing installation, allowing water to flow to each sink. However, before using the sinks, it is essential to perform a thorough check for leaks and ensure proper water flow.
Checking for Leaks and Proper Water Flow
After connecting the water supply lines, it is crucial to check for any leaks and ensure that water is flowing properly to both sinks. Here’s how you can do it:
- Turn on the shut-off valves.
- Check each connection point, including the shut-off valves, supply lines, and faucet connections, for any signs of leaks or drips.
- If you notice any leaks, tighten the connections as necessary.
- Turn on the faucets and check the water flow in both sinks. Make sure there is an even and consistent flow of water.
- If the water flow is not satisfactory, check for any obstructions or clogs in the supply lines and faucets.
Regularly checking for leaks and ensuring proper water flow will help prevent costly water damage and ensure the optimal functioning of your double sink plumbing system.

Testing And Finalizing The Installation
Once you have successfully connected the plumbing fixtures of your double sink, it is crucial to test and finalize the installation. This step ensures that everything is properly set up and functioning as it should. In this section, we will cover the necessary steps to test the water supply, check for any leaks, and make any adjustments or modifications to secure the sink and plumbing fixtures.
Turning On the Water Supply
Before moving forward, it’s important to turn on the water supply to the double sink. Locate the shut-off valves for both the hot and cold water pipes under the sink. Turn the handles clockwise to open the valves and allow the water to flow. Take note of any unusual noises or weak water flow.
Checking for Leaks and Correcting Any Issues
Once the water supply is on, it’s time to inspect the plumbing connections for any leaks. Carefully observe the area around the connections, especially under the sink, for any signs of water drips or moisture. Use a flashlight if needed to thoroughly examine each joint and connection point.
If you notice any leaks, it’s necessary to address them immediately. Start by tightening the connections using a wrench or pliers. Be cautious not to overtighten, as it may damage the plumbing components. If tightening doesn’t resolve the leak, you may need to disassemble the connection, inspect the seal, and replace it if necessary. Make sure to use plumber’s tape or thread sealant on threaded connections to create a watertight seal.
Adjusting and Securing the Sink and Plumbing Fixtures
After ensuring there are no leaks, it’s essential to check the stability of the sink and plumbing fixtures. Gently apply pressure to different areas of the sink to determine if it moves or feels loose. If you notice any wobbling or instability, you may need to adjust or secure the sink further.
To secure the sink, you can use mounting brackets and screws provided with the sink unit. Follow the manufacturer’s instructions on how to properly install these brackets. Additionally, you can reinforce the plumbing connections by using pipe straps or clips. These will help support the weight of the pipes and prevent strain on the connections.
Finally, it’s a good practice to check the alignment and levelness of the sink. Adjust the position, if needed, so that it sits evenly on the countertop. This will not only enhance the aesthetics but also ensure efficient drainage.
By following these testing and finalizing steps, you can be confident that your double sink plumbing installation is in good working order. It’s important to regularly inspect the plumbing connections and fixtures to prevent any problems or leaks in the future.
Frequently Asked Questions
How Are Double Sinks Plumbed?
Double sinks are typically plumbed using a T-connector from the main water supply line. The T-connector splits the water flow to each sink, ensuring equal pressure. Drainage pipes from each sink connect to a common drainpipe, which carries the wastewater away.
Can 2 Sinks Share The Same Drain?
Yes, 2 sinks can share the same drain. This is possible by connecting both sinks to a common drain pipe, saving space and reducing plumbing requirements. It is important to ensure proper installation and proper slope in the drain pipe to prevent clogs and water backup.
Do You Need Two Water Lines For A Double Sink?
Yes, you need two water lines for a double sink. Each sink requires its own water supply to function properly.
Do You Need 2 Pee Traps For Double Sink?
No, you don’t need 2 pee traps for a double sink. One pee trap is sufficient for both sinks, as long as they are connected to the same drain line. Just make sure it is properly installed and functioning to prevent any plumbing issues.
Conclusion
Installing double sink plumbing is a straightforward process that can greatly improve the functionality and aesthetics of your kitchen or bathroom. By following the step-by-step instructions outlined in this guide, you can successfully complete the installation on your own. With the right tools and techniques, you can ensure proper water flow and prevent potential plumbing issues in the future.
So, don’t hesitate to take on this DIY project and enjoy the benefits of a new double sink in your space!