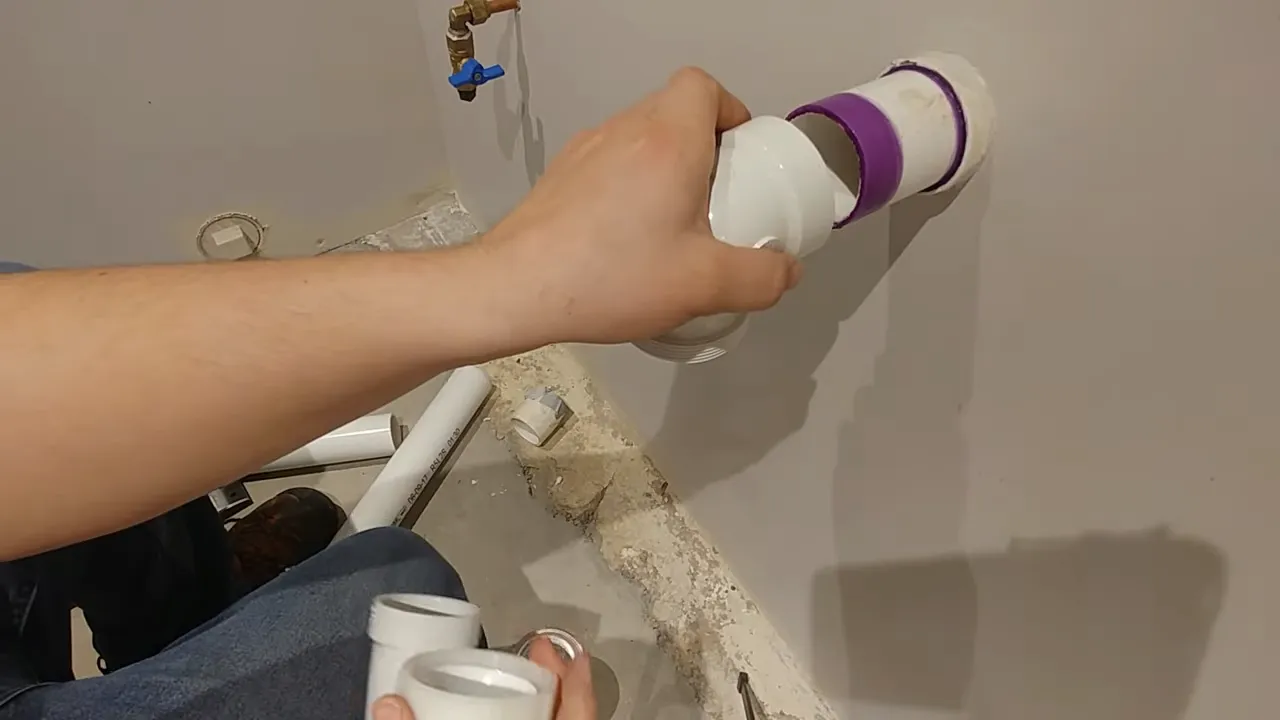
To install a washer drain, first, locate the nearest drainpipe and measure the distance between it and the washer. Then, connect a drain hose from the washer to the drainpipe using a hose clamp and ensure it is securely fastened.
Understanding The Washer Drain System
When it comes to installing a washer drain, it is essential to have a clear understanding of the washer drain system. This system plays a crucial role in efficiently removing wastewater from your washer and preventing any potential plumbing issues. Understanding the components of a washer drain system and the importance of proper installation will ensure a hassle-free laundry experience.
Components of a Washer Drain System
The washer drain system consists of several key components that work together to effectively remove water from your washing machine. These components include:
- Drain Hose: The drain hose is a flexible pipe that connects your washing machine to the washer drain system. It carries wastewater away from the machine and into the drain system. It is important to ensure the drain hose is properly connected and securely fastened to prevent leaks or disconnection during the wash cycle.
- Standpipe or Utility Sink: The standpipe or utility sink serves as the main point of connection for the washer drain system. It provides a dedicated outlet for the wastewater to flow into the drain system. The standpipe should be of the correct height and diameter to facilitate efficient drainage and prevent any backflow.
- P-trap: The P-trap is a U-shaped pipe that is installed beneath the standpipe or utility sink. It acts as a barrier to prevent sewer gas from entering your home and provides a water seal to prevent clogs and odors. The P-trap should be properly installed and regularly cleaned to ensure optimal functionality.
- Vent Pipe: The vent pipe is an essential component of the washer drain system. It allows air to enter the system, preventing negative pressure that can impede proper drainage. The vent pipe should be adequately sized and correctly positioned to ensure smooth water flow and prevent any vacuum-like effects.
Importance of Proper Installation
Proper installation of the washer drain system is vital to maintain the performance and longevity of your washing machine. It ensures efficient water removal, prevents clogs and backups, and minimizes the risk of costly water damage. A poorly installed washer drain system can lead to issues such as slow drainage, leaks, foul odors, and even sewer backups, which can be inconvenient and expensive to resolve.
Additionally, a properly installed washer drain system adheres to local plumbing codes and regulations, ensuring the safety and compliance of your home plumbing. It is crucial to follow the manufacturer’s guidelines and consult a professional plumber if necessary to ensure a correct and secure installation.
In conclusion, understanding the components of a washer drain system and the importance of proper installation is essential for a seamless laundry experience. By ensuring each component is correctly installed and functioning optimally, you can enjoy worry-free washing while protecting your home from potential plumbing issues.
Assessing The Existing Drain Setup
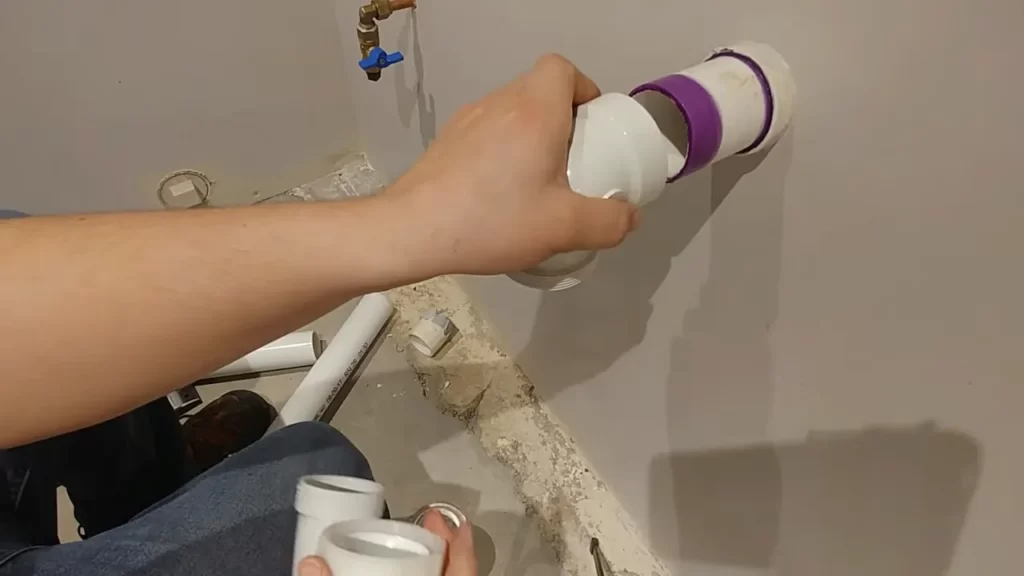
Before you embark on the task of installing a washer drain, it’s crucial to assess the current drain setup in your laundry area. By doing so, you can ensure a seamless installation process and prevent any potential issues down the road. Here are a few key aspects to consider when assessing the existing drain:
Checking the condition of the current drain
The first step in assessing the existing drain is to check its overall condition. Inspect the drain pipe for any cracks, leaks, or blockages. A damaged or compromised drain can cause water backup and flooding, leading to costly repairs in the future. If you notice any visible signs of damage, it’s advisable to have the drain repaired or replaced before proceeding with the installation.
Ensuring compatibility with the washer drain requirements
Another important factor to consider is the compatibility of the existing drain with the requirements of your washer. Different washers have varying drain size and flow rate specifications. Refer to the washer’s manual or consult the manufacturer’s guidelines to determine the specific drain requirements. Once you have this information, ensure that the existing drain can accommodate the washer’s needs. If necessary, you may need to make modifications or upgrades to the drain system.
In some cases, the existing drain may not be suitable for the washer’s drainage needs, particularly if you’re installing a high-capacity or commercial-grade machine. In such instances, you might need to install a separate dedicated drain for the washer. This will ensure optimal performance and prevent any issues related to inadequate drainage during the wash cycles.
Assessing the existing drain setup is a crucial first step in installing a washer drain. By checking the condition of the current drain and ensuring its compatibility with the washer’s requirements, you can lay the groundwork for a successful installation process. Remember, a well-functioning drain is essential for your washer’s performance and longevity, so it’s worth investing the time and effort to get it right from the beginning.
Gathering The Necessary Tools And Materials
When it comes to installing a washer drain, having the right tools and materials is crucial. With the proper equipment in hand, the process becomes smoother and more efficient. In this section, we will discuss the essential tools and materials required for a secure and efficient drain system installation.
Essential tools for the installation process
Before diving into the installation, it is essential to gather the necessary tools that will make the process much easier and hassle-free. Here are the must-have tools:
- Adjustable wrench
- Hacksaw
- Electric drill with hole saw attachment
- Tape measure
- Screwdriver set (both flathead and Phillips)
- Plumbing pliers
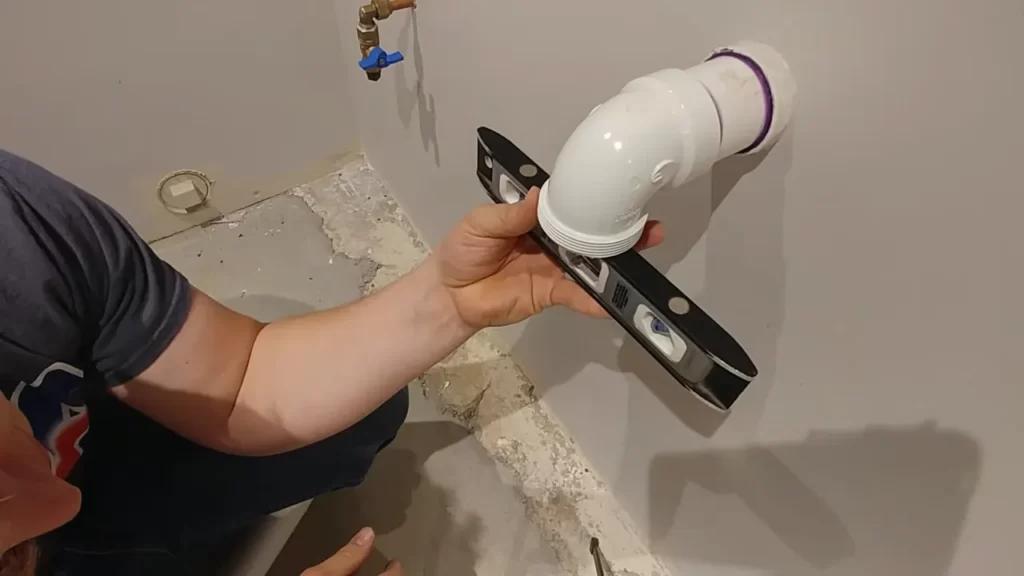
- Level
- Pipe cutter
- Caulking gun
- Pipe wrench
With these tools by your side, you will have everything you need to successfully install your washer drain system.
Materials required for a secure and efficient drain system
Aside from the tools, gathering the right materials is just as important. Here is a list of the materials you will need for a secure and efficient drain system:
| Materials | Description |
|---|---|
| Drain pipe | Choose a durable and leak-proof material such as PVC or ABS. Measure the length and diameter needed based on your washer’s specifications. |
| P-trap | This curved pipe prevents sewer gases from flowing back into your home. Ensure it matches the drain pipe’s diameter. |
| Washing machine drain pan | A drain pan is recommended to catch potential leaks and protect your flooring. |
| Pipe fittings | These connectors allow for easy installation and secure connections between the various pipes. |
| Pipe glue or primer | Used to seal the joints and ensure a tight connection between the pipes. |
| Teflon tape | A thin white tape used to create a watertight seal around threaded connections. |
| Drain hose | Attach the drain hose from your washing machine to the drain pipe. Ensure it is of the appropriate length and diameter. |
| Screws | Used to secure the drain pan or any other fixtures in place. |
By having these materials ready, you will be well-prepared to create a secure and efficient washer drain system.
Preparing The Area For Installation
Before you can install a washer drain, it is essential to prepare the area properly. In this step, you will clear the surrounding space and make necessary adjustments to the plumbing system. By following these guidelines, you can ensure a smooth and efficient installation process.
Clearing the surrounding space
First and foremost, it is important to clear the surrounding space to ensure a clutter-free area for the installation of your washer drain. Remove any objects or obstacles that may hinder the installation process, such as furniture, appliances, or storage items. This will create enough space for you to work comfortably and avoid any accidental damage to your belongings.
Making necessary adjustments to the plumbing system
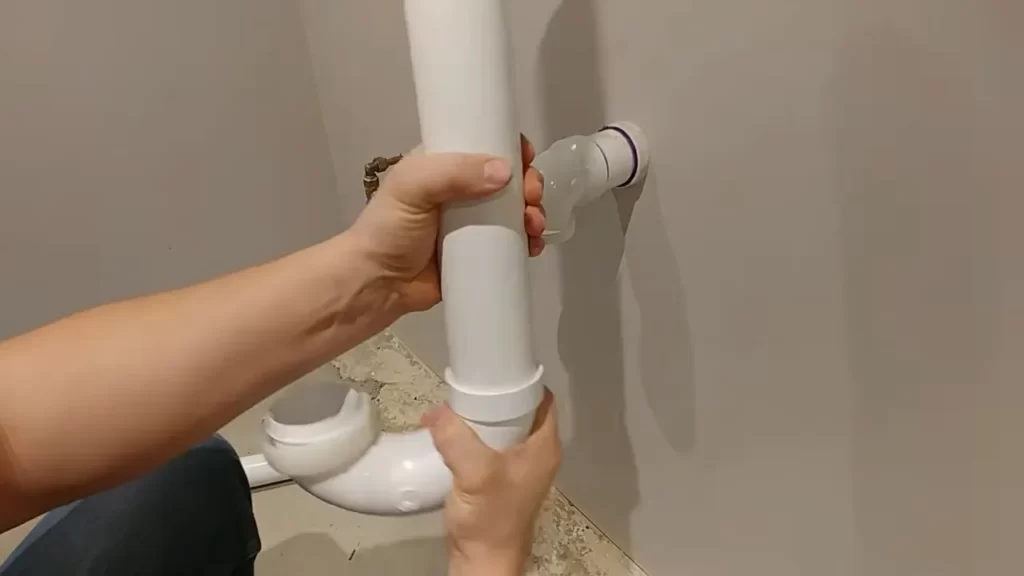
Next, it is crucial to make necessary adjustments to the plumbing system to accommodate the installation of the washer drain. This involves ensuring that the pipes and connections are in proper working condition and are aligned correctly.
You may need to check for any leaks, damaged pipes, or blockages in the existing plumbing system. If any issues are found, it is recommended to address them before proceeding with the installation. This will prevent potential problems in the future and ensure the efficient functioning of your washer drain.
Another aspect to consider is the proper positioning of the drain hose. This hose should be securely connected to the drainpipe to prevent any leaks or overflow during the washer’s operation. Ensure that the drain hose is aligned at a suitable angle and securely fastened to the drainpipe.
Lastly, it is essential to test the plumbing system after making the necessary adjustments. Run water through the pipes to check for any leaks or drainage issues. This will help identify and resolve any potential problems before installing the washer drain.
Conclusion
By properly preparing the area for the installation of a washer drain, you can ensure a smooth and efficient process. Clearing the surrounding space and making necessary adjustments to the plumbing system will help prevent any potential problems and ensure the proper functioning of your washer drain.
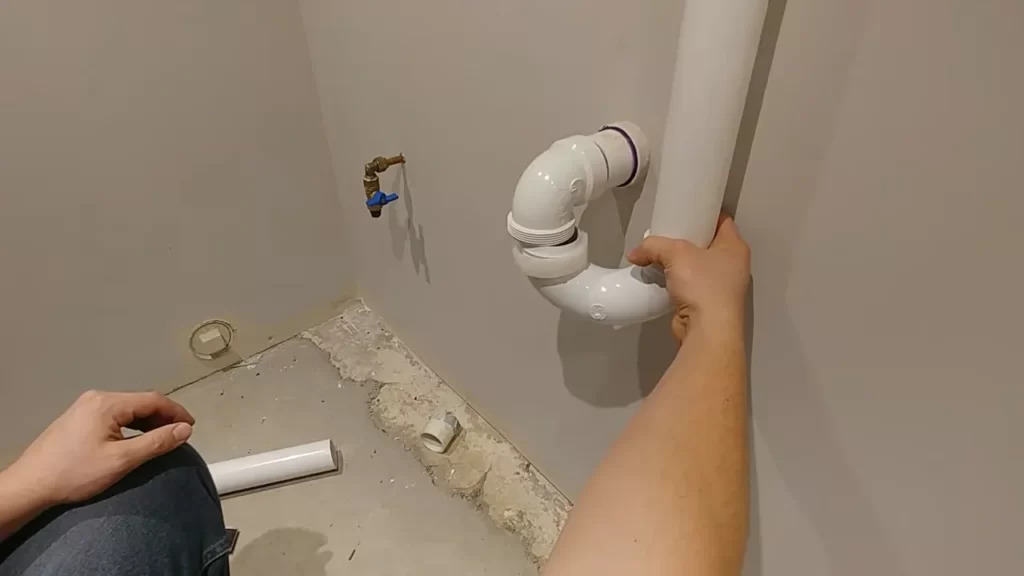
Installing The Washer Drain Pipe
Installing the washer drain pipe is an important step when setting up your washing machine. A properly installed drain pipe ensures that dirty water is efficiently and safely removed from your laundry area. In this section, we will guide you through the process of determining the ideal location for the drain pipe, as well as measuring and cutting it to the correct length.
Determining the ideal location for the drain pipe
Before you start installing the drain pipe, it’s important to determine the ideal location for it. Here are a few factors to consider when selecting the placement:
- Proximity to the washing machine: The drain pipe should be located near the washing machine to ensure a shorter distance for the water to travel. This helps to prevent clogs and improve drainage efficiency.
- Accessibility: Choose a location that allows easy access for maintenance and repair purposes. A readily accessible drain pipe makes it easier to clear any blockages that may occur in the future.
- Gravity flow: Ensure that the drain pipe is positioned to allow for gravity flow. It should have a downward slope to facilitate the smooth flow of water.
Measuring and cutting the drain pipe to the correct length
Once you have determined the ideal location for the drain pipe, it’s time to measure and cut it to the correct length. Follow these steps:
- Measure the distance: Use a measuring tape to determine the distance from the washing machine’s drain outlet to the location where you plan to install the drain pipe.
- Add extra length: Add a few inches to the measured distance. This additional length allows for any necessary adjustments during installation and ensures the pipe reaches the drain system properly.
- Mark and cut the pipe: Using a pipe cutter or a hacksaw, mark the measured distance on the drain pipe and make a clean, straight cut. Ensure that the pipe is securely held in place while cutting to achieve a precise and even cut.
- Smooth the edges: After cutting the pipe, use sandpaper or a file to smooth the edges. This step helps to prevent any sharp edges or burrs that may cause damage or hinder the proper flow of water.
Once you have measured and cut the drain pipe, you are ready to proceed with the installation. Remember to securely attach the pipe to the washing machine’s drain outlet, ensuring a tight and leak-free connection. Properly installing the washer drain pipe is essential for the efficient operation of your washing machine, providing you with cleaner laundry and peace of mind.
Connecting The Drain Pipe To The Plumbing System
Connecting the drain pipe of your washer to the plumbing system is an essential step in ensuring efficient and hassle-free laundry experience. It involves attaching the drain pipe to the existing plumbing system and securing the connection with appropriate fittings.
Attaching the drain pipe to the existing plumbing system
To connect the drain pipe of your washer to the existing plumbing system, follow these simple steps:
- Locate the drainpipe in your laundry area. It is usually situated near the floor and is often capped with a threaded fitting.
- Remove the cap from the drainpipe and clean any debris or blockage.
- Prepare the drainpipe by wrapping a layer of plumber’s tape around the threads of the drainpipe. This will create a tight seal when connecting the washer drain hose.
- Take the washer drain hose and insert one end into the drainpipe. Ensure a snug fit by pushing it in firmly.
- If the drainpipe has a clamp, secure the washer drain hose in place by tightening the clamp using a screwdriver.
Securing the connection with appropriate fittings
Once the washer drain hose is attached to the existing plumbing system, it is important to secure the connection with appropriate fittings to prevent leaks and ensure the smooth flow of wastewater. Here’s how:
- Identify the type of fitting required for your specific plumbing system. This could be a slip joint fitting, compression fitting, or a threaded fitting.
- Measure the diameter of the drainpipe and select a fitting that matches the size.
- Apply a layer of plumber’s tape to the threads of the fitting to create a tight seal.
- Insert the fitting into the end of the washer drain hose and tighten it securely using a wrench or pliers.
- Ensure that the fitting is tightly secured to the drainpipe to prevent any leaks.
By following these steps, you can effectively connect the drain pipe of your washer to the plumbing system, ensuring proper drainage and preventing any messy situations. Remember to regularly check for leaks and make necessary adjustments if needed.
Installing A P-Trap For Proper Drainage
When it comes to installing a washer drain, one crucial step is installing a P-trap for proper drainage. The P-trap is a curved piece of pipe that prevents sewer gas from entering your home while allowing wastewater to flow out. In this article, we will walk you through the process of installing and connecting the P-trap to the drain pipe, ensuring that your washer drain functions effectively and efficiently.
Understanding the Purpose of a P-Trap
The first step in installing a P-trap is understanding its purpose. A P-trap is designed to hold water and form a seal in the curved section of the pipe. This seal prevents smells and gases from flowing back into your home. Without a P-trap, foul odors can permeate your living space, making it an essential component of your washer drainage system.
Installing and Connecting the P-Trap to the Drain Pipe
Now that you understand the importance of a P-trap, let’s dive into the installation process. Follow these steps to install and connect the P-trap to the drain pipe:
Step 1: Gather the necessary tools and materials
- Pipe wrench
- PVC P-trap
- PVC primer and cement
- Teflon tape
Step 2: Prepare the drain pipe
Start by cutting the drain pipe to the appropriate length using a pipe cutter. Be sure to measure carefully to ensure a proper fit.
Step 3: Apply primer and cement
Using a brush, apply PVC primer to the ends of the drain pipe and the inside of the P-trap. Allow the primer to dry for a few minutes, then apply PVC cement to the primed areas. Quickly connect the P-trap to the drain pipe, twisting it clockwise to ensure a tight fit. Hold the pipe in place for a few seconds to allow the cement to set.
Step 4: Create a watertight seal
To create a watertight seal, wrap Teflon tape around the threads of the P-trap’s connection point. This will prevent any leaks from occurring and ensure proper drainage.
Step 5: Test for leaks
Once the P-trap is securely connected, turn on the water and run the washer to test for any leaks. Inspect the P-trap and the connections for any signs of water leakage. If you notice any leaks, try tightening the connections or applying additional Teflon tape as necessary.
By following these steps, you can install a P-trap for proper drainage in your washer drain. This will help prevent unpleasant odors and gases from entering your home, ensuring a clean and functional laundry area.
Ensuring Proper Ventilation For The Drain System
Proper ventilation is an essential aspect of installing a washer drain system. It not only ensures the efficient operation of the system but also helps prevent unpleasant odors and damage to the plumbing. In this section, we will discuss the importance of ventilation in a washer drain system and the steps involved in installing a vent pipe for adequate airflow.
Importance of Ventilation in a Washer Drain System
Ventilation plays a crucial role in a washer drain system as it helps create positive air pressure and allows the smooth flow of wastewater. When a washing machine drains water, it creates a vacuum in the drainpipe, which can hinder the flow and cause problems such as clogs and slow draining. By installing proper ventilation, you can resolve these issues and ensure the efficient functioning of your washer drain system.
Installing a Vent Pipe for Adequate Airflow
One of the key components of a well-ventilated washer drain system is a vent pipe. The vent pipe provides the necessary airflow, allowing wastewater to flow freely, preventing the buildup of gases and pressure. Below are the steps involved in installing a vent pipe for adequate airflow:
- Identify the optimal location: Before installing the vent pipe, identify the most suitable location. The ideal spot is usually on an exterior wall, near the plumbing stack, or where it can extend vertically through the roof.
- Measure and cut the pipe: Use a measuring tape to determine the length required for the vent pipe. Cut the pipe to the appropriate length using a pipe cutter or hacksaw.
- Connect the vent pipe: Connect the vent pipe to the existing drainage system by using appropriate fittings. Ensure a secure and watertight connection to prevent any leaks.
- Secure the vent pipe: Use pipe straps or hangers to secure the vent pipe in place. Ensure that it is well-supported to prevent any sagging or damage over time.
- Cap the vent pipe: Install a vent cap at the end of the vent pipe to prevent debris, animals, and water from entering while still allowing proper airflow.
By following these steps, you can ensure adequate ventilation in your washer drain system, promoting efficient drainage and preventing any potential issues.
Testing The Washer Drain System
Once you have successfully installed the washer drain, it is important to test the system to ensure that it is working properly. Running a test cycle will help you identify any leaks or issues with the drainage. Let’s explore how to do this and troubleshoot common problems that may arise.
Running a test cycle to check for leaks and proper drainage
To test the washer drain system, follow these steps:
- Make sure the washer is properly connected to the drain pipe.
- Fill the washer with a small amount of water.
- Start a regular wash cycle.
- While the washer is running, carefully inspect the area around the drain pipe for any signs of leaks.
- Observe the water flow as it drains out of the washer. It should be steady and without any blockages.
If you notice any leaks or slow drainage during the test cycle, it is important to troubleshoot and resolve the issue.
Troubleshooting common issues and ensuring functionality
Here are some common issues you may encounter while testing the washer drain system:
| Issue | Troubleshooting Steps |
|---|---|
| Leaking at the connection point | Check if the connections are tight and securely fastened. If necessary, apply plumber’s tape or tighten the connection. |
| Water backup in the drain pipe | Ensure that the drain pipe is not clogged. Use a plumber’s snake or drain cleaner to clear any blockages. |
| Slow drainage | Check for any obstructions in the drain pipe. Remove any debris or lint that may be blocking the flow of water. |
By troubleshooting these common issues and ensuring the functionality of your washer drain system, you can avoid potential problems in the future and ensure efficient operation.
Remember, regular testing and maintenance of your washer drain system is crucial to prevent water damage and maintain the longevity of your washing machine.
Securing And Insulating The Drain System
Properly securing and insulating your washer drain system is crucial to ensure its efficient and noiseless operation. In this section, we will discuss two key aspects of securing and insulating the drain system: properly fastening the drain pipe and fittings, and insulating the drain system for noise reduction and temperature control.
Properly fastening the drain pipe and fittings
It is essential to securely fasten the drain pipe and fittings to prevent leaks and ensure a steady flow of wastewater. Here are the steps to properly fasten the drain pipe and fittings:
- Carefully measure and cut the drain pipe to the required length, ensuring a proper fit.
- Insert the drain pipe into the drain opening on the washer, ensuring a tight connection.
- Secure the connection using suitable clamps or pipe connectors to prevent any movement or disconnection.
- For any additional fittings, such as elbows or couplings, ensure they are properly aligned and securely fastened using the appropriate methods, such as solvent cement or threaded connections.
By following these steps, you can ensure a secure and leak-free connection for your washer drain system.
Insulating the drain system for noise reduction and temperature control
In addition to securing the drain system, proper insulation is essential for minimizing noise and controlling temperature fluctuations. Here are some tips for insulating the drain system:
- Wrap the drain pipe with foam pipe insulation, which helps reduce noise caused by water flow and vibrations.
- Ensure that the insulation completely covers the drain pipe, including any bends or fittings, to ensure effective noise reduction.
- For areas with extreme temperature variations, consider using insulation sleeves or heat tape to prevent freezing or heat loss in the drain system.
- Inspect the insulation regularly to ensure it is in good condition and replace it if necessary.
Proper insulation not only improves the efficiency and quietness of your washer drain system but also helps protect it from potential damage due to extreme temperatures.
By properly fastening the drain pipe and fittings and insulating the drain system, you can ensure a reliable and efficient washer drain system that operates quietly and withstands temperature variations. Take these necessary steps during installation to enjoy hassle-free laundry routines for years to come.
Maintaining And Cleaning The Washer Drain System
When it comes to maintaining and cleaning your washer drain system, regular upkeep is essential. By following a few simple tips and cleaning methods, you can ensure that your drain system remains functional and clog-free, resulting in a longer-lasting appliance and avoiding any potential issues. In this article, we will explore some recommended methods for maintaining and cleaning your washer drain system.
Regular maintenance tips for a long-lasting drain system
Regular maintenance is crucial for a long-lasting and efficient washer drain system. Here are some simple yet effective tips to keep your drain system in great shape:
- Inspect the drain hose: Regularly check the drain hose for any cracks or signs of damage. If you notice any issues, promptly replace the hose to prevent leaks and water damage.
- Ensure proper installation: Make sure the drain hose is installed correctly. It should be securely attached to the washer and elevated above the level of the washing machine’s drum. This prevents water from flowing back into the machine and causing potential blockages.
- Check for obstructions: Periodically inspect the drain system for any debris or obstructions that may cause clogs. Remove any visible blockages and clean the surrounding area.
- Monitor water levels: Keep an eye on the water levels during each washing cycle. Excessive water or slow drainage may indicate a potential issue with the drain system.
- Replace worn-out parts: Over time, certain components of the drain system, such as the drain pump or valves, may wear out. If you notice any leaks or abnormal noises, consider replacing these parts to maintain optimal performance.
Recommended cleaning methods for preventing clogs and buildup
To prevent clogs and buildup in your washer drain system, regular cleaning is crucial. Here are some recommended cleaning methods:
- Monthly vinegar flush: Fill a bucket with a mixture of equal parts white vinegar and hot water. Disconnect the drain hose from the washer and immerse it in the vinegar solution. Let it soak for at least 30 minutes to dissolve any accumulated residue. Rinse the hose thoroughly before reconnecting.
- Remove lint: Lint can accumulate in the drain system over time, leading to blockages. After each load, clean the lint filter inside the washing machine and remove any lint or debris. Additionally, regularly check and clean the lint trap located near the drain pump.
- Inspect and clean the drain pump: Periodically open the drain pump access panel and check for any debris or foreign objects. Remove any blockages using a small brush or cloth. Be cautious when handling the drain pump and follow the manufacturer’s instructions.
- Use drain cleaners sparingly: While drain cleaners may seem like a quick fix for stubborn clogs, they can be harsh on the drain system and cause damage. Instead, consider using natural alternatives such as baking soda and vinegar to dissolve minor clogs.
- Regularly clean the drum: Clean the drum of the washing machine regularly to prevent any residue or soap scum from entering the drain system. Follow the manufacturer’s instructions regarding cleaning agents and cycles.
By following these regular maintenance tips and recommended cleaning methods, you can ensure a well-maintained and clog-free washer drain system. Incorporating these practices into your routine will help extend the lifespan of your appliance and ensure optimal performance.
Frequently Asked Questions
How Should Washing Machine Drain Pipe Be Installed?
To install a washing machine drain pipe, follow these steps: 1. Position the pipe to reach the drain pipe or standpipe, ensuring a downward slope. 2. Secure the drain hose with hose clamps to prevent leaks. 3. Attach the hose to the drain pipe or standpipe, using a drain hose adapter if necessary.
4. Test the connection for any leaks. 5. Make sure the drain pipe is properly vented to avoid water backup.
How Do You Hook Up A Washer Drain To An Outlet Box?
To hook up a washer drain to an outlet box, follow these steps: 1. Install a trap under the sink or in the wall for proper drainage. 2. Connect the drain hose to the outlet box using a hose clamp. 3.
Position the outlet box near the sink or wall and secure it in place. 4. Attach the other end of the drain hose to the outlet on the back of the washer. 5. Test the connection by running a small amount of water through the washer.
Ensure there are no leaks.
How High Should Drain Pipe Be For Washing Machine?
The drain pipe for a washing machine should be at least 30 inches (76 cm) high, according to plumbing codes. This height helps prevent the machine’s water from backing up into the drain or causing damage.
Where Do You Put The Drain In A Washing Machine?
The drain for a washing machine is typically located at the back of the machine near the bottom. It is usually connected to a hose that leads to a wall outlet or a floor drain.
Conclusion
Installing a washer drain doesn’t have to be daunting. By following these step-by-step instructions, you can easily set up your washer drain and ensure smooth and efficient drainage. From gathering the necessary tools to connecting the drain hose, this guide has provided all the necessary information for a successful installation.
So, go ahead and confidently tackle this project, knowing that you have the knowledge and expertise to get the job done right.
