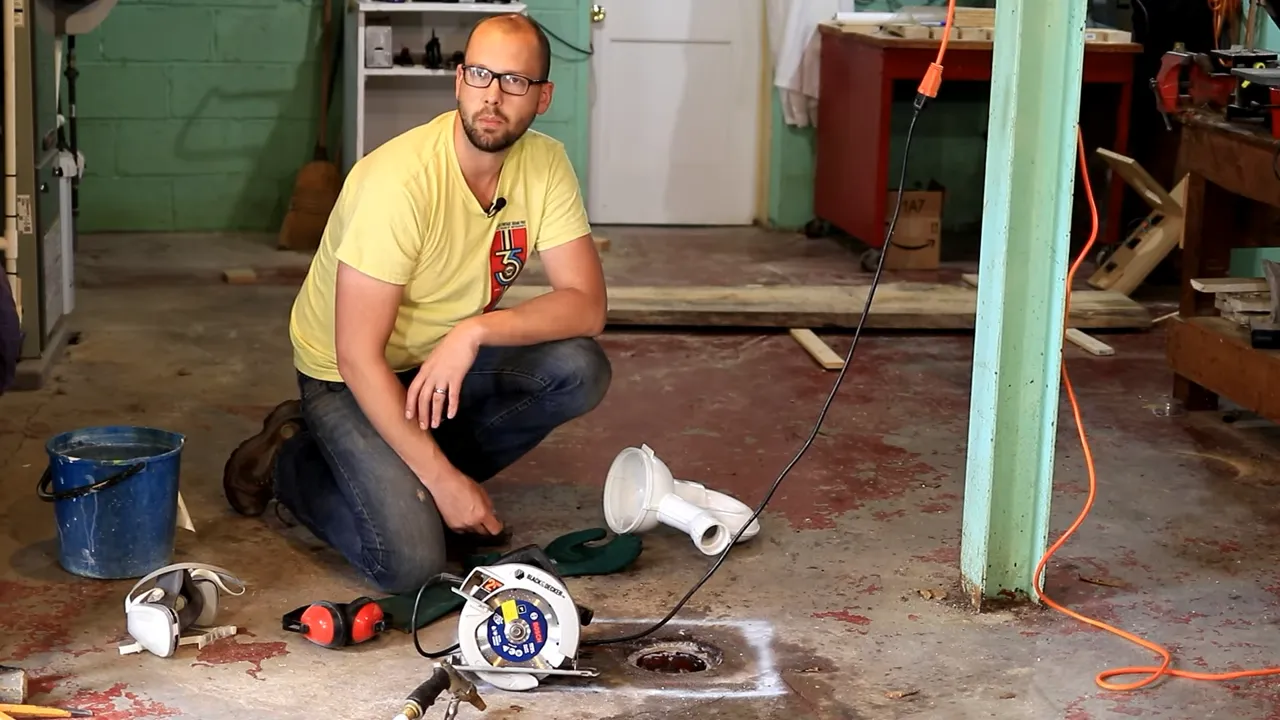
To install a floor drain, follow these steps: prepare the area, cut the floor, install the drain, and connect the plumbing. Installing a floor drain can be a practical solution for preventing water damage and maintaining a clean and dry environment in areas prone to excess moisture, such as basements, laundry rooms, or bathrooms.
By efficiently removing water from these spaces, floor drains help prevent costly repairs and potential health hazards. We will guide you through the process of installing a floor drain in a concise and straightforward manner, ensuring that you can successfully complete this project with ease.
Whether you are a homeowner looking to improve your space or a professional plumber seeking guidance, these step-by-step instructions will help you install a floor drain effectively and efficiently. So let’s get started with the installation process!
Understanding The Role Of A Floor Drain In A Space
A floor drain is a vital component in any space where water or liquid accumulation is a concern. It serves as a safeguard against potential water damage, flooding, and issues related to poor drainage. By understanding the role of a floor drain, you can take proactive measures to prevent water-related problems, promote proper drainage, and ensure a healthy environment free from mold growth.
Preventing Water Damage and Flooding
One of the key functions of a floor drain is to prevent water damage and flooding. Whether it’s due to heavy rainfall, plumbing leaks, or accidents, excess water can wreak havoc on surfaces and structures. By installing a floor drain, you provide an efficient outlet for water to be channeled away, reducing the risk of stagnant water pooling on your floors and causing irreparable damage. The floor drain acts as a barrier, intercepting and diverting water to a designated drainage system.
Promoting Proper Drainage and Preventing Mold Growth
Another vital role of a floor drain is to promote proper drainage and prevent the growth of mold. Standing water not only creates a breeding ground for bacteria and fungi but also poses a threat to the structural integrity of your space. Mold growth can lead to a range of health issues, including allergies and respiratory problems. By installing a floor drain, you ensure that water is efficiently drained, leaving no chance for mold to develop and thrive.
Additionally, a properly installed floor drain can help maintain a clean and hygienic environment. It prevents the accumulation of dirt, debris, and other potential contaminants, ensuring that your space remains safe and inviting.
Overall, understanding the role of a floor drain is crucial for safeguarding your space against water damage, flooding, mold growth, and the associated health risks. It is a proactive measure that promotes proper drainage and helps you maintain a clean and healthy environment.
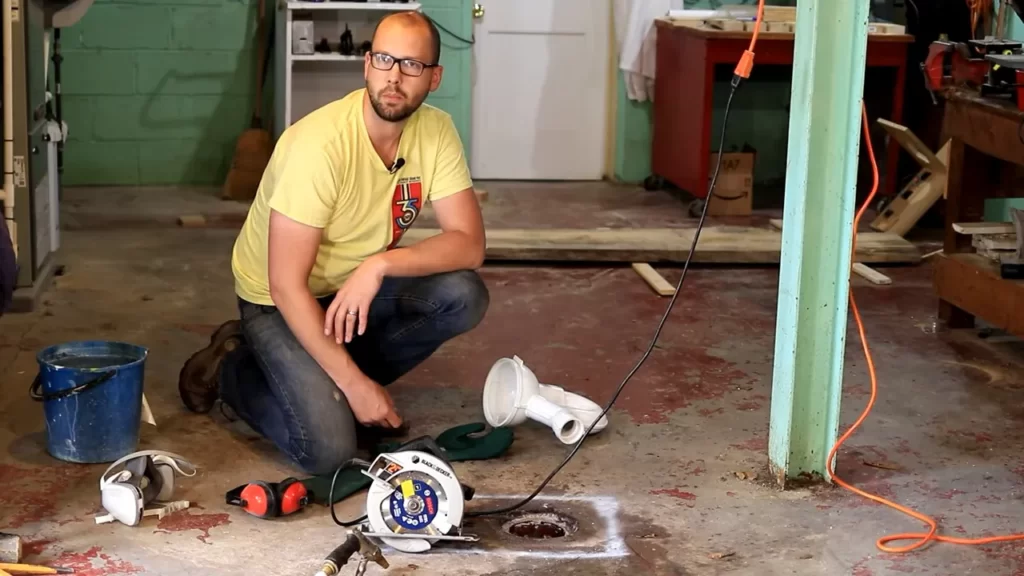
Why It’S Crucial To Install A Floor Drain Properly
Installing a floor drain may seem like a trivial task, but it plays a vital role in maintaining the functionality and durability of your flooring. Proper installation of a floor drain is crucial for several reasons. Failure to install a floor drain properly can lead to costly repairs in the future, compromise the longevity of your flooring, and even cause potential health and safety hazards. This article will outline the importance of installing a floor drain correctly and provide you with the necessary steps to avoid these issues.
Avoiding costly repairs in the future
When it comes to floor drains, a small mistake during installation can lead to significant problems down the line. A poorly installed drain can cause leakage, leading to water damage to your flooring, subflooring, and even the surrounding walls. The water damage can go unnoticed for an extended period, resulting in mold growth, rotting wood, and structural damage. Repairing this extensive damage can be time-consuming and costly.
By following the correct installation procedure, you can ensure that your floor drain is leak-free and properly sealed. This will prevent any water from seeping into unwanted areas, consequently protecting your flooring and avoiding the need for costly repairs in the future.
Ensuring the longevity of your flooring
Your flooring is an investment, and you want it to last for years to come. Improperly installed floor drains can shorten the lifespan of your flooring significantly. Without a properly functioning drain, excess water and moisture can accumulate, leading to warping, buckling, and other damage. This is especially true in areas prone to frequent water exposure, such as bathrooms, kitchens, and laundry rooms.
By installing a floor drain correctly, you can effectively manage the water flow, preventing any standing water from damaging your flooring materials. This will help ensure the longevity and durability of your flooring, saving you the time, effort, and money required for early replacement.
In conclusion, it is crucial to install a floor drain properly to avoid costly repairs in the future and ensure the longevity of your flooring. By taking the necessary precautions and following the correct installation steps, you can prevent water damage, protect your investment, and maintain a safe and healthy environment in your living space.
Assessing The Area And Determining The Best Location
Before you start installing a floor drain, it’s crucial to assess the area and determine the best location for it. This step is vital because it ensures that the drain will effectively fulfill its purpose and function efficiently.
Considering the Purpose and Layout of the Space
To begin with, you need to consider the purpose and layout of the space where you plan to install the floor drain. Whether it’s a bathroom, laundry room, or basement, understanding how the area will be used will help you determine the most suitable location for the drain. For instance, in a laundry room, the drain should ideally be placed near the washing machine to effectively handle any spills or leaks.
Identifying Potential Obstacles or Existing Plumbing Connections
Identifying potential obstacles or existing plumbing connections is another essential step in determining the best location for the floor drain. Take a close look at the area and note down any obstructions such as electrical wires, structural supports, or pipes that might hinder the installation process.
In addition, check for any existing plumbing connections in the vicinity. If there are nearby pipes or drain lines, it may be advantageous to install the floor drain in close proximity to avoid extensive plumbing work.
It’s important to note that the code requirements for floor drain installation may vary depending on your location. Therefore, it is always wise to consult with a professional plumber or check your local building codes to ensure compliance.
In conclusion, when assessing the area and determining the best location for a floor drain, consider the purpose and layout of the space, and identify potential obstacles or existing plumbing connections. By carefully evaluating these factors, you can install the floor drain in the most suitable location, ensuring optimal functionality and effectiveness.
Gathering The Necessary Tools And Materials For The Installation
Before you begin the installation process, it is essential to gather all the necessary tools and materials. This preparation ensures a smooth and efficient installation of your floor drain. Take the time to review the steps below on how to gather the required items for a successful installation.
Choosing the right type and size of floor drain
The first step in gathering the tools and materials for installing a floor drain is selecting the appropriate type and size of the drain. There are several factors to consider when making this decision:
- The location of the floor drain – Is it going to be installed in a bathroom, laundry room, or basement? This determines the type of drainage system required.
- The anticipated amount of water flow – If the drain is intended for high-traffic areas or areas prone to flooding, a larger drain with a higher flow rate is necessary.
- The floor material – Different types of floor drains are designed for specific floor materials such as concrete, tile, or vinyl. Make sure to choose a drain that is compatible with the flooring material.
Once you have determined the appropriate type and size of the floor drain, make sure to purchase it from a reputable supplier or home improvement store. This ensures the quality and durability of the drain.
Selecting compatible piping and fittings
In addition to the floor drain, you will need to gather the necessary piping and fittings to complete the installation. Here are some key considerations:
- Pipe material – Depending on your local building codes and personal preference, you may choose between PVC, ABS, or cast iron pipes. Ensure that the pipe material is compatible with the floor drain and fits securely.
- Pipe size – The diameter of the pipe should match the outlet size of the floor drain. It is crucial to measure the drain outlet accurately to prevent leaks or blockages.
- Fittings – To connect the pipe to the floor drain and create a watertight seal, you will need appropriate fittings such as couplings, elbows, and adapters. Make sure the fittings are compatible with the chosen pipe material.
- Pipe cutter and adhesive – Depending on the type of pipe material, you may need a pipe cutter to trim the pipes to the correct length. Adhesive or cement is necessary for securely attaching the fittings to the pipes.
To ensure a successful installation, take note of the recommended pipe and fitting specifications provided by the manufacturers of both the floor drain and the piping materials. This guarantees a proper fit and prevents any future plumbing issues.
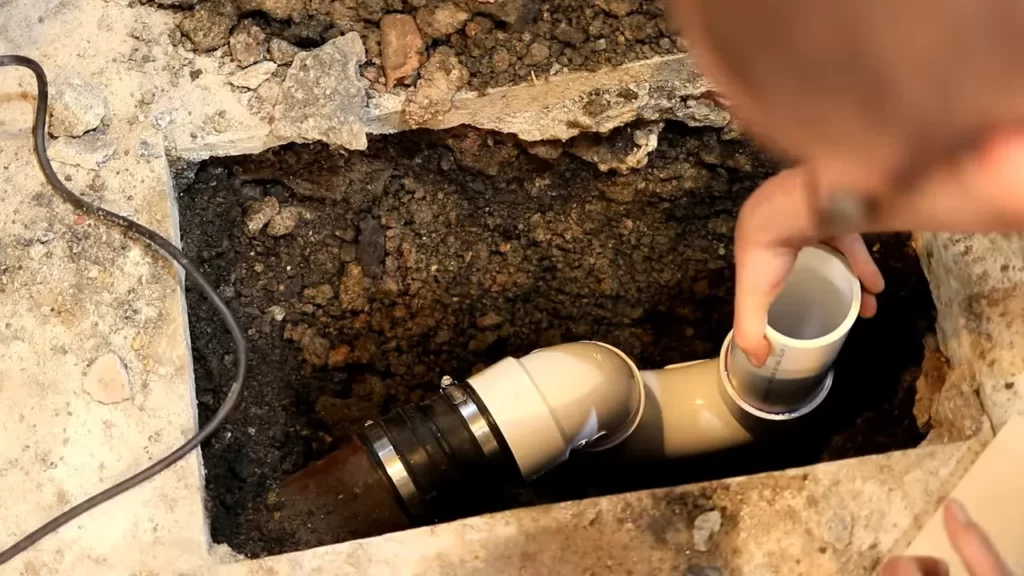
Removing The Existing Flooring And Preparing The Subfloor
Before installing a new floor drain, it is crucial to remove the existing flooring and prepare the subfloor properly. This will ensure a secure and efficient installation process. Follow these steps to clear the area and prepare the surface for the new drain installation:
Clearing the area and removing any debris
The first step in preparing the subfloor is to clear the area of any obstacles and remove any debris. This includes removing furniture, appliances, and any other items that may be in the way. Once the area is clear, thoroughly clean the subfloor using a broom or vacuum to remove dust, dirt, and any loose materials. This will provide a clean and level surface for the new drain installation.
Preparing the surface for the new drain installation
After clearing the area, it’s essential to prepare the surface of the subfloor to ensure a proper and secure fit for the new drain. Here are the steps to follow:
- Assess the subfloor: Start by assessing the condition of the subfloor. Look for any signs of damage, such as cracks or unevenness. If you notice any issues, it’s crucial to address them before proceeding with the installation.
- Measure and mark: Measure the dimensions of the new drain and mark the area on the subfloor where it will be installed. Ensure that the marked area is square and aligned with the surrounding flooring.
- Prep the subfloor: Depending on the material of the subfloor, different preparations may be required. If you have a concrete subfloor, ensure it is clean and free from any moisture. Use a concrete patching compound to fill any cracks or holes, and allow it to dry completely. For a wooden subfloor, check for any loose or damaged boards and replace them if necessary. Secure any loose boards using screws or nails.
- Apply a primer: To improve adhesion, consider applying a primer to the subfloor. This step is particularly important for concrete subfloors. Follow the manufacturer’s instructions and allow the primer to dry completely before proceeding.
- Level the subfloor: It’s essential to have a level subfloor to ensure proper drainage. Use a leveling compound or self-leveling underlayment if necessary to correct any uneven areas. Follow the product instructions and allow sufficient drying time.
- Install a moisture barrier: In areas where moisture may be a concern, it’s advisable to install a moisture barrier. This will help protect the subfloor and prevent any damage over time. Secure the moisture barrier according to the manufacturer’s instructions.
By clearing the area and properly preparing the subfloor, you can ensure a smooth and effective installation of a new floor drain. Taking the time to complete these steps will help prevent future issues and ensure the longevity of your drain system.
Installing The Floor Drain And Connecting The Plumbing
Installing a floor drain is an important step in keeping your basement or other areas of your home dry and free from water damage. A floor drain helps to prevent flooding by providing an outlet for water to drain away. In this section, we will discuss the process of installing a floor drain and connecting the plumbing, so you can ensure proper drainage and maintain a dry environment in your home.
Cutting an opening for the drain in the subfloor
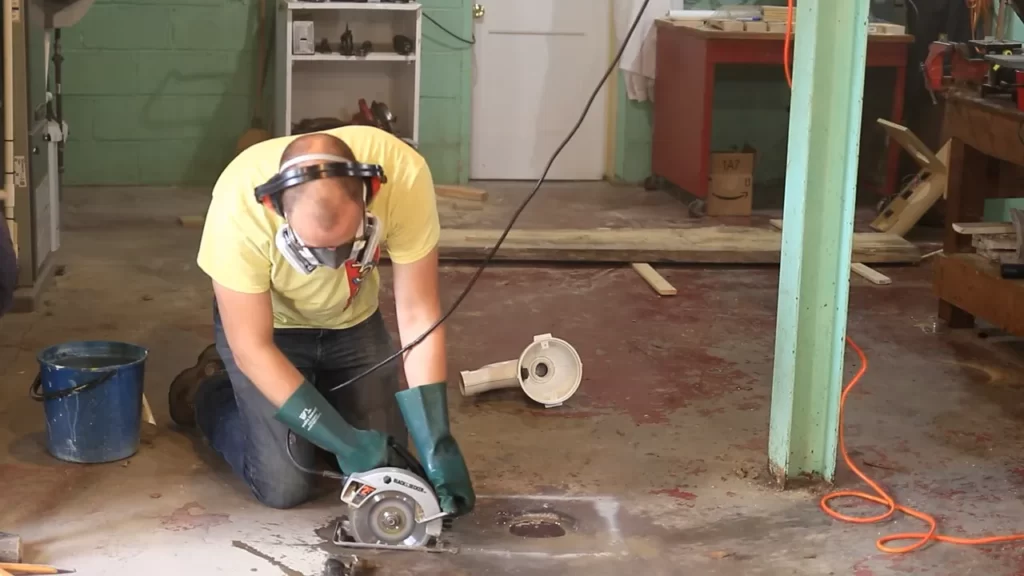
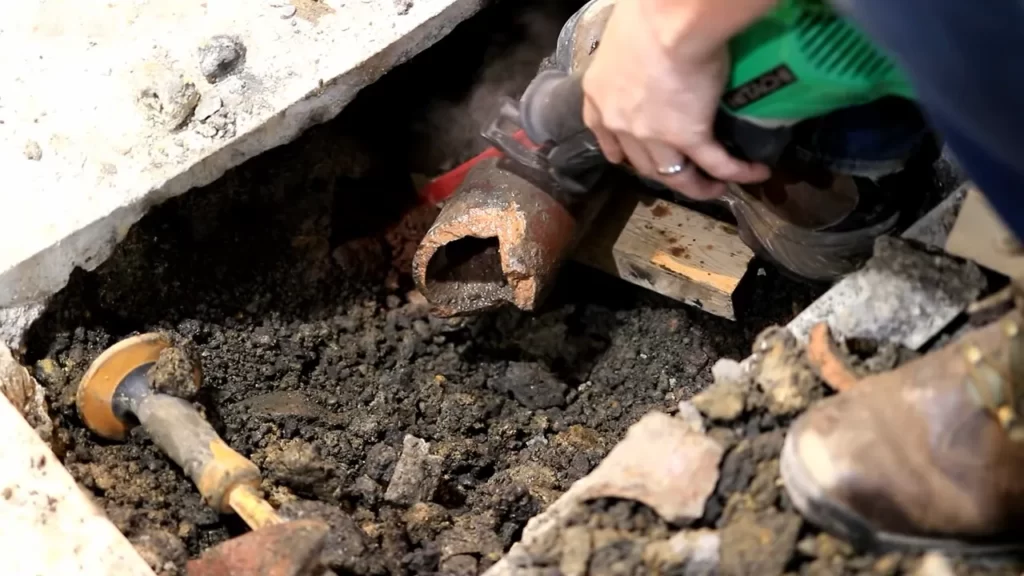
The first step in installing a floor drain is to cut an opening in the subfloor where you want the drain to be located. This is typically done using a reciprocating saw or a jigsaw. Measure the dimensions of the drain and mark the center of the area where you want to install it. Make sure to take into consideration any pipes or obstacles that may be underneath the subfloor.
Once you have marked the area, carefully cut along the lines using the saw. Take your time to ensure a clean and precise cut. Use caution when cutting to avoid damaging any pipes or other infrastructure.
Attaching the drain securely and fitting the plumbing components
After cutting the opening for the drain, it’s time to attach the drain securely and fit the plumbing components. This process involves several steps to ensure proper installation.
- First, place a layer of plumber’s putty around the flange of the drain. This will create a watertight seal between the drain and the subfloor.
- Next, insert the drain into the opening, making sure it fits snugly. Use a screwdriver or a wrench to tighten the screws on the flange, securing the drain in place.
- Once the drain is securely attached, you can connect the plumbing components. This includes installing a P-trap and a pipe that will connect to the main drainage system. Ensure that each joint is properly sealed using plumbing adhesive or Teflon tape.
- Lastly, check for any leaks by running water through the drain system. Make sure that all connections are tight and secure. If you notice any leaks, tighten the fittings or reapply sealant as necessary.
Properly installing a floor drain and connecting the plumbing is crucial to ensure effective drainage and prevent water damage. By following these steps, you can maintain a dry and protected environment in your home. Take the time to complete each step carefully and double-check for any leaks or loose connections. With the proper installation, your floor drain will function efficiently and provide you with peace of mind.
Testing And Adjusting The Drain For Proper Functionality
Once you have successfully installed a floor drain, it is crucial to test and adjust it to ensure proper functionality. This step is important to avoid any potential issues with leaks or ineffective drainage. In this section, we will discuss how to check for leaks and ensure smooth water flow, as well as making necessary adjustments to guarantee effective drainage.
Checking for Leaks and Ensuring Smooth Water Flow
To begin, it is vital to carefully examine the newly installed floor drain for any leaks. Even a small leak can lead to significant water damage over time. Follow these steps to check for leaks:
- Inspect the entire drain system, including the connection points and the drain cover, for any signs of water escaping. Be sure to look closely at the edges and corners of the drain, as these are common areas for leaks to occur.
- If you notice any water drips or moisture, use a rag to dry the area and identify the source of the leak. It could be a loose connection or a faulty seal that needs to be addressed.
- Once you have identified the source of the leak, take appropriate measures to fix it. This may involve tightening the connections or replacing defective seals. It is crucial to address any leaks before proceeding with the testing.
- Once you have confirmed that there are no leaks, it is time to check the water flow. Slowly pour water into the floor drain and observe how it drains away. Ideally, the water should flow smoothly without any blockages or pooling.
- If you notice any issues with water flow, it may be due to debris or a clogged drain. In such cases, remove the drain cover and use a plumbing snake or a wire brush to clear out any obstructions. Additionally, ensure that the drain cover is properly aligned to allow for unobstructed flow.
Making Necessary Adjustments to Ensure Effective Drainage
After conducting the initial testing, it is important to make any necessary adjustments to guarantee effective drainage. Here are some steps to follow:
- Check the slope of the floor surrounding the drain. It should be angled slightly towards the drain to promote proper water flow.
- If the slope is insufficient, you may need to make adjustments to the floor’s surface by adding a thin layer of self-leveling compound or using a grinder to alter the slope.
- Ensure that the drain cover is securely fastened. A loose drain cover can lead to water leakage or blockages. Use an appropriate screwdriver to tighten the screws and ensure a snug fit.
- Consider installing a drain strainer or grate to prevent debris from entering the drain system. This will help maintain optimal drainage and reduce the likelihood of clogs.
- Perform a final test by pouring water into the drain to ensure that it is effectively draining away. Pay attention to how quickly the water disappears and if there are any issues, repeat the necessary adjustments until the drainage is satisfactory.
By thoroughly testing and adjusting your floor drain, you can ensure that it functions properly and prevents potential water damage. Taking the time to check for leaks, ensuring smooth water flow, and making necessary adjustments will give you peace of mind knowing that your drain is effective and reliable.
Ensuring Proper Slope For Optimal Drainage
Understanding the importance of slope in drain installation
When it comes to installing a floor drain, ensuring proper slope is crucial for optimal drainage. The slope of the drain pipe determines how effectively water flows through the system. Without the correct slope, water may not drain completely, leading to stagnant pools, foul odors, and potential water damage. Understanding the importance of slope and how to achieve it during installation is key to a well-functioning floor drain.
Tips for achieving the correct slope during installation
Here are some helpful tips to ensure you achieve the correct slope when installing a floor drain:
- Measure and plan: Before beginning the installation process, it’s important to measure and plan where the drain will be placed. Take into consideration the natural flow of water in the area and the location of existing drain lines.
- Establish the proper gradient: Once you have determined the location of the drain, establish the proper gradient or slope. The general rule of thumb is to aim for a minimum slope of 1/4 inch per foot to facilitate efficient drainage.
- Use a spirit level: To ensure accuracy, it is recommended to use a spirit level during installation. This will help you gauge the slope and make any adjustments as needed. Checking the slope in multiple directions will ensure the overall drainage efficiency.
- Secure the drain: Once the slope has been established and verified, securely fasten the drain in place. Ensure it is level and in line with the slope of the drain pipe.
- Test the drainage: After installation, conduct a thorough test to ensure the drain is functioning properly. Pour water into the drain and observe how quickly and efficiently it flows. Any slow drainage or standing water may indicate that the slope needs adjustment.
By adhering to these tips, you can achieve the correct slope during floor drain installation, promoting optimal drainage and preventing potential issues down the line. Remember, an incline of just a quarter inch per foot can make all the difference in keeping your floor dry and free from water damage.
Optimal Drain Cover Selection For Different Applications
Choosing the right drain cover for your floor drain is essential to ensure proper drainage and prevent any potential damage. With different materials and designs available, it’s important to consider factors such as aesthetics, durability, and safety. In this section, we will explore the key points to consider when selecting an optimal drain cover for your specific application.
Choosing the Right Material and Design for Your Space
The material and design of your drain cover play a vital role in its performance and longevity. Let’s dive into the factors to consider when choosing the right material and design:
Aesthetics:
The drain cover you choose should seamlessly blend with the overall aesthetics of your space. Whether you have a commercial facility or a residential area, selecting a drain cover that complements the existing design elements will enhance the overall visual appeal of the space. Popular materials such as stainless steel or bronze offer a modern and sleek look, while options like cast iron provide a more classic and timeless appearance.
Durability:
The durability of your drain cover is crucial, especially if you’re installing it in heavy-use areas or environments that experience high foot traffic. Opting for materials such as stainless steel, brass, or PVC ensures long-lasting performance, as they are resistant to corrosion, rust, and wear and tear. Additionally, consider the load-bearing capacity of the cover, especially if you expect vehicles or heavy machinery to pass over it.
Safety:
Ensuring safety is paramount, particularly in environments where slip and fall accidents can occur. Look for drain covers that offer slip-resistant features, such as grates with treaded surfaces or anti-slip coatings. These provide reliable traction, reducing the risk of accidents and injuries.
Another safety consideration is the ability of the drain cover to prevent debris and clogging. A properly designed drain cover will have slots or perforations that allow for water flow while keeping larger objects from entering the drain pipe. This helps maintain optimal drainage performance and minimizes the likelihood of blockages.
Maintenance:
Consider the ease of maintenance when selecting a drain cover. Depending on the material, some covers may require regular cleaning or periodic sealing to prevent build-up and maintain their appearance. Choose a drain cover that fits your maintenance capabilities and schedule.
Remember, selecting the right material and design for your drain cover is crucial in ensuring optimal performance, durability, and safety. Take the time to evaluate the specific requirements of your space and make an informed decision that aligns with your needs. By doing so, you’ll have a floor drain that not only functions smoothly but also complements the overall aesthetics of your environment.
Maintenance And Troubleshooting For A Floor Drain
Proper maintenance and regular troubleshooting for a floor drain are essential to ensure its efficient functioning. Ignoring these aspects can lead to clogs, unpleasant odors, and costly repairs. In this section, we will discuss some important guidelines to keep your floor drain clean and free of debris, as well as how to address common issues such as clogs and odors.
Keeping the drain clean and free of debris
Regular cleaning is paramount for the optimal performance of your floor drain. Here are some tips to keep your drain clean and free of debris:
- Remove any visible debris, such as hair or small objects, from the drain using gloves or a tweezer.
- Flush the drain with hot water to help dislodge any accumulated grime or grease.
- Use a mild detergent or a specially formulated drain cleaner to remove stubborn deposits. Be sure to follow the manufacturer’s instructions and precautions.
- Regularly inspect and clean the drain cover or grate to prevent the buildup of dirt and debris.
- Install a drain strainer or filter to prevent larger particles from entering the drain.
- Consider scheduling professional drain cleaning services annually for a more thorough cleaning.
Addressing common issues such as clogs and odors
Even with regular maintenance, floor drains can sometimes encounter issues like clogs or unpleasant odors. Here are some steps you can take to address these common problems:
Clogs:
- Start by using a plunger to try and dislodge the clog. Make sure to cover any nearby drains to create proper suction.
- If the plunger does not work, try using a drain snake or auger to break up and remove the obstruction. Insert the tool into the drain and rotate it while applying gentle pressure.
- If the clog persists, a drain cleaner specifically designed for floor drains may be effective. Follow the instructions and safety recommendations provided by the manufacturer.
- If all else fails, it is recommended to seek professional assistance to avoid causing further damage to the drain system.
Odors:
Unpleasant odors from floor drains can be a result of dried-out trap seals or the buildup of organic matter. Here’s what you can do to tackle these odors:
- Flush the drain with hot water to rehydrate the trap and restore the water seal.
- Pour a mixture of baking soda and vinegar down the drain. This natural solution helps eliminate odors and break down organic matter.
- Consider using enzymatic drain cleaners formulated specifically for removing organic buildup and combating odors.
- Regularly flush the drain with water to prevent the trap seal from drying out.
- If the odor persists or worsens, it is recommended to consult a professional plumber for further inspection and assistance.
By following these maintenance and troubleshooting guidelines, you can ensure that your floor drain remains clean, functional, and odor-free, saving you from potential headaches and costly repairs.
Frequently Asked Questions
How Do You Plumb A Floor Drain?
To plumb a floor drain, follow these steps: 1. Dig a trench to access the existing drain pipes. 2. Install a P-trap, which prevents sewer gas from entering the building. 3. Connect the drain pipe to the P-trap and ensure a tight seal.
4. Install a clean-out plug for easy access to the drain. 5. Test for leaks and adjust as needed. Remember to consult a professional if you’re unsure or need assistance.
How Do You Install A Floor Drain In A Utility Room?
To install a floor drain in a utility room, follow these steps: 1. Choose the location for the drain carefully. 2. Remove the flooring and dig a trench for the drainpipe. 3. Connect the drainpipe to the main sewer line or sump pump.
4. Set the floor drain in place and secure it. 5. Finish the installation by connecting the drainpipe to the floor drain and replacing the flooring.
Do I Need A Floor Drain In Laundry Room?
Yes, having a floor drain in your laundry room is recommended. It helps prevent water damage from leaks, spills, and washing machine overflow. Additionally, a floor drain allows for easy cleaning and maintenance, ensuring a safe and functional laundry space.
Can You Add A Drain To An Existing Concrete Floor?
Yes, it is possible to add a drain to an existing concrete floor.
Conclusion
To sum up, installing a floor drain is a crucial step in ensuring proper drainage and preventing water damage. By following the step-by-step process outlined in this guide, you can confidently undertake this project yourself. Remember to choose the right location, gather the necessary tools and materials, and carefully follow the instructions.
With a well-installed floor drain, you can have peace of mind knowing that water will flow away easily, keeping your space clean and dry.
