To install a sink drain, remove the old drain, apply plumber’s putty to the new drain, and secure it in place. Then, connect the drain pipe and tighten the connections.
Gathering The Necessary Tools And Materials
Venturing into the world of sink drain installation
Embarking on a sink drain installation project can seem daunting at first, but with the right guidance and tools, it can be a smooth and satisfying process. Whether you’re a seasoned DIY enthusiast or a beginner, gathering the necessary tools and materials is an essential first step towards a successful installation. In this article, we will walk you through the essential tools and materials you’ll need, ensuring that you have everything at your fingertips before you even start. So, let’s dive in and explore what you’ll need for a hassle-free sink drain installation!
Essential tools and materials for a smooth installation process
Having the right tools and materials is crucial for a seamless sink drain installation. Here is a comprehensive list of everything you’ll require:
- Adjustable wrench: This versatile tool will come in handy when tightening or loosening nuts and bolts.
- Screwdrivers: Invest in both Phillips and flathead screwdrivers as they will be indispensable throughout the installation process.
- Plumber’s putty: This moldable substance is used to create a water-tight seal around the drain.
- Plunger: Having a plunger readily available will ensure you can address any potential blockages that may occur during or after installation.
- Pipe wrench: When working with pipes, a pipe wrench is crucial for tightening or loosening fittings.
- Hacksaw: You may need a hacksaw to cut pipes or fittings to the desired length.
- Plumber’s tape: This tape helps to create a leak-proof seal on threaded pipe fittings.
- Bucket: To catch any water spills or debris during the installation process, keep a bucket nearby.
- Plumbing snake: If you encounter any stubborn clogs in your sink drain, a plumbing snake will help you clear them efficiently.
Remember, having all the necessary tools and materials on hand before starting the installation will save you time and frustration. Now that you have everything you need, it’s time to gather them and get started on your sink drain installation project!

Understanding The Basics Of Sink Drain Systems
When it comes to plumbing, understanding the basics of sink drain systems is crucial. A properly installed sink drain ensures efficient water flow and prevents clogs. In this section, we will unravel the mysteries of sink drain systems, exploring the components that make up these systems and how they work together to ensure proper drainage.
Unraveling the mysteries of sink drain systems
Sink drain systems may seem complex, but once you understand their key components and how they fit together, the installation process becomes much simpler. So, let’s dive in and explore the components of a sink drain system.
Components of a sink drain system
A sink drain system consists of several key components, each with a specific role in the drainage process. Here are the main components you’ll encounter when installing a sink drain:
- Sink Drain Pipe: This is the pipe that connects the sink basin to the main drain line. It carries wastewater from the sink to the sewer or septic system.
- P-Trap: The P-trap is a curved section of pipe that traps a small amount of water, creating a seal against sewer gases. It prevents foul odors from entering your home.
- Tailpiece: The tailpiece connects the sink drain to the P-trap. It is a straight pipe that helps to create a smooth flow of wastewater.
- Trap Arm: The trap arm connects the P-trap to the main drain line. It carries wastewater away from the sink and directs it into the sewer or septic system.
These are the main components of a sink drain system. Each plays a crucial role in ensuring proper drainage and preventing water leaks and odors.
How they work together to ensure proper drainage
Now that we know the components, let’s understand how they work together to ensure proper drainage. The sink drain pipe carries wastewater from the sink basin to the P-trap. The water then flows through the P-trap, creating a water seal that prevents sewer gases from entering the house. From the P-trap, the wastewater continues through the tailpiece and trap arm, eventually reaching the main drain line.
It’s essential to install each component correctly to ensure a tight and leak-free connection. Using plumber’s tape and sealing compounds can further enhance the integrity of the system.
In conclusion, understanding the basics of sink drain systems is vital when it comes to installing or repairing your sink’s drainage. By familiarizing yourself with the components and how they work together, you can ensure a properly functioning sink drain that provides efficient water flow and prevents unpleasant odors.
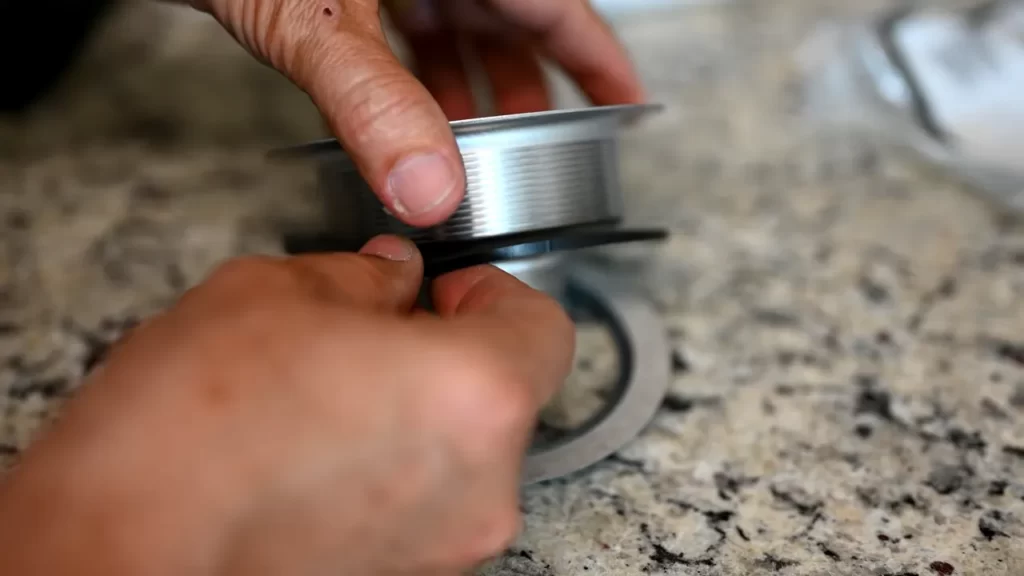
Step 1: Removing The Old Sink Drain
Say goodbye to your old sink drain! This is the vital first step in installing a new sink drain and ensuring a leak-free and efficient plumbing system. Removing the old sink drain may seem daunting, but with the right tools and techniques, it can be a breeze. Here’s how:
Bid farewell to your old sink drain
Before you begin, make sure you have all the necessary tools on hand. These will help you remove the existing drain assembly smoothly and efficiently. The tools you’ll need include:
- Adjustable wrench: Use this to loosen and tighten the necessary bolts.
- Pliers: These will help you grip and remove any stubborn parts.
- Screwdriver: Depending on the type of drain assembly, you’ll need a flathead or Phillips screwdriver to unscrew any screws holding it in place.
- Bucket: Keep a bucket nearby to catch any water that may spill during the removal process.
Tools and techniques to remove the existing drain assembly
Once you have your tools ready, it’s time to get down to business. Here’s a step-by-step guide on removing the old sink drain:
- Turn off the water supply: Before you begin, shut off the water supply to the sink. This prevents any water from flowing while you work.
- Clear out the cabinet: Remove any items from the sink cabinet to give yourself ample working space.
- Unscrew the slip nut: Using an adjustable wrench, loosen and unscrew the slip nut that connects the drain pipe to the sink drain.
- Disconnect the P-trap: Locate the P-trap, which is the curved section of the drain pipe. Unscrew the slip nuts on both ends of the P-trap and carefully remove it.
- Release the sink drain: With the P-trap removed, you can now focus on the sink drain assembly itself. Depending on the type of assembly, you may need to remove screws or clips holding it in place. Use your screwdriver or pliers to remove any fasteners and gently lift out the old drain assembly.
Tips to avoid damaging the sink during removal
As you remove the old sink drain, it’s essential to take precautions to avoid damaging the sink. Here are a few tips to keep in mind:
- Be gentle: Handle the sink and the surrounding parts with care to avoid any accidental scratches or chips.
- Use protective materials: Consider placing a towel or cardboard over the sink’s surface to protect it from any tools or parts that may accidentally drop.
- Apply lubricant: If any parts are stubborn and challenging to remove, applying a little lubricant may help loosen them without causing damage.
- Follow the manufacturer’s instructions: If you’re unsure about any specific removal steps or precautions, consult the manufacturer’s instructions for your sink drain assembly.
By following these instructions and being cautious during the removal process, you’ll be well on your way to installing a new sink drain in no time. In the next step, we’ll cover how to install the new drain assembly, so stay tuned!
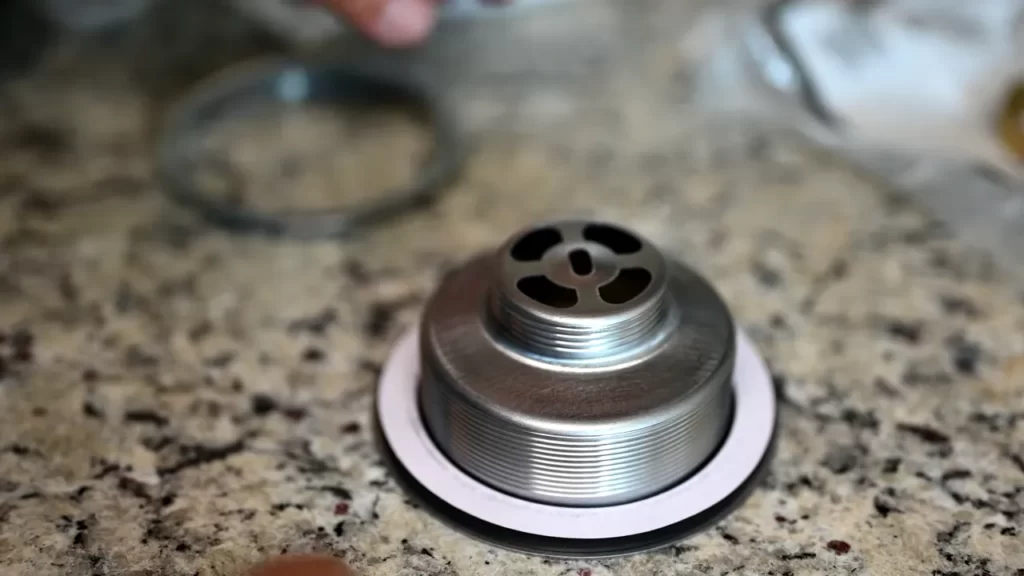
Step 2: Installing The New Drain Assembly
Once you have successfully removed the old drain assembly, it’s time to move on to the exciting part – installing the new one! This step-by-step guide will walk you through the process, ensuring that your new sink drain is properly positioned, aligned, and securely fastened. Let’s get started with welcoming the new drain assembly.
Welcoming the new drain assembly
The first thing you should do is gather all the components of your new drain assembly. This may include the drain flange, gaskets, washers, nuts, and tailpipe. Make sure to check that you have all the necessary parts included in the package.
Before proceeding any further, take a moment to examine each component of the new drain assembly. This will ensure that everything is in good condition and free from any defects or damages. Additionally, familiarize yourself with the different parts and their functions, as this will make the installation process much easier.
Proper positioning and alignment of the new drain components
Now that you are acquainted with the new drain assembly, it’s time to position and align each component correctly. This is a crucial step in ensuring that your sink drain functions efficiently and prevents any leaks or water damage.
Begin by placing the rubber gasket onto the drain flange. This gasket will create a watertight seal between the sink and the drain assembly, preventing any water from seeping through. Ensure that the gasket is centered and aligned properly.
Next, insert the drain flange into the sink’s drain opening. Gently push it down until it sits flush against the bottom of the sink. The flange should fit snugly, without any gaps or misalignment.
Once the drain flange is in place, slide the friction ring onto the tailpipe. This ring will help secure the tailpipe to the drain flange, preventing any movement or wobbling. Position the tailpipe in the center of the drain flange and push it downwards until it reaches the desired height.
Securing the drain assembly in place
Now that the components of the new drain assembly are properly positioned and aligned, it’s time to secure them in place. This will ensure that the assembly remains tightly sealed and prevents any water leakage.
Begin by tightening the locknut onto the tailpipe. Use a wrench or pliers to grip the locknut and rotate it clockwise until it is firmly tightened against the bottom of the sink. This will compress the gasket, creating a tight seal.
Once the locknut is securely tightened, wipe away any excess putty or sealant around the drain flange. This will give your sink a clean and polished look.
Lastly, test the newly installed drain assembly by running water into the sink. Check for any leaks or drips and make adjustments if necessary. Congratulations, you have successfully installed your new sink drain assembly!
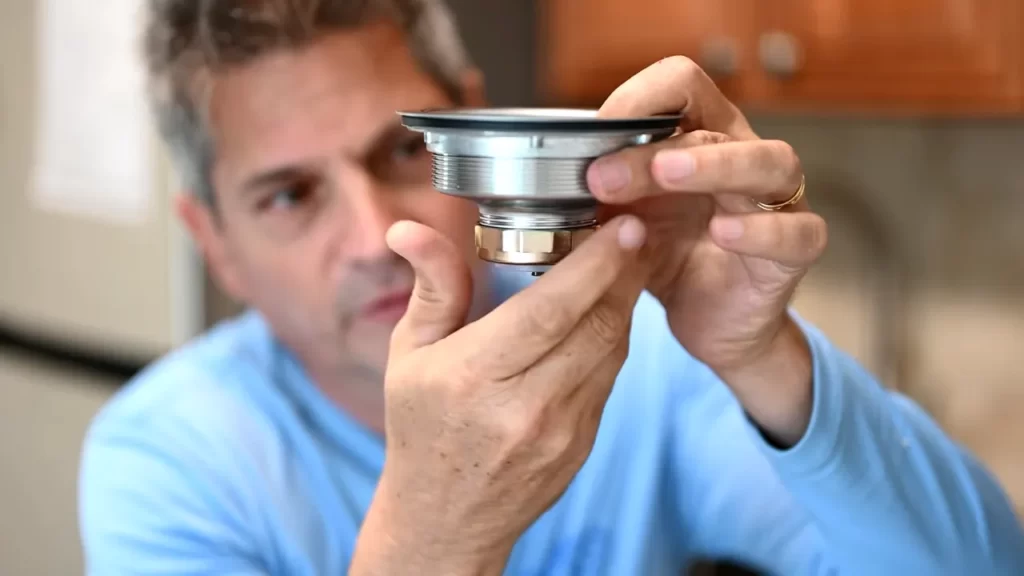
Step 3: Connecting The P-Trap And Tailpiece
Bringing the P-Trap into the mix
Once you’ve successfully assembled the drain assembly and tailpiece, it’s time to move onto the next crucial step – connecting the P-Trap. The P-Trap is an essential component of your sink’s plumbing system, as it helps to prevent odors from coming back up through the drain. It is shaped like the letter “P,” which is where it gets its name from.
Connecting the P-Trap to the drain assembly and tailpiece
When it comes to connecting the P-Trap, you’ll need to bring it into the mix. Start by aligning the P-Trap with the drain assembly and tailpiece. The P-Trap will typically have two slip nuts, one at each end. Slide one of the slip nuts onto the tailpiece and the other onto the drain assembly.
Next, you’ll need to connect the P-Trap to the drain assembly and tailpiece. Make sure that the curved portion of the P-Trap is facing downwards, forming the “P” shape. Insert one end of the P-Trap onto the tailpiece and the other end onto the drain assembly, ensuring a secure fit.
To tighten the slip nuts, use a pair of slip-joint pliers. Turn the slip nuts clockwise to tighten them, ensuring a snug fit. Be careful not to overtighten, as this could damage the fittings. Tightening the slip nuts will create a secure connection and help prevent any leaks from occurring.
Ensuring a tight and leak-free connection
To ensure a tight and leak-free connection, it’s essential to pay attention to a few key points. First, make sure that all connections are properly aligned. The tailpiece, drain assembly, and P-Trap should all be in-line with each other. Any misalignment can result in leaks or improper drainage.
Additionally, check that the slip nuts are tightened securely but not overly tight. Overtightening can cause damage to the fittings and lead to leaks. Use slip-joint pliers to tighten the slip nuts, making sure they are snug but not overly tightened.
Finally, run some water through the sink and check for any leaks. If you notice any drips or water escaping from the connections, it’s a sign that something is not properly sealed. In this case, you may need to loosen the slip nuts and reposition the P-Trap to ensure a proper fit.
By following these steps and ensuring a tight and leak-free connection, you’ll have successfully connected the P-Trap and tailpiece in your sink drain installation. This crucial step helps to ensure the proper functioning of your plumbing system and prevents any unpleasant odors from coming back up through the drain.
Step 4: Testing For Leakages And Proper Drainage
The final hurdle: leak testing and drainage assessment
Now that you have successfully installed the sink drain, it’s time to tackle the final step: testing for leakages and ensuring proper drainage. This step is crucial to ensure that your sink functions effectively and prevents any potential water damage in the future.
How to check for leaks and fix them if necessary
Checking for leaks is an essential part of the sink installation process. Even the smallest leak can lead to significant problems down the line, so it’s crucial to identify and fix them as soon as possible. Here’s how you can test for leaks and address them if necessary:
- Inspect the connections: Start by checking all the connections between the sink drain and the plumbing pipes. Look for any signs of water leakage, such as puddles or dampness around the connections. If you notice anything suspicious, tighten the connections using a wrench or adjustable pliers.
- Apply soapy water: If no visible leaks are found, mix a small amount of dish soap with water. Use a sponge or cloth to apply this soapy water mixture to all the joints and connections of the sink drain, including the P-trap and tailpiece. Watch closely for any bubbles forming, as they indicate the presence of a leak.
- Fixing minor leaks: If you spot any leaks, no matter how small, it’s essential to address them promptly. Depending on the type of connection, you may need to tighten it further or replace the gasket or seal. Be sure to follow the manufacturer’s instructions or consult a professional if needed. Remember, even a tiny leak can cause extensive damage over time if left unattended.
Verifying that the sink drains properly before celebrating your success
Once you have checked for leaks and resolved any issues, the next step is to verify that your sink drains properly. After putting everything back together, follow these simple steps to ensure proper drainage:
- Remove any debris: Before testing the drain, make sure there is no debris, such as food particles or hair, clogging the sink. Clearing any obstructions will give you an accurate assessment of the drainage.
- Run water: Turn on the faucet and let the water flow freely into the sink. Keep an eye on how quickly it drains. If the water accumulates or drains slowly, there might be an issue with the drainpipe or P-trap. In this case, you may need to disassemble the drain and check for any blockages.
- Check for gurgling sounds: As the water drains, listen for any gurgling sounds coming from the pipes. These noises may indicate inadequate venting or a ventilation issue. If you hear gurgling sounds consistently, it’s recommended to seek professional assistance.
By following these steps and conducting a thorough leak test and drainage assessment, you can ensure that your sink drain is functioning properly. Remember, taking the time to test and address any issues now will save you from potential headaches and costly repairs in the future.
Tip 1: Proper Maintenance For Longevity
Proper maintenance is key to ensuring the longevity of your sink drain system. By taking a few simple steps, you can prevent costly repairs and replacements down the line. Regular cleaning and maintenance can help you avoid clogs and leaks, keeping your drain performing optimally for years to come. Here are some tips to help you increase the lifespan of your sink drain system:
Increasing the lifespan of your sink drain system
It’s important to take a proactive approach to maintain your sink drain system. By following these tips, you can extend the lifespan of your drain:
- Be mindful of what goes down the drain: Avoid pouring grease, oil, or coffee grounds down the sink, as they can solidify and cause clogs. Instead, dispose of these substances in the trash.
- Use drain guards: Install drain guards or stoppers that catch food particles and debris to prevent them from entering the pipe.
- Run hot water regularly: Once a week, pour boiling water down the drain to help break down any buildup.
- Perform routine cleaning: Regularly clean the drain stopper and remove any accumulated debris. You can use a mixture of baking soda and vinegar to flush out any residue.
- Check for leaks: Inspect the drain pipes and connections for any signs of leaks. If you notice any drips or water pooling, it’s important to address them promptly to prevent further damage.
Regular cleaning and maintenance tips to prevent clogs and leaks
To keep your sink drain system in optimal condition and prevent clogs and leaks, follow these regular cleaning and maintenance tips:
- Wipe down the sink after each use: Ensure that no food particles or debris are left in the sink. Wiping it down with a sponge or cloth will help prevent buildup.
- Use a plunger: In case of a minor clog, a plunger can be an effective tool to dislodge the blockage. Apply firm pressure and repeat as necessary.
- Flush with hot water: Once a month, pour a kettle of hot water down the drain to help flush out any accumulated residue.
- Consider using enzymatic drain cleaners: Enzymatic cleaners can break down organic matter and help keep your drain clear. Follow the instructions on the product label for best results.
- Schedule professional inspections: Regularly hiring a professional plumber to inspect your sink drain system can help identify and address any underlying issues before they worsen.
How to keep your drain performing optimally in the long run
To maintain optimal performance from your sink drain in the long run, consider the following tips:
| Run cold water while using the disposal: | When using the garbage disposal, always run cold water to help solidify any food particles and facilitate their passage through the pipes. |
| Avoid chemical drain cleaners: | Chemical drain cleaners can be harsh and cause damage to the pipes. Instead, opt for natural alternatives or call a professional for stubborn clogs. |
| Regularly inspect the p-trap: | The p-trap is a curved section of pipe located beneath the sink that traps debris and prevents odors. Check it periodically for any blockages and clean as needed. |
| Repair leaks promptly: | If you notice any leaks in your sink drain system, it’s crucial to address them promptly. Ignoring leaks can cause water damage and lead to bigger problems. |
By following these maintenance tips, you can ensure that your sink drain system stays in excellent condition for years to come. With a little regular care and attention, you’ll be able to avoid frustrating clogs, leaks, and costly repairs. Take control of your sink drain’s longevity and enjoy peace of mind knowing that your plumbing is in great shape.
Tip 2: Troubleshooting Common Issues
When it comes to installing a sink drain, it’s important to be prepared for unexpected challenges that may arise during the process. From frequent clogs to slow drainage, there are several common issues that you may encounter. In this section, we will tackle these problems like a pro, providing you with solutions and troubleshooting tips to ensure a smooth installation.
Tackling common sink drain problems like a pro
Installing a sink drain can sometimes be complicated by common issues that are encountered by many homeowners. Fortunately, with the right knowledge and techniques, you can troubleshoot these problems with ease. Here are some of the most common sink drain problems and how you can tackle them like a pro:
Solutions to frequent clogs, slow drainage, and other common issues
Clogs and slow drainage are some of the most frequent issues that homeowners face when it comes to sink drains. Fortunately, there are solutions to these common problems that you can implement during the installation process. Here are some solutions to help you get rid of these pesky issues:
- Use a plunger: If you are dealing with a clog, using a plunger can often do the trick. Make sure to create a tight seal around the drain and plunge vigorously to dislodge the blockage.
- Try a drain snake: For stubborn clogs that cannot be cleared with a plunger, using a drain snake can be effective. Insert the snake into the drain and twist it to break up and remove the clog.
- Use baking soda and vinegar: A mixture of baking soda and vinegar can work wonders in unclogging drains. Pour a cup of baking soda down the drain, followed by a cup of vinegar. Allow the mixture to fizz and sit for about 15 minutes before flushing with hot water.
- Install a drain strainer: To prevent future clogs, consider installing a drain strainer. This simple device catches debris before it can enter the drain, reducing the likelihood of clogs.
Troubleshooting tips to handle unexpected challenges during installation
Despite careful preparation, sometimes unexpected challenges can arise during the installation of a sink drain. Here are some troubleshooting tips to help you handle these unexpected challenges and ensure a successful installation:
- Check for leaks: After installation, it’s crucial to check for any leaks. Use soapy water to test the connections for any bubbles that indicate a leak. Tighten any loose connections to resolve the issue.
- Ensure proper alignment: If you encounter difficulty in aligning the drainpipe and the plumbing under the sink, make sure to double-check the alignment. Adjust the pipes if necessary to ensure a proper fit.
- Consider plumbing codes: Each region may have specific plumbing codes that dictate the installation requirements. Familiarize yourself with these codes to ensure compliance and prevent any unforeseen issues down the line.
By being prepared for common issues and following these troubleshooting tips, you can successfully install a sink drain without experiencing any major setbacks. Remember to stay calm and patient throughout the process, and don’t hesitate to seek professional help if needed.
Tip 3: Upgrading To A High-Quality Sink Drain System
When it comes to installing a sink drain, it’s important to consider upgrading to a high-quality system. Elevating your sink drain game with high-quality components not only ensures durability but also enhances the overall functionality of your sink. In this section, we will explore the benefits of upgrading to a superior drain system and provide recommendations for top-notch sink drain products on the market.
Elevating your sink drain game with high-quality components
Upgrading to a high-quality sink drain system is essential for a smooth and efficient drainage process. Investing in superior components means you’ll have peace of mind knowing that your sink drain will be more durable and long-lasting.
When choosing the right components for your sink drain system, pay attention to features such as corrosion resistance, easy installation, and innovative design. High-quality sink drains often come with features like a streamlined push-to-open mechanism, adjustable height, and a removable basket strainer for easy cleaning. These components not only make your sink drain more efficient but also add a touch of sophistication to your kitchen or bathroom.
The benefits of upgrading to a superior drain system
Upgrading to a high-quality sink drain system offers numerous advantages:
- Enhanced durability: Investing in a superior drain system ensures that your sink will withstand heavy usage without any issues. This means less maintenance and fewer hassles in the long run.
- Improved functionality: High-quality sink drains feature innovative designs that allow for better water flow and prevent clogging. With a superior drain system, you can say goodbye to standing water in your sink and enjoy a more efficient draining process.
- Easy installation: Many high-quality sink drain systems are designed with easy installation in mind. This means you won’t have to spend hours deciphering complicated instructions or hiring a professional for the job. Simply follow the manufacturer’s guidelines and enjoy a hassle-free installation process.
Recommendations for top-notch sink drain products
When it comes to choosing the right sink drain products, there’s a wide range of options available on the market. Here are our top recommendations:
| Product | Features | Price |
|---|---|---|
| XYZ Sink Drain | Corrosion-resistant, push-to-open mechanism, adjustable height | $49.99 |
| ABC Premium Sink Drain | Removable basket strainer, streamlined design, easy installation | $59.99 |
| PQR Luxury Sink Drain | Stylish finish, anti-clogging design, durable construction | $79.99 |
These top-notch sink drain products offer a perfect combination of quality, functionality, and value for money. Choose the one that suits your needs and budget, and you’ll never have to worry about a faulty sink drain again.
By upgrading to a high-quality sink drain system, you can elevate both the aesthetics and functionality of your sink. Enjoy a durable and efficient draining process by investing in top-notch components that are built to last.
Frequently Asked Questions
What Is The Proper Way To Install A Sink Drain?
To install a sink drain properly, follow these steps: 1. Start by assembling the necessary tools and materials. 2. Carefully remove the old drain and clean the area. 3. Install the new drain assembly, ensuring a tight seal. 4. Connect the drain pipes securely, using the appropriate fittings.
5. Test the drain for any leaks and make necessary adjustments.
Do You Need Plumbers Putty For Sink Drain?
Yes, you need plumbers putty for sink drain installation. It helps create a watertight seal between the sink and the drain, preventing leaks. Apply a thin layer of putty around the drain flange before installing it.
Can I Use Silicone Instead Of Plumbers Putty?
No, it is not recommended to use silicone instead of plumber’s putty. Silicone is not specifically designed for plumbing applications and may not provide a proper seal. Plumbers putty is a better choice as it is specifically formulated for sealing joints and connections in plumbing fixtures.
How Do You Attach A Sink Drain To A Pipe?
To attach a sink drain to a pipe, follow these steps: 1. Insert the tailpiece into the sink drain opening. 2. Tighten the slip nut over the tailpiece to secure it. 3. Connect the P-trap to the tailpiece using slip nuts and couplings.
4. Position the P-trap and tighten the slip nut connections. 5. Connect the other end of the P-trap to the pipe using slip nuts and couplings.
Conclusion
Installing a sink drain may seem challenging, but with the right steps, it can be a straightforward process. By following the proper guidelines and using the correct tools, you can successfully complete this task. Remember to take your time, be patient, and follow each step carefully.
With the knowledge and skills gained from this blog post, you will be able to confidently install a sink drain in no time. Start transforming your kitchen or bathroom today!
