
To install a bathroom faucet and drain, begin by turning off the water supply, removing the old faucet and drain, and cleaning the sink surface. Then, install the new faucet and drain according to the manufacturer’s instructions, making sure to properly connect the water supply lines and tighten all connections.
Finally, test the faucet for any leaks and make any necessary adjustments. Introducing a new bathroom faucet and drain can give your bathroom a fresh look and improve its functionality. Whether you’re replacing an old faucet or installing a new one, this guide will walk you through the steps to ensure a smooth installation process.
By following these instructions, you’ll have a new faucet and drain installed in your bathroom in no time.
Getting Started: Tools And Materials Needed
When it comes to installing a new bathroom faucet and drain, having the right tools and materials is essential. Having everything you need right from the start will not only make the installation process smoother but also ensures that you achieve better results. In this section, we will discuss the essential tools and materials you will need for the project, as well as some recommended ones that can help you achieve even better results.
Essential tools and materials for the project
Before you begin the installation process, make sure you have the following essential tools and materials on hand:
- Adjustable wrench
- Bucket or container to catch water
- Plumber’s putty or silicone caulk
- Teflon tape
- Plumber’s tape
- Screwdrivers (flathead and Phillips)
- Channel locks or pliers
- Old towels or rags
- Bucket or container to catch water
- Basin wrench
- Plumbing cleaner
- Plumbing tape
- Plumbing wrench
Recommended tools and materials for better results
In addition to the essential tools listed above, there are a few recommended tools and materials that can help you achieve even better results:
- Plumbing snake: This tool is useful for unclogging any debris or build-up in the drain pipe.
- Plumbing heat shield: If you are installing a faucet near a wall that is prone to heat, using a heat shield can protect the wall from any potential damage.
- Extra-long supply lines: If your existing supply lines are old or in poor condition, it is recommended to replace them with extra-long supply lines to ensure a secure and leak-free connection.
- Plumber’s tape: Having an extra roll of plumber’s tape can never hurt. It is always good to have some on hand in case you need it during the installation process.
- Pipe cutter: If you need to cut any pipes during the installation process, a pipe cutter can make the job much easier and more precise.
Removing The Old Faucet And Drain
When it’s time to upgrade your bathroom faucet and drain, the first step is to remove the old ones. This may seem like a daunting task, but with the right approach, you can tackle it successfully. In this section, we will walk you through the steps to safely remove the old faucet and drain, as well as provide some tips to handle common challenges that may arise during the removal process.
Steps to safely remove the old faucet and drain
- Turn off the water supply: Before getting started, it is crucial to turn off the water supply to your bathroom. Look for the shut-off valves under the sink and turn them clockwise until they are fully closed. This will prevent any water from flowing when you disconnect the faucet and drain.
- Clear the area: Remove any items from under the sink to create a clear workspace. This will give you easy access to the faucet and drain and prevent any accidents or damage to your belongings.
- Disconnect the water lines: Use an adjustable wrench to loosen the nuts connecting the water supply lines to the faucet. Once loose, carefully remove the lines, making sure to catch any drips that may occur.
- Remove the faucet handles and spout: Depending on your faucet type, you may need to unscrew or pry off the handles. Once the handles are removed, locate the retaining nut securing the spout and loosen it. Gently pull the spout upwards to detach it from the faucet body.
- Undo the drain assembly: Under the sink, find the nut securing the drain assembly to the sink basin. Loosen this nut and carefully detach the drain assembly from the sink. You may need to use a wrench or pliers to loosen any stubborn connections.
- Inspect for any remaining connections: After removing the faucet and drain, take a moment to inspect the area for any remaining connections. Make sure that all components have been detached before proceeding with the installation of your new faucet and drain.
Tips for handling common challenges during removal
Removing an old faucet and drain can sometimes present challenges, but with the right approach, you can overcome them. Here are some tips to help you handle common challenges:
- Stuck nuts: If you encounter stubborn nuts that refuse to budge, try using a penetrating oil like WD-40 to loosen them. Allow the oil to penetrate for a few minutes before attempting to loosen the nut again.
- Rusted connections: Rusted connections can be difficult to deal with, especially if they have corroded over time. In such cases, applying heat using a hairdryer or heat gun can help expand the metal and make it easier to loosen the connections.
- Leaky connections: While disconnecting the water lines, it is common to encounter some leakage. To minimize this, keep a bucket or towel handy to catch any drips. Additionally, ensure that all connections are tightly sealed when installing the new faucet and drain.
- Difficult-to-reach areas: Under-sink areas can be cramped, making it challenging to access certain parts of the faucet and drain. Consider using a basin wrench or a pair of long-reach pliers to reach and loosen connections in tight spaces.
By following these steps and using the tips provided, you can confidently remove your old bathroom faucet and drain. Once you have successfully removed them, you will be ready to continue with the installation of your new faucet and drain, bringing a fresh look to your bathroom.
Choosing The Right Faucet And Drain
When it comes to installing a new bathroom faucet and drain, choosing the right ones is crucial for both functionality and aesthetics. A faucet and drain that don’t match your bathroom decor can stick out like a sore thumb and disrupt the overall look and feel of your space. Therefore, it’s important to consider a few key factors when selecting the perfect faucet and drain.
Considerations for selecting a new faucet and drain
There are several factors you should keep in mind when choosing a new faucet and drain for your bathroom. By taking these considerations into account, you can ensure that your new fixtures seamlessly blend with your existing decor while also providing the functionality you need.
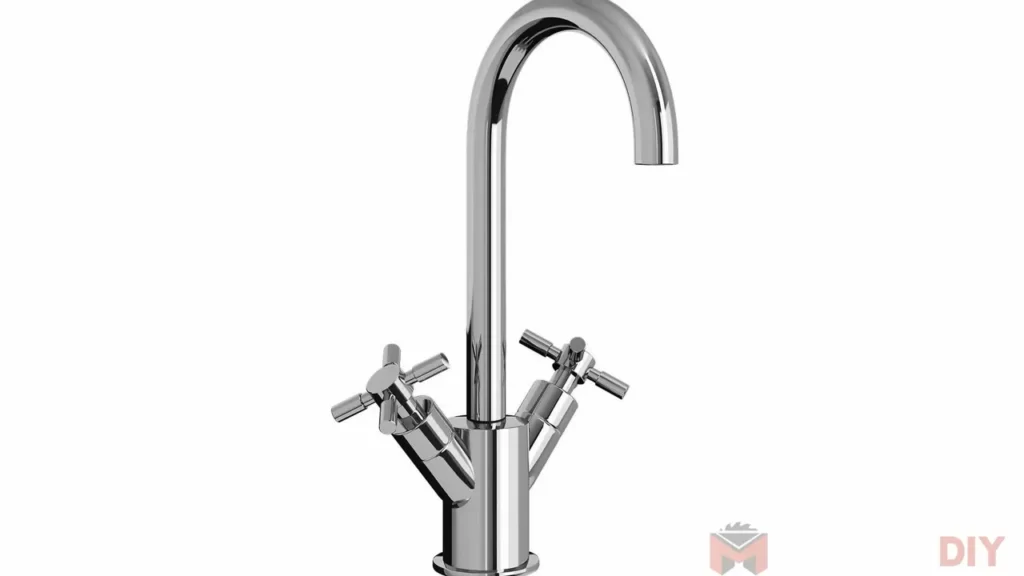
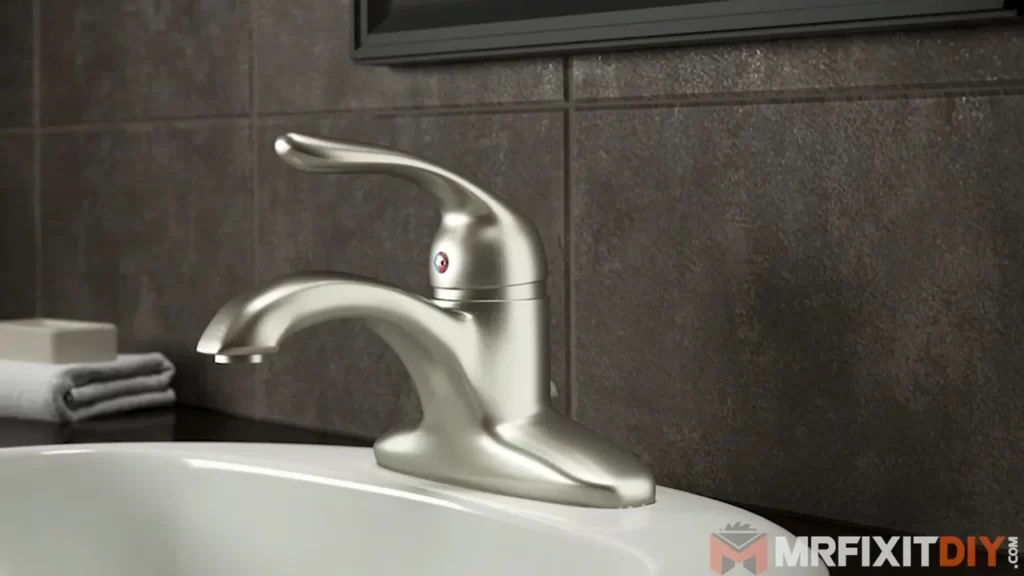
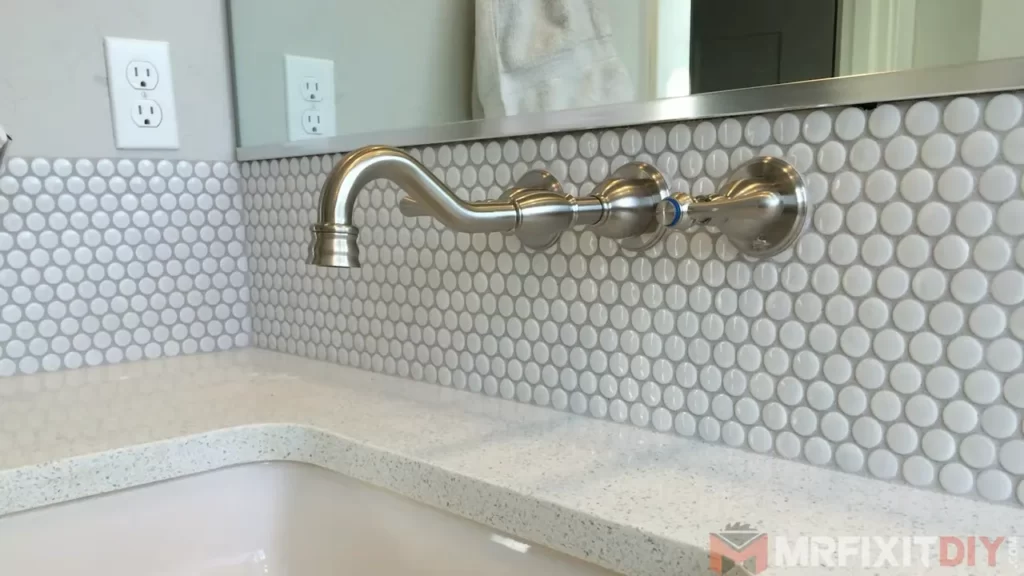
- Style and Finish: The style and finish of your faucet and drain should complement the overall design scheme of your bathroom. Whether your bathroom has a modern, traditional, or rustic look, it’s important to find fixtures that match the aesthetic. Consider the shape, handle design, and finish options available for the faucets and drains you are considering. Popular finishes include chrome, brushed nickel, and oil-rubbed bronze.
- Durability and Quality: Investing in a high-quality faucet and drain is essential for both longevity and performance. Look for fixtures made from durable materials like solid brass or stainless steel that resist corrosion and tarnishing. Ensure that the drain features a reliable stopper mechanism that won’t get stuck or cause drainage issues over time.
- Compatibility and Installation: Before purchasing a new faucet and drain, make sure they are compatible with your existing plumbing system. Measure the sink’s mounting holes and plumbing connections to ensure a proper fit. Additionally, consider the ease of installation. Some faucets and drains may require professional installation, while others come with detailed instructions for a DIY project.
- Water Efficiency: With increasing concern for water conservation, choosing a faucet that is water-efficient can not only reduce your water usage but also lower your utility bills. Look for faucets labeled with the WaterSense certification, which ensures that they meet strict water efficiency standards set by the Environmental Protection Agency (EPA).
Matching the style and finish with your bathroom decor
When it comes to making your bathroom look cohesive, matching the style and finish of the faucet and drain with your overall decor is key. By doing so, you can create a harmonious and visually appealing space.
To achieve this, consider the following:
- Color Palette: Take note of the dominant colors in your bathroom, such as the tile, countertops, or cabinetry. Choose a faucet and drain with a finish that complements these colors. For example, if you have silver accents in your bathroom, a chrome-finished faucet and drain would be a great choice.
- Design Style: Take into account the overall design style of your bathroom. If you have a sleek and contemporary bathroom, opt for a faucet and drain with clean lines and a minimalist design. On the other hand, if you have a traditional bathroom, consider fixtures with elegant curves and intricate detailing.
- Finish Consistency: Ensure that the faucet and drain have matching finishes. For instance, if you choose a brushed nickel faucet, select a brushed nickel drain as well. This consistency adds a polished look to your bathroom decor.
By following these guidelines and considering your specific needs, you can confidently choose a faucet and drain that not only enhances your bathroom’s functionality but also complements your personal style and creates a cohesive and aesthetically pleasing space.
Installing The New Faucet: Step-By-Step Guide
Replacing your bathroom faucet can be a DIY project that not only enhances the overall look of your bathroom but also improves functionality. In this step-by-step guide, we will walk you through the process of installing a new faucet and drain, ensuring a smooth and hassle-free installation. Let’s get started!
Preparing the sink and workspace for installation
Before diving into the installation process, it’s important to prepare your sink and workspace for a seamless installation. Here are a few steps you need to follow:
- Clear any clutter from the sink area and remove any items that may obstruct your work.
- Turn off the water supply to avoid any leaks or water damage during the installation.
- Place a towel or rag in the sink to prevent any small parts from falling into the drain.
- Inspect the sink for any debris or old putty. Remove any residue using a putty knife or scraper, ensuring a clean surface for installation.
Connecting the water supply lines and ensuring proper fittings
The next step involves connecting the water supply lines and ensuring that the fittings are secure. Follow these steps:
- Start by wrapping plumber’s tape around the threaded ends of the water supply lines to ensure a watertight seal.
- Insert the supply lines through the mounting holes in the sink.
- Secure the supply lines to the faucet using the provided nuts or connectors.
- Tighten the fittings with an adjustable wrench, ensuring a snug fit but avoiding over-tightening.
- Double-check the connections to ensure there are no leaks.
Mounting the faucet and securing it in place
Now it’s time to mount the new faucet and secure it in place. Follow these steps:
- Place the faucet into the mounting holes on the sink.
- Align the faucet correctly, ensuring that it sits straight and level.
- Tighten the mounting nuts underneath the sink with a basin wrench, ensuring the faucet is securely attached.
- Use a wrench or pliers to tighten the nuts until they are snug but be cautious not to overtighten and risk damaging the faucet or sink.
Testing and adjusting the faucet for optimum functionality
With the faucet securely in place, it’s time to test and adjust its functionality. Follow these steps:
- Turn on the water supply and check for any leaks around the connections.
- Turn the faucet handle(s) on and off to ensure smooth operation.
- Adjust the hot and cold water handles as needed.
- If you notice any leaks or issues, double-check the connections and tighten them if necessary.
- Finally, give the faucet a thorough cleaning to remove any fingerprints or debris.
Congratulations! You have successfully installed a new bathroom faucet and drain. Enjoy the enhanced look and functionality of your bathroom while saving money by doing it yourself. With these step-by-step instructions, you can confidently tackle any faucet installation project.

Installing The Drain: Expert Tips
Installing the drain is a crucial step in the process of installing a bathroom faucet. With the right tools and a little know-how, you can successfully complete this task and ensure a leak-free installation. In this section, we will explore expert tips for installing the drain, including understanding the different types of drains available, installing the drain assembly and ensuring a proper seal, and troubleshooting common issues during drain installation.
Understanding the different types of drains available
Before you begin the drain installation process, it’s essential to understand the different types of drains available. This knowledge will help you choose the right drain assembly for your bathroom faucet. Here are the most common types:
| Type | Description |
|---|---|
| Pop-up drain | A pop-up drain is a type of drain that can be opened or closed by pushing or pulling on a lever. It is a popular choice for bathroom sinks. |
| Grid drain | A grid drain is a drain with small holes or slots that allows water to drain while catching debris. It is commonly used in showers and tubs. |
| Toe-touch drain | A toe-touch drain is a drain that can be opened or closed by pushing it with your foot. It is an excellent option for those who prefer hands-free operation. |
Installing the drain assembly and ensuring a proper seal
Once you’ve selected the appropriate drain assembly for your faucet, it’s time to install it. Follow these steps to ensure a proper installation and a watertight seal:
- Begin by applying plumber’s putty or silicone caulk around the underside of the drain flange. This will create a watertight seal between the sink and the drain.
- Insert the drain flange into the designated hole in the sink, making sure it sits flush against the bottom of the sink.
- From underneath the sink, thread the drain body onto the flange. Use a wrench to tighten it securely but be careful not to overtighten, as this could damage the sink.
- Attach the drain tailpiece to the drain body, ensuring a tight connection. Use a slip nut and washer to secure the tailpiece.
- Finally, connect the other end of the tailpiece to the plumbing system using a slip nut and washer.
Troubleshooting common issues during drain installation
During the drain installation process, you may encounter certain issues that need troubleshooting. Here are some common problems and their solutions:
- If you notice leaks around the drain flange, it may indicate that the plumber’s putty or silicone caulk was not applied correctly. Remove the drain assembly, clean off the old putty or caulk, and reapply it before reinstalling the drain.
- If the drain is not draining efficiently, it could be due to a clog or an improper connection. Check for any obstructions and ensure all the connections are tight and secure.
- In case the drain lever or control mechanism is not functioning correctly, disassemble the drain assembly and inspect for any damages or misalignments. Fix or replace any faulty parts as needed.
By understanding the different types of drains, properly installing the drain assembly, and troubleshooting common issues, you can confidently complete the drain installation process for your bathroom faucet. Remember to double-check for leaks and ensure everything is functioning correctly before calling it a job well done.
Final Steps: Testing And Finishing Touches
Congratulations! You are nearing the end of your bathroom faucet and drain installation journey. The hard work is almost over, but there are a few crucial steps you don’t want to skip. In this section, we will guide you through the final steps: testing the faucet and drain for leaks and proper operation, and adding finishing touches to give your installation a polished look.
Testing the faucet and drain for leaks and proper operation
Once you have successfully connected the water supply lines and drain pipes, it’s vital to test your installation before declaring it complete. Testing for leaks and ensuring the faucet and drain are operating properly will help you avoid any potential issues down the road. Follow these steps to ensure everything is in perfect working order:
- Turn on the water supply to the faucet by gradually opening the shut-off valves. Keep an eye out for any leaks around the connections. If you notice any drips or leaks, tighten the connections as necessary.
- Next, run both hot and cold water from the faucet. Check if the water flow is smooth and consistent. Be sure to inspect the drain for any signs of clogging or slow drainage. If you encounter any issues, double-check the drain connection and clear any blockages.
- Further ensure proper operation by testing the faucet handles and any additional features such as a sprayer or detachable nozzle. Make sure they turn on/off smoothly and there are no leaks or drips when in use.
- If you have installed a pop-up drain, carefully push the stopper down to check if it closes tightly and holds water effectively. Release the stopper and verify that it opens freely to allow water to drain without any restrictions.
- Take a few moments to observe the area below the sink while the faucet is on and after you have turned it off. Ensure there are no leaks or signs of water pooling that could indicate a problem with the installation.
Adding finishing touches and cleaning up the workspace
With the faucet and drain tested and functioning flawlessly, it’s time to add those final touches that will elevate the overall appearance of your newly installed bathroom fixture. Follow these steps to give your installation that professional finishing touch:
- Clean up any debris or excess materials that may have accumulated during the installation process. Wiping down the area around the sink and removing any leftover caulk or adhesive will leave the space looking clean and tidy.
- Apply a bead of silicone caulk or plumber’s putty around the base of the faucet and where the drain meets the sink. This will provide a watertight seal and prevent any water from seeping into hidden areas.
- Reattach the decorative escutcheon plate if your faucet came with one. This plate sits beneath the handle and adds a sleek and finished look to your installation.
- Give the faucet and drain a final wipe down with a damp cloth to remove any smudges or fingerprints. This will help the fixtures shine and appear brand new.
By following these final steps, you can confidently complete your bathroom faucet and drain installation. Remember, testing for leaks and ensuring proper operation is crucial for the longevity and functionality of your new fixtures. Adding those finishing touches will give your installation that extra touch of professionalism. Now, step back and admire your hard work – you deserve it!
Maintenance And Care: Extending The Lifespan Of Your Faucet And Drain
Proper maintenance and care are essential for ensuring the longevity of your bathroom faucet and drain. By following routine maintenance practices and adopting effective cleaning and care tips, you can keep your faucet shiny, functional, and free from common issues that may arise over time. In this section, we will explore several ways to maintain and care for your bathroom faucet and drain, helping you extend their lifespan and avoid costly repairs or replacements.
Routine maintenance practices to prevent problems
Regular maintenance is key to preventing problems and ensuring the smooth operation of your bathroom faucet and drain. Here are some routine maintenance practices you should incorporate into your care regimen:
- Check for leaks: Periodically inspect the faucet for any signs of leakage. This can be done by examining the area around the base of the faucet and underneath the sink. If you notice any leaks, promptly address them to prevent further damage.
- Tighten loose fittings: Over time, fittings and connections may loosen, leading to faucet wobbling or leaks. Use a wrench or pliers to tighten any loose fittings, ensuring a secure connection.
- Clear debris from aerator: The aerator, located at the tip of the faucet, can accumulate mineral deposits or debris, affecting water flow. To prevent this, unscrew the aerator and soak it in vinegar for a few hours to dissolve any buildup. Then, rinse it thoroughly and reattach.
- Inspect and clean the drain: Regularly check the drain for any clogs or blockages. Remove hair, soap residue, or other debris using a drain snake or a plunger. This will help maintain proper drainage and prevent water backups.
- Inspect the seals and gaskets: Seals and gaskets play a crucial role in preventing leaks. Inspect them for wear and tear, replacing any damaged parts as needed. This simple step can save you from potential leakage issues.
Cleaning and care tips for maintaining a shiny and functional faucet
A clean and sparkling faucet not only enhances the overall appearance of your bathroom but also ensures its smooth functioning. Follow these cleaning and care tips to maintain a shiny and functional faucet:
- Regularly wipe down the faucet with a soft, non-abrasive cloth to remove dirt, fingerprints, and water spots. This prevents the accumulation of grime and keeps your faucet looking its best.
- Avoid using harsh chemicals or abrasive cleaners that may damage the finish. Instead, opt for mild soap or dishwashing liquid mixed with warm water for cleaning. Rinse thoroughly and dry with a soft cloth.
- For tougher stains or mineral deposits, apply a mixture of equal parts vinegar and water to the affected areas. Allow it to sit for a few minutes before gently scrubbing with a soft brush. Rinse thoroughly and dry.
- Regularly clean and replace the drain stopper to prevent buildup and ensure proper drainage. This will help maintain the functionality of your drain and prevent water backups.
- Inspect the drain flange for any buildup or blockage. Use a toothbrush or a small brush to clean the flange, ensuring debris does not impede proper drainage.
By adhering to these routine maintenance practices and implementing effective cleaning and care tips, you can extend the lifespan of your bathroom faucet and drain. Remember, regular maintenance and care not only keep your investment in top shape but also prevent costly repairs down the line.
Troubleshooting: Common Problems And Solutions
Installing a bathroom faucet and drain can be a rewarding DIY project, but it’s not without its fair share of challenges. From leaky faucets to clogged drains, there are a few potential issues that you may encounter along the way. In this section, we will explore some common problems and provide quick and effective solutions to help you troubleshoot and resolve them easily.
Identifying potential issues with the faucet and drain
Before diving into the solutions, it’s essential to identify the potential issues you may face with your bathroom faucet and drain. This will help you target the problem accurately and save time in finding the right solution. Here are a few common problems:
- Dripping faucet: A faucet that continues to drip even when fully closed can be a frustrating issue.
- Low water pressure: If you notice a decrease in water flow from your faucet, it could be due to low water pressure.
- Clogged drain: A clogged drain can lead to standing water in your sink, causing inconvenience and potential damage.
- Leaking connections: Leaks can occur around the connections between the faucet, drain, and supply lines.
Quick fixes for common problems encountered
Now that you’ve identified some potential issues, let’s explore quick fixes for these common problems:
1. Dripping faucet:
Start by checking the faucet’s handle and ensure it is fully closed. If that doesn’t solve the problem, you may need to replace the faucet’s cartridge or O-ring. These components can wear out over time and cause leakage.
2. Low water pressure:
One possible solution for low water pressure is to clean the aerator. Use a small brush and vinegar to remove any mineral deposits that may be clogging the aerator. If that doesn’t improve the water flow, you may need to consider checking the supply valves or contacting a plumber for further assistance.
3. Clogged drain:
To clear a clogged drain, you can start by using a plunger to create suction and dislodge any debris. If that doesn’t work, try a chemical drain cleaner or a homemade mixture of baking soda and vinegar. For stubborn clogs, you may require a drain snake or professional help.
4. Leaking connections:
If you notice leaks around the connections, check if they are properly tightened. Use pliers to ensure the connections are snug. If the leaks persist, you may need to replace the washers, gaskets, or supply lines.
Remember, if you are unsure or uncomfortable handling any of these troubleshooting tasks, it’s always best to consult a professional plumber to avoid causing further damage or voiding any warranties. By addressing these common problems promptly, you can ensure a smoothly functioning bathroom faucet and drain.
Frequently Asked Questions On
Can I Install Bathroom Faucet Myself?
Yes, you can install a bathroom faucet yourself. It’s a DIY task that can be done easily with basic tools and step-by-step instructions. Just make sure to turn off the water supply, follow the manufacturer’s guidelines, and double-check for leaks after installation.
How To Install Bathroom Drain?
To install a bathroom drain, first gather the necessary tools such as a drain kit, pliers, and a wrench. Then, start by removing the old drain and cleaning the area. Next, attach the new drain and secure it tightly using the wrench.
Finally, test the drain to ensure proper functionality.
How Do You Connect A Bathroom Sink Drain To Plumbing?
To connect a bathroom sink drain to plumbing, follow these steps: 1. Remove the old drain assembly. 2. Apply plumber’s putty to the new drain flange. 3. Insert the drain flange into the sink drain hole and tighten the nut underneath.
4. Connect the P-trap to the drain pipe, tightening the slip nuts. 5. Test for leaks by running water into the sink.
Does A Faucet Have To Be Over The Drain?
Yes, a faucet should be installed over the drain to allow water to flow correctly and prevent splashing or water damage.
Conclusion
To wrap it up, installing a bathroom faucet and drain may seem daunting at first, but with the right tools and steps, it can be a straightforward process. By following the detailed instructions provided in this blog post, you can successfully complete the installation and enjoy the benefits of a functional and stylish bathroom fixture.
Remember to turn off the water supply and take your time to ensure everything is properly connected. Happy DIY-ing!