
To install a bathroom sink stopper, first, remove the nut securing the old stopper, then insert the new stopper and tighten the nut securely. Are you planning to install a new bathroom sink stopper?
Whether you’re replacing a worn-out stopper or upgrading to a more functional one, installing a bathroom sink stopper is a straightforward process. In this guide, we will walk you through the steps to install a bathroom sink stopper easily. By following these simple instructions, you can have a fully functioning sink stopper in no time.
So, let’s get started and transform your bathroom sink into an efficient and convenient fixture.
Before You Begin
Before you begin the process of installing a bathroom sink stopper, it’s important to gather the necessary tools and materials and clear the workspace. Following these steps will ensure a smooth installation and help you avoid any unnecessary delays or complications. Let’s dive into the details:
Gather the necessary tools and materials
Before starting the installation, make sure you have all the tools and materials required for the job. This will help you work efficiently and prevent any interruptions.
| Tools | Materials |
|---|---|
|
|
Clear the workspace
Once you have all the necessary tools and materials ready, it’s important to prepare your workspace before starting the installation process. Clearing the area will provide you with enough space to work comfortably and help prevent any accidents or damage to your bathroom fixtures.
Here are a few steps to clear the workspace effectively:
- Remove any personal items or objects from the sink area to avoid them getting in the way.
- Place a towel or drop cloth on the floor below the sink to protect it from any debris or water that may drip during the installation process.
- Turn off the water supply to the sink by closing the shut-off valve located under the sink.
By following these steps and ensuring you have the necessary tools and materials ready, you’ll be well-prepared to tackle the installation of a bathroom sink stopper. Keeping your workspace clear and organized will make the process more efficient and help you complete the installation without any hassles.
Removing The Old Stopper
Removing the old stopper is a crucial step when installing a new bathroom sink stopper. This allows you to properly clean the drain and ensures your new stopper fits securely in place. In this section, we will walk you through the process of removing the old stopper, starting with locating the stopper assembly.
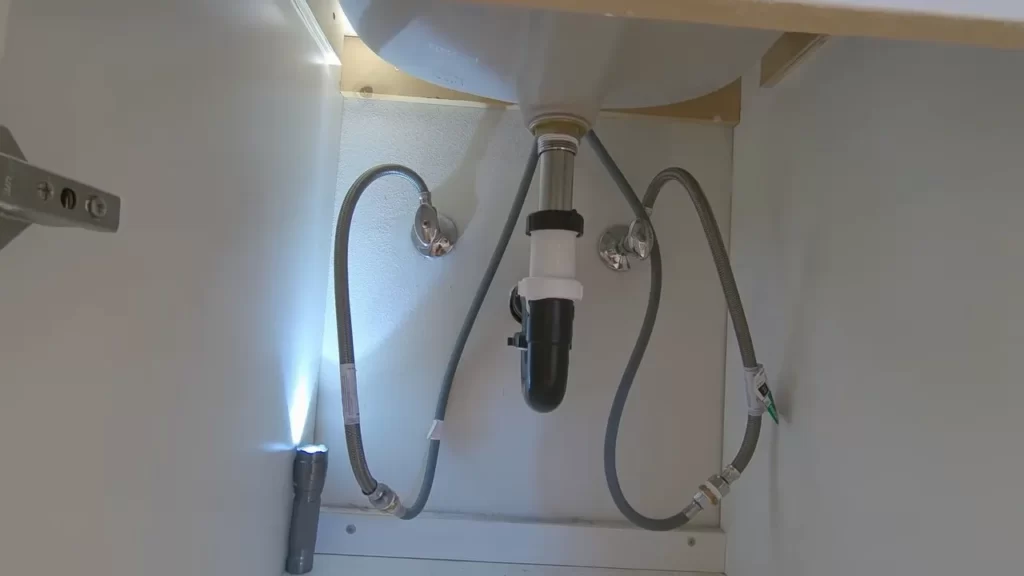
Locate the stopper assembly
The first step to removing your old stopper is locating the stopper assembly. The stopper assembly is typically located underneath the sink, near the back of the drain. Look for a horizontal rod that extends from the sink’s drainpipe. This rod is connected to the stopper, allowing you to open and close the drain.
Disconnect the stopper from the pivot rod
Once you’ve located the stopper assembly, you’ll need to disconnect the stopper from the pivot rod. To do this, you’ll need to locate the small metal clip or pin that connects the stopper to the rod. Use a pair of pliers or your fingers to remove the clip or pin, allowing you to release the stopper from the rod.
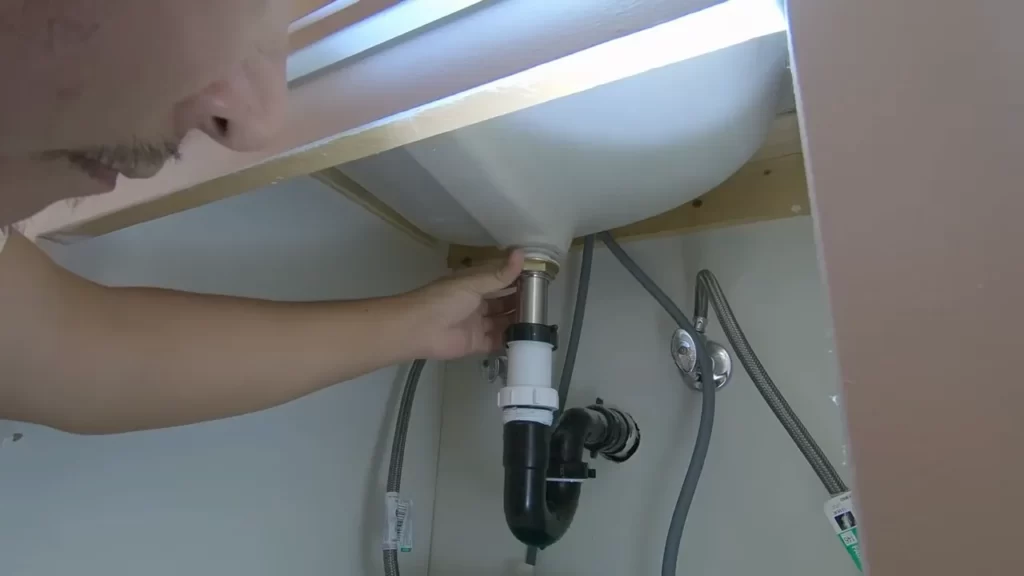
Remove the pivot rod from the drainpipe
With the stopper disconnected, you can now remove the pivot rod from the drainpipe. This rod is responsible for controlling the movement of the stopper. To remove it, look for a nut or connector that secures the rod to the drainpipe. Loosen the nut or connector using a wrench or pliers, then carefully remove the pivot rod from the drainpipe.
By following these steps, you can easily remove the old stopper from your bathroom sink. Make sure to properly clean the drain before installing the new stopper to ensure a secure fit. In the next section, we will guide you through the process of installing a new bathroom sink stopper.
Choosing The New Stopper
When it comes to installing a bathroom sink stopper, one of the first steps is choosing the right stopper for your sink. This may seem like a simple task, but there are actually a few important factors to consider when making your selection. In this section, we will explore how to determine the type of stopper you need, consider different materials and finishes, and select the appropriate size for your sink.
Determine the type of stopper you need
The first step in choosing a new bathroom sink stopper is to determine the type that will work best for your sink. Some common options include:
- Pop-up stoppers
- Flip-top stoppers
- Push-pull stoppers
- Basket strainers
Each type of stopper operates differently and has its own unique advantages. Consider factors such as ease of use, durability, and maintenance when making your decision.
Consider different materials and finishes
Once you have determined the type of stopper you need, it’s time to consider the materials and finishes available. This will not only affect the overall aesthetic of your sink but also its durability and longevity. Some common materials and finishes for stoppers include:
| Material | Finish |
|---|---|
| Stainless steel | Polished |
| Brass | Antique |
| Plastic | Chrome |
Consider the existing fixtures in your bathroom and choose a material and finish that complements the overall design. Additionally, keep in mind that certain materials may require more maintenance or be more prone to wear and tear.
Select the appropriate size for your sink
Lastly, when choosing a bathroom sink stopper, it’s crucial to select the appropriate size for your sink. Measure the diameter of your sink’s drain opening to ensure a proper fit. Keep in mind that stoppers come in a variety of sizes to accommodate different sink types and designs.
By taking into account the type of stopper you need, the materials and finishes available, and the appropriate size for your sink, you can confidently choose a new stopper that will not only function properly but also enhance the overall look of your bathroom.
Installing The New Stopper
Installing the new stopper for your bathroom sink is a straightforward process that can be completed with just a few simple steps. By following these instructions, you can have your sink stopper functioning in no time. Let’s dive into the details of how to install a bathroom sink stopper.
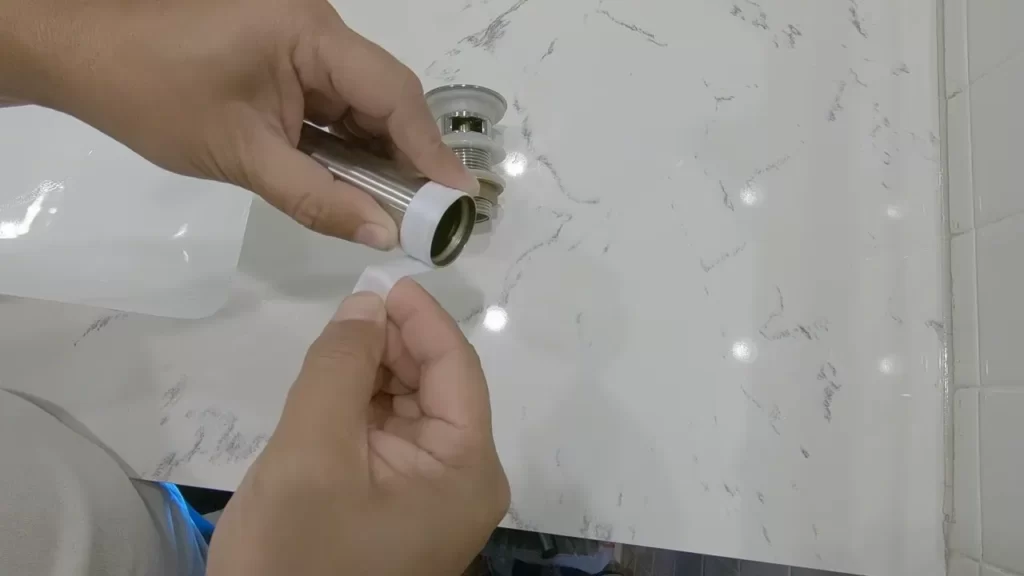
Prepare the stopper assembly
Before you begin the installation process, it’s important to prepare the stopper assembly. Start by gathering all the necessary tools and materials, such as a new stopper, gasket, and pivot rod. Ensure that you have the correct size and type of stopper for your sink. Double-check that everything is in working order and free from any defects or damages.
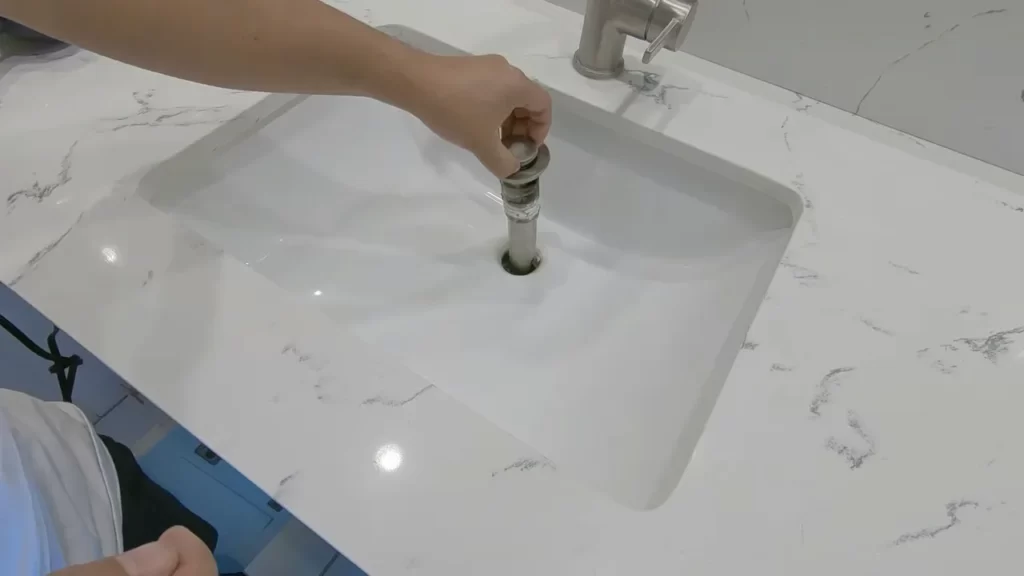
Insert the stopper into the drain opening
Once you’ve prepared the stopper assembly, it’s time to install it into the drain opening. Begin by positioning the stopper in the open position, making sure it aligns properly with the drain. Insert the stopper into the drain, making sure it fits snugly without any gaps. This will prevent any water leakage when the sink is in use. Test the stopper by manually raising and lowering it to ensure it moves freely and without any obstructions.
Reattach the pivot rod to the drainpipe
After inserting the stopper into the drain opening, it’s time to reattach the pivot rod to the drainpipe. Locate the pivot rod assembly underneath the sink and remove any debris or buildup that may hinder its proper functioning. Align the pivot rod with the opening in the stopper assembly and secure it in place using the appropriate hardware or mechanism provided. Ensure that the pivot rod is connected securely but also allows the stopper to move up and down smoothly. Test the stopper once again to confirm it opens and closes as intended.
In conclusion, installing a new bathroom sink stopper involves preparing the stopper assembly, inserting the stopper into the drain opening, and reattaching the pivot rod to the drainpipe. By following these simple steps, you can have a properly functioning sink stopper in no time. Enjoy the convenience and functionality of your newly installed bathroom sink stopper!
Adjusting The Stopper Mechanism
Once you have successfully installed a bathroom sink stopper, it is important to ensure that it is adjusted properly for optimal functioning. This involves testing the movement of the stopper, making necessary adjustments, and ensuring a tight seal when the stopper is closed.
Test the stopper’s movement
The first step in adjusting the stopper mechanism is to test its movement. To do this, simply push the stopper down and release it to see if it moves smoothly. If you notice any resistance or if it doesn’t move freely, adjustments may be necessary.
Make necessary adjustments for proper functioning
When it comes to adjusting the stopper mechanism, there are a few different factors to consider. One of the most common adjustments involves the linkage rod, which connects the stopper to the control lever. If the stopper doesn’t open or close fully, you may need to adjust the length of the linkage rod.
To adjust the length of the linkage rod, locate the adjustable clevis on the rod. Loosen the set screw on the clevis and slide the rod up or down until the stopper moves smoothly and closes tightly. Once you have made the necessary adjustment, tighten the set screw to secure the clevis in place.
Another adjustment that may be necessary is to ensure that the stopper is properly aligned with the drain opening. If the stopper is crooked or doesn’t seal tightly, it may need to be repositioned. To do this, remove the stopper from the drain and adjust its position until it aligns properly with the opening. Then, reinstall the stopper and test its movement and seal.
Ensure a tight seal when the stopper is closed
Properly adjusting the stopper mechanism also involves ensuring a tight seal when the stopper is closed. A loose or inadequate seal can result in water leakage and drainage issues. To ensure a tight seal, inspect the stopper for any visible gaps between its rubber surface and the drain opening. If you notice any gaps, adjust the stopper’s position or tighten any adjustable components to eliminate them.
Additionally, you can apply a thin layer of plumber’s putty around the edges of the drain opening before reinstalling the stopper. This will provide an extra seal and prevent any potential leakage.
By following these steps and making the necessary adjustments, you can ensure that your bathroom sink stopper functions properly, allowing you to enjoy a hassle-free sink draining experience.
Troubleshooting Tips
Installing a bathroom sink stopper may seem like a simple task, but sometimes issues can arise that require troubleshooting. In this section, we will explore common problems that you might encounter when installing a bathroom sink stopper and their respective solutions. From dealing with leaks or loose connections to addressing issues with stopper movement, we’ve got you covered!
Common problems and their solutions
When installing a bathroom sink stopper, it is not uncommon to encounter certain problems. Here are some of the most common issues you might come across and how to solve them:
| Problem | Solution |
|---|---|
| The stopper is not sealing properly | 1. Check if there are any debris or hair clogs in the drain. Remove them using a drain cleaning tool. 2. If the stopper has an adjustable linkage, adjust it to ensure a tight seal. 3. Apply plumber’s putty around the stopper’s sealing area to improve the seal. |
| The stopper is difficult to move or gets stuck | 1. Clean the stopper and its housing thoroughly to remove any grime or buildup. 2. Lubricate the moving parts with a silicone-based lubricant to improve movement. 3. Replace the stopper if it is damaged or worn out. |
| The stopper is making a rattling noise | 1. Check if the stopper is properly connected to the linkage. Adjust it if necessary. 2. Ensure that the stopper is securely fastened to the overflow plate. 3. Tighten any loose screws or connections. |
Dealing with leaks or loose connections
If you notice leaks or loose connections during or after installing a bathroom sink stopper, here’s what you can do to address these issues:
- Check all the connections between the sink, stopper, and drain pipes. Tighten any loose connections using a wrench or pliers.
- If there is a significant amount of leakage, consider applying a small amount of thread seal tape to the threaded connections for an extra seal.
- Inspect the rubber gaskets, washers, or O-rings. If they are damaged or worn out, replace them with new ones.
- If the leakage persists, it might be necessary to disassemble the drain assembly and reassemble it, ensuring that everything is properly aligned and tightened.
Addressing issues with stopper movement
If you are experiencing difficulties with the movement of the stopper, follow these steps to troubleshoot the problem:
- Remove the stopper and clean it thoroughly. Look for any signs of damage or wear.
- Inspect the linkage mechanism for any misalignment or bent components. Adjust or replace them as needed.
- Check if the stopper is hitting any obstructions underneath the sink. Trim or remove any interfering objects.
- Apply a thin layer of silicone lubricant to the moving parts to facilitate smooth movement.
- If the stopper still doesn’t move properly, consider replacing it with a new one.
By following these troubleshooting tips, you’ll be able to overcome various issues that may arise when installing a bathroom sink stopper. Remember to be patient and take your time during the troubleshooting process to ensure a successful installation.
Cleaning And Maintenance
Proper cleaning and maintenance of your bathroom sink stopper are essential for keeping it in good working condition and preventing clogs. By following a few simple steps, you can ensure that your stopper functions smoothly and lasts for years to come.
Regular cleaning to prevent clogs
To prevent clogs from occurring in the first place, it’s crucial to establish a routine cleaning schedule for your bathroom sink stopper. By regularly cleaning your stopper, you can remove any hair, soap scum, or other debris that may have accumulated and potentially cause a blockage.
Here’s a simple cleaning process to follow:
- Detach the stopper from the sink drain.
- Rinse the stopper with warm water to remove any loose debris.
- Use a gentle brush or cloth to scrub away any stubborn residue.
- Rinse the stopper again to ensure it’s free from any cleaning products.
- Reattach the stopper to the sink drain.
By incorporating this quick and easy cleaning routine into your regular bathroom cleaning schedule, you can minimize the risk of clogs and keep your sink stopper functioning optimally.
Removing debris from the stopper mechanism
In addition to regular cleaning, it’s essential to periodically remove any debris that may have accumulated within the stopper mechanism. Over time, hair, soap residue, and other small items can get trapped in the mechanism, causing it to become stuck or preventing it from functioning correctly.
Follow these steps to remove debris from the stopper mechanism:
- Detach the stopper from the sink drain.
- Inspect the stopper mechanism for any visible debris.
- Using a pair of tweezers or a small brush, carefully remove the debris.
- Rinse the stopper mechanism with warm water to ensure it’s thoroughly clean.
- Reattach the stopper to the sink drain.
Regularly checking and clearing the stopper mechanism will help maintain its functionality and prevent any unexpected issues from arising.
Maintaining the stopper’s finish and appearance
To keep your bathroom sink stopper looking its best, it’s important to maintain its finish and appearance. Depending on the material of your stopper, there are different methods you can use to ensure its longevity.
Here are a few tips to help you maintain the stopper’s finish and appearance:
- For chrome or stainless steel stoppers, wipe them down with a soft cloth dampened with a mild soap solution. This will remove any dirt or fingerprints and restore their shine.
- For porcelain or ceramic stoppers, use a non-abrasive cleaner to remove any stains or discoloration. Rinse thoroughly and dry with a soft cloth.
- If your stopper has a decorative finish, such as brushed nickel or oil-rubbed bronze, be cautious not to use any abrasive cleaners that could damage the finish. Instead, use a mild soap solution and a soft cloth to clean and maintain its appearance.
By following these maintenance tips, you can keep your bathroom sink stopper looking beautiful and ensure its durability over time.
Frequently Asked Questions
How Do I Attach My Bathroom Sink Stopper?
To attach your bathroom sink stopper, first remove the old stopper by unscrewing it or pulling it out. Then, insert the new stopper into the drain hole and secure it in place by tightening the retaining nut or screw. Test the stopper to ensure it moves up and down smoothly.
Can You Just Replace Stopper In Bathroom Sink?
Yes, you can simply replace the stopper in your bathroom sink. It’s a straightforward process that can be done easily.
How Do You Use A Pop-Up Sink Stopper?
To use a pop-up sink stopper, simply push it down to close the drain and prevent water from flowing. To open the drain, pull up on the stopper. It’s that easy!
How Do You Install A Pop-Up Tub Drain Stopper?
To install a pop-up tub drain stopper: 1. Remove the old stopper by unscrewing or pulling it out. 2. Insert the new stopper into the drain hole. 3. Screw or push the stopper until it securely fits. 4. Test the stopper by filling the tub with water.
5. Adjust the stopper if needed to ensure it seals properly.
Conclusion
Installing a bathroom sink stopper is a simple and essential task that can prevent water wastage and keep your sink in prime condition. By following the step-by-step guide provided in this blog post, you can easily accomplish this DIY task without any professional assistance.
So, go ahead and give it a try! A functional bathroom sink stopper will not only enhance the functionality of your sink but also save you money in the long run. Start installing your new bathroom sink stopper today!