
To install a new bathtub drain, first, remove the old drain strainer using a drain key or pliers. Then, clean the drain flange surface and apply plumber’s putty or silicone caulk.
Finally, screw the new drain strainer into place and tighten it securely. The installation process can be completed within a few simple steps. A new bathtub drain can be installed by following a few simple steps. Start by removing the old drain strainer using a drain key or pliers.
Next, ensure a clean surface by cleaning the drain flange area and applying plumber’s putty or silicone caulk. Finally, screw the new drain strainer into place and tighten it securely. With these steps, you can easily install a new bathtub drain and enjoy a functional and well-maintained bathroom fixture.
Factors To Consider When Selecting A Bathtub Drain
When it comes to choosing a new bathtub drain, there are several factors that you should consider. The right drain can not only enhance the functionality of your bathtub but also add a touch of style to your bathroom. In this section, we will explore three important factors that you should keep in mind when selecting a bathtub drain: drain size compatibility, material and durability, and types of drain mechanisms.
Drain Size Compatibility
One of the first things you should consider when selecting a bathtub drain is the drain size compatibility. The drain should be compatible with the size of your bathtub, as well as the plumbing system in your home. It is important to ensure that the drain size matches the drain opening in your bathtub to ensure a proper fit. Installing a drain that is too large or too small can lead to leaks or drainage issues.
Material and Durability
The material and durability of the bathtub drain are crucial factors to consider. You want to choose a drain that is made from high-quality and durable materials that can withstand constant exposure to water and chemicals commonly used in bathrooms. The drain should also be resistant to corrosion and rust, ensuring its longevity. Common materials for bathtub drains include stainless steel, brass, and plastic.
Types of Drain Mechanisms
Another important factor to consider is the type of drain mechanism you prefer. There are different types of drain mechanisms available, each with its own advantages and disadvantages. The two most common types of bathtub drain mechanisms are pop-up drains and trip lever drains.
A pop-up drain is a popular choice as it allows you to easily open and close the drain by simply pressing or pulling on a lever or knob. This type of drain mechanism is easy to use and provides a tight seal, preventing water from leaking out of the bathtub.
A trip lever drain, on the other hand, uses a lever or handle that you need to manually lift or lower to open or close the drain. While this type of drain may require a bit more effort to operate, it offers a traditional and classic look to your bathtub.
Before making a decision, it is important to carefully consider the advantages and disadvantages of each type of drain mechanism, as well as your personal preferences and needs.
In conclusion, when selecting a new bathtub drain, it is essential to consider drain size compatibility, material and durability, and the type of drain mechanism. By taking into account these factors, you can choose a drain that not only fits your bathtub perfectly but also meets your style and functionality requirements.
Measure Your Bathtub For The Proper Drain Size
Installing a new bathtub drain may seem like a daunting task, but with the right measurements, you can ensure a perfect fit. Before diving into the installation process, it is crucial to measure your bathtub to determine the proper drain size. This will help you find the right drain for your specific bathtub, ensuring a leak-free and secure installation.
Tools needed for measurement
When measuring your bathtub for a new drain, it’s essential to have the right tools on hand to get accurate measurements. Here are the tools you’ll need:
- Tape measure
- Permanent marker
Step-by-step measuring process
Follow these simple steps to measure your bathtub correctly, ensuring a proper drain size:
- Start by cleaning the bathtub thoroughly to remove any dirt or debris that may interfere with the measurements.
- Using a tape measure, measure the width of the drain opening on the bottom of the bathtub. Make sure to measure from the inside edges of the opening for accurate dimensions. Note down this measurement.
- Next, measure the length of the drain opening by starting from the inside edge of one end and extending the tape measure to the inside edge of the opposite end. Note down this measurement as well.
- Once you have both the width and length measurements, it’s time to determine the depth of the drain opening. Measure from the bottom of the tub to the top of the drain hole. This measurement will ensure that your new drain fits snugly.
- Finally, mark the measurements on the bathtub using a permanent marker. This will serve as a reference during the installation process and help you determine the proper drain size.
By following these step-by-step instructions and accurately measuring your bathtub, you’ll be able to select the right drain size for your installation project. Remember to double-check your measurements before purchasing a new drain to ensure a perfect fit.
Shop For The Right Bathtub Drain
When it comes to installing a new bathtub drain, it’s essential to choose the right one that not only meets your needs but also enhances the functionality and appearance of your bathtub. To ensure you make the best choice, follows these steps when shopping for a new bathtub drain.
Research Different Drain Options
Before making any purchase, it’s crucial to conduct thorough research on the different drain options available to you. Start by understanding the types of drains suitable for your bathtub. Common options include push-pull drains, pop-up drains, toe-tap drains, and trip-lever drains. Each type offers unique features and functionalities, so take the time to learn about them.
Compare Features and Prices
Once you’ve familiarized yourself with the various types of drains, it’s important to compare their features and prices. Consider what features are important to you, such as easy installation, durability, and ease of use. Take note of any additional features like built-in clog prevention mechanisms or corrosion-resistant materials. Keep your budget in mind as well, comparing prices to ensure you are getting the best value for your money.
Consider Customer Reviews and Ratings
Customer reviews and ratings can provide valuable insights into the performance and quality of a bathtub drain. Look for feedback from individuals who have already installed the drain you are considering. Pay attention to both positive and negative reviews, as they can help you identify potential issues or concerns. Aim for a drain that consistently receives positive feedback, demonstrating its reliability and satisfaction among users.
In conclusion, selecting the right bathtub drain requires research, comparison, and consideration of customer reviews and ratings. By following these steps, you’ll be well-equipped to find a drain that suits your needs, enhances your bathing experience, and ensures the functionality and longevity of your bathtub.
Gather The Necessary Tools And Supplies
Before you dive into installing a new bathtub drain, it’s important to gather all the necessary tools and supplies. Having everything you need within reach will make the installation process much smoother and efficient. To help you get started, here’s a breakdown of the tools and supplies you’ll need:
List of Required Tools
Let’s begin by familiarizing ourselves with the essential tools you’ll need for this project. Having these tools ready and easily accessible will save you time and frustration:
- Adjustable Wrench: This versatile tool will come in handy for loosening and tightening various plumbing connections.
- Plumber’s Putty Knife: A putty knife with a flexible blade is perfect for removing old putty or caulk around the drain.
- Hacksaw: You may need to cut through pipes during the installation process, and a handheld hacksaw will do the job.
- Screwdriver: Both a flathead and a Phillips screwdriver are typically needed for different types of screws and fasteners you might encounter.
- Teflon Tape: Also known as plumber’s tape, this thin white tape is essential for creating watertight seals when connecting pipes.
- Pliers: A good pair of pliers will help you grip and twist plumbing fittings securely.
- Bucket or Container: Having a container nearby will be useful for catching any water or debris that may spill during the installation.
Recommended Supplies
In addition to the tools mentioned above, there are a few supplies that are highly recommended for a successful bathtub drain installation:
- New Bathtub Drain Kit: To ensure you have all the necessary components for a proper installation, it’s best to purchase a complete bathtub drain kit.
- Plumber’s Putty or Silicone Caulk: Depending on the type of drain kit you choose, you’ll need either plumber’s putty or silicone caulk to create a watertight seal around the drain.
- Pipe Cleaner or Brush: Before installing the new drain, it’s a good idea to clean the existing pipes to remove any debris or build-up.
- Rags or Towels: Keep some rags or towels nearby to wipe away excess water or clean up any messes that may occur during the installation process.
- Plumbing Tape Measure: Accurate measurements are crucial when it comes to installing a bathtub drain, so having a tape measure on hand will ensure you get it right the first time.
By gathering these essential tools and recommended supplies, you’ll be fully prepared to take on the task of installing a new bathtub drain. So, let’s get started!
Prep The Bathtub Area
Clear the space around the bathtub
Before you begin the installation process, it’s essential to clear the space around the bathtub. This will ensure you have enough room to work comfortably and prevents any accidents or obstructions. Remove any bathroom accessories or items such as soap dishes, shower caddies, or curtains that may interfere with the installation process.
Protect surrounding surfaces
When installing a new bathtub drain, it’s crucial to protect the surrounding surfaces to prevent any damages or stains. Here are some steps to follow:
- Cover the floor around the bathtub with a drop cloth or plastic sheeting. This will protect the flooring from any potential scratches, spills, or debris during the installation process.
- Apply painter’s tape or adhesive tape along the edges of the bathtub, where it meets the walls and tiles. This will create a barrier and prevent any accidental scratches or marks on the surrounding surfaces.
By taking these precautions, you can ensure that the installation process goes smoothly and without any unwanted damages to your bathroom.
Remove The Old Bathtub Drain
Removing the old bathtub drain is a crucial step in installing a new one. Whether you’re upgrading your bathroom or dealing with a faulty drain, this guide will walk you through the process. By following these steps and troubleshooting tips, you’ll be able to remove the old drain safely and efficiently.
Steps to safely remove the old drain
- 1. Prepare the workspace by removing any surrounding debris or items that may hinder your access to the drain.
- 2. Locate the cover plate of the drain, which is usually located in the center of the bathtub. Use a screwdriver to remove the screws securing the cover plate.
- 3. Once the cover plate is removed, you should be able to see the drain flange. This is the top part of the drain that is visible from inside the tub.
- 4. Use an adjustable wrench to loosen the drain flange by turning it counterclockwise. Apply gentle pressure and ensure a firm grip on the wrench to prevent slipping.
- 5. Keep turning the wrench until the drain flange is completely loose and can be lifted out of the bathtub.
- 6. Use your hand or a pair of pliers to carefully extract the drain flange from the bathtub. Be cautious not to scratch the surface of your tub.
- 7. Inspect the area around the drain pipe for any obstructions or debris. Clean the pipe thoroughly if necessary.
- 8. Once the drain flange is removed, the old drain assembly should be easily accessible. Use pliers or a drain removal tool to unscrew the old drain assembly from the drain pipe.
Common challenges and troubleshooting tips
While removing the old bathtub drain, you might encounter a few challenges. Here are some troubleshooting tips to help you overcome them:
1. Stripped screws:
If the screws securing the cover plate are stripped and cannot be removed with a screwdriver, you can use a screw extractor to grip and remove the screw.
2. Stuck drain flange:
If the drain flange is stuck and won’t turn, applying penetrating oil or heat with a hairdryer can help loosen it. Tap lightly with a rubber mallet to break any corrosion or rust that may be causing the resistance.
3. Stubborn drain assembly:
If the old drain assembly is difficult to unscrew, applying heat or using a pipe wrench can provide extra leverage. Keep in mind that excessive force may damage the drain pipe, so use caution.
By following these steps and troubleshooting tips, you’ll be well-equipped to remove the old bathtub drain and take the first step towards installing a new one.
Read The Instructions And Familiarize Yourself With The Drain Components
When installing a new bathtub drain, it’s crucial to start by thoroughly reading the instructions provided with the drain kit. Regardless of your previous experience with plumbing projects, each drain may have its own unique components and installation requirements. Familiarizing yourself with these components and understanding their functions will help ensure a smooth installation process.
Understanding the Different Parts of the Drain
To install a new bathtub drain successfully, you need to have a clear understanding of the various parts that make up the drain system. It’s essential to know the function of each component and how they fit together to create a reliable and efficient drainage system for your bathtub. Here’s a breakdown of the different parts you may encounter:
- Drain Flange: This is the visible part of the drain that sits on top of the bathtub, providing an opening for water to flow out.
- Overflow Plate: The overflow plate is located near the top of the bathtub’s sidewall and prevents the bathtub from overflowing. It usually includes a lever or plate that allows you to open or close the drain.
- Strainer: The strainer is a removable cover that helps prevent debris from clogging the drain. It typically features a series of small holes that allow water to pass through while catching any solid particles.
- Stopper: The stopper is responsible for stopping or allowing the water to drain. It can be controlled by either a lever behind the overflow plate or a separate mechanism located at the bottom of the drain.
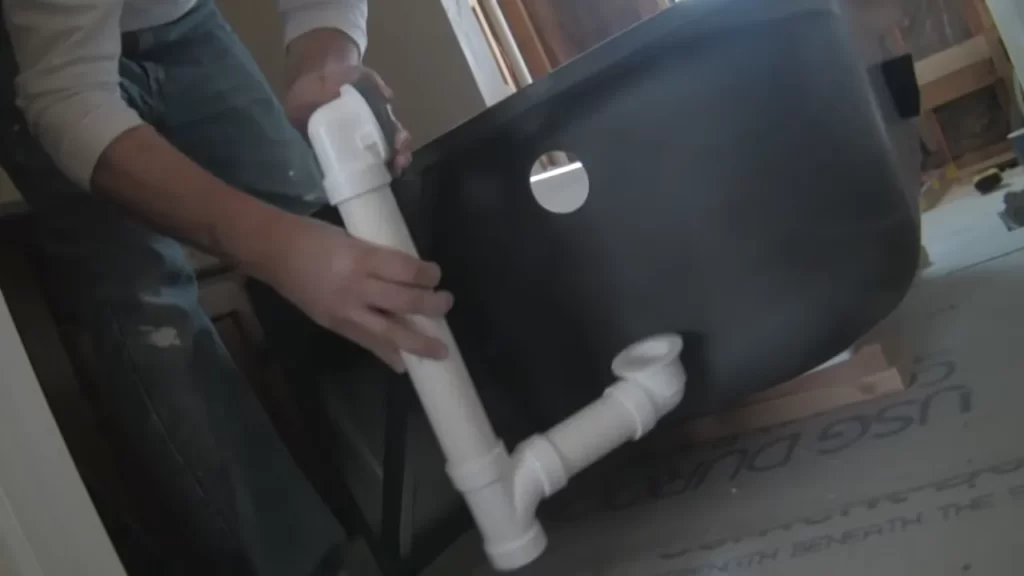
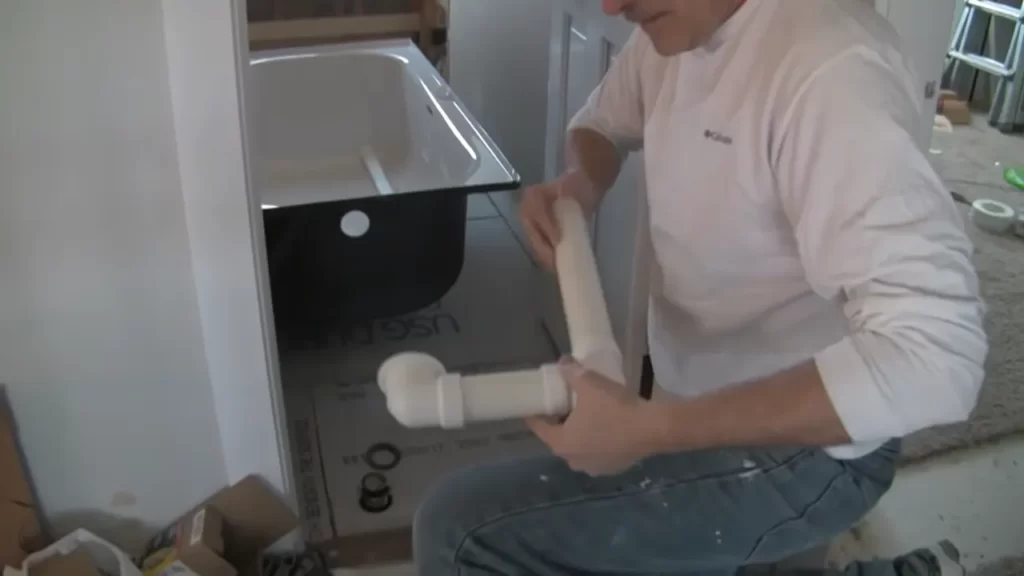
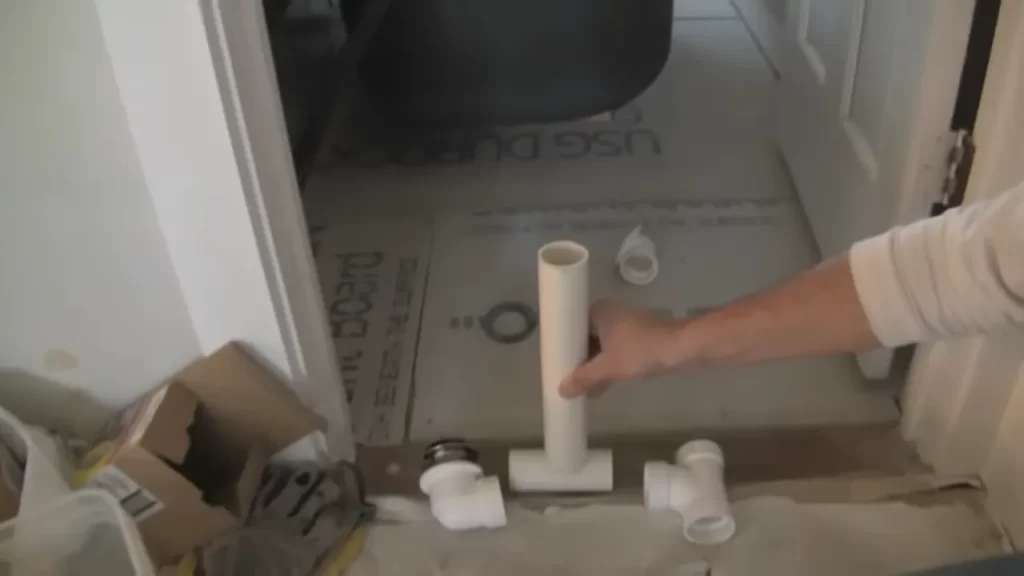
- Plumbing Piping: The plumbing piping connects the drain to the main plumbing system. It ensures that the water flows to the appropriate sewer or septic system.
Identify Any Additional Tools Required
Before you begin the installation process, double-check the instructions to identify any additional tools or materials required for the job. While most drain kits come with the necessary components, you may need to gather a few extra items to complete the installation successfully. Common tools that might be required include:
- Adjustable wrench
- Plumber’s putty
- Plunger
- Pipe cutter
- Teflon tape
- Pipe wrench
Having all the necessary tools on hand before starting the installation will save you time and ensure a smoother process.
Familiarizing yourself with the drain components and understanding the instructions are vital steps in the bathtub drain installation process. By doing so, you’ll be better equipped to handle any challenges that may arise. So, take the time to read the instructions carefully, know your drain’s components, and gather all the tools you need. With the right preparation, installing a new bathtub drain can be a satisfying and successful DIY project.
Apply Plumbers Putty Or Silicone Sealant
When it comes to installing a new bathtub drain, one crucial step is to apply plumbers putty or silicone sealant. This ensures a watertight seal that prevents any leaks or water damage. Preparing the drain area for a watertight seal and using proper application techniques are essential for a successful installation.
Preparing the drain area for a watertight seal
The first step in applying plumbers putty or silicone sealant is to prepare the drain area. This involves removing any residues or debris that could compromise the seal. Start by cleaning the surface of the drain flange and bathtub surface using a mild detergent and water. Ensure that the surfaces are thoroughly dry before proceeding.
Proper application techniques
Once the drain area is clean and dry, you can apply the plumbers putty or silicone sealant using proper techniques to ensure an effective and lasting seal. The technique you choose depends on the type of sealant you are using:
If you are using plumbers putty:
- Take a small amount of plumbers putty and roll it between your hands to form a thin, rope-like shape.
- Apply the putty evenly around the underside of the drain flange, ensuring complete coverage.
- Insert the drain flange into the drain hole and press it down firmly. The putty should spread out and create a seal.
- Wipe away any excess putty that squeezes out from between the flange and the bathtub surface.
If you are using silicone sealant:
- Cut the tip of the silicone sealant tube at a 45-degree angle.
- Insert the tube into a caulk gun and apply a thin, continuous bead of sealant around the underside of the drain flange.
- Place the drain flange into the drain hole and press it down firmly. The sealant should spread out to create an effective seal.
- Use a damp cloth or sponge to smooth out the excess sealant and wipe away any smudges or drips.
No matter which sealant you use, it’s essential to follow the manufacturer’s instructions for drying and curing times. This ensures that the sealant fully sets and provides the best possible seal.
In conclusion, applying plumbers putty or silicone sealant is a crucial step in installing a new bathtub drain. By properly preparing the drain area and using the appropriate application techniques, you can ensure a watertight seal that prevents leaks and protects your bathroom from water damage.
Install And Secure The New Drain
Step-by-step Installation Process
Installing and securing a new bathtub drain is an essential step in ensuring a functional and leak-free bathing experience. By following a simple step-by-step process, you can enjoy the benefits of a properly installed drain for years to come.
- Prepare the area: Before beginning the installation, make sure to remove any debris or old sealant from the drain hole. A clean surface will ensure a proper fit and tight seal.
- Apply plumber’s putty: Plumber’s putty provides a watertight seal between the drain flange and the bathtub. Take a small amount of putty and roll it into a rope-like shape. Place the putty around the underside of the drain flange.
- Insert the drain: Carefully lower the drain flange into the drain hole, making sure the putty is in contact with the bathtub surface. Push down on the flange to ensure it is securely in place.
- Tighten the drain: Using a drain wrench or pliers, grip the drain locking ring and turn it clockwise until it is tight. This will secure the drain flange to the bathtub, creating a firm connection.
- Check for leaks: After tightening the drain, it’s important to check for any potential leaks. Fill the bathtub with water and let it sit for a few minutes. Inspect the area around the drain for any signs of water leakage. If there are no leaks, continue with the installation process.
- Seal the drain: To further ensure a leak-free installation, apply silicone caulk around the outer edge of the drain flange. This will provide an extra layer of protection against water seepage.
By following these step-by-step instructions, you can confidently install and secure a new bathtub drain. Taking the time to ensure a proper fit and tight seal will help prevent any future plumbing issues and allow you to enjoy your bathtub to the fullest.
Check For Leaks And Proper Drain Functionality
Once you have successfully installed a new bathtub drain, the next crucial step is to check for leaks and ensure proper drain functionality. It’s important to perform these checks to avoid any potential water damage and to ensure that your new bathtub drain is functioning as it should. In this section, we will discuss two important steps for checking the drain: filling the bathtub with water to test for leaks and checking the drain’s performance.
Filling the bathtub with water to test for leaks
Filling the bathtub with water is an essential step to verify if there are any leaks in the drainage system. To do this, follow the steps below:
- Ensure that the drain stopper is closed tightly to prevent any water leakage.
- Slowly fill the bathtub with water. It’s recommended to fill it about halfway or until the water level covers the drain.
- Observe the area around the drain, including the bathtub’s edges and the floor beneath. Look for any signs of water leakage, such as drips, puddles, or wet spots.
- If you notice any leaks, it’s important to address them promptly. Tighten any loose connections and consider using plumber’s tape or silicone caulk to seal any gaps or cracks.
- Continue to monitor the area for a few hours to ensure that there are no hidden leaks that may occur over time.
Checking the drain’s performance
Ensuring the drain’s performance is equally important as identifying any leaks. To check the drain’s functionality, follow the steps below:
- Open the drain stopper and allow the water to drain completely. Take note of how quickly the water drains.
- If the water drains slowly or if there are any obstructions, it’s likely that there could be an issue with the drain. Consider using a drain snake or plunger to clear any blockages.
- After clearing any blockages, repeat the process of filling the bathtub and draining it again. Observe if the water drains at a faster pace.
- If you notice any ongoing issues with the drain’s performance, it may be best to consult a professional plumber who can further assess and resolve the problem.
By following these steps to check for leaks and ensure proper drain functionality, you can confidently enjoy your newly installed bathtub drain without any worries. Remember, it’s important to address any leaks or performance issues promptly to prevent further damage and ensure a smoothly functioning drainage system.
Finishing Touches And Clean-Up
After successfully installing your new bathtub drain, it’s time to add those all-important finishing touches and ensure a clean-up that leaves your bathroom looking immaculate. This final step will not only ensure everything looks great but also guarantees a long-lasting and functional drain for years to come.
Cleaning up any mess from the installation process
During the installation process, it’s not uncommon for a bit of mess to occur. Bits of debris, dust, or even excess caulk can find their way onto the bathtub and surrounding area. To ensure a clean and pristine finish, give the surfaces a thorough clean-up. Here’s how:
- Remove any loose debris: Start by removing any loose debris or dirt using a soft brush or damp cloth. Be careful not to scratch or damage the bathtub surface.
- Wipe down with a gentle cleaner: Using a mild bathroom cleaner, wipe down the entire area, paying extra attention to any spots where caulk or adhesive might have left residue.
- Rinse thoroughly: Once you’ve cleaned the surfaces, rinse them thoroughly with warm water to remove any residue from the cleaner.
- Dry with a soft cloth: Finally, dry the surfaces with a soft cloth to prevent water spots or streaks.
Optional aesthetic enhancements
With the clean-up complete, why not take the opportunity to add some optional aesthetic enhancements to your newly installed bathtub drain? These simple yet effective touches can elevate the overall look of your bathroom. Here are a few ideas:
1. Upgrade the drain cover:
If your current drain cover is plain or worn out, consider upgrading to a more stylish or decorative one. Whether you prefer a vintage-inspired design or a modern and sleek look, there are plenty of options available to match your bathroom’s style.
2. Add a decorative tile border:
Installing a row of decorative tiles around the bathtub area can instantly add a touch of elegance and create a focal point in the bathroom. Choose tiles that complement the color scheme and overall aesthetic of the space.
3. Install a shelf or ledge:
To make your bathtub area more functional and visually appealing, consider installing a small shelf or ledge nearby. This can serve as a convenient spot to place candles, bath products, or even a book or tablet for a relaxing soak.
Remember, when making these optional enhancements, it’s essential to ensure they do not interfere with the functionality and proper drainage of the bathtub. Take care to read the manufacturer’s recommendations and consult a professional if needed.
Frequently Asked Questions
How Do You Install A New Drain In A Bathtub?
To install a new drain in a bathtub, follow these steps: 1. Remove the old drain by loosening the screw or turning it counterclockwise. 2. Clean the drain hole and apply plumber’s putty around the new drain body. 3. Insert the new drain into the hole and tighten it with a wrench.
4. Connect the drainpipe and overflow pipe to the new drain. 5. Test for leaks by filling the tub with water.
Can You Replace Just The Drain In A Bathtub?
Yes, you can replace just the drain in a bathtub. It is possible to remove and replace the drain without replacing the entire bathtub.
Do You Use Plumbers Putty On Tub Drain?
Yes, plumbers putty is commonly used on tub drains to create a watertight seal and prevent leaks. It helps to secure the drain and ensure it stays in place.
How Do You Replace A Bathtub Drain Stopper?
To replace a bathtub drain stopper, follow these steps: 1. Remove the old stopper by unscrewing it counterclockwise. 2. Clean the drain area thoroughly. 3. Insert the new stopper by screwing it in clockwise until snug. 4. Test the stopper by filling the tub with water and checking for leaks.
5. Adjust the stopper if necessary until it seals properly.
Conclusion
Installing a new bathtub drain doesn’t have to be a daunting task. By following these simple steps, you can successfully install a new drain and enjoy a leak-free bathtub. Remember to gather all the necessary tools and materials before starting the installation process.
With careful planning, patience, and attention to detail, you can easily complete this home improvement project. So go ahead, get ready to enjoy a relaxing bath in your newly installed bathtub drain!