
To install a diverter tub spout, remove the old spout, clean the pipe, apply plumber’s tape to the threads, and screw on the new spout until tight. Use a pipe wrench for added leverage if necessary.
The diverter tub spout is an important component in your bathroom that allows you to divert water from the bathtub faucet to the showerhead. Whether you’re replacing a damaged spout or upgrading to a new one, knowing how to properly install it is essential.
In this guide, we’ll walk you through the step-by-step process to install a diverter tub spout, ensuring a leak-free and functional installation. Stay tuned to learn more about how to get the job done quickly and efficiently.
Understanding The Diverter Tub Spout
If you’re planning to upgrade your bathroom or need to replace an old tub spout, understanding the role of a diverter tub spout is crucial. A diverter tub spout is a key component of a bath and shower setup that allows you to switch the water flow between the bathtub faucet and the showerhead. In this section, we will explore what a diverter tub spout is, how it works, and why it’s important to have a functional one. Let’s dive in!
What is a diverter tub spout?
A diverter tub spout is a device installed in the bathroom that controls the flow of water between the bathtub and the showerhead. It is typically located at the bottom of the tub spout and features a simple push-pull mechanism. When the diverter is activated, it redirects the water from the tub spout to the showerhead or vice versa, giving you the flexibility to choose where you want the water to flow.
How does a diverter tub spout work?
The working principle of a diverter tub spout is quite straightforward. When you pull up on the diverter handle, a valve inside the spout moves and redirects the water flow towards the showerhead. Conversely, when you push the diverter handle down, the valve moves back into its original position, directing the water back to the tub spout. This mechanism allows you to easily switch between bathing and showering without hassle.
Importance of a functional diverter tub spout
Having a functional diverter tub spout is essential for a smooth and convenient bathing experience. It not only allows you to enjoy the luxury of a relaxing shower but also ensures efficient water usage. A malfunctioning or faulty diverter can lead to water leaks, inconsistent water flow, or even an inability to switch between the bathtub and the showerhead. Therefore, it’s important to regularly inspect and maintain your diverter tub spout to avoid any inconvenience or water wastage.
Tools And Materials Needed
In order to successfully install a diverter tub spout, you will need to gather a few essential tools and materials. Having these items ready before starting the installation process will ensure a smooth and hassle-free experience.
List of tools required for installation
Here is a comprehensive list of tools that you will need:
| 1. | Adjustable wrench |
| 2. | Plumber’s tape |
| 3. | Plumbers’ putty |
| 4. | Hex key (Allen wrench) |
| 5. | Screwdriver (both Phillips and flathead) |
| 6. | Teflon tape |
| 7. | Plumbing pipe cutter |
Make sure to have these tools readily available as you proceed with the installation.
List of materials required for installation
Along with the necessary tools, you will also need specific materials to complete the installation process:
- Diverter tub spout
- Replacement pipe
- Plumbing sealant
- Washers (if not included with the spout)
- Plumbing adhesive
- Plumbing tape
It is crucial to have these materials on hand to ensure a successful and efficient installation of the diverter tub spout.
Step 1: Removing The Existing Tub Spout
In order to install a diverter tub spout, you’ll first need to remove the existing one. This step is essential to ensure a smooth installation process and avoid any potential issues. In this section, we’ll guide you through the process of identifying the type of tub spout you have, the steps to remove it, and troubleshooting common issues that may arise during the removal process.
How to Identify the Type of Tub Spout You Have
Before you can remove your existing tub spout, it’s important to determine its type. There are three main types of tub spouts: slip-on, threaded, and setscrew. Knowing the type of spout you have will help you choose the appropriate removal method.
| Type | Description |
|---|---|
| Slip-On | The spout slides onto the pipe and is secured with a set screw. |
| Threaded | The spout screws onto the pipe and may have a decorative cap. |
| Setscrew | The spout is secured to the pipe using a setscrew located underneath. |
Steps to Remove the Existing Tub Spout
Once you’ve identified the type of tub spout you have, you can proceed with its removal. Follow these steps:
- Turn off the water supply to the tub by closing the main water valve.
- Locate the access panel or the wall behind the tub and look for the tub spout pipe.
- For a slip-on tub spout, locate the set screw underneath and loosen it with an Allen wrench or a screwdriver.
- If you have a threaded tub spout, grip it firmly and twist it counterclockwise to unscrew it from the pipe.
- For a setscrew tub spout, remove the setscrew using an Allen wrench and then pull the spout away from the wall.
Troubleshooting Common Issues During Removal
While removing your tub spout, you might encounter a few issues. Here are some troubleshooting tips:
- If the tub spout is stuck, try applying lubricant and gently twisting it to loosen it.
- For stubborn setscrews, apply penetrating oil to loosen them before attempting to remove them.
- If the spout won’t budge, it may be due to a buildup of grime or mineral deposits. Clean the connection area before attempting removal.
- If you’re unsure or encountering difficulties during the removal process, it’s recommended to consult a professional plumber for assistance.
With these steps and troubleshooting tips, you should now be able to successfully remove your existing tub spout in preparation for the installation of a diverter tub spout.
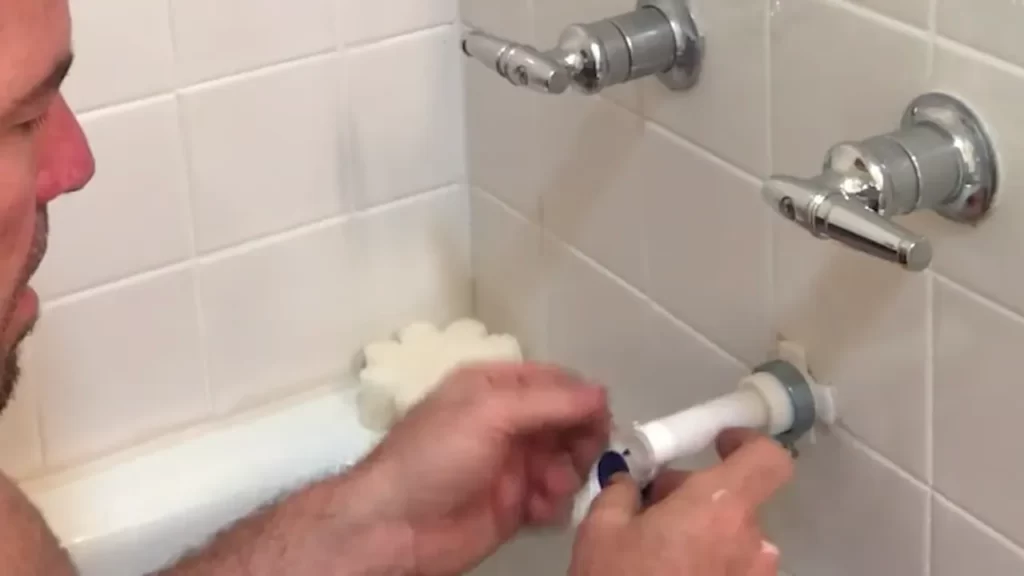
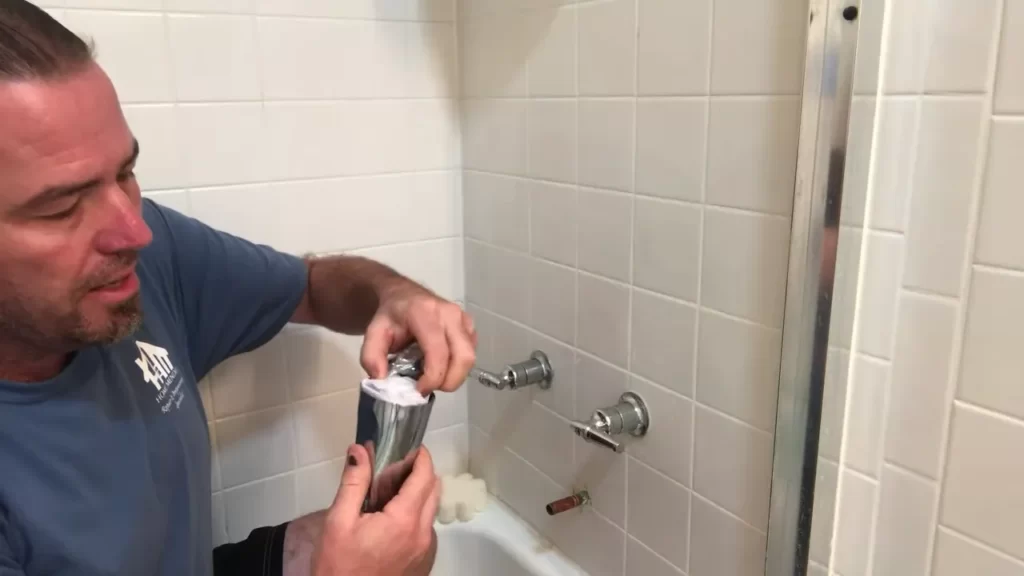
Step 2: Preparing The Tub Spout And Pipe
Before installing the diverter tub spout, it’s important to prepare both the tub spout and the pipe to ensure a proper and leak-free connection. This step involves cleaning the pipe threads, applying plumber’s tape, and choosing the appropriate pipe adapter.
Cleaning the Pipe Threads
To start, clean the pipe threads thoroughly to remove any debris or old residue. This will help create a smooth surface for a secure fit. Use a wire brush or a cloth to wipe away any dirt or buildup that may hinder the connection.

Applying Plumber’s Tape
Next, apply plumber’s tape to the cleaned pipe threads. Plumber’s tape, also known as Teflon tape, is used to create a tight seal and prevent leaks. It is a thin white tape that is wrapped around the pipe threads in a clockwise direction.
Take the end of the plumber’s tape and hold it against the exposed pipe threads. Begin wrapping the tape around the threads, pulling it tightly as you go. Ensure that the tape covers the entire length of the threads, overlapping slightly with each wrap. Continue until the threads are fully covered.

Choosing the Appropriate Pipe Adapter
Before attaching the tub spout, it’s essential to choose the appropriate pipe adapter. This ensures a secure and proper connection between the spout and the pipe. The type of adapter needed will depend on the specific tub spout design and the size of the existing pipe.
Consult the manufacturer’s instructions or look for markings on the tub spout to determine the required pipe adapter size. Measure the diameter of the pipe to ensure compatibility. It’s essential to select an adapter that matches the size and threading of the pipe to prevent any leaks or compatibility issues.

Once you have determined the correct size and type of pipe adapter, proceed to the next step, which involves attaching the tub spout to the pipe. With the pipe and tub spout prepared, you are one step closer to enjoying a refreshed and functional bathtub.
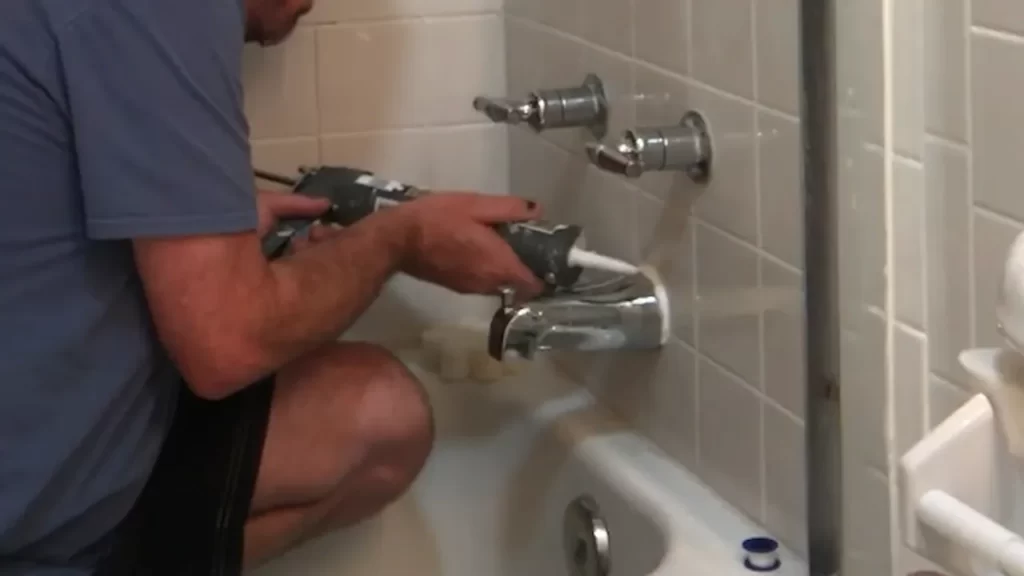
Step 3: Attaching The Diverter Tub Spout
Once you have positioned the diverter tub spout correctly and made sure the pipe is clean and free of any obstructions, it’s time to secure the spout onto the pipe. This step is crucial in ensuring that the diverter tub spout functions properly and provides a seamless water flow transition between the tub faucet and the showerhead. Follow the simple instructions below to attach the spout securely:
Positioning the diverter tub spout correctly
Before attaching the diverter tub spout, it’s essential to position it correctly to ensure that it aligns perfectly with your tub and shower setup. This involves determining the appropriate height and distance from the wall to ensure optimal functionality and ease of use.
To position the spout correctly:
- Measure the distance from the bottom of the tub to the desired height of the spout.
- Mark this measurement on the wall using a pencil or marker.
- Using a level, ensure that the mark is straight and aligned with the tub.
Securing the spout onto the pipe
Once you have positioned the diverter tub spout correctly, it’s time to secure it onto the pipe. Follow these steps to do so:
- Apply plumber’s tape to the threads on the pipe to prevent any leaks.
- Place the spout onto the pipe, ensuring that it aligns with the mark you made on the wall.
- Tighten the spout onto the pipe by turning it clockwise.
- Use a pipe wrench or adjustable pliers to secure the spout tightly, being careful not to damage the surface or over-tighten.
Double-checking for leaks or loose fittings
After attaching the diverter tub spout, it’s crucial to double-check for any leaks or loose fittings before using the tub and shower. This quick inspection will help ensure the proper functioning and prevent any water-related mishaps. Follow these steps to double-check:
- Turn on the water and divert it to the tub spout. Pay close attention to any signs of water leakage around the spout or pipe.
- Inspect the connections between the spout and the pipe, ensuring that they are secure and properly tightened.
- If you notice any leaks or loose fittings, turn off the water and readjust or tighten the spout as necessary.
By following these steps to attach the diverter tub spout and checking for leaks or loose fittings, you can ensure a seamless installation process and enjoy a functional and efficient tub and shower setup in no time.
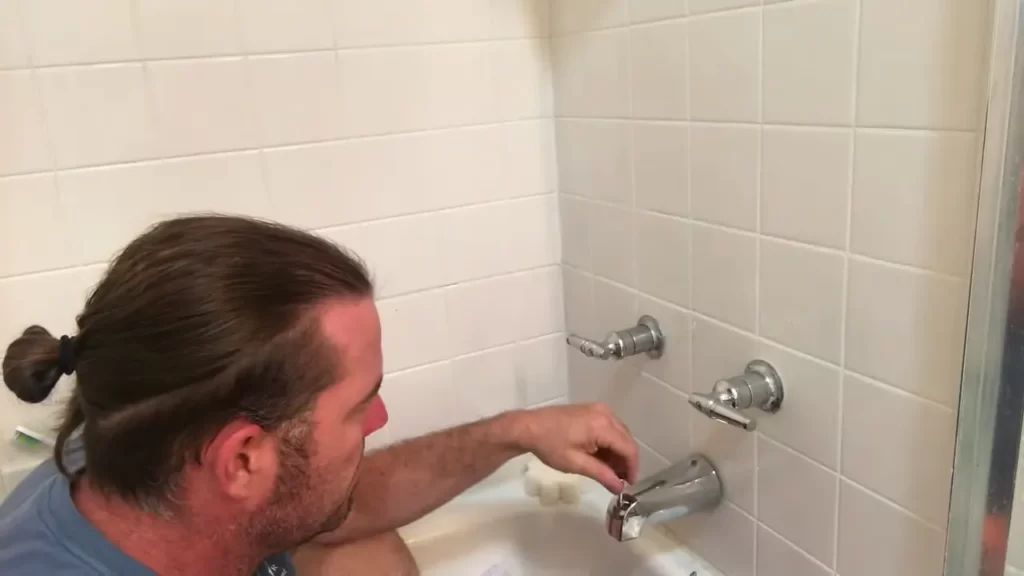
Step 4: Testing The Diverter Tub Spout
Once you have successfully installed the diverter tub spout, it’s time to test its functionality. This step is crucial to ensure that the diverter is working properly and diverting water as intended. Follow the instructions below to carry out the testing process.
Running water to test the functionality
The first step in testing the diverter tub spout is to run water through the bathtub faucet. Turn on the water faucet and check if the water flows smoothly without any leaks. This will help you determine if the spout is securely attached and properly connected to the plumbing system. It’s important to pay attention to any signs of dripping or dripping sound that may indicate a loose connection.
Troubleshooting any issues with the diverter tub spout
If you notice any issues with the diverter tub spout, such as water not flowing through the showerhead or leaks occurring, there are a few troubleshooting steps you can take to resolve these problems:
- Check for any debris or dirt that may be blocking the diverter. Remove any obstructions and clean the spout using a mild detergent or vinegar solution.
- Inspect the diverter valve and ensure that it is functioning properly. If the valve is faulty, you may need to replace it with a new one.
- Verify that the connections between the spout and the plumbing system are tight and secure. If there are any loose connections, tighten them using an adjustable wrench or pliers.
- If the issues persist, it may be necessary to consult a professional plumber to assess and fix the problem.
Ensuring that the diverter is diverting water as intended
Once you have confirmed that the diverter tub spout is working and there are no leaks or obstructions, it’s time to ensure that the diverter is diverting water to the showerhead as intended. Follow these steps:
- Turn on the bathtub faucet and allow the water to flow for a few seconds.
- Activate the diverter by pulling up or twisting the diverter knob, depending on the type of diverter you have installed.
- Observe if the water flow switches from the bathtub faucet to the showerhead. Check if the showerhead is producing a steady stream of water.
- Test the functionality of the diverter by repeatedly switching the water flow between the bathtub faucet and the showerhead.
If you notice any issues with water flow or the diverter’s functionality, repeat the troubleshooting steps mentioned earlier. It’s crucial to ensure that the diverter is working properly to deliver a satisfying shower experience.
Step 5: Finishing Touches And Maintenance
Cleaning and Polishing the Newly Installed Tub Spout
Once you have successfully installed the diverter tub spout, it is important to clean and polish it to maintain its pristine appearance. Cleaning the tub spout regularly not only keeps it looking shiny and new but also helps prevent the buildup of dirt, grime, and mineral deposits.
To clean the tub spout, follow these simple steps:
- Start by removing any visible dirt or debris from the spout using a soft cloth or sponge.
- Mix a solution of warm water and mild soap or a non-abrasive cleaner.
- Dip the cloth or sponge into the soapy solution and gently scrub the surface of the tub spout, paying attention to any areas with stubborn stains or deposits.
- Rinse the spout thoroughly with clean water to remove any soap residue.
- Dry the tub spout using a soft towel or cloth to prevent water spots.
- For an extra touch of shine, you can use a non-abrasive metal polish or chrome cleaner specifically designed for bathroom fixtures. Apply the polish according to the manufacturer’s instructions and buff the spout to a brilliant finish.
By following these cleaning steps regularly, you will not only maintain the appearance of your tub spout but also extend its lifespan.
Regular Maintenance Tips for a Long-Lasting Installation
To ensure the longevity of your tub spout installation and keep it functioning at its best, it is important to perform regular maintenance. Here are some essential maintenance tips:
- Check the spout for any signs of leaks. If you notice any water dripping or a constant flow, it may indicate a faulty installation or a damaged spout. In such cases, it is advisable to seek professional help.
- Inspect the connection between the spout and the pipe regularly. Ensure it remains tight and secure. If you notice any looseness or movement, use a wrench to tighten the connection.
- Periodically clean the diverter mechanism to ensure smooth operation. This will help prevent any blockages or restricted water flow.
- Keep an eye out for any signs of corrosion or rust on the spout. If you spot any, it is essential to address the issue promptly to prevent further damage.
- Lastly, make sure to follow the manufacturer’s instructions for any specific maintenance recommendations related to your tub spout model.
By implementing these regular maintenance tips, you can enjoy a long-lasting and problem-free tub spout installation for years to come.
Additional Considerations for Upgrading Your Tub Spout
Upgrading your tub spout can be an excellent way to enhance the overall look and functionality of your bathroom. Here are a few additional considerations to keep in mind:
- Before purchasing a new tub spout, measure the length and diameter of your existing spout to ensure a proper fit.
- Consider the style and design of your bathroom when selecting a new tub spout. You want the new spout to complement the existing fixtures and decor.
- If you are not confident in your DIY skills, it is always a good idea to consult a professional plumber for the installation. They have the expertise and knowledge to ensure a seamless upgrade.
- If you are upgrading from a non-diverter tub spout to a diverter spout, make sure to install the necessary components, such as the diverter valve, to enable the diverting of water between the tub spout and the showerhead.
Keeping these considerations in mind will help you make a well-informed decision and successfully upgrade your tub spout, adding both style and functionality to your bathroom.
Frequently Asked Questions
How Do You Replace A Tub Diverter Spout?
To replace a tub diverter spout, first, shut off the water supply. Then, remove the old spout by unscrewing it counterclockwise or loosening the setscrew. Install the new spout by screwing it on clockwise, making sure it is tight. Turn on the water supply to test for leaks.
How Do You Install A Slip Fit Tub Spout?
First, remove any existing tub spout by turning it counterclockwise. Clean the pipe threads with a cloth or brush to remove debris. Apply plumber’s tape to the threads clockwise. Thread the slip fit tub spout onto the pipe clockwise by hand until snug.
Use a wrench to tighten further if needed.
How Do You Put A Tub Spout Back On?
To put a tub spout back on, carefully remove any residue or debris from the pipe. Apply plumber’s tape to the threaded end of the pipe. Align the spout with the pipe and twist it clockwise until snug. Use a wrench to tighten it securely, but avoid over-tightening.
How Does A Tub Spout Diverter Work?
A tub spout diverter is a device that redirects water flow in a bathtub. When the diverter is engaged, water is directed to the showerhead instead of the spout. This allows for easy switching between filling the tub and using the shower.
Conclusion
Installing a diverter tub spout is a simple and effective way to enhance your shower experience. With just a few steps, you can enjoy the convenience of diverting water to a handheld showerhead or a tub filler. By following the instructions provided in this blog post, you can easily install a diverter tub spout without any hassle.
Remember to turn off the main water supply and use appropriate tools for a smooth installation process. So, go ahead and give your bathroom a stylish upgrade with a diverter tub spout today!