Install a fiberglass bathtub by preparing the area and plumbing, attaching the tub to the drain, and sealing the edges. Transforming your bathroom with a new bathtub can be a rewarding project that adds both functionality and aesthetic appeal.
Installing a fiberglass bathtub is a popular choice due to its affordability, durability, and easy maintenance. By following a few simple steps, you can successfully install a fiberglass bathtub and enjoy a relaxing soak in no time. We will guide you through the process of installing a fiberglass bathtub, from preparing the area and plumbing to attaching the tub to the drain and sealing the edges.
So, let’s get started!
Tools And Materials Needed
Before you start installing a fiberglass bathtub, it’s important to gather all the necessary tools and materials. Having everything ready and within reach will make the installation process much smoother and more efficient. Here is a list of the essential items you will need:
Fiberglass bathtub
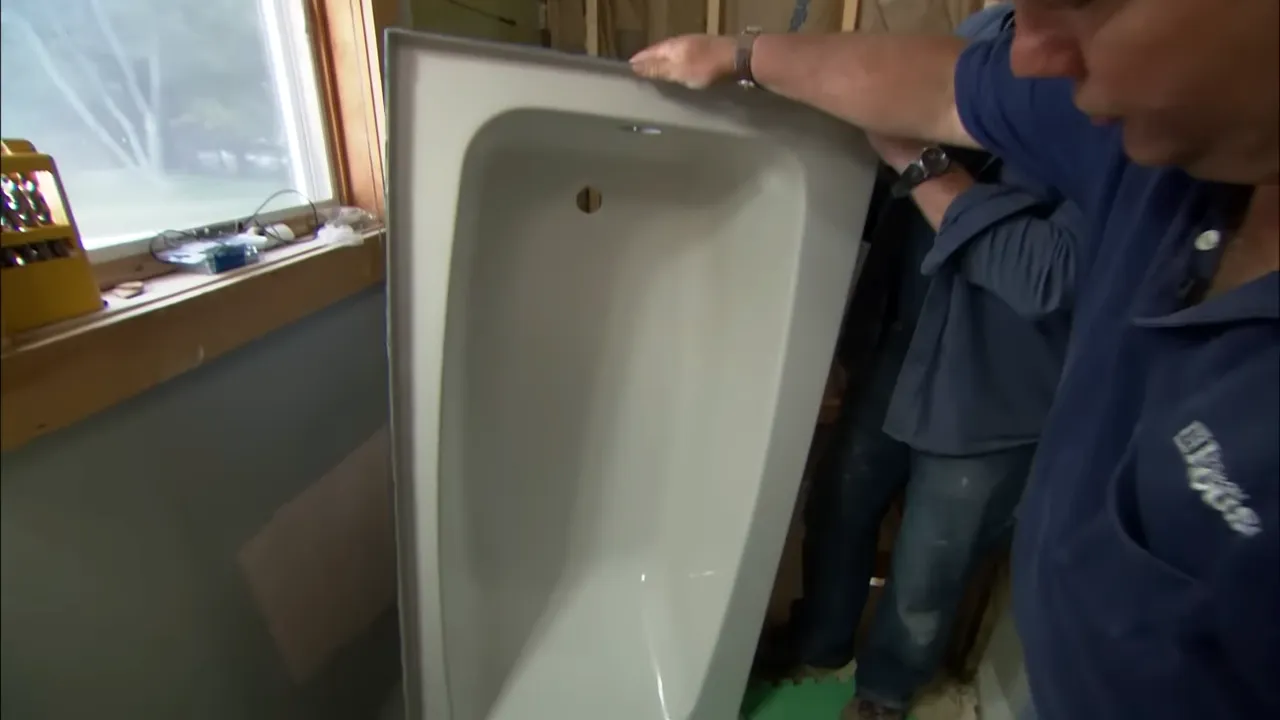
The centerpiece of your bathroom renovation project is the fiberglass bathtub itself. Make sure you have measured your space accurately and chosen a bathtub that fits your desired dimensions and style. A high-quality fiberglass bathtub will not only enhance your bathroom’s aesthetics but also ensure longevity and easy maintenance.
Adjustable wrench
This versatile tool is a must-have for any plumbing project. It allows you to tighten or loosen different sized nuts and bolts, ensuring a secure and leak-free installation. An adjustable wrench with a comfortable grip will make it easier to maneuver in tight spaces.
Screwdriver set
A reliable screwdriver set is essential for removing and installing various fixtures and fasteners during the bathtub installation process. Look for a set that includes different types and sizes of screwdrivers to accommodate different screw heads.
Plumber’s putty
Plumber’s putty is a soft, pliable material used to create watertight seals around drains and faucets. It is essential for preventing leaks and ensuring a secure connection between the bathtub and plumbing fixtures. Make sure to choose a plumber’s putty that is specifically designed for use with fiberglass bathtubs.
Silicone caulk
Silicone caulk is a waterproof sealant that will be used to seal the edges of the fiberglass bathtub against the walls and floor. It provides a protective barrier against moisture and prevents water from seeping into the gaps. Opt for a high-quality silicone caulk that is mold and mildew resistant to ensure long-lasting results.
Level
To achieve a perfectly level bathtub, you will need a reliable level tool. This will ensure that your bathtub is properly aligned and will provide a comfortable bathing experience. A bubble level is a popular choice for its accuracy and ease of use.
Hacksaw
A hacksaw is necessary for cutting through plumbing pipes when necessary. It is crucial to have a clean, precise cut to ensure a proper fit and prevent any leaks or blockages in the plumbing system. Choose a hacksaw with a sharp blade and consider using a pipe cutting guide for more accurate cuts.
Pipe cutter
A pipe cutter is specifically designed for cutting through copper or plastic plumbing pipes. This tool creates a smooth, even cut without any burrs or jagged edges. Having a pipe cutter handy will save you time and effort during the bathtub installation process.
Tape measure
Accurate measurements are crucial when installing a fiberglass bathtub. A tape measure will help you determine the size and placement of the bathtub in your bathroom. Measure twice to ensure precision and avoid any costly mistakes.
In conclusion, having the right tools and materials is essential for a successful fiberglass bathtub installation. Make sure you have all the items mentioned above before you begin the project. With proper preparation and attention to detail, you’ll have a beautiful and functional fiberglass bathtub that will stand the test of time.

Preparation And Safety
When it comes to installing a fiberglass bathtub, proper preparation and safety measures are crucial to ensure a successful and risk-free process. Taking the time to prepare your bathroom space and prioritize safety not only helps you achieve a smooth installation but also safeguards your well-being. In this section, we will walk you through the essential steps of preparing your bathroom and prioritizing safety during the installation of a fiberglass bathtub.
Measure the bathroom space
Before you begin the installation process, it is imperative to measure your bathroom space accurately. Measuring ensures that the fiberglass bathtub fits perfectly into the allocated area, avoiding any unnecessary gaps or modifications later on. Measure the length, width, and height of your bathroom space using a tape measure to determine the appropriate size for your fiberglass bathtub.
Remove the old bathtub
The next step involves removing the old bathtub from your bathroom. Start by turning off the water supply and disconnecting any plumbing fixtures attached to the existing bathtub. Using appropriate tools such as a utility knife or wrench, carefully detach the bathtub from its surroundings. Ensure you have a clear path to maneuver the old bathtub out of the bathroom safely, taking special care not to damage any walls or flooring during the removal process.
Ensure proper ventilation
Proper ventilation is vital during the installation of a fiberglass bathtub. Adequate airflow helps eliminate any potentially harmful fumes emitted by adhesives or sealants used in the installation process. Open windows and doors, and if necessary, use fans or portable ventilation systems to ensure sufficient air circulation within the bathroom. This precautionary step contributes to maintaining a healthy work environment while safeguarding your respiratory well-being.
Use safety gloves and goggles
When it comes to safety, protecting your hands and eyes is essential. Prior to beginning the installation, put on a pair of safety gloves to shield your hands from sharp edges and potential injuries. Additionally, wear safety goggles to safeguard your eyes from any loose debris or particles that may be released during the removal or installation process. Ensuring you have the correct protective gear enhances your well-being and minimizes the risk of accidents or injuries.
Installing The Drain And Overflow
As you continue with the installation of your fiberglass bathtub, the next step is to focus on installing the drain and overflow. This crucial step ensures proper drainage and prevents any potential leaks. Follow these instructions to remove the existing drain, install a new drain and overflow assembly, and connect it to the main plumbing.
Remove the existing drain
To start, you need to remove the existing drain. Refer to the manufacturer’s instructions for your specific bathtub model, as the removal process may vary slightly. Here’s a general guideline to help you through the process:
- Locate the access panel at the bottom of the bathtub or the area beneath it.
- Remove the screws or fasteners securing the access panel and set it aside.
- Once the access panel is open, identify the drain pipe and the drain shoe.
- Using a suitable wrench or pliers, carefully loosen and remove the drain shoe.
- Once the drain shoe is removed, you can now proceed to the next step, installing a new drain and overflow assembly.
Install a new drain and overflow assembly
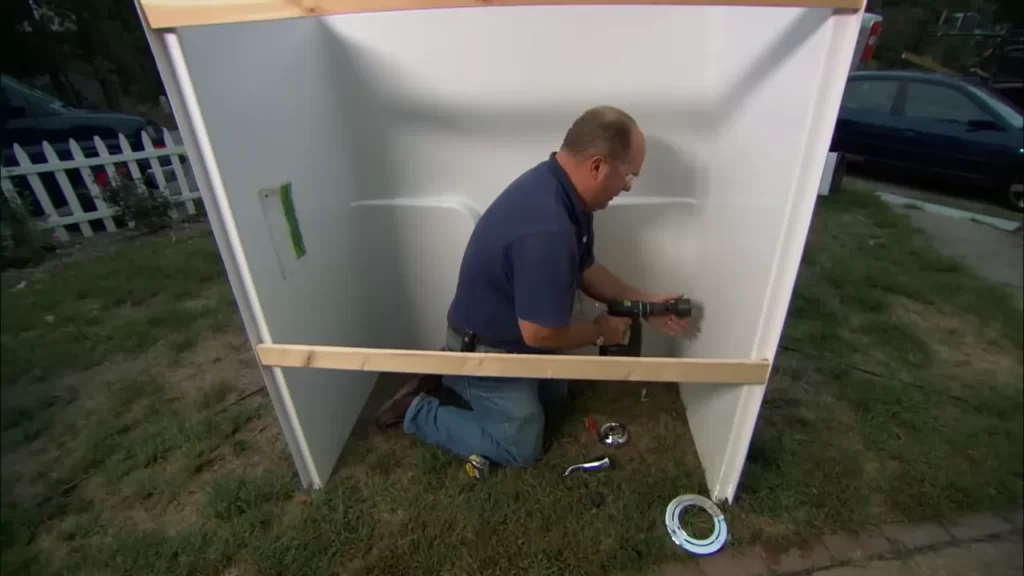
Installing a new drain and overflow assembly is vital to ensure proper functioning of your bathtub. Here’s how you can install it:
- Take your new drain and overflow assembly and carefully insert it into the opening where the old drain shoe was located.
- Make sure the rubber gasket provided with the assembly is properly positioned between the assembly and the bathtub.
- Hand-tighten the locknut on the assembly to secure it in place, ensuring a watertight seal.
- Follow the manufacturer’s instructions to properly align and adjust the overflow drain cover.
Connect the drain to the main plumbing
Now that you have successfully installed the new drain and overflow assembly, the final step is to connect it to the main plumbing system:
- Apply plumber’s tape to the threads of the drain pipe, ensuring a tight seal.
- Carefully insert the drain pipe into the drain shoe of the assembly.
- Tighten the nut connecting the drain pipe and the drain shoe using a wrench or pliers.
- Double-check all connections to ensure they are secure and leak-free.
Once you have completed these steps, you have successfully installed the drain and overflow for your new fiberglass bathtub. Remember to always consult the manufacturer’s instructions and guidelines specific to your bathtub model. With the drain and overflow installed correctly, you can now move on to the next phase of the installation process.
Sealing And Caulking
Proper sealing and caulking are essential steps in installing a fiberglass bathtub. These measures help ensure that your bathtub is watertight and prevents any leaks or water damage. Follow these steps to correctly seal and caulk your fiberglass bathtub:
Apply plumber’s putty to the drain flange
The first step in sealing your fiberglass bathtub is to apply plumber’s putty to the drain flange. This putty creates a watertight seal between the drain and the bathtub. To apply plumber’s putty:
- After assembling the drain flange, take a small amount of plumber’s putty and roll it into a rope shape.
- Press the putty firmly onto the underside of the drain flange, ensuring complete coverage around the entire perimeter.
- Place the drain flange in the designated location on the bottom of the bathtub, aligning it with the drain hole.
Attach the drain flange to the tub
Once you have applied plumber’s putty, it’s time to attach the drain flange to the tub. This step secures the drain to the bathtub and further reinforces the watertight seal. To attach the drain flange:
- Insert the drain flange into the drain hole, ensuring it is positioned correctly.
- Tighten the drain flange using a drain wrench or pliers, making sure it is snugly secured to the bathtub.
- Wipe away any excess plumber’s putty or debris around the drain flange.
Apply silicone caulking around the flange
The final step in sealing and caulking your fiberglass bathtub is to apply silicone caulking around the flange. This caulk acts as a protective barrier against water and prevents any potential leakages. Follow these steps to apply silicone caulking:
- Cut the tip of the silicone caulk tube at a 45-degree angle.
- Place the caulk tube into a caulk gun and apply a continuous bead of caulk around the outer edge of the drain flange.
- Smooth the caulk with a caulk smoothing tool or your finger to ensure an even and clean finish.
- Allow the caulk to dry completely according to the manufacturer’s instructions before using the bathtub.
Remember, proper sealing and caulking are crucial to maintaining the integrity of your fiberglass bathtub. By following these steps and taking the time to ensure a proper seal, you can enjoy a leak-free and durable bathtub for years to come.
Leveling And Securing The Bathtub
Ensuring that your fiberglass bathtub is level and securely installed is essential for both its functionality and longevity. Proper leveling prevents any water pooling or leakage while maintaining the structural integrity of the tub. Securing the bathtub also ensures its stability against any movement or shifting, providing you with a safe and reliable bathing experience.
Check the level of the floor
Before installing the fiberglass bathtub, it is crucial to check if the floor is level. A level floor will prevent any issues with water drainage and help distribute the weight evenly. To determine if the floor is level, you can follow these steps:
- Start by placing a level on various parts of the floor to identify any areas that are not even.
- If you notice any unevenness, mark those areas for further attention.
- Next, using a floor leveling compound, apply it to the marked areas and spread it evenly to create a smooth and level surface.
- Allow the leveling compound to dry completely before proceeding with the installation of the bathtub.
Adjust the bathtub legs
Once the floor is level, it is time to adjust the legs of the bathtub to ensure an even and stable installation. Follow these steps to adjust the legs:
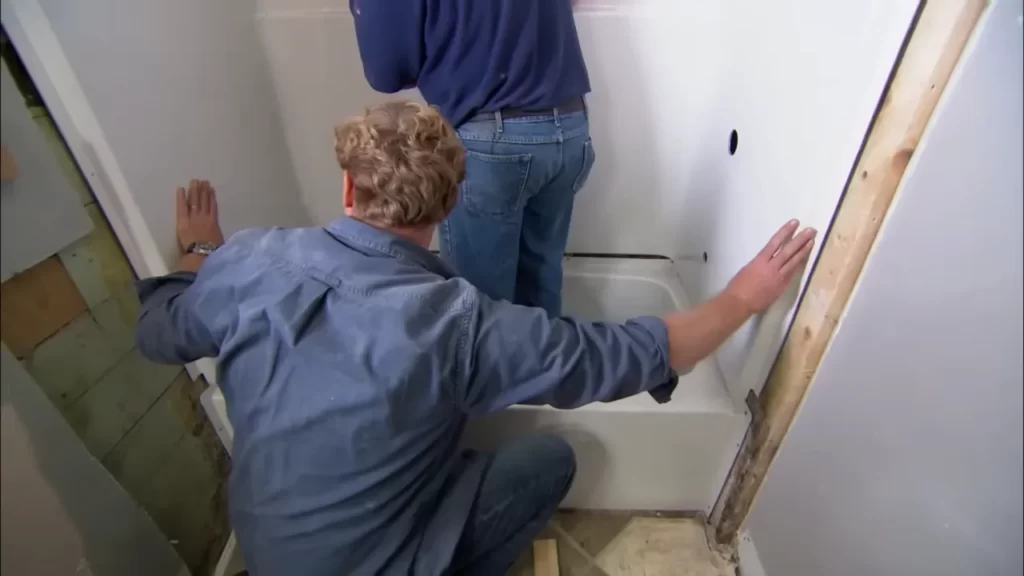
- Place the fiberglass bathtub in its desired position and use a carpenter’s level to check if it is level both from side to side and front to back.
- If the bathtub is not level, adjust the legs accordingly by either extending or retracting them. Most fiberglass bathtubs have adjustable legs that can be turned to achieve the desired level.
- Check the level again after adjusting the legs and repeat the process until the bathtub is perfectly level.
Secure the tub to the wall studs
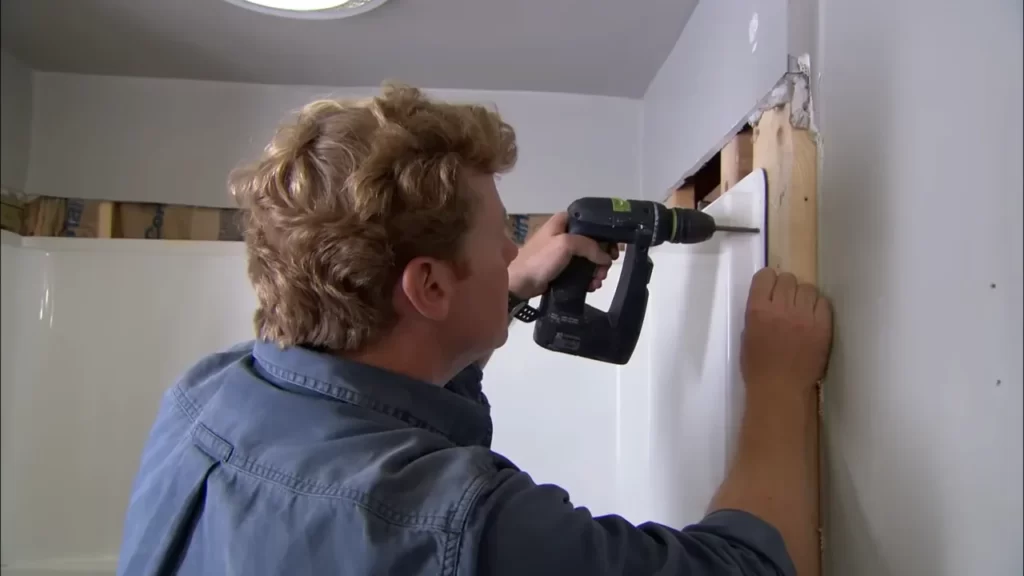
To ensure the stability of the fiberglass bathtub, it is crucial to secure it to the wall studs. Follow these steps to securely fasten the tub to the wall:
- Identify the wall studs behind the tub using a stud finder.
- Mark the location of the studs on the wall using a pencil or a small piece of masking tape.
- Drill pilot holes into the marked stud locations.
- Using screws or nails, attach the flange of the bathtub to the wall studs. Make sure to place the fasteners evenly spaced along the flange for optimal strength and stability.
- Once the tub is securely attached to the wall, ensure that the connections are tight and there is no movement or flexing.
By following these steps to level and secure your fiberglass bathtub, you can ensure its proper installation and enjoy a safe and stable bathing experience for years to come.
Connecting To Plumbing Fixtures
Connecting to Plumbing Fixtures
When it comes to installing a fiberglass bathtub, one of the crucial steps is connecting it to the plumbing fixtures. This ensures that you have a proper water supply and can enjoy the use of your bathtub to the fullest. In this section, we will guide you through the process of connecting the water supply lines, installing the faucet and showerhead, and testing for leaks.
Connect the water supply lines
To begin, you will need to connect the water supply lines to your bathtub. This step requires some basic knowledge of plumbing and may require the use of specific tools. Here’s a step-by-step guide to help you through the process:
- Locate the hot and cold water supply valves. These are typically found on the wall behind the bathtub.
- Attach the appropriate water supply hoses to the valves. Make sure to check the manufacturer’s instructions for the correct size and type of hose.
- Tighten the connections using an adjustable wrench to ensure a secure fit. Be careful not to overtighten and cause damage to the plumbing.
- Attach the other end of the water supply hoses to the corresponding connections on the bathtub. Again, refer to the manufacturer’s instructions for the specific connections.
- Tighten the connections securely, ensuring that there are no leaks.
Install the faucet and showerhead
Once the water supply lines are connected, it’s time to install the faucet and showerhead. This step adds the finishing touch to your bathtub installation and allows you to control the water flow and temperature. Follow these steps to install the faucet and showerhead:
- Remove any protective coverings or packaging from the faucet and showerhead.
- Apply plumber’s tape to the threads of the faucet and showerhead connections. This will help create a watertight seal.
- Attach the faucet to the designated opening on the bathtub. Use a wrench to tighten the connection, ensuring it is secure.
- Connect the showerhead to the designated outlet. Again, tighten the connection securely.
Test for leaks
After completing the installation of the water supply lines, faucet, and showerhead, it’s crucial to test for leaks. Leaks can lead to water damage and should be addressed as soon as possible. Follow these steps to test for leaks:
- Turn on the water supply valves.
- Slowly increase the water flow by opening the faucet and showerhead.
- Inspect all connections for any signs of water leakage.
- If you notice any leaks, tighten the connections further or consider using plumber’s tape to create a tighter seal.
- Continue testing until you are confident that there are no leaks present.
By following these steps to connect your fiberglass bathtub to the plumbing fixtures, you can ensure a properly functioning and leak-free installation. Enjoy your new bathtub and the relaxation it brings!
Final Steps And Tips
After successfully installing a fiberglass bathtub, there are a few final steps and tips to consider to ensure a professional and long-lasting finish. These steps include installing tile or a surround around the bathtub, caulking the edges for a waterproof seal, and cleaning up the work area.
Install tile or surround around the bathtub
Adding tile or a surround to your fiberglass bathtub not only enhances its aesthetic appeal but also provides extra protection against moisture and water damage. To complete this step:
- Measure the dimensions of your bathtub and carefully cut the tile or surround panels to fit.
- Apply an adhesive or thin-set mortar to the back of the tile or surround panels using a trowel.
- Press the panels firmly against the wall, working from bottom to top, and use spacers to maintain consistent gaps between the tiles or panels.
- Allow the adhesive or mortar to dry completely, following the manufacturer’s instructions.
- Grout the gaps between the tiles or panels using a rubber float, ensuring to fill in all the spaces.
- Wipe away any excess grout using a damp sponge, being careful not to disturb the newly applied grout.
Caulk the edges for a waterproof seal
To prevent water from seeping into the gaps between the bathtub and the surrounding walls, it’s essential to caulk the edges with silicone caulk. Follow these steps:
- Ensure the edges of the bathtub are clean and dry before applying caulk.
- Cut the tip of the caulk tube at a 45-degree angle, creating a small opening.
- Load the caulk tube into a caulk gun and apply a consistent bead of caulk along the edges, working in a continuous motion.
- Smooth the caulk with a caulk smoothing tool or a wet finger to create an even seal.
- Allow the caulk to dry completely according to the manufacturer’s instructions.
Clean up the work area
After completing the bathtub installation, it’s important to clean up the work area for a professional finish. Follow these tips:
- Remove any debris, such as leftover adhesive or grout, using a putty knife or a damp cloth.
- Wipe down the bathtub and surrounding surfaces with a mild cleanser to remove any dirt or dust.
- Check for any visible imperfections, such as smudges or uneven tiles, and make the necessary adjustments.
- Ensure the area is well-ventilated to allow for proper drying and curing of any applied materials.
By following these final steps and tips, you can complete the installation of your fiberglass bathtub successfully. Not only will your bathtub be functional, but it will also add beauty and value to your bathroom.
Maintenance And Care
Regular maintenance and care are essential to ensure your fiberglass bathtub stays in top condition for years to come. By following these simple steps, you can keep your bathtub looking clean, preventing any potential leaks or cracks from causing further damage.
Regularly clean the bathtub
One of the most crucial aspects of maintaining a fiberglass bathtub is regular cleaning. By incorporating this into your cleaning routine, you can prevent the build-up of soap scum, grime, and mineral deposits. Here’s a step-by-step guide:
- Start by rinsing the tub with warm water to remove any loose debris.
- Mix a mild, non-abrasive cleaner with warm water in a bucket.
- Using a soft cloth or sponge, apply the cleaning solution to the entire surface of the bathtub.
- Gently scrub the bathtub in small circular motions, paying particular attention to any stained or dirty areas.
- Rinse the tub thoroughly with warm water to remove any residue from the cleaning solution.
- Wipe the tub dry with a clean, soft cloth to prevent water spots.
Note: Avoid using abrasive cleaners, harsh chemicals, or rough scrub brushes as they can scratch or damage the surface of the bathtub.
Check for any leaks or cracks
In addition to regular cleaning, it’s important to regularly inspect your fiberglass bathtub for any signs of leaks or cracks. Even a small crack can quickly escalate into a major issue if left untreated. Follow these steps:
- Inspect the surface of the bathtub visually, looking for any visible cracks or damage.
- Run your hands along the edges, corners, and bottom of the tub to check for any hidden cracks.
- Pay attention to any discoloration, soft spots, or areas that feel weaker than the rest of the tub.
Note: If you notice any signs of damage or suspect a leak, it’s crucial to address the issue promptly to prevent further complications.
Promptly repair any damage
If you discover any leaks, cracks, or other damage during your inspection, it’s crucial to take immediate action to ensure the longevity of your fiberglass bathtub. Here’s what you can do:
- Contact a professional: If the damage is significant or beyond your DIY skills, it’s advisable to seek the assistance of a professional bathtub repair service.
- DIY repair: For minor cracks or leaks, you can consider repairing it yourself using a fiberglass repair kit. Follow the instructions provided with the kit to effectively fix the damaged area.
Note: It’s important to follow the repair instructions carefully and to allow sufficient time for the repaired area to cure before using the bathtub.
Frequently Asked Questions
Do You Screw A Fiberglass Tub To The Wall?
No, you do not screw a fiberglass tub to the wall. Fiberglass tubs are typically installed using a mortar bed or adhesive. The tub is then secured in place using brackets or clips.
What Do You Put Under A Bathtub For Support?
A bathtub should be placed on a solid and level foundation for support. This can be achieved by using a mortar bed or a wooden platform.
Do You Have To Set A Tub In Mortar?
Yes, it is necessary to set a tub in mortar.
How Do You Install A Bathtub Step-By-Step?
To install a bathtub, follow these steps: 1. Turn off the water supply. 2. Remove the old tub and clean the area. 3. Connect the drain and overflow assembly. 4. Position the new bathtub and level it. 5. Attach the plumbing fixtures and seal the edges.
Conclusion
Installing a fiberglass bathtub may seem like a daunting task, but with the right steps, it can be a straightforward process. From preparing the area to ensuring a proper installation, this guide has provided you with essential tips and techniques.
By following these instructions, you can confidently embark on your bathtub installation journey. Remember to choose a high-quality bathtub, gather the necessary tools, and take your time during each step. With patience and careful attention to detail, you’ll soon be enjoying a relaxing soak in your newly installed fiberglass bathtub.