
To install a shower tub combo, first, ensure that the area is properly prepared and the necessary plumbing is in place. Then, secure the tub in the designated area, connect the drain and water supply lines, and seal the joints to prevent leaks.
Planning And Preparation
Installing a shower tub combo can be an exciting project that can transform your bathroom into a functional and stylish space. However, to ensure a successful installation process, proper planning and preparation are key. This involves measuring and assessing your bathroom space, choosing a suitable shower tub combo unit, and gathering the necessary tools and materials. In this article, we will guide you through each step in detail to help you get started on your shower tub combo installation journey.
Measure and assess the bathroom space
Before you start shopping for a shower tub combo unit, it’s important to accurately measure and assess your bathroom space. This will help ensure that you select a unit that fits perfectly and avoids any installation complications. Follow these steps to measure and assess your bathroom:
- Measure the width, height, and depth of the available space for the shower tub combo using a tape measure. Write down these measurements to refer to later.
- Consider the placement of existing fixtures such as toilets, sinks, and cabinets. Take note of any restrictions or obstructions that may impact the installation process.
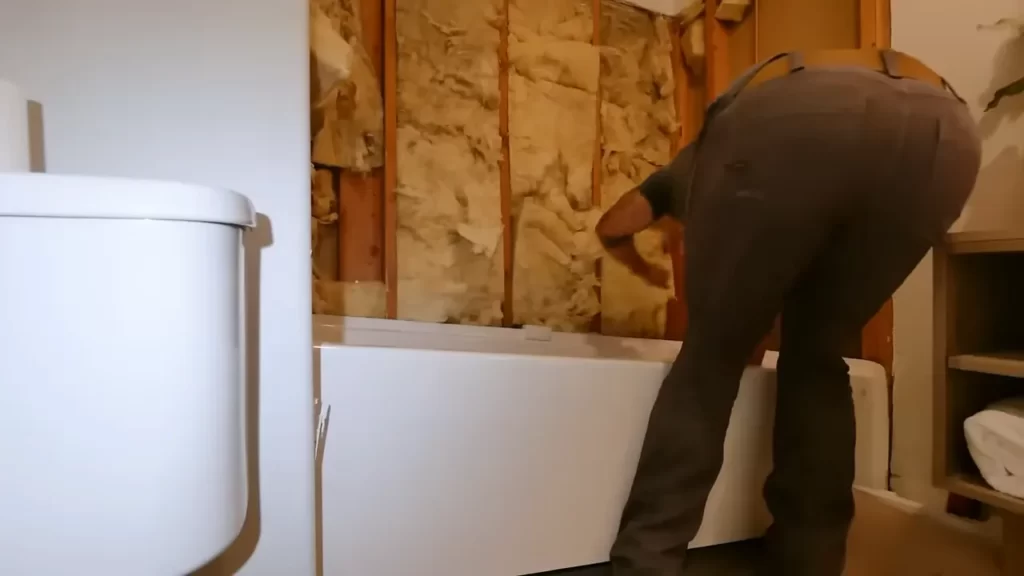
- Evaluate the structural integrity of the walls and floor where the shower tub combo will be installed. Make any necessary repairs or reinforcements before proceeding with the installation.
Choose a suitable shower tub combo unit
Once you have determined the measurements and assessed your bathroom space, it’s time to choose a suitable shower tub combo unit. Consider the following factors:
- Size: Select a unit that fits comfortably within the available space without obstructing other fixtures or impeding movement in the bathroom.
- Design: Choose a style and finish that complements your bathroom decor and personal preferences.
- Functionality: Look for features such as adjustable showerheads, built-in shelves, and grab bars to enhance the functionality and convenience of the combo unit.
Gather necessary tools and materials
Before you begin the installation process, make sure you have all the necessary tools and materials. This will help ensure a smooth and efficient installation. Here is a list of the commonly required tools and materials:
| Tools | Materials |
|---|---|
| Measuring tape | Shower tub combo unit |
| Pencil or marker | Plumbing connectors and fittings |
| Level | Waterproofing membrane or sealant |
| Adjustable wrench | Tubular pipe cutter (if required) |
| Power drill | Tile adhesive and grout (if applicable) |
| Screwdriver | Plumbing tape |
Ensure you have all the listed tools and materials readily available before you begin the installation process. This way, you can work efficiently without any unnecessary delays or interruptions.
By carefully planning and preparing for your shower tub combo installation, you can ensure a successful and hassle-free experience. Now that you understand the importance of measuring and assessing your bathroom space, choosing a suitable unit, and gathering the necessary tools and materials, you’re ready to move on to the next steps of the installation process.
Removing Existing Fixtures
Before you can install a shower tub combo, you need to remove any existing fixtures that may be in the way. This step ensures a smooth and hassle-free installation process. In this section, we will cover the necessary steps to remove these fixtures, including turning off the water supply, removing shower or bathtub fixtures, and disconnecting the plumbing connections.
Turn off the water supply
The first step in removing any fixtures is to turn off the water supply. This prevents any water from flowing while you work and avoids any potential accidents. Locate the main water shutoff valve, typically found near the water meter or inside a utility room.
Remove any existing shower or bathtub fixtures
Once the water supply is turned off, it’s time to remove any existing shower or bathtub fixtures. These fixtures can include faucets, showerheads, handles, and spouts. Use a suitable tool, such as an adjustable wrench or pliers, to loosen and remove the fixtures. Depending on the type of fixture, you may need to unscrew or use a key to disconnect them from the plumbing.
Disconnect the plumbing connections
In addition to removing the fixtures, you also need to disconnect the plumbing connections. This involves loosening and removing any nuts or connectors that hold the pipes in place. Carefully detach the pipes connected to the fixtures and ensure you have a bucket or towels nearby to catch any remaining water.
Pro tip: Before disconnecting any plumbing connections, it’s a good idea to take a picture or make a note of how everything is assembled. This will make the reinstallation process much easier later on.
Once you have successfully turned off the water supply, removed the shower or bathtub fixtures, and disconnected the plumbing connections, you’re now ready to proceed with the next steps of installing your shower tub combo. Stay tuned for the upcoming sections where we will discuss further installation procedures.
Installing The Shower Tub Combo
Installing a shower tub combo in your bathroom can be a great way to save space and add functionality. Whether you’re renovating your bathroom or starting from scratch, the installation process doesn’t have to be daunting. In this guide, we’ll take you through the steps of installing a shower tub combo unit, from positioning it in the bathroom to connecting the plumbing fixtures and pipes. Let’s get started!
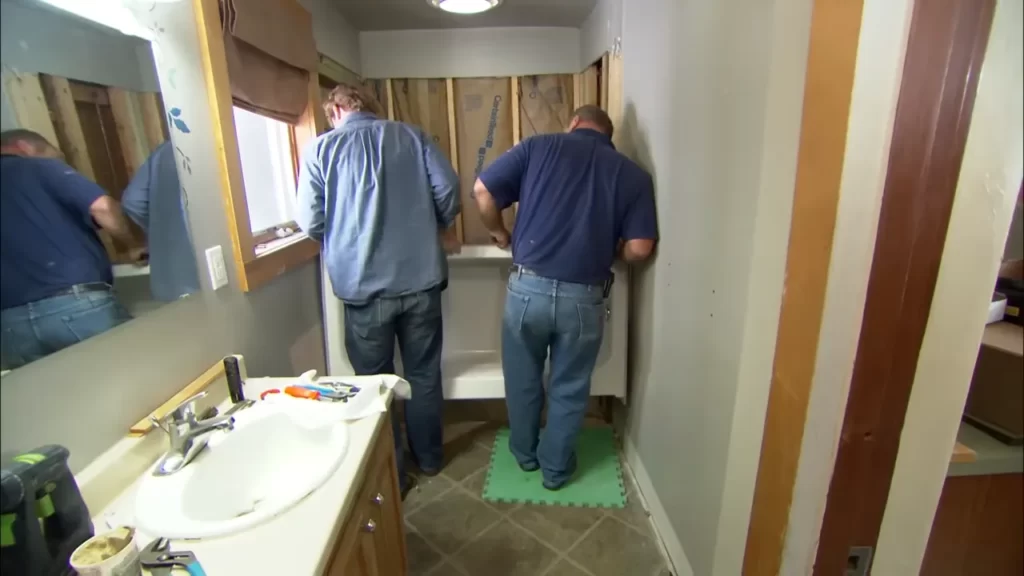
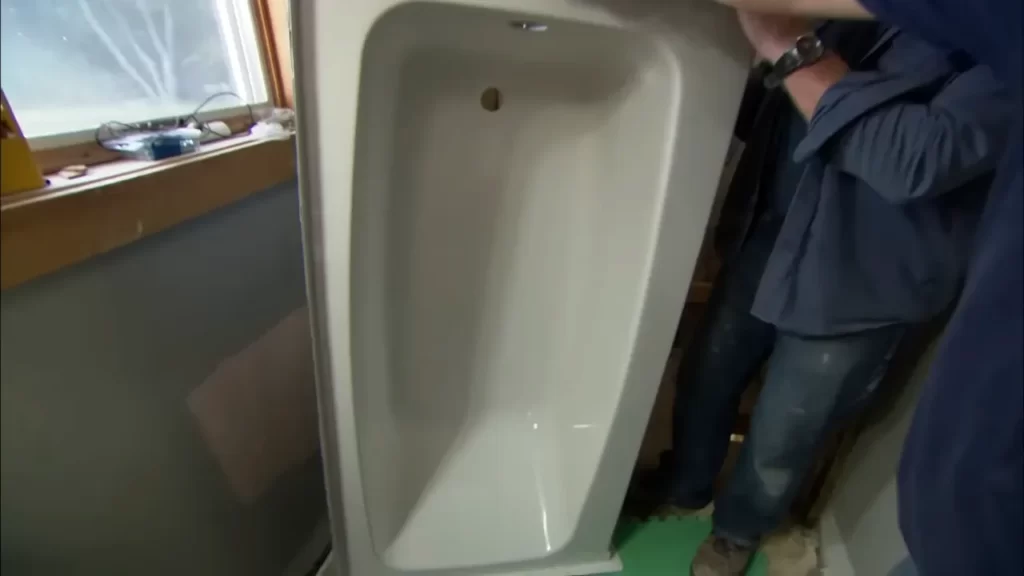
Position the shower tub combo unit in the bathroom
The first step in installing a shower tub combo is to identify the best location for the unit in your bathroom. Consider factors such as accessibility, available space, and the placement of existing plumbing. Once you’ve determined the ideal spot, make sure the floor is level. Use a level to check for any unevenness, and if necessary, adjust the floor by adding shims or using a self-leveling compound.
Next, carefully position the shower tub combo unit in the desired location. Ensure that there is enough clearance on all sides for easy access and maintenance. Remember to keep the unit away from any obstructions, such as walls, doors, or fixtures. It’s also important to take into account the positioning of the drain and plumbing connections.
Secure the unit to the floor and wall
Once the shower tub combo unit is in place, it’s time to secure it to the floor and wall. Start by attaching an adhesive or silicone caulk bead along the bottom edge of the unit to create a watertight seal. This will help prevent any water from leaking under the unit and causing damage.
Next, secure the unit to the floor using screws or nails. Make sure to use appropriate fasteners that are suitable for the type of flooring you have. If you have a concrete floor, you may need to use concrete anchors or masonry screws.
For added stability, secure the unit to the wall as well. Find the wall studs using a stud finder and mark their location. Then, drill holes into the unit and attach it to the wall using screws or nails. Be careful not to damage any plumbing or electrical lines behind the wall.
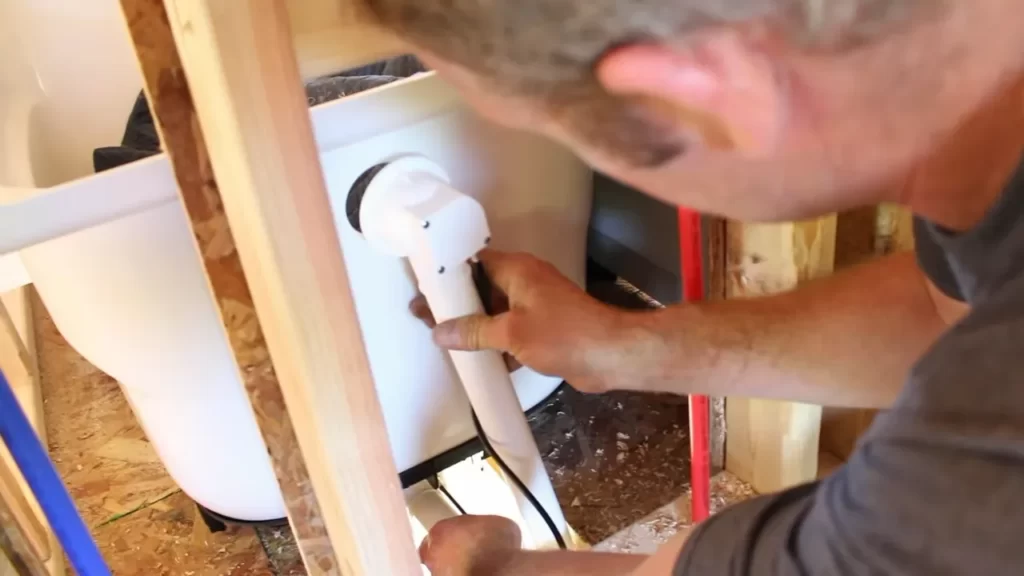
Connect the plumbing fixtures and pipes
Before you can start enjoying your new shower tub combo, you need to connect the plumbing fixtures and pipes. Begin by attaching the showerhead and faucet to their respective fittings on the unit. Use plumber’s tape on the threaded connections to ensure a tight seal and prevent any leaks.
Next, connect the drain pipe to the unit’s drain outlet. Apply plumber’s putty or silicone caulk to the drain flange before inserting it into the drain outlet. Tighten the locknut to secure the drain in place.
When connecting the supply lines, make sure to use the appropriate fittings and connectors. Depending on your plumbing setup, you may need to use compression fittings or solder the connections. Follow the manufacturer’s instructions and local plumbing codes to ensure a proper and safe installation.
Once all the plumbing connections are in place, turn on the water supply and check for any leaks. Make sure all the fittings are tight and secure. If you notice any leaks, tighten the connections or replace any faulty parts.
Now that you’ve successfully installed the shower tub combo unit, it’s time to test it out! Run the water and make sure everything is functioning correctly. Enjoy the convenience and versatility of your new shower tub combo.
Waterproofing And Sealing
Proper waterproofing and sealing are crucial when installing a shower tub combo to prevent costly water damage and ensure the longevity of your bathroom renovation. By following these essential steps, you can create a watertight seal that keeps your shower area protected from leaks and moisture.
Apply a waterproof membrane to the walls
The first step in waterproofing your shower tub combo is to apply a reliable waterproofing membrane to the walls. This membrane acts as a barrier against water penetration, protecting the underlying structure and preventing the growth of mold and mildew.
To apply the membrane, follow these steps:
- Clean the walls thoroughly to ensure proper adhesion.
- Apply the waterproofing membrane using a brush or roller, ensuring complete coverage.
- Pay special attention to the corners and seams, as these areas are prone to leaks.
- Allow the membrane to dry completely before moving on to the next step.
Install a tub surround or tile the walls
Once the waterproof membrane is in place, you have two options for the walls of your shower tub combo: installing a tub surround or tiling the walls. Both options provide a waterproof barrier and a visually appealing finish.
Option 1: Tub Surround
A tub surround is a pre-made system that encloses the walls around your shower tub combo. It usually consists of ABS or fiberglass panels that are easy to install and maintain. To install a tub surround:
- Cut the panels to the correct size, ensuring a snug fit around the tub.
- Apply construction adhesive to the back of each panel.
- Press the panels firmly against the walls, starting from the bottom and working your way up.
- Secure the panels in place with screws or nails.
- Seal the seams between the panels using a waterproof silicone sealant.
Option 2: Tiling the Walls
Tiling the walls of your shower tub combo offers endless design possibilities and a more custom look. To tile the walls:
- Prepare the walls by applying a layer of thin-set mortar.
- Place the tiles onto the mortar, using tile spacers to ensure even gaps between tiles.
- Allow the mortar to dry, then apply grout between the tiles, using a grout float.
- Wipe away excess grout with a damp sponge, and allow it to cure.
Seal the seams and joints to prevent leaks
To create a watertight seal and prevent leaks, it’s essential to seal the seams and joints of your shower tub combo. This includes the corners, edges, and any areas where different materials meet.
To seal the seams and joints, follow these steps:
- Using a caulk gun, apply a bead of waterproof silicone sealant along the seams and joints.
- Smooth the sealant using a caulking tool or your finger, ensuring complete coverage.
- Wipe away any excess sealant with a damp cloth.
Regularly inspect the sealed areas for any signs of wear or damage, and reseal as necessary to maintain a watertight barrier.
Installing The Shower Valve And Faucet
Once you have located the valve and faucet positions on the shower tub combo unit, it’s time to install the shower valve and faucet. Following the manufacturer’s instructions is crucial to ensure a successful installation. Here’s a step-by-step guide to help you through the process:
1. Locate the valve and faucet positions on the unit
Before you begin installing the shower valve and faucet, identify the specific locations where they should be mounted on your shower tub combo unit. Refer to the instructions provided by the manufacturer for accurate placement. Take measurements and mark the positions accordingly.
2. Install the shower valve and faucet according to the manufacturer’s instructions
To start the installation process, carefully read and understand the manufacturer’s instructions. Make sure you have all the necessary tools and materials readily available. Follow these steps:
- Step 1: Assemble the shower valve according to the specifications provided. Ensure all the components are securely attached.
- Step 2: Attach the valve to the pre-marked position on the shower tub combo unit. Use the provided screws or brackets to secure it in place. Ensure it is level and aligned correctly.
- Step 3: Connect the water supply lines to the relevant ports on the shower valve. Use Teflon tape or pipe joint compound to create a watertight seal. Tighten the connections using an adjustable wrench, being careful not to overtighten.
- Step 4: Install the faucet following the manufacturer’s instructions. This typically involves attaching it to the valve and securing it with the provided hardware. Ensure the faucet handle aligns correctly with the water control mechanism.
Once you have completed the installation, carefully inspect all connections for any potential leaks. Seal any gaps with the appropriate products. Finally, turn on the water supply and test the functionality of your new shower tub combo by adjusting the temperature and flow. Enjoy the refreshing experience it provides!
Connecting The Drain System
Now that you have successfully installed the shower tub combo and ensured its stability, it’s time to tackle the crucial task of connecting the drain system. This step is essential for proper drainage and preventing any leaks or pooling of water. Follow these simple steps to install the drain components and connect the drain pipes to the main plumbing system.
Install the drain components
Before connecting the drain pipes, it’s necessary to install the drain components. Start by placing the drain flange onto the drain hole at the base of the shower tub combo. Ensure that it fits snugly and is properly aligned. You may need to apply a small amount of plumber’s putty to create a watertight seal between the flange and the tub. Tighten the flange with a drain wrench to secure it in place.
Next, insert the drain tailpiece into the drain flange from underneath the tub. This tailpiece guides the water flow from the tub to the drain pipes. Make sure to align it properly and check for any leaks or misalignments.
Connect the drain pipes to the main plumbing system
Now that the drain components are installed, it’s time to connect the drain pipes to the main plumbing system. Follow these steps carefully:
- Measure and cut the PVC drain pipe according to the distance between the drain tailpiece and the main plumbing line. It’s crucial to ensure accurate measurements to avoid any pipe misalignments.
- Apply PVC primer to both the pipe end and the corresponding fitting. Then, apply PVC cement to the same areas. This creates a strong bond and prevents any leaks.
- Insert the pipe into the fitting and twist it slightly to ensure a proper connection. Hold it in place for a few seconds to allow the cement to set.
- If you need to connect multiple pipes, repeat the above steps for each connection, ensuring a secure and watertight joint at every junction.
- Finally, attach the last section of the drain pipe to the main plumbing line using the same method described above. Double-check all the connections for leaks or any loose fittings. If needed, use a pipe wrench to tighten them further.
Once all the drain pipes are securely connected, run water through the shower tub combo to check for any leakages. It’s recommended to leave the water on for a few minutes to ensure that the drainage system is working efficiently.
By following these simple steps, you can confidently connect the drain system of your shower tub combo. Remember that proper installation is the key to ensuring a functional and leak-free bathroom. Now it’s time to move on to the next steps of your bathroom remodeling project!
Testing And Finishing Touches
Once you have successfully installed your shower tub combo, it’s time to move on to the crucial step of testing and adding finishing touches. To ensure that your installation is solid and the combo is functioning properly, follow these simple steps:
Turn on the water supply and check for leaks
To start, you need to turn on the water supply and carefully inspect for any leaks. It’s important to be thorough in this process, as even the smallest leak can cause significant damage over time. Here’s how to do it:
- Slowly turn on the water supply by opening the main valve. It’s recommended to have someone assist you during this step.
- While the water is running, carefully examine all the connections and pipes to check for any signs of leakage. Pay close attention to joints, valves, and any areas where you made modifications during the installation process.
- If you notice any leaks, immediately turn off the water supply and take necessary actions to resolve the issue. This may involve tightening connections, adding sealant, or even seeking professional help.
- Repeat this process multiple times, testing both the hot and cold water supplies, to ensure that your shower tub combo is leak-free and ready for use.
Test the shower tub combo’s functionality
Once you have confirmed that there are no leaks, it’s time to test the functionality of your shower tub combo. By following these steps, you can ensure that everything is working smoothly:
- Turn on the water supply and adjust the temperature according to your preference.
- Test the water pressure by turning on both the showerhead and bathtub faucet. Ensure that the pressure is consistent and that the water is flowing as desired.
- Check the functionality of any additional features your shower tub combo may have, such as a hand shower or massage jets. Make sure these features are working correctly and without any issues.
- If you notice any problems, such as poor water pressure or malfunctioning features, it’s essential to address them promptly. This may involve adjusting valves, unclogging showerheads, or seeking professional assistance if necessary.
Apply any necessary finishing touches, such as caulking or grouting
With the testing phase complete, it’s time to add those essential finishing touches that will not only enhance the aesthetics of your shower tub combo but also help to prevent any future problems. Here’s what to do:
- Inspect the areas where the tub meets the walls and the floor. These areas should be caulked to prevent water from seeping in and causing damage.
- Using a high-quality caulk suitable for wet environments, carefully apply a thin bead of caulk along the edges of the tub, ensuring a tight seal.
- If your shower tub combo also includes tiles, it’s essential to properly grout the tile joints to prevent water penetration. First, remove any excess adhesive between the tiles, leaving clean gaps for grouting.
- Prepare a batch of grout according to the manufacturer’s instructions, and using a grout float or your fingers, push the grout into the joints, ensuring they are completely filled.
- Remove any excess grout with a damp sponge or cloth, and allow it to dry completely.
- Finally, use a grout sealer to protect the grout from moisture and stains, following the product’s instructions.
By carefully testing your shower tub combo’s functionality and applying necessary finishing touches, you can ensure a successful installation that not only looks great but also functions efficiently, providing you with a relaxing and enjoyable bathing experience for years to come.
Cleaning And Maintenance Tips
Regularly cleaning and maintaining your shower tub combo is essential to ensure its longevity and keep it looking clean and inviting. By following these tips, you can prevent mildew and soap scum buildup, check for any loose or damaged components, and maintain proper ventilation to prevent moisture-related issues.
Regularly Clean the Shower Tub Combo to Prevent Mildew and Soap Scum Buildup
Mildew and soap scum can quickly accumulate on the surfaces of your shower tub combo, making it look dirty and unhygienic. To prevent this buildup, it’s important to incorporate regular cleaning into your routine.
To effectively clean your shower tub combo, follow these steps:
- Mix equal parts of white vinegar and water in a spray bottle.
- Spray the solution onto the surfaces of the tub, shower walls, and any other areas prone to buildup.
- Allow the solution to sit for 10-15 minutes to break down the mildew and soap scum.
- Use a sponge or scrub brush to gently scrub the surfaces, paying extra attention to stubborn areas.
- Rinse thoroughly with warm water.
- Dry the surfaces with a clean towel or microfiber cloth.
By regularly performing this cleaning routine, you can keep your shower tub combo looking clean and prevent the growth of mold and mildew.
Check for Any Loose or Damaged Components and Repair as Needed
Over time, certain components of your shower tub combo may become loose or damaged, affecting its functionality and appearance. To ensure everything is in proper working order, periodic inspections are necessary.
Here’s what you need to do:
- Inspect the showerhead, faucets, handles, and any other hardware for any signs of looseness or damage.
- If you notice any issues, such as leaks or wobbling parts, it’s important to address them promptly.
- Tighten any loose screws or connections using an appropriate tool.
- If components are damaged beyond repair, consider replacing them with new ones.
Regular checks and timely repairs will extend the lifespan of your shower tub combo and ensure a hassle-free bathing experience.
Maintain Proper Ventilation to Prevent Moisture-Related Issues
Proper ventilation is crucial in any bathroom, especially when you have a shower tub combo. Insufficient airflow can lead to excess moisture, which can result in various issues, including mold and mildew growth, peeling paint, and warping of wood surfaces.
To maintain proper ventilation:
- Keep the bathroom door open or use an exhaust fan during and after showering to allow the steam to escape.
- Ensure that the bathroom has a window or an exhaust fan to circulate fresh air.
- Consider using a dehumidifier to control humidity levels, especially in areas with high moisture.
By following these ventilation practices, you can minimize the risk of moisture-related problems and keep your shower tub combo in top condition.
Frequently Asked Questions
How Much Does It Cost To Install A Shower Tub Combo?
The cost of installing a shower tub combo can vary, but on average, homeowners can expect to spend around $2,500 to $6,000. It depends on factors such as the materials, size, and any additional features or modifications needed for installation.
Is A Shower Tub Combo A Good Idea?
A shower tub combo is a great idea because it saves space and provides versatility in bathing options. It’s convenient for those who prefer showers and those who enjoy soaking in a bathtub. This combination is perfect for small bathrooms where separate shower and tub installations may not be possible.
How To Install A Tub And Shower Surround?
To install a tub and shower surround, follow these steps: 1. Measure the area to ensure proper fit. 2. Remove any existing fixtures and prepare the walls for installation. 3. Apply adhesive according to the manufacturer’s instructions. 4. Place the surround panels onto the wall, aligning them properly.
5. Secure the panels with screws or adhesive as specified by the manufacturer.
How Do You Connect A Bathtub To A Shower?
To connect a bathtub to a shower, you can install a showerhead over the bathtub faucet. You can also consider adding a shower curtain rod or glass enclosure for a more permanent solution. Make sure to consult a professional for any plumbing modifications needed to ensure a proper connection.
Conclusion
Installing a shower tub combo can be a seamless process with the right guidance. By following these step-by-step instructions, you can successfully add a stylish and functional shower tub combo to your bathroom. From preparing the space to connecting the plumbing, every detail is crucial for a successful installation.
Remember to always prioritize safety and consult professionals if needed. With patience and precision, you can transform your bathroom into a relaxing oasis. Start your installation journey today!