
Installing a fiberglass tub and surround is a straightforward process that involves several steps: preparing the space, checking for level and stability, connecting the plumbing, applying adhesive, securing the tub, and installing the surround. It is important to follow the manufacturer’s instructions and use the appropriate tools and materials for a successful installation.
In this guide, we will walk you through the process of installing a fiberglass tub and surround, ensuring a beautiful and functional addition to your bathroom. So let’s get started with the step-by-step instructions.
Factors To Consider Before Purchasing
Installing a fiberglass tub and surround can be a great way to refresh your bathroom and give it a sleek, modern look. However, before you make your purchase, there are a few key factors to consider. These factors will ensure that you choose the right size, style, and design to fit your needs, as well as ensure that it is compatible with your existing plumbing system.
Size and Dimensions
When it comes to choosing a fiberglass tub and surround, one of the first factors to consider is the size and dimensions. You want to make sure that the tub and surround will fit in your bathroom space comfortably. Measure the area where you plan to install the tub and surround and compare it to the dimensions of the product you are considering. Pay attention to the length, width, and height to ensure that it will fit properly.
Style and Design Options
The style and design of the fiberglass tub and surround are also important factors to consider. Think about the overall aesthetic of your bathroom and choose a style that complements it. Whether you prefer a minimalistic and modern design or a more traditional look, there are plenty of options available. Consider the color, shape, and finish of the tub and surround, and choose one that best suits your personal style and preferences.
Compatibility with Existing Plumbing
Another crucial factor to consider is the compatibility of the fiberglass tub and surround with your existing plumbing. Ensure that the drain opening, water supply lines, and faucet holes align properly with your plumbing system. This will prevent any issues or additional work that may arise during installation. In addition, consider if any modifications need to be made to your plumbing system to accommodate the new tub and surround. Consulting a professional plumber can help ensure a successful installation.
When purchasing a fiberglass tub and surround, it is essential to consider the size and dimensions, style and design options, and compatibility with your existing plumbing. By taking each of these factors into account, you can confidently choose a tub and surround that will fit perfectly in your bathroom and provide the desired aesthetic appeal.

Materials And Tools Needed For Installation
Before you can start installing your fiberglass tub and surround, it’s important to gather all the necessary materials and tools. Having everything prepared in advance will ensure a smooth installation process. Here are the key items you’ll need:
Fiberglass tub and surround kit
A fiberglass tub and surround kit is an all-in-one package that includes the tub, surround panels, and any necessary hardware. It’s crucial to choose a kit that fits the measurements of your bathroom to ensure a proper fit.
Caulk and caulk gun
Caulk is an essential component of the installation process as it helps to create a watertight seal between the tub, surround, and walls. Make sure to choose a waterproof caulk that is specifically designed for use in bathrooms. A caulk gun will help you apply the caulk evenly and precisely.
Adhesive
Adhesive is used to secure the surround panels to the walls and tub. Depending on the specific kit you’re using, you may need adhesive that is compatible with fiberglass or other materials. Be sure to read the manufacturer’s instructions to determine the appropriate adhesive for your particular kit.
Screwdriver
A screwdriver will be necessary for assembling any hardware that comes with your tub and surround kit. It will also come in handy for removing any existing fixtures that need to be taken down before installation.
Level
Using a level is crucial to ensure that your tub and surround are installed correctly and level with the floor. This will help prevent any water pooling or drainage issues that could arise from an uneven installation.
Utility knife
A utility knife is a versatile tool that will come in handy during the installation process. It can be used to trim any excess caulk, cut holes for fixtures, or make precise cuts on the surround panels.
Measuring tape
A measuring tape is essential for taking accurate measurements of your bathroom and tub area. This will help you ensure that your tub and surround kit fit properly and allow for any necessary adjustments before installation.
By gathering these materials and tools beforehand, you’ll be well-prepared to tackle the installation process with confidence. Remember to follow the manufacturer’s instructions provided with your specific tub and surround kit for the best results.
Removing The Old Tub And Surround
Before you can install a new fiberglass tub and surround, you’ll need to remove the old one. This process involves turning off the water supply, removing fixtures and trim, cutting through caulk and adhesive, and finally, removing the tub and surround itself. In this section, we’ll walk you through each step in detail.
Turning off the water supply
The first step in removing the old tub and surround is to turn off the water supply. This is essential to prevent any leaks or water damage. Locate the shut-off valves on the water supply lines, usually located near the floor or walls behind the tub. Turn the valves clockwise until they are fully closed. To ensure the water is completely shut off, turn on a faucet in another part of the house and wait until the water stops running.
Removing fixtures and trim
Once the water supply is turned off, you can move on to removing the fixtures and trim around the tub. Start by removing the showerhead, bathtub spout, and any other fixtures attached to the walls or tub. Use a wrench or pliers to loosen and unscrew these items. Set them aside in a safe place for reinstallation later. Next, carefully remove any trim or molding around the edge of the tub using a pry bar or putty knife. Take your time to avoid damaging the surrounding walls or surfaces.
Cutting through caulk and adhesive
To separate the tub and surround from the walls, you’ll need to cut through the caulking and adhesive that holds them in place. Use a utility knife or caulk removal tool to carefully cut along the edges where the tub and surround meet the walls. Take care not to damage the walls or tub surface as you cut. Once the caulk is cut, gently pry the tub and surround away from the walls using a pry bar or putty knife.
Removing the tub and surround
With the caulk and adhesive cut, you can now remove the old tub and surround from the bathroom. This step may require some assistance, as the tub and surround can be heavy. Have a friend or family member help you lift and remove them from the space. Take care not to scrape or damage the walls or flooring as you work. Once the tub and surround are removed, inspect the area for any remaining caulk or adhesive. Use a scraper or sandpaper to remove any residue before proceeding with the installation of the new fiberglass tub and surround.
Remember: Removing the old tub and surround can be a labor-intensive process, so it’s important to take your time and follow each step carefully. By preparing the space properly, you’ll ensure a smooth and successful installation of your new fiberglass tub and surround.
Prepping The Installation Area
Prepping the installation area is a crucial step when it comes to installing a fiberglass tub and surround. Taking the time to properly prepare the space ensures a smooth and successful installation process. In this section, we will guide you through the important steps to prepare the installation area, including checking the bathroom floor condition, repairing any damage or uneven surfaces, cleaning the area thoroughly, and measuring and marking the placement of the new tub.
Checking the bathroom floor condition
Before starting the installation process, it is essential to check the condition of your bathroom floor. Look for any signs of water damage, rot, or weakened areas. If you notice any of these issues, it is crucial to address them before proceeding with the installation. Failure to do so can lead to future problems and potentially damage your new fiberglass tub.
Repairing any damage or uneven surfaces
If you come across any damage or uneven surfaces on your bathroom floor, take the time to repair them. Start by removing any loose or damaged tiles or flooring materials. Fill in any holes or cracks with a suitable filler, ensuring a smooth and level surface for the tub installation. This step is necessary to provide a stable foundation and prevent future issues.
Cleaning the area thoroughly
Before installing your new fiberglass tub and surround, it is crucial to clean the installation area thoroughly. Remove any dirt, dust, or debris from the floor, walls, and surrounding areas. Use a mild cleaner and a scrub brush to ensure a clean and sanitary surface. Proper cleaning not only enhances the adhesion of the tub but also ensures a clean and appealing final result.
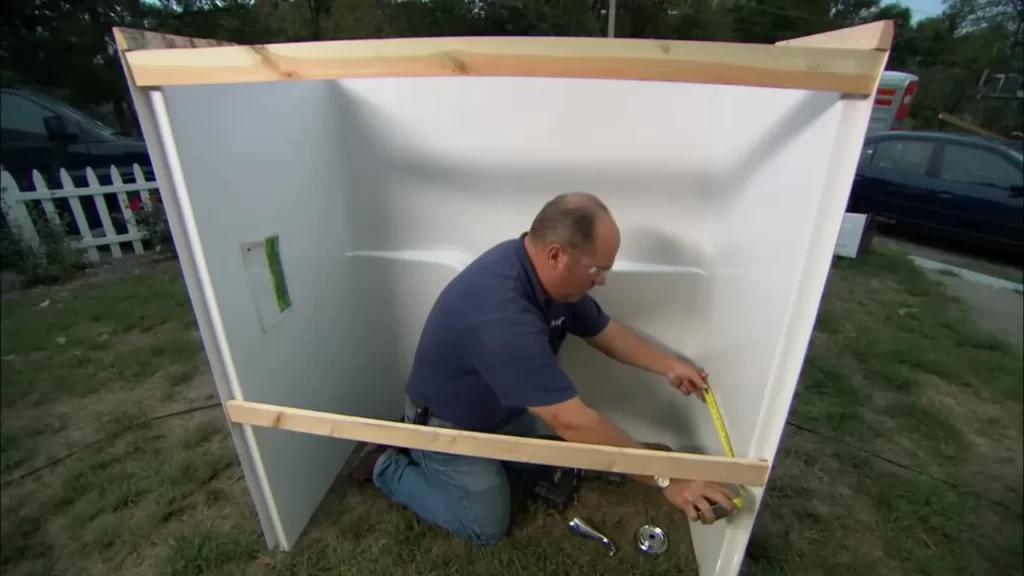
Measuring and marking the placement of the new tub
Once the area is prepped, it’s time to measure and mark the placement of the new tub. Start by measuring the dimensions of your bathroom to ensure a proper fit. With the help of a measuring tape, mark the position of the tub on the floor, taking into account any required plumbing connections. Double-check the measurements to ensure accuracy and make any necessary adjustments before moving forward.
By following these crucial steps to prepare the installation area, you are setting the foundation for a successful fiberglass tub and surround installation. Remember, proper preparation ensures a seamless and long-lasting result, so don’t rush through this essential stage.
Dry Fitting And Adjustments
When it comes to installing a fiberglass tub and surround, one of the most critical steps is dry fitting and making necessary adjustments for the perfect fit. Dry fitting involves temporarily placing the tub and surround in the designated area to ensure it fits properly and assess any adjustments that need to be made. This step is crucial as it allows you to address any potential issues or discrepancies before making the final installation. Let’s dive into the details of dry fitting and adjustments to ensure a seamless installation process.
Dry fitting the tub and surround
The first step in the dry fitting process is placing the tub and surround in the designated area without any adhesives or fasteners. This temporary placement allows you to assess how the tub fits within the available space and determine if any modifications are needed. Here are some key points to consider:
- Ensure the tub is centered and aligned properly with the drain and faucet locations.
- Check for any gaps or uneven areas between the tub and the surrounding walls.
- Verify that the tub is at the desired height and level, making adjustments if necessary.
By dry fitting the tub and surround in this manner, you can identify any potential issues before moving forward with the installation process.
Making necessary adjustments for a perfect fit
During the dry fitting process, it’s common to encounter minor adjustments that need to be made to achieve a perfect fit for your fiberglass tub and surround. Here are some techniques to ensure a seamless installation:
- Shimming: If the tub doesn’t sit level or appears uneven, shimming can be used to adjust the height and stability. Shims, typically made of wood or plastic, are placed beneath the tub to level it and create a secure foundation.
- Trimming: In some cases, you may need to trim the tub or the surrounding walls to achieve a proper fit. This may involve using a saw or other appropriate tools to remove excess material carefully.
- Caulking: During the dry fitting process, pay attention to any gaps between the tub and the wall. These gaps can be filled and sealed with caulk to ensure a watertight installation and prevent any water damage in the future.
By making necessary adjustments during the dry fitting process, you can eliminate potential issues and ensure that your fiberglass tub and surround fit seamlessly within your bathroom space.
Ensuring level placement
When installing a fiberglass tub and surround, ensuring a level placement is crucial for both functionality and aesthetics. A level tub ensures proper drainage and prevents leakage. Here’s how to ensure level placement:
- Use a spirit level: Place a spirit level on the edges of the tub to determine if it’s level from all directions. Make adjustments as necessary by shimming or repositioning the tub.
- Check for stability: Ensure that the tub doesn’t wobble or move when pressure is applied. If it does, reinforce its stability by adjusting or adding additional support.
By taking the time to ensure that your fiberglass tub and surround are placed level, you can enjoy a comfortable and properly functioning installation.
Applying Adhesive And Caulk
Applying Adhesive to the Tub and Surround
One important step in installing a fiberglass tub and surround is applying adhesive. The adhesive ensures a secure and stable connection between the tub, surround, and the wall. To start, make sure the tub and surround surfaces are clean and dry. Any dirt or moisture can affect the adhesion process.
Next, apply a generous amount of adhesive to the back of the tub and surround using a caulk gun or adhesive dispenser. The adhesive should be evenly distributed, covering the entire surface area. Be sure to follow the manufacturer’s instructions regarding the specific type of adhesive to use and any application guidelines.
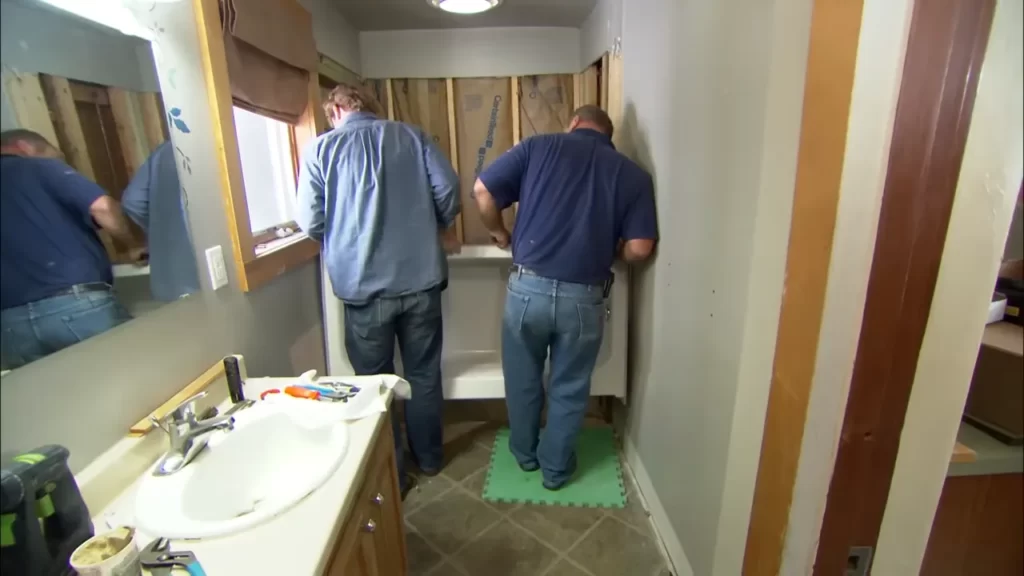
Placing the Tub into Position
Once the adhesive is applied, carefully place the tub into position, aligning it with the designated area on the floor. Measure and adjust if needed to ensure a proper fit. Take your time with this step, as it is crucial to ensure the tub is centered and level.
Using a level, check the tub in both directions to ensure it is perfectly horizontal. This will prevent any potential future issues, such as draining problems or uneven water levels. Remember, a well-placed and level tub is essential for optimal functionality and longevity.
Applying Caulk to Seams and Edges for a Watertight Seal
To create a watertight seal and prevent any potential leaks, applying caulk to seams and edges is vital. Start by filling a caulk gun with the appropriate waterproof caulk. Silicone caulk is commonly used for its durability and flexibility, which allows it to withstand moisture and movement.
Apply a steady and even bead of caulk along the seams where the tub and surround meet the wall. Additionally, apply caulk along the edges of the tub and surround. Use a caulk smoothing tool or your finger to remove any excess caulk and create a neat finish.
Remember to work in small sections, as caulk tends to dry quickly. This ensures better control and a cleaner result. Allow the caulk to dry completely according to the manufacturer’s instructions before using the tub and surround.
In conclusion, applying adhesive and caulk correctly is crucial in achieving a secure and watertight installation of a fiberglass tub and surround. Taking the time to properly apply adhesive, place the tub into position, and evenly spread caulk will not only ensure a successful installation but also contribute to the longevity and functionality of your bathroom fixtures. So, follow these steps diligently to enjoy a well-installed and sealed fiberglass tub and surround.
Connecting And Securing The Plumbing
Connecting and securing the plumbing fixtures is a crucial step in the process of installing a fiberglass tub and surround. It ensures that the water flows smoothly and safely. In this section, we will guide you through the steps you need to take to reconnect the plumbing fixtures, tighten the connections securely, and check for leaks.
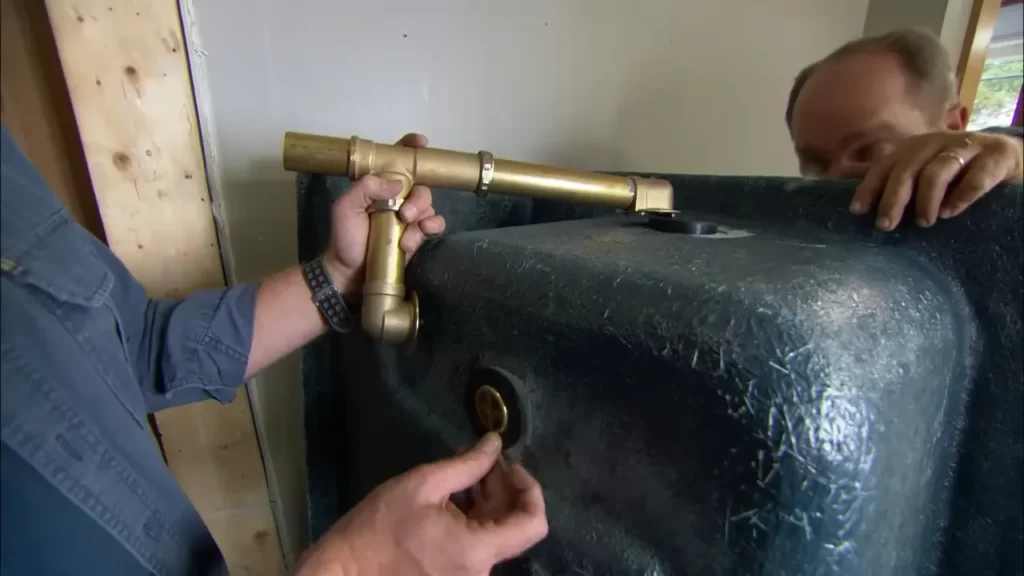
Reconnecting the Plumbing Fixtures
To begin reconnecting the plumbing fixtures, you need to gather the necessary supplies:
| Supplies: |
|
Follow these steps to reconnect the plumbing fixtures:
- Apply plumber’s tape to the threads of the water supply lines and drain pipe.
- Attach the water supply lines to the appropriate hot and cold water valves, using an adjustable wrench to tighten the connections.
- Connect the drain pipe to the tub’s drain outlet, ensuring a secure fit.
- Use a screwdriver to tighten any screws or clamps that secure the plumbing fixtures in place.
Tightening Connections Securely
Properly tightening the connections is essential to prevent leaks and ensure the longevity of your fiberglass tub and surround. Here are the steps to tighten the connections securely:
- Check for any loose connections by gently wiggling the pipes and fixtures.
- If you find any loose connections, use an adjustable wrench to tighten them until they are snug. Be careful not to overtighten, as it may cause damage.
- Apply a thin layer of pipe compound to the threads before reconnecting any fittings if necessary.
Checking for Leaks
After reconnecting and securing the plumbing, it is crucial to check for leaks to ensure everything is functioning correctly. Follow these steps to check for leaks:
- Turn on the water supply and let it flow for a few minutes.
- Inspect all the connections, valves, and pipes for any signs of leaks.
- If you notice any leaks, tighten the connections further or make any necessary adjustments to eliminate the leakage.
By following these steps to reconnect the plumbing fixtures, tightening the connections securely, and checking for leaks, you can ensure a hassle-free and functional fiberglass tub and surround installation.
Finishing Touches And Clean Up
Trimming Excess Caulk
After allowing the caulk to dry for the recommended amount of time, it’s time to give your fiberglass tub and surround those finishing touches. To achieve a polished and professional look, start by trimming any excess caulk around the edges. Use a sharp utility knife or a caulk removal tool to carefully remove any stray or uneven caulk lines. Be sure to take your time and work slowly to avoid damaging the tub or surround.
Installing Fixtures and Trim
Next, it’s time to install the fixtures and trim that will complete the overall look of your fiberglass tub and surround. Whether you’ve chosen a sleek and modern faucet or a traditional showerhead, follow the manufacturer’s instructions carefully for a seamless installation. Make sure all fixtures are securely tightened and properly aligned. Additionally, install any trim pieces, such as decorative caps or corner shelves, to enhance the aesthetic appeal of your bathroom.
Wiping Down the Tub and Surround
Now that the installation is complete, it’s important to clean up any dust, debris, or fingerprints that may have accumulated during the process. Use a soft cloth or sponge, along with a mild household cleaner, to gently wipe down the entire surface of the tub and surround. Be sure to pay close attention to corners and crevices where dirt can easily accumulate. This final step will not only give your fiberglass tub and surround a clean and polished appearance, but it will also help preserve its longevity.
Testing for Functionality
The last step in your fiberglass tub and surround installation is to test its functionality. Turn on the water and check for any leaks or drips around the fixtures. Adjust the temperature controls and test the water flow to ensure everything is working properly. Step into the tub and make sure it feels sturdy and secure. Run the shower to check the water pressure and make any necessary adjustments. Taking the time to test for functionality will give you peace of mind knowing that your fiberglass tub and surround is not only beautiful, but also fully operational.
Maintaining And Caring For The Fiberglass Tub And Surround
Maintaining and caring for your fiberglass tub and surround is essential to keep them looking their best and to extend their lifespan. With proper cleaning, preventive measures, and regular maintenance, you can ensure that your fiberglass tub and surround remain in pristine condition for many years to come. In this article, we will provide you with valuable tips and tricks on cleaning, preventing damage and stains, as well as establishing a regular maintenance routine for your fiberglass tub and surround.
Cleaning Tips and Tricks
Cleaning your fiberglass tub and surround regularly not only helps in maintaining their appearance but also prevents the accumulation of dirt, grime, and soap scum. Follow these effective cleaning tips and tricks to keep your tub and surround sparkling clean:
- Use a non-abrasive cleaner specifically designed for use on fiberglass surfaces. Avoid using harsh chemicals or scrub pads that can scratch or damage the fiberglass.
- Apply the cleaner to the tub and surround and let it sit for a few minutes to dissolve any stubborn stains or soap scum.
- Gently scrub the surface using a soft sponge or cloth, focusing on areas with stains or buildup.
- Rinse thoroughly with warm water, ensuring all the cleaner residue is removed.
- Dry the tub and surround with a clean towel to prevent water spots or streaks.
Preventing Damage and Stains
Prevention is key when it comes to caring for your fiberglass tub and surround. By taking a few precautions, you can avoid potential damage and unsightly stains. Here are some preventive measures you should consider:
- Use mild and non-abrasive cleaning products to avoid scratching or damaging the fiberglass surface.
- Avoid using metal or abrasive tools when cleaning the tub or surround.
- Place a non-slip bath mat or adhesive strips on the bottom of the tub to prevent accidental slips and falls.
- Wipe away any spills or splashes immediately to prevent staining.
- Avoid using harsh chemicals, such as bleach or acetone, near the tub and surround, as they can cause discoloration or damage.
Regular Maintenance Routine
Establishing a regular maintenance routine for your fiberglass tub and surround is crucial to keep them looking their best. Follow these steps to ensure your tub and surround remain in excellent condition:
- After each use, rinse the tub and surround with warm water to remove any soap residue or dirt.
- Once a week, use a non-abrasive cleaner to remove any buildup or stains.
- Inspect the caulking around the tub and surround regularly. If you notice any cracks or deterioration, recaulk to prevent water damage.
- Keep the bathroom well-ventilated to prevent excessive humidity, which can lead to mold or mildew growth. Use an exhaust fan or open a window during and after showers.
- Periodically wax your fiberglass tub and surround with a specialized wax to maintain their shine and protect the surface.
By following these cleaning tips, preventive measures, and establishing a regular maintenance routine, you can ensure that your fiberglass tub and surround continue to provide you with a luxurious bathing experience for years to come.
Frequently Asked Questions
Do You Screw A Fiberglass Tub To The Wall?
Yes, fiberglass tubs are typically secured to the wall. Wall anchors or screws are commonly used for this purpose. It is important to ensure proper installation to prevent any possible damage or instability.
Do You Need Drywall Behind A Tub Surround?
Yes, you need drywall behind a tub surround. Drywall provides a sturdy backing for the tub surround, ensuring stability and durability over time. It also helps prevent water damage and provides a smooth surface for installation. Drywall is an essential component for a properly installed tub surround.
What Goes Behind A Tub Surround?
A tub surround typically includes a moisture barrier, cement board, and tile or another waterproof material. The moisture barrier prevents water damage while the cement board provides a stable surface for the tile. The waterproof material ensures a watertight seal to protect the walls around the tub.
How Do You Install A Tub Surround Over An Existing Tub?
To install a tub surround over an existing tub: 1. Clean and prepare the tub surface. 2. Measure and cut the tub surround panels. 3. Apply adhesive to the panels and press them onto the tub surface. 4. Secure the panels with screws or clips.
5. Apply caulk to seal the edges for a finished look.
Conclusion
After following the step-by-step guide on how to install a fiberglass tub and surround, you can enjoy a stylish and functional addition to your bathroom. With its durability, low maintenance, and aesthetic appeal, fiberglass is an ideal choice. By ensuring proper measurements, preparation, and installation, you can create a modern and inviting space.
Remember, seeking professional help is always an option if you’re unsure or lacking confidence. Embrace this exciting DIY project and transform your bathroom into a sanctuary of relaxation.