
To install a new tub faucet, first, turn off the water supply. Then, remove the existing faucet by unscrewing it from the wall or tub.
Next, assemble the new faucet according to the manufacturer’s instructions and secure it in place. Lastly, turn on the water supply and check for any leaks. Are you planning to upgrade your bathroom’s tub faucet? Installing a new tub faucet can be a straightforward process if you follow the correct steps.
This guide will provide you with a concise and accurate explanation of how to install a new tub faucet. By carefully adhering to these instructions, you can ensure a successful installation that will enhance the functionality and appearance of your bathroom. So, let’s dive in and learn how to install your new tub faucet!
Choosing The Right Tub Faucet
When it comes to installing a new tub faucet, choosing the right one is essential to not only enhance the overall aesthetics of your bathroom but also ensure optimal functionality. In this section, we will explore the factors to consider when selecting a tub faucet, how to match the faucet with your existing bathroom fixtures, and the various styles and finishes available.
Factors to Consider When Selecting a Tub Faucet
Before diving into the wide range of tub faucets available, there are a few factors you should keep in mind. Firstly, consider the type of tub you have. Is it a freestanding tub or a built-in one? Understanding this will help you choose the appropriate faucet style and installation type.
Secondly, think about the configuration of your tub. Does it have pre-drilled holes for a deck-mounted faucet, or will you need a wall-mounted one? Taking note of these details will ensure a seamless installation process.
Additionally, it’s important to consider the water flow rate and pressure in your bathroom. If you have low water pressure, you may want to opt for a faucet specifically designed to work well in these conditions. On the other hand, if you have high water pressure, choosing a faucet with adjustable flow settings can help you achieve the desired water output.
Matching the Faucet with Your Existing Bathroom Fixtures
Your bathroom may already have a certain style or theme that you’d like to maintain or enhance. To ensure a cohesive look and feel, it’s important to consider how the new tub faucet will complement your existing fixtures.
Take note of the finishes of your current faucets, showerheads, and other hardware. Try to choose a tub faucet with a finish that matches or coordinates well with these existing fixtures. This could be something like brushed nickel, chrome, brass, or even a matte black finish for a modern touch.
Not only should the finish match, but also the overall design style. If your bathroom has a contemporary aesthetic, opt for a sleek and minimalist tub faucet. Alternatively, if you have a more traditional or vintage-inspired bathroom, a faucet with elegant curves and intricate details would be a suitable choice.
Exploring Different Styles and Finishes
Now, let’s explore the wide range of styles and finishes available for tub faucets. From modern to traditional, there is something to suit every preference and bathroom design.
You can choose from various handle options, including single-handle, dual-handle, or even touchless faucets for added convenience and hygiene. Consider the ease of use as well as the style when selecting the handle type.
As for the finishes, there are numerous options to choose from. A popular choice is polished chrome, which adds a timeless and versatile look to any bathroom. Brushed nickel offers a more subtle and muted appearance that complements both modern and traditional styles. If you’re looking for something bold and dramatic, consider matte black or oil-rubbed bronze finishes.
Remember, always choose a high-quality faucet that is durable and built to last. Investing in a reputable brand ensures that your new tub faucet will provide reliable performance and withstand the test of time.

Gathering The Tools And Materials
Before installing a new tub faucet, it is essential to gather all the necessary tools and materials. Having everything ready before starting the installation process will ensure smooth progress and minimize any potential delays.
Essential tools for the installation process
Here is a list of tools you should have on hand:
| Tool | Description |
|---|---|
| Adjustable wrench | Used to tighten or loosen nuts and bolts |
| Plumber’s tape | Wrap around pipe threads to create a watertight seal |
| Bucket | To catch any water that may leak during the installation |
| Screwdriver set | For removing or tightening screws as needed |
| Tub faucet installation kit | Includes all necessary components for the installation |
Materials needed for a successful installation
Make sure to have the following materials ready:
- New tub faucet
- Thread sealant
- Plumbers putty
- Silicone caulk
- Piping and fittings (if necessary)
- Work gloves
Safety precautions to keep in mind
Prior to starting the installation process, keep these safety precautions in mind:
- Shut off the water supply to your bathroom to prevent any accidents or water damage.
- Wear work gloves to protect your hands from potential injuries or cuts.
- Use caution when working with plumbing tools to avoid any mishaps.
- If you are unsure about any step of the installation, consult a professional plumber.
By gathering the necessary tools and materials and keeping safety precautions in mind, you are ready to proceed with the tub faucet installation. In the next section, we will guide you through the step-by-step process of installing the new faucet.

Preparing The Tub Area
Before installing a new tub faucet, it’s important to make sure the tub area is properly prepared. This involves shutting off the water supply, clearing the workspace, and draining the existing tub faucet. By following these steps, you’ll create an organized and safe environment for installing the new faucet. Let’s get started!
Shutting off the water supply
The first step in preparing the tub area is to shut off the water supply. This will prevent any accidental leaks or water damage during the installation process. To shut off the water supply, locate the shut-off valve, which is typically located near the tub or in the basement. Turn the valve clockwise until it is fully closed. It’s important to ensure that the water is completely off before proceeding with the installation.
Clearing the workspace and removing any obstacles
Once the water supply is shut off, it’s time to clear the workspace. Remove any items or obstacles that may get in the way during the installation process. This includes towels, bath products, and any other personal items that are near the tub area. Clearing the workspace not only makes the installation easier but also minimizes the risk of any damage to your belongings during the process.
Draining the existing tub faucet
Before installing the new tub faucet, you’ll need to drain the existing one. Start by placing a bucket under the faucet to catch any water. Then, locate the drain plug and remove it. Allow the water to drain completely before moving on to the next step. This step ensures that there is no remaining water in the faucet and makes the installation process smoother.
By following these steps to prepare the tub area, you’ll be one step closer to installing your new tub faucet. Remember to shut off the water supply, clear the workspace, and drain the existing faucet. These simple steps will help create an organized and safe environment for the installation process.
Removing The Old Tub Faucet
Removing the old tub faucet is the crucial first step when installing a new one. Whether you’re upgrading your bathroom or simply replacing a worn-out fixture, knowing how to properly uninstall the old faucet is essential. In this section, we will provide you with step-by-step instructions on removing the old tub faucet, tips for dealing with stubborn connections, and how to inspect the plumbing to ensure its condition is suitable for the new faucet installation.
Instructions for uninstalling the old faucet
- Before you begin, turn off the water supply to the tub. This can typically be done by shutting off the main water valve or locating the specific valve for the tub.
- Use a wrench or pliers to remove the decorative caps or handles covering the faucet connections. Once removed, you’ll have better access to the underlying components.
- Next, carefully loosen and remove the nuts or screws that secure the faucet to the tub. These are usually found underneath the handles or behind the faucet.
- Once the nuts or screws are removed, gently pull the old faucet away from the tub. You may need to wiggle it back and forth to loosen any remaining connections.
- Finally, inspect the exposed plumbing connections for any signs of damage or corrosion. If necessary, clean or replace any compromised parts.
Tips for dealing with stubborn connections
Removing an old tub faucet can sometimes be challenging, particularly if the connections are stubborn or corroded. Here are a few tips to help make the process easier:
- To loosen stubborn nuts or screws, apply penetrating oil and let it sit for a few minutes before attempting to remove them.
- If the connections are still difficult to loosen, try using a pair of pliers, a wrench, or even a specialized tool like a basin wrench.
- A gentle tap with a hammer can sometimes help break loose stuck or rusted connections, but be careful not to damage the plumbing or surrounding area.
Inspecting the plumbing and ensuring its condition
Before installing your new tub faucet, it’s important to inspect the existing plumbing to ensure its condition and suitability for the replacement. Here’s what you should check:
| Checkpoints | Analysis |
|---|---|
| Visible leaks or water damage | Any signs of leaks or water damage should be addressed before installing the new faucet. Repair or replace any compromised plumbing as necessary. |
| Corrosion or mineral buildup | Inspect the pipes and connections for any signs of corrosion or mineral buildup. Clean or replace affected parts to ensure proper functionality. |
| Compatibility with the new faucet | Make sure the existing plumbing is compatible with the specifications of your new faucet. Check for correct pipe sizes, fittings, and any additional requirements. |
By carefully following the instructions for uninstalling the old faucet, handling stubborn connections with ease, and inspecting the plumbing for any issues, you’ll be well-prepared to move onto the next step in the installation process – installing your new tub faucet.
Installing The New Tub Faucet
Step-by-step guide for installing the new faucet
Installing a new tub faucet can be a great way to update the look of your bathroom and improve your bathing experience. If you’re handy with tools and have a bit of DIY experience, you can tackle this project yourself. In this step-by-step guide, we’ll walk you through the process of installing a new tub faucet, so you can enjoy a fresh look and smooth operation in no time.
- Prepare for installation: Before you begin, gather all the necessary tools and materials. This may include a new tub faucet, plumber’s tape, a pipe wrench, a screwdriver, and a basin wrench. Make sure to turn off the water supply to the tub before starting.
- Remove the old faucet: Start by removing the old tub faucet. Use a screwdriver or a wrench to disconnect the handles and spout from the wall or tub. You may need to use a little force or lubricant to loosen stubborn connections.
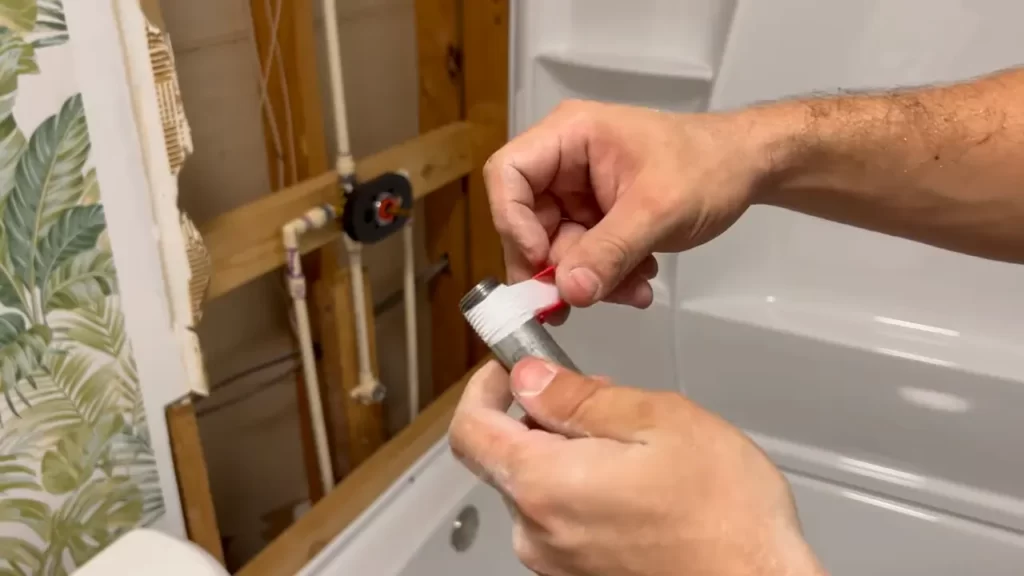
- Prepare the new faucet: Before installing the new faucet, inspect it to ensure all parts are included and in good condition. Apply plumber’s tape to the threads of the faucet connections to create a watertight seal.
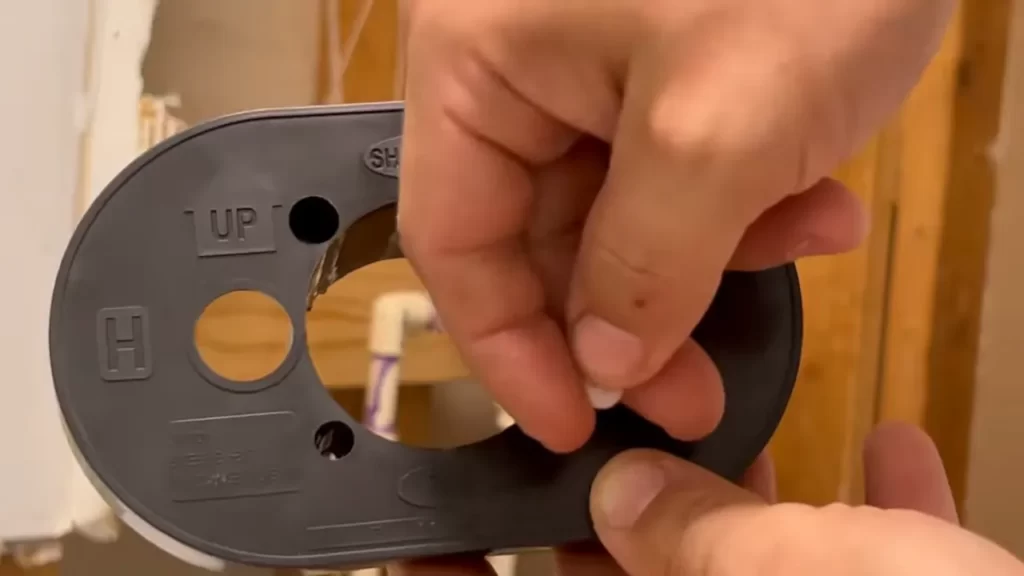
- Position the new faucet: Carefully position the new faucet in the desired location. Make sure the faucet aligns with the pre-existing holes in the wall or tub. Use a level to ensure proper alignment and adjust as necessary.
- Connect the new faucet to the plumbing: Now it’s time to connect the new faucet to the plumbing. Follow the manufacturer’s instructions for your specific faucet model. This may involve attaching supply lines or connecting the faucet to the water pipes using a wrench. Make sure all connections are tight and secure.
- Test for leaks: Once the faucet is securely connected to the plumbing, it’s important to test for leaks. Slowly turn on the water supply, watching for any drips or water escaping from the connections. If you spot any leaks, tighten the connections or reapply plumber’s tape as needed.
Connecting the new faucet to the plumbing
Connecting the new tub faucet to the plumbing is a crucial step in ensuring a proper installation. Here are some key points to consider during this process:
- Follow the manufacturer’s instructions: Each faucet model may have specific requirements for connecting to the plumbing. Make sure to carefully read and follow the manufacturer’s instructions to ensure a secure and leak-free connection.
- Use plumber’s tape: Apply plumber’s tape to the threads of the faucet connections before attaching them to the plumbing. This will help create a watertight seal and prevent leaks.
- Hand-tighten connections: When connecting the faucet to the plumbing, hand-tighten the connections first. Once they are snug, you can use a wrench to give them an extra quarter turn for added security. Avoid overtightening, as this can damage the connections.
- Test for leaks: After connecting the faucet to the plumbing, turn on the water supply and check for any leaks. If you notice any leaks, tighten the connections or reapply plumber’s tape until the leaks are resolved.
Avoiding common installation mistakes
Installing a new tub faucet can be a straightforward process, but it’s important to avoid common installation mistakes that can lead to problems down the line. Here are some pitfalls to watch out for:
- Not shutting off the water supply: Failing to turn off the water supply before removing the old faucet can result in water damage and potential flooding. Always shut off the water supply before starting any faucet installation.
- Using the wrong tools: Using the correct tools for the job is essential to prevent damage to the faucet or plumbing. Make sure you have the necessary tools on hand and use them correctly.
- Overtightening connections: While it’s important to ensure connections are tight, overtightening can cause leaks or damage to the faucet or plumbing. Use caution and avoid excessive force when tightening connections.
- Skipping the plumber’s tape: Plumber’s tape helps create a watertight seal and prevent leaks. Skipping this step can lead to problems in the future. Always apply plumber’s tape to the threads of the faucet connections.
- Not testing for leaks: It’s crucial to test for leaks after installing the new faucet. Don’t skip this step, as it allows you to catch and address any leaks before they cause damage.
Testing And Troubleshooting
**Testing and Troubleshooting**
Once you have successfully installed your new tub faucet, it’s important to test its water flow and functionality to ensure everything is working as it should. In this section, we will guide you through the process of testing and troubleshooting to address any leaks or issues that may arise, and provide tips for proper maintenance and care.
**Instructions for Testing the Water Flow and Functionality**
Before using your new tub faucet, it’s essential to test the water flow and functionality to ensure everything is in order. Follow these instructions to perform a quick and simple test:
1. Turn on the water supply: Start by turning on the main water supply to your tub faucet. Allow the water to flow for a few seconds to flush out any debris that may have accumulated during installation.
2. Check for proper water flow: Observe the water flow from the tub spout and the showerhead (if applicable). The water should flow smoothly without any sudden changes or interruptions. If you notice any issues, such as weak water flow or inconsistent pressure, continue reading for troubleshooting steps.
3. Test the hot and cold water controls: Turn the hot and cold water handles or knobs to control the water temperature. Check if the water transitions from hot to cold smoothly and adjust as necessary. Make sure both controls are functioning properly.
4. Engage the diverter (if applicable): If your tub faucet includes a diverter for using the showerhead, test its effectiveness. When you activate the diverter, the water should redirect from the tub spout to the showerhead without any leaks or decrease in pressure.
**Addressing Any Leaks or Issues That May Arise**
While testing your tub faucet, you may encounter leaks or other issues that require troubleshooting. Address these problems promptly to ensure optimal performance and prevent any further damage. Follow these steps to troubleshoot common faucet issues:
1. Leaks from the spout or handles: If you notice leaks from the tub spout or handles, first check if any connections are loose. Tighten any loose fittings using a wrench. If the leaks persist, you may need to replace worn-out washers, seals, or cartridges. Refer to the manufacturer’s instructions or seek professional help if necessary.
2. Weak water flow or reduced pressure: Inadequate water flow or reduced pressure can be caused by mineral deposits or debris clogging the aerator or showerhead. Remove the aerator or showerhead and clean it thoroughly by soaking it in vinegar or using a brush. Rinse it well and reinstall it.
3. Inconsistent water temperature: If your tub faucet fails to deliver the desired water temperature consistently, it may be due to a faulty mixing valve. Consider contacting a professional plumber to inspect and replace the valve if needed.
**Tips for Proper Maintenance and Care**
To ensure the longevity and optimal performance of your tub faucet, follow these maintenance and care tips:
1. Regular cleaning: Clean your tub faucet regularly using a mild, non-abrasive cleaner to remove any soap scum, mineral deposits, or grime that may accumulate over time. Avoid using harsh chemicals or abrasive materials that could damage the faucet’s finish.
2. Check for leaks: Periodically inspect your tub faucet for any leaks or drips. If you notice any, take immediate action to prevent further damage and unnecessary water wastage.
3. Prevent corrosion: Keep your tub faucet dry after each use to prevent the formation of rust or corrosion. Wipe it down with a soft cloth to remove any moisture.
4. Schedule professional maintenance: Consider scheduling regular maintenance checks with a professional plumber to ensure your tub faucet is functioning optimally. They can detect and address any potential issues before they become major problems.
By following these testing and troubleshooting instructions, addressing leaks or issues that may arise, and practicing proper maintenance and care, you can enjoy the functionality and longevity of your new tub faucet for years to come.
Enjoying Your New Tub Faucet
Now that you have successfully installed your new tub faucet, it’s time to sit back, relax, and enjoy the benefits of your upgraded bathing experience. But before you start indulging in soothing bubble baths or invigorating showers, there are a few things you should know to ensure the longevity and optimal performance of your new fixture. In this section, we will provide you with some valuable tips for cleaning and maintaining your faucet, maximizing its lifespan, and enhancing your overall bathing experience.
Tips for Cleaning and Maintaining the Faucet
Cleaning and maintaining your tub faucet not only keeps it looking shiny and new but also ensures its smooth operation and prevents any potential issues. Here are some effective tips to help you maintain your faucet:
- Regularly clean the faucet with a mild soap or a non-abrasive cleaner. Avoid using harsh chemicals or abrasive brushes that may damage the finish.
- Wipe the faucet dry after each use to prevent the buildup of soap scum or water spots.
- Inspect and clean the aerator regularly. The aerator is a small component located at the end of the faucet spout that mixes air with the water flow, reducing splashing and conserving water. Simply unscrew it and clean any debris that may have accumulated.
- Check for any leaks or drips and repair them promptly to prevent water wastage and potential damage to your bathroom.
- Consider using a water softener if your home has hard water. Hard water can cause mineral deposits to accumulate on your faucet, affecting its performance and appearance.
Maximizing the Lifespan of Your New Fixture
A bathtub faucet is an investment, and you want it to last for years to come. By following these simple steps, you can maximize the lifespan of your new fixture:
- Only operate the faucet handles with gentle force, avoiding excessive twisting or wrenching that could strain the internal components.
- Avoid slamming the handles shut, as this can cause premature wear and tear.
- Regularly check and tighten any loose connections or fittings to prevent leaks.
- If you notice any signs of wear or damage, such as rust or corrosion, contact a professional plumber to assess and repair the issue.
- Consider installing a water pressure regulator if your home has high water pressure. Excessive pressure can strain the faucet and lead to premature failure.
Enhancing Your Bathing Experience
Now that you have a new tub faucet, it’s the perfect time to elevate your bathing experience. Here are some ideas to enhance your relaxation and make the most out of your new fixture:
- Invest in a bath caddy or tray to hold your favorite book, a glass of wine, or some scented candles, creating a spa-like atmosphere.
- Experiment with different bath products, such as bath salts, essential oils, or bath bombs, to enhance the soothing and rejuvenating effects of your baths.
- Consider installing a handheld showerhead attachment for added convenience and versatility during your showering routine.
- Explore different water temperature settings to find your perfect balance of warmth and invigoration. Remember to always be mindful of your safety and avoid water that is too hot.
By following these tips for cleaning and maintaining your new tub faucet, maximizing its lifespan, and enhancing your bathing experience, you can ensure that your investment brings you years of enjoyment and relaxation. So go ahead, indulge in luxurious baths or invigorating showers, and make the most out of your newly installed tub faucet!
Frequently Asked Questions
Can I Replace A Bathtub Faucet Myself?
Yes, you can replace a bathtub faucet on your own. Just follow the instructions carefully for a successful installation.
How Do You Replace A Whole Tub Faucet?
To replace a whole tub faucet, turn off water supply, unscrew handle and trim, disconnect water lines, and remove the old faucet. Install the new faucet by connecting water lines, securing trim, and tightening the handle. Finally, turn on water supply and test for any leaks.
How Much Does It Cost To Install A New Bathtub Faucet?
The cost to install a new bathtub faucet can vary depending on factors like the type of faucet and any additional plumbing work required. On average, you can expect to pay between $150 and $350 for the installation. Prices may fluctuate based on your location and the complexity of the project.
How Do You Install A Tub Spout With A Set Screw?
To install a tub spout with a set screw, follow these steps. First, remove the old spout. Then, apply Teflon tape to the pipe threads. Next, slide the new spout onto the pipe and tighten the set screw with an Allen wrench.
Finally, test the spout for leaks.
Conclusion
Installing a new tub faucet doesn’t have to be daunting. By following the step-by-step instructions and using the right tools, you can easily upgrade your bathroom in no time. Remember to turn off the water supply, remove the old faucet, and install the new one securely.
Whether you’re a DIY enthusiast or a first-timer, this guide has provided you with the essential knowledge to successfully complete this project. Enjoy your new tub faucet and the enhanced functionality it brings to your bathroom décor. Happy plumbing!