To install a 5 piece tub surround, follow these steps: measure and mark the placement, remove the old tub and wall materials, prepare the wall surface, dry fit the panels, apply adhesive, secure the panels, and finish the edges. Installing a 5 piece tub surround involves measuring, removing old materials, preparing the wall surface, fitting the panels, applying adhesive, securing the panels, and finishing the edges.
By following these steps, you will successfully install a 5 piece tub surround in your bathroom space.
Factors To Consider Before Installation
Before you dive into installing a 5 piece tub surround, there are a few important factors to consider. These factors will not only ensure a seamless installation process but also help you choose the best tub surround for your bathroom. Take a look at the following factors:
Size and Measurement Requirements
One of the crucial factors to consider before installing a 5 piece tub surround is the size and measurement requirements. You need to carefully measure the space where the tub surround will be installed to ensure a perfect fit. This involves measuring the height, width, and depth of the area. Additionally, consider the spacing requirements for fixtures such as faucets and showerheads. It’s important to take accurate measurements to avoid any issues during installation and to guarantee a professional-looking finish.
Material and Durability Options
Another factor to consider is the material and durability options available for your tub surround. It’s essential to choose a material that is not only visually appealing but also durable and long-lasting. Common materials for tub surrounds include acrylic, fiberglass, and PVC. Each material has its own strengths and weaknesses, so make sure to research and choose the one that suits your needs and preferences. Consider factors such as resistance to water, mold, and stains, as well as ease of maintenance. Opting for a high-quality material will ensure that your tub surround stands the test of time.
Design and Style Considerations
The design and style of your tub surround is not just about aesthetics, but also about creating a cohesive look in your bathroom. A well-chosen tub surround can elevate the overall design of your bathroom and create a relaxing and inviting atmosphere. Consider factors such as color, pattern, texture, and overall design style. Look for tub surrounds that complement your existing bathroom decor and reflect your personal style. Whether you prefer a contemporary, traditional, or minimalist look, there are plenty of designs and styles available to suit your taste.
By considering these factors before installation, you can ensure a successful and satisfying experience when installing a 5 piece tub surround. Don’t rush the decision-making process; take the time to measure accurately, research material options, and explore different design styles. With proper planning and attention to detail, you’ll be well on your way to enjoying a beautiful and functional tub surround in your bathroom.
Removing The Existing Tub Surround
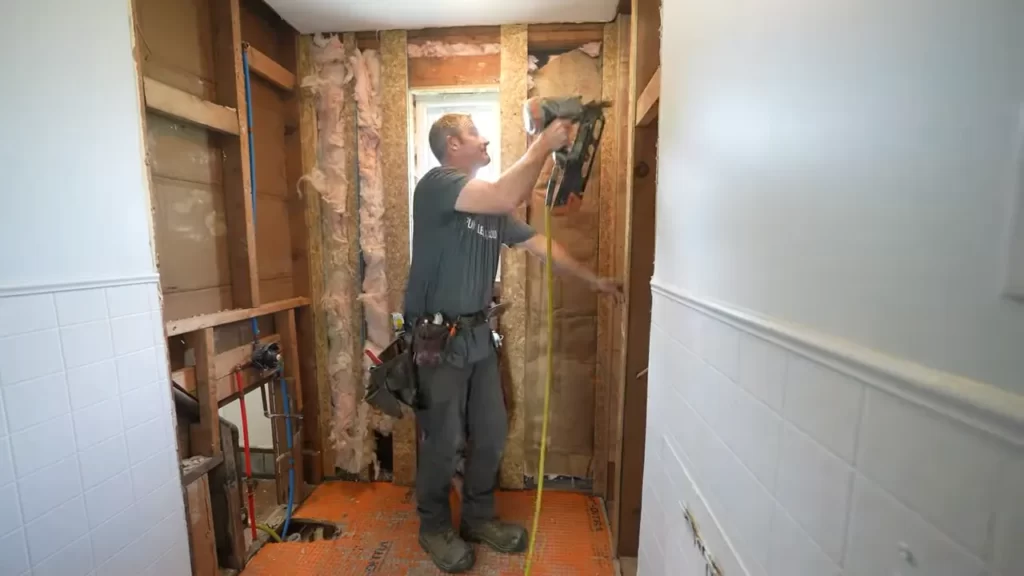
Removing an old tub surround is the first step towards installing a new 5 piece tub surround. While it may seem like a daunting task, with the right tools and a step-by-step process, you can get it done efficiently and effectively. This article will guide you through the process of removing the existing tub surround, ensuring a clean and smooth surface for the installation of the new one.
Tools and Equipment Needed
Before you commence the removal process, make sure you have the necessary tools and equipment at hand. Here is a list of items you will need:
| Tools | Equipment |
|---|---|
|
|
Step-by-Step Removal Process
Follow these step-by-step instructions to remove the existing tub surround:
- Clear the area: Begin by removing all objects, such as shower curtains, towels, and accessories, near the tub surround. Lay down a plastic drop cloth to catch any debris and protect the flooring.
- Prepare for safety: Wear gloves, safety glasses, and a mask to protect yourself from any sharp edges or debris during the removal process.
- Locate the caulking: Inspect the edges of the tub surround to identify the caulking that holds it in place. Use a utility knife to carefully cut through the caulking and separate the surround from the walls.
- Pry off the trim pieces: Once the caulking is cut, use a pry bar to gently remove any trim pieces attached to the tub surround. Be cautious not to damage the walls or the tub.
- Remove the panels: Starting from the top corner, carefully pull the panels away from the wall. Use a putty knife or pry bar to help loosen stubborn sections if necessary. Work your way around the entire surround until all the panels are detached.
- Dispose of the old surround: Place the removed panels directly into trash bags to minimize mess and avoid damaging the floor. Dispose of them in a waste container suitable for construction debris.
- Clean the area: Use a vacuum cleaner to remove any remaining debris or adhesive from the walls and the tub. Wipe down the surfaces with a damp cloth to ensure they are clean and ready for the installation process.
Dealing with Disposal
Proper disposal of the old tub surround is crucial for a safe and clean removal process. Here are a few tips to help you deal with the disposal:
- Double-bag the removed panels to prevent any sharp edges from poking through the trash bags.
- Check with your local waste management company or recycling center to determine where you can dispose of the old tub surround, as it may require separate handling.
- If possible, break down the panels into smaller pieces to ensure they fit properly in the waste container.
By carefully following these instructions and taking the necessary safety precautions, you will be able to successfully remove the old tub surround and prepare the space for the installation of your new 5 piece tub surround. Happy renovating!
Preparing The Bathtub Area
Preparing the Bathtub Area
Before you can begin the installation of your 5 piece tub surround, it is crucial to properly prepare the bathtub area. This involves a few essential steps including cleaning and removing any residue, repairing any damaged surfaces, and measuring and marking for installation. In this section, we will guide you through each of these steps to ensure your tub surround is installed smoothly and securely.
Cleaning and Removing Residue
Start by thoroughly cleaning the bathtub and surrounding area to remove any dirt, grime, or soap residue. This will help the tub surround adhere properly and ensure a long-lasting installation. Here’s a step-by-step guide:
- Clear the surrounding area: Remove any toiletries, bath accessories, or personal items from the bathroom to create a clean and clutter-free workspace.
- Dust and sweep: Use a broom or vacuum cleaner to remove any loose dirt or debris from the floor and bathtub area.
- Wipe down the bathtub: Use a mild detergent or cleaner and a sponge or cloth to clean the bathtub thoroughly, paying attention to the edges and corners.
- Rinse and dry: Rinse the bathtub with clean water and dry it completely with a towel to ensure there are no remaining cleaning agents.
Repairing Damaged Surfaces
Before installing the tub surround, it’s important to address any damaged or uneven surfaces in the bathtub area. This will help create a smooth and level base for your new surround. Follow these steps to repair any issues:
- Inspect the bathtub area for any cracks, chips, or uneven surfaces.
- If you find any cracks or chips, use a bathtub repair kit to fill in the damaged areas. Follow the manufacturer’s instructions for the best results.
- If the bathtub surface is uneven, sand down any high spots and fill in any low areas with a leveling compound. Allow the compound to dry and then sand it to create a smooth surface.
Measuring and Marking for Install
Precise measurements and markings are crucial for a successful tub surround installation. Follow these steps to ensure accuracy:
1. Measure the height of the tub surround panels from the top edge of the bathtub to the desired height. Mark this measurement on the walls around the tub using a pencil or marker.
2. Measure the length of each wall where the panels will be installed. Mark these measurements on the panels themselves, ensuring that each panel is marked correctly for its corresponding wall.
3. Double-check all measurements and markings before moving forward with the installation process. This will help prevent any errors or misalignments during the installation.
By properly preparing the bathtub area through cleaning, repairing any damages, and accurately measuring and marking for installation, you are setting yourself up for a successful 5 piece tub surround installation. Take your time to ensure each step is done correctly, and you’ll enjoy a beautiful and functional tub surround in no time.
Gathering The Necessary Tools And Materials
Before embarking on the installation of a 5 piece tub surround, it is essential to gather all the required tools and materials. Having everything prepared and within reach will make the installation process smoother and more efficient. This section will provide you with a list of the necessary tools and guidance on choosing the right adhesive and caulk for the job.
List of Required Tools
Here’s a comprehensive list of tools you will need:
- Cordless drill
- Hacksaw
- Putty knife
- Level
- Tape measure
- Adjustable wrench
- Utility knife
- Trowel
- Hammer
- Screwdriver
- Caulking gun
Having these tools on hand will ensure that you can handle any necessary adjustments and fixings during the installation process.
Choosing the Right Adhesive and Caulk
Selecting the proper adhesive and caulk is crucial for a successful and long-lasting installation. Here are some factors to consider when making your choices:
- Waterproof: Ensure that both the adhesive and caulk are specifically designed to be waterproof. This will prevent any water damage and mold growth behind the tub surround.
- Compatibility: Check with the manufacturer’s recommendations to ensure that the adhesive and caulk are suitable for the material of the tub surround. Different materials may require different products for optimal adhesion.
- Flexibility: Look for adhesive and caulk that offer flexibility. This is important as the tub and walls may experience some movement, and a flexible adhesive and caulk will help prevent cracks and leaks.
- Drying Time: Consider the drying time of the adhesive and caulk. Opt for products that have a relatively quick drying time to minimize the installation time and allow for a faster completion.
- Color Options: If aesthetics are important to you, choose adhesive and caulk that are available in various colors. This will allow you to seamlessly blend the tub surround with your bathroom decor.
By carefully considering these factors, you can ensure that you select the appropriate adhesive and caulk for your 5 piece tub surround installation.
Step-By-Step Installation Process
Applying Adhesive to the Tub and Surround Panels
Before you begin the installation process, it’s important to apply adhesive to the tub and the back of each surround panel. This will ensure a secure and long-lasting installation. Follow these steps:
- Clean the surface of the tub and the wall where the surround will be installed, removing any dirt or debris. This will help the adhesive bond properly.
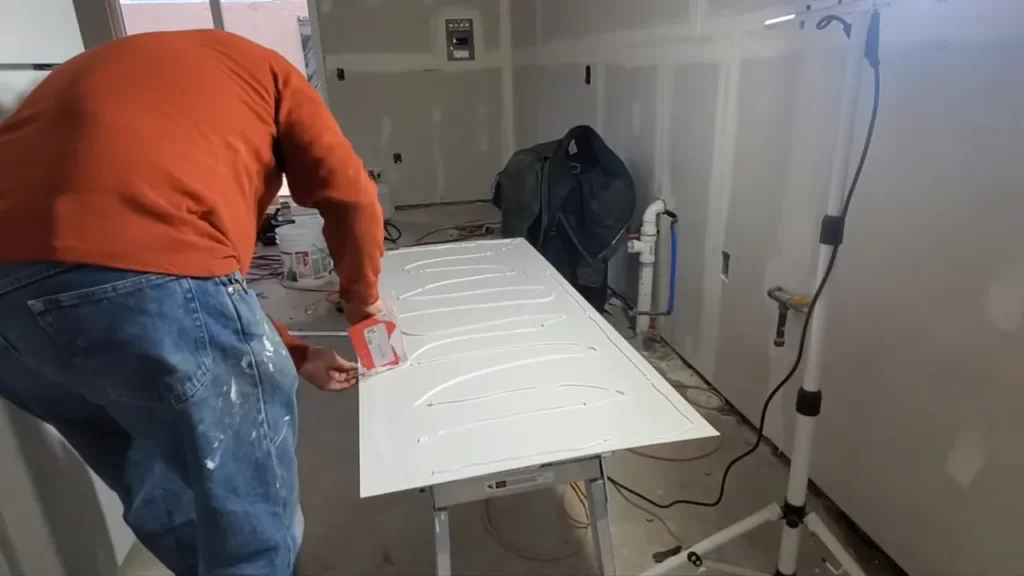
- Apply a thin and even layer of adhesive to the back of the first surround panel using a notched trowel. Make sure to cover the entire surface of the panel.
- Apply adhesive to the area of the tub where the panel will be placed.
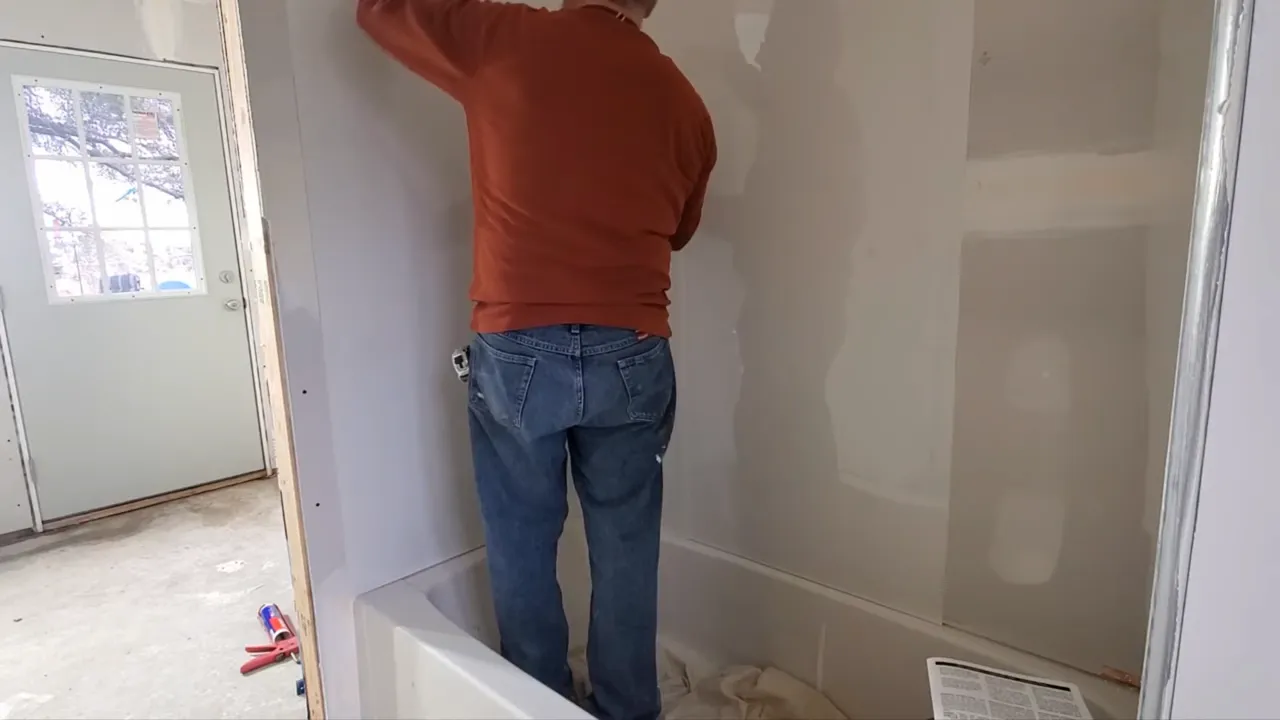
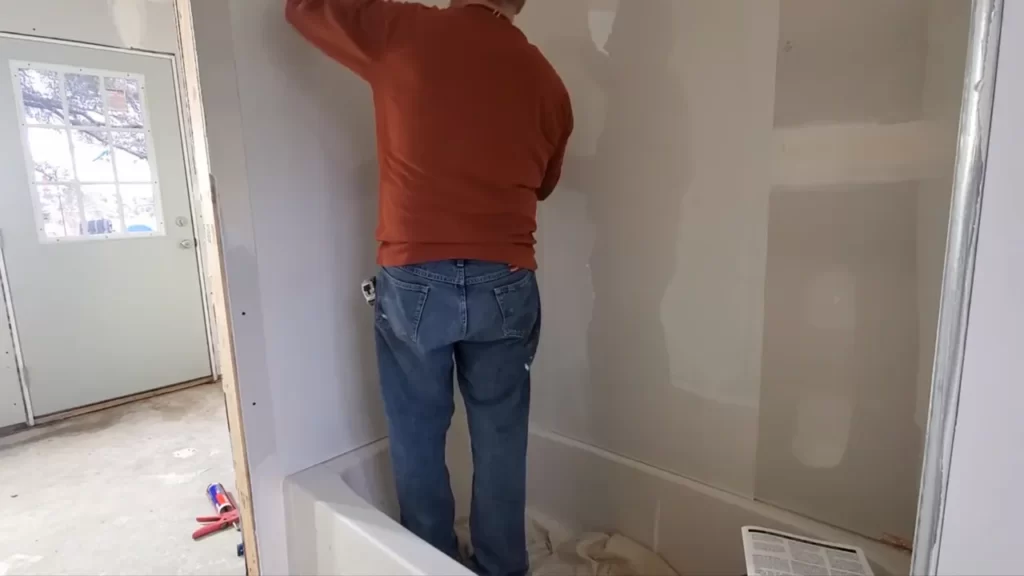
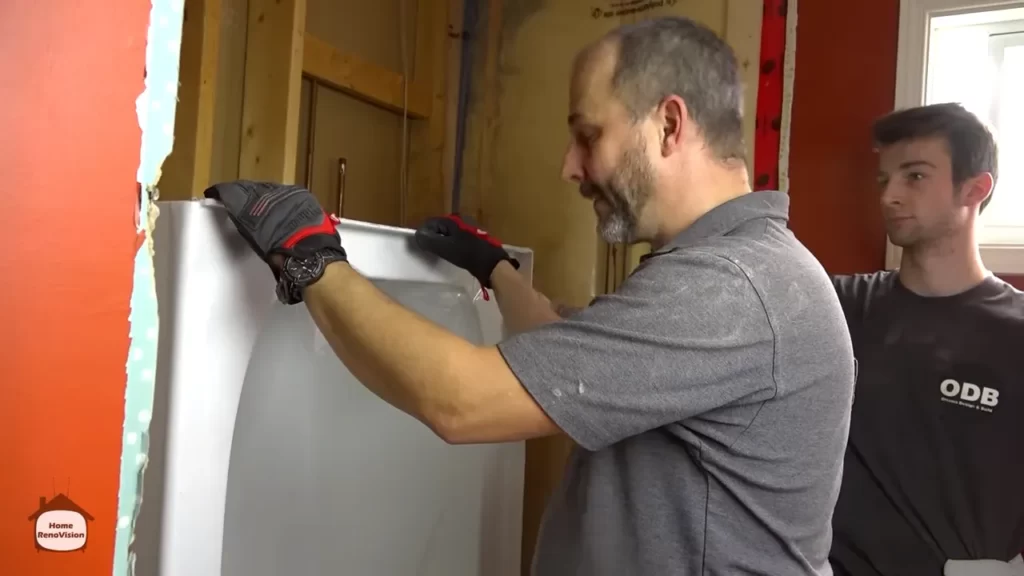
- Press the panel firmly against the tub, making sure it is aligned properly. Use a level to ensure it’s straight.
- Repeat this process for the remaining surround panels, applying adhesive to both the panel and the tub before installing.
Inserting the Panels and Ensuring Proper Alignment
Once the adhesive has been applied, it’s time to insert the panels and ensure they are aligned correctly. Follow these steps:
- Start by placing the first panel against the wall, aligning it with the edge of the tub. Make sure it is level.
- Gently push the panel towards the wall, sliding it into the groove or track of the previous panel.
- Continue inserting the remaining panels in the same manner, ensuring they fit snugly together without any gaps.
- Use a level to check the alignment of each panel, adjusting as necessary.
Securing the Surround to the Wall
Once the panels are properly aligned, it’s time to secure the surround to the wall. Follow these steps:
- Drill pilot holes through the flange of each panel into the wall studs. Make sure the holes are evenly spaced.
- Insert screws into the pilot holes and tighten them to secure the panels to the wall.
- Check the alignment of the panels again, making any necessary adjustments to ensure they are straight.
Caulking and Finishing Touches
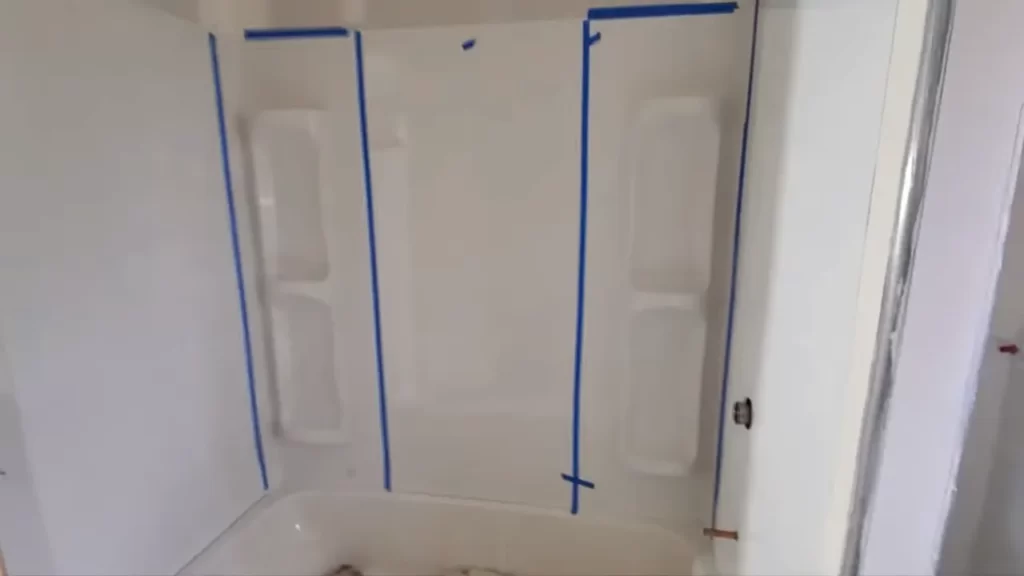
After securing the surround panels, it’s important to caulk the edges to prevent water from seeping behind the panels. Here’s what to do:
- Fill a caulk gun with silicone caulking.
- Cut the tip of the caulk tube at a 45-degree angle.
- Apply a smooth and even bead of caulk along the edges of the surround panels.
- Use a wet finger or a caulk finishing tool to smooth out the caulk and create a neat, finished look.
- Allow the caulk to dry according to the manufacturer’s instructions.
- Finally, wipe away any excess caulk with a damp cloth.
Congratulations! You have successfully installed a 5 piece tub surround using this step-by-step installation process. By following these instructions and ensuring proper alignment, your tub surround will provide a beautiful and functional addition to your bathroom.
Ensuring A Proper Seal
One of the most crucial steps in installing a 5 piece tub surround is ensuring a proper seal. This will prevent any leaks or gaps that can lead to water damage and mold growth. To achieve a watertight seal, follow these steps:
Testing for Leaks and Gaps
Before applying any sealant, it’s important to test for any existing leaks or gaps in the tub surround. This will allow you to address any issues before proceeding with the installation. Here’s how you can do it:
- Fill the bathtub with water to the highest level.
- Inspect the area where the tub surround meets the walls for any signs of water leakage.
- Look for any gaps or openings between the tub and the surround.
- If you notice any leaks or gaps, use a dry cloth to wipe the area dry and proceed with repairing the damage before continuing with the installation.
Applying Waterproofing Sealant
Once you have ensured that there are no leaks or gaps, you can proceed with applying a waterproofing sealant. This will provide an additional layer of protection against water damage. Here’s how you can seal the tub surround:
- Clean the tub surround thoroughly to remove any dirt, debris, or grease. Use a mild detergent and a scrub brush to ensure a clean surface.
- Dry the tub surround completely using a clean cloth or towel.
- Apply a generous amount of waterproofing sealant along the seams where the tub surround meets the walls. Pay special attention to the corners and edges.
- Use a caulk gun to apply the sealant in a smooth and continuous bead. Make sure to fill any gaps or openings.
- Smooth the sealant with a caulk smoothing tool or your finger to create a neat and uniform seal.
- Allow the sealant to dry completely according to the manufacturer’s instructions before using the tub.
Ensuring a proper seal is essential for the longevity and functionality of your 5 piece tub surround. By following these steps and taking the time to test for leaks and gaps, as well as applying a waterproofing sealant, you can enjoy a watertight and worry-free bathing experience.
Maintaining And Cleaning The Tub Surround
Maintaining and Cleaning the Tub Surround
Proper maintenance and regular cleaning of your 5 piece tub surround are essential for keeping it in pristine condition and prolonging its lifespan. In this section, we will provide you with some valuable tips and techniques to maintain and clean your tub surround effectively.
Recommended Cleaning Products and Techniques
Using the right cleaning products and techniques is vital to prevent any damage to your tub surround while ensuring it remains spotless. Here are some recommended cleaning products and techniques you can use:
1. Non-Abrasive Cleansers:
Choose non-abrasive cleansers specifically designed for tubs and showers. These cleansers are gentle on the surface and will not scratch or damage the tub surround material. Pro tip: Ensure the cleanser is free from bleach or ammonia as these harsh chemicals can cause discoloration.
2. Soft Microfiber Cloth:
Utilize a soft microfiber cloth to clean the tub surround. The fine fibers of the cloth effectively remove dirt, grime, and soap scum without leaving any scratches or streaks. Pro tip: Regularly wash the microfiber cloth separately in hot water to maintain its cleaning efficiency.
3. Mild Vinegar Solution:
Create a mild vinegar solution by mixing equal parts of white vinegar and water. This gentle mixture is highly effective in removing hard water stains and mineral buildup from your tub surround. Apply the solution to the surface with a sponge or spray bottle, let it sit for a few minutes, and then wipe it clean with a damp cloth.
Regular Maintenance Tips for Longevity
To extend the longevity of your 5 piece tub surround, incorporate these regular maintenance tips into your cleaning routine:
1. Avoid Harsh Scrubbing:
While cleaning the tub surround, avoid using abrasive brushes or scouring pads as they can cause irreparable damage to the surface. Instead, use your soft microfiber cloth or a gentle sponge for cleaning.
2. Prevent Chemical Damage:
Keep in mind that certain chemicals, such as bleach, can harm the finish of your tub surround. Avoid using any harsh or abrasive cleaning products that contain bleach or ammonia. Opt for mild cleansers or natural alternatives, like the vinegar solution mentioned above.
3. Regular Inspection:
Regularly inspect your tub surround for any signs of wear, cracks, or leaks. Addressing these issues promptly can prevent further damage and costly repairs down the line.
4. Promptly Remove Stains:
Deal with any stains, spills, or marks as soon as possible to prevent them from setting into the surface. Use the recommended cleaning products and techniques mentioned earlier to effectively remove stains without causing damage.
By following these recommended cleaning products and techniques, as well as incorporating regular maintenance tips, you can ensure your 5 piece tub surround maintains its beauty and durability for years to come. Take care of your tub surround, and it will reward you with a long-lasting and visually appealing bathing experience.
Safety Precautions To Keep In Mind
When it comes to installing a 5 piece tub surround, safety should always be a top priority. By taking the proper precautions, you can ensure a smooth installation process and protect yourself from any potential hazards. In this section, we will discuss two key safety measures that you should keep in mind: proper ventilation and personal protective equipment (PPE).
Proper Ventilation and Airflow
Before you begin the installation process, it is important to ensure that your work area is well-ventilated. Adequate ventilation helps to dissipate any fumes or odors that may be emitted during the installation. It also helps to reduce the concentration of any potentially harmful substances in the air, keeping you safe and healthy.
To ensure proper ventilation, make sure that windows and doors are open to allow fresh air to circulate throughout the space. If you are working in a bathroom with no exterior windows, consider using a fan to improve airflow. This will help to carry away any fumes or airborne particles that may be generated during the installation process.
Personal Protective Equipment (PPE)
Personal protective equipment, or PPE, is essential when installing a 5 piece tub surround. PPE is designed to protect you from exposure to hazards, such as chemicals, dust, and sharp objects. Before you begin the installation, make sure you have the following PPE items on hand:
| 1. | Safety goggles |
| 2. | Dust mask |
| 3. | Gloves |
| 4. | Protective clothing |
| 5. | Non-slip footwear |
Wear safety goggles to protect your eyes from any flying debris or splashing liquids. A dust mask will help prevent you from inhaling dust particles or harmful fumes. Gloves will protect your hands from sharp edges, chemicals, and any potential injuries. Additionally, wearing protective clothing, such as coveralls or long sleeves, can help minimize skin exposure to any hazardous substances.
Lastly, don’t forget to wear non-slip footwear to prevent any slips or falls, especially when working in wet conditions. Your safety is of utmost importance, and by wearing the appropriate PPE, you can minimize the risk of accidents or injuries during the installation process.
By following these safety precautions, you can ensure a safe and successful installation of your 5 piece tub surround. Remember, always prioritize safety and take the necessary steps to protect yourself throughout the entire installation process.
Troubleshooting Common Installation Issues
Ensuring a smooth and successful installation of a 5 piece tub surround can sometimes present challenges. However, with a little troubleshooting and know-how, you’ll be able to tackle any common issues that may arise. In this section, we’ll discuss two common installation problems and their solutions: dealing with misaligned or uneven panels, and addressing caulk or adhesive problems.
Dealing with Misaligned or Uneven Panels
Misaligned or uneven panels can not only affect the overall appearance of your tub surround but also compromise its functionality. Here’s how you can address this issue:
| Problem | Solution |
|---|---|
| Misaligned panels | Start by double-checking your measurements to ensure accuracy. If the panels are slightly misaligned, you can try adjusting them by carefully nudging them into place. However, if the misalignment is significant, you may need to uninstall the surround and readjust your measurements before reinstalling it. |
| Uneven panels | If the panels are uneven, check if the underlying wall is level. Use a level tool to determine any areas that need to be adjusted. You may need to add shims or sand down high spots to create a level surface. Additionally, double-check that the panels are properly interlocked and snugly fitted together. |
Addressing Caulk or Adhesive Problems
Proper application of caulk and adhesive is crucial to ensure the durability and water resistance of your tub surround. Here are some solutions to common caulk or adhesive problems:
- Caulk not adhering
If the caulk is not adhering properly, make sure to thoroughly clean and dry the surface before applying it. Use a caulk remover or scraper to remove any old caulk residue. Applying a primer specifically designed for the tub surround material can also improve caulk adhesion. Finally, ensure that the caulk is properly applied with continuous and even pressure.
- Excessive adhesive squeeze-out
If you notice excessive adhesive squeeze-out during installation, it’s important to address it promptly. Use a putty knife or scraper to carefully remove the excess before it dries. Wipe away any residue with a damp cloth. Not only will this help improve the aesthetic appearance, but it will also prevent the adhesive from interfering with the proper functioning of the tub surround.
- Inadequate adhesive coverage
If you find that the adhesive coverage is inadequate, it can jeopardize the stability of your tub surround. Ensure that you follow the manufacturer’s instructions regarding the quantity and application of the adhesive. Apply an adequate amount to the back of each panel, ensuring full coverage. Additionally, press firmly and evenly when installing the panels to maximize the bond.
By carefully troubleshooting misaligned panels and addressing caulk or adhesive problems, you can guarantee a successful installation of your 5 piece tub surround. Remember, attention to detail and patience are key in overcoming any challenges that may arise during the installation process. Happy remodeling!
Hiring A Professional Vs. Diy Installation
Hiring a Professional vs. DIY Installation
When it comes to installing a 5 piece tub surround, one of the first decisions you’ll need to make is whether to hire a professional or tackle the installation yourself. Both options have their own set of pros and cons, so it’s important to carefully consider your own skill level, time availability, and budget before making a decision.
Pros and Cons of Hiring a Professional
While hiring a professional may come at an additional cost, it can save you time, effort, and potential headaches. Here are some of the benefits and challenges of hiring a professional for your tub surround installation:
| Pros | Cons |
|---|---|
| Expertise: Professionals have the necessary skills and experience to ensure a proper installation. | Cost: Hiring a professional can be more expensive compared to a DIY installation. |
| Time Saving: Professionals are typically faster at completing the job due to their knowledge and experience. | Limited Control: You may have less control over the project and the final result. |
| Warranty: Many professionals offer warranties on their work, providing you with peace of mind. | Availability: You may need to wait for a professional’s availability to schedule the installation. |
Benefits and Challenges of DIY Installation
If you have some DIY experience and enjoy tackling projects on your own, installing a 5 piece tub surround yourself can be a rewarding endeavor. Here are some of the benefits and challenges to consider:
- Cost Saving: Doing it yourself can save you money as you won’t have to pay for professional labor.
- Flexibility: You have full control over the project timeline and can work at your own pace.
- Sense of Accomplishment: Successfully completing a DIY project can be fulfilling and boost your confidence.
- Time and Effort: DIY installation can be time-consuming and physically demanding, especially if you lack experience.
- Unexpected Issues: Without professional expertise, you may encounter unexpected challenges during the installation process.
- No Warranty: If issues arise in the future, you won’t have a professional warranty to fall back on.
Ultimately, the decision between hiring a professional or opting for a DIY installation depends on your individual circumstances. By weighing the pros and cons, you can make an informed choice that suits your needs, budget, and skill level.
Frequently Asked Questions
How Do You Install Tub Surround Panels?
To install tub surround panels, follow these steps: 1. Prepare the wall surface by cleaning and removing any old material. 2. Measure and cut the panels to fit your tub area. 3. Apply adhesive to the back of the panels and press them onto the wall.
4. Secure the panels using nails or screws, if needed. 5. Finish by sealing the edges and corners to ensure a watertight installation.
What Do You Put Behind A Tub Surround?
You can put backer board or cement board behind a tub surround to provide a sturdy and waterproof base for the installation. These materials help to prevent moisture damage and create a stable surface for the surround to adhere to.
Do You Need Cement Board Behind Shower Surround?
Yes, it is recommended to have cement board behind a shower surround. Cement board provides a sturdy and moisture-resistant base for the tiles or other materials used in the shower. It helps prevent water damage, mold, and mildew.
What Is The Difference Between 3 Piece And 5 Piece Tub Surround?
3 piece tub surround consists of three separate panels that are installed around the bathtub, offering basic coverage and easy installation. On the other hand, a 5 piece tub surround includes five panels, providing enhanced coverage and more options for customization.
Conclusion
To sum up, installing a 5 piece tub surround doesn’t have to be a daunting task. With the right tools and a step-by-step approach, you can achieve a professional-looking result. From preparing the wall to fitting the panels and sealing the edges, this guide has provided valuable tips and insights.
Remember to measure accurately, follow manufacturer instructions, and take your time to ensure a tight and secure fit. So go ahead, give your bathroom a fresh new look and enjoy the satisfaction of a job well done.