To install a bathtub drain and overflow, watch a video that provides accurate, step-by-step instructions. Then, follow the video tutorial for a seamless installation process.
Installing a bathtub drain and overflow can be a daunting task without proper guidance. However, with the help of a video tutorial, this process becomes easier and more manageable. We will explore the importance of video tutorials for installing a bathtub drain and overflow, how they provide accurate instructions, and how they can guide you through the entire installation process.
By following the steps outlined in the video, you can ensure a successful installation and enjoy a fully functional bathtub drain and overflow in your bathroom. So, let’s dive in and discover the benefits of video tutorials for this particular task.
Choosing The Right Bathtub Drain And Overflow System
When it comes to installing a new bathtub or replacing an old one, choosing the right bathtub drain and overflow system is a crucial step. The drain and overflow system not only ensures proper drainage but also adds to the overall aesthetic appeal of the bathtub. With so many options available in the market, it can be overwhelming to make a decision. However, considering a few factors and understanding the different types of bathtub drain and overflow systems can help you make an informed choice.
Factors to consider before purchasing a bathtub drain and overflow system
Before you begin your search for the perfect bathtub drain and overflow system, it is important to consider a few key factors:
- Compatibility: Ensure that the drain and overflow system you choose is compatible with your bathtub. Look for products that are specifically designed to fit the type and size of your bathtub.
- Material: The material of the drain and overflow system plays a significant role in its durability and longevity. Opt for high-quality materials such as brass or stainless steel that are resistant to rust and corrosion.
- Style and Design: Consider the overall style and design of your bathroom when selecting a bathtub drain and overflow system. Choose a finish and design that complements your bathroom decor.
- Ease of Installation: Look for a drain and overflow system that is easy to install, especially if you are planning to do it yourself. Choose products that come with clear instructions and necessary hardware.
- Maintenance: Consider the maintenance requirements of the drain and overflow system. Look for products that are easy to clean and maintain, ensuring hassle-free usage in the long run.
Understanding the different types of bathtub drain and overflow systems available in the market
Before making a purchase, it is essential to have a basic understanding of the different types of bathtub drain and overflow systems available in the market:
| Type | Description |
| Toe-Tap Drain | A popular option, a toe-tap drain is operated by pressing down on the stopper with your toe. It offers a seamless and clean look. |
| Pop-Up Drain | A pop-up drain is controlled by a lever or knob that lifts or pushes down the stopper to open or close the drain. |
| Trip-Lever Drain | A trip-lever drain system uses a lever mechanism to open and close the drain. This type provides easy operation. |
| Push-Pull Drain | A push-pull drain system requires you to manually lift or pull a knob or lever to open or close the drain. |
Each type of drain and overflow system has its own advantages and considerations. Choose the one that best suits your preferences and needs.
By considering the factors mentioned above and having a good understanding of the available types, you can choose the right bathtub drain and overflow system that not only functions efficiently but also enhances the overall look of your bathroom.

Step-By-Step Guide: How To Install Bathtub Drain And Overflow Video
In this step-by-step guide, we will walk you through the process of installing a bathtub drain and overflow system. Whether you are replacing an old system or installing a new one, this video tutorial will provide you with all the instructions you need to successfully complete the installation. Follow along with the video and refer to the accompanying steps below to ensure a smooth installation process.
Preparing for the installation process
Before you begin, make sure you have all the necessary tools and materials ready. This will help streamline the installation process and prevent any unnecessary delays. Gather the following items:
- Wrench
- Screwdriver
- Plumber’s tape
- Drain and overflow kit
- Bucket
Having these tools and materials on hand will ensure that you are fully prepared to carry out the installation seamlessly.
Ensuring safety measures are in place
Prior to starting any plumbing project, it’s important to prioritize safety. Here are a few safety measures to keep in mind:
- Wear protective gloves to protect your hands from any sharp edges or potential irritants.
- Ensure the water supply to the bathtub is turned off to prevent any accidental flooding or leaks.
By taking these safety precautions, you can ensure a safe and hassle-free installation process.
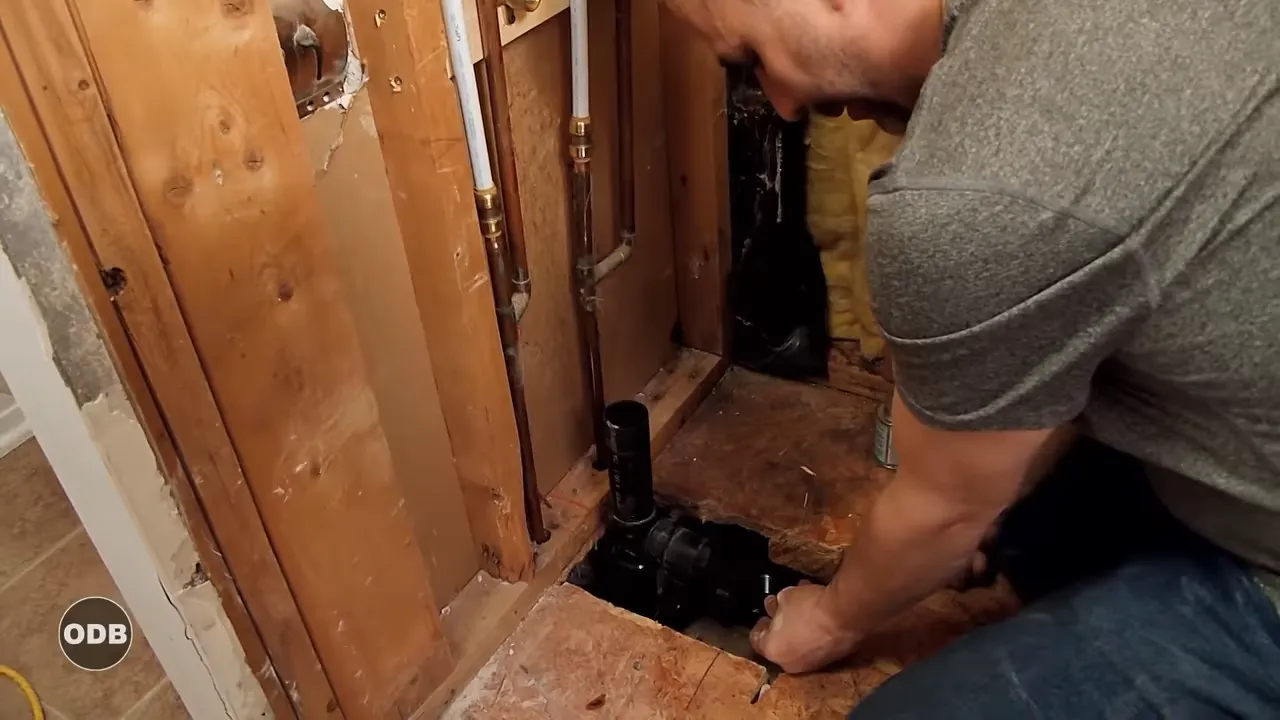
Removing the old drain and overflow system
Begin by removing the old drain and overflow system from the bathtub. Follow the steps below:
- Locate the overflow cover plate and remove any screws holding it in place using a screwdriver.
- Disconnect the plumbing connections by loosening the nuts with a wrench.
- Remove the drain stopper by unscrewing it counterclockwise.
Once these components are removed, you can proceed with installing the new drain and overflow system.
Installing the new drain and overflow system
Now it’s time to install the new drain and overflow system. Follow the steps below:
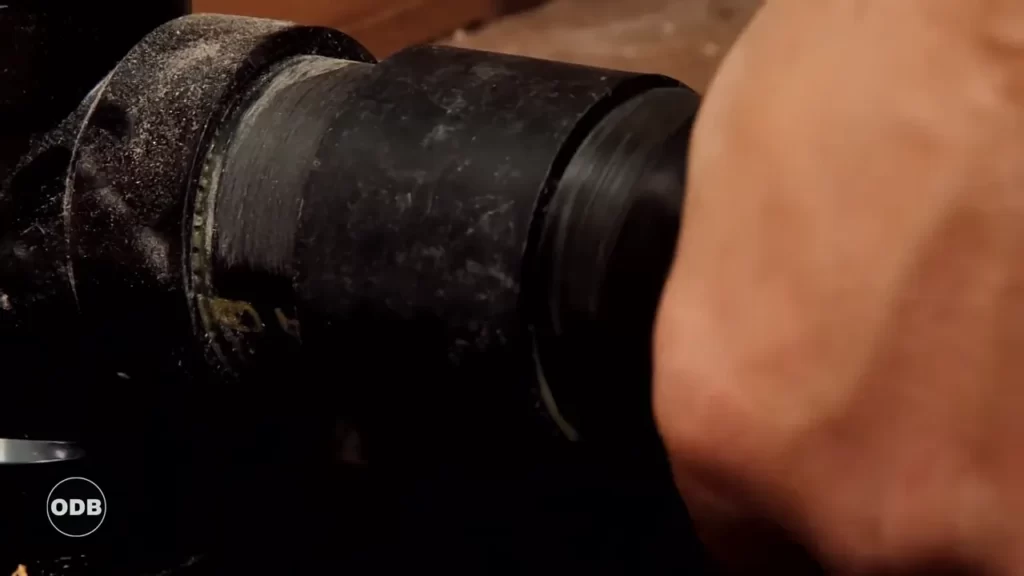
- Begin by fitting the drain shoe and gasket into the drain hole at the bottom of the bathtub.
- Use a wrench to tighten the drain shoe and gasket securely.
- Next, secure the overflow pipe and plate onto the side of the bathtub.
- Make sure all connections are tight and secure to prevent any leaks.
At this stage, you have successfully installed the new drain and overflow system in your bathtub.
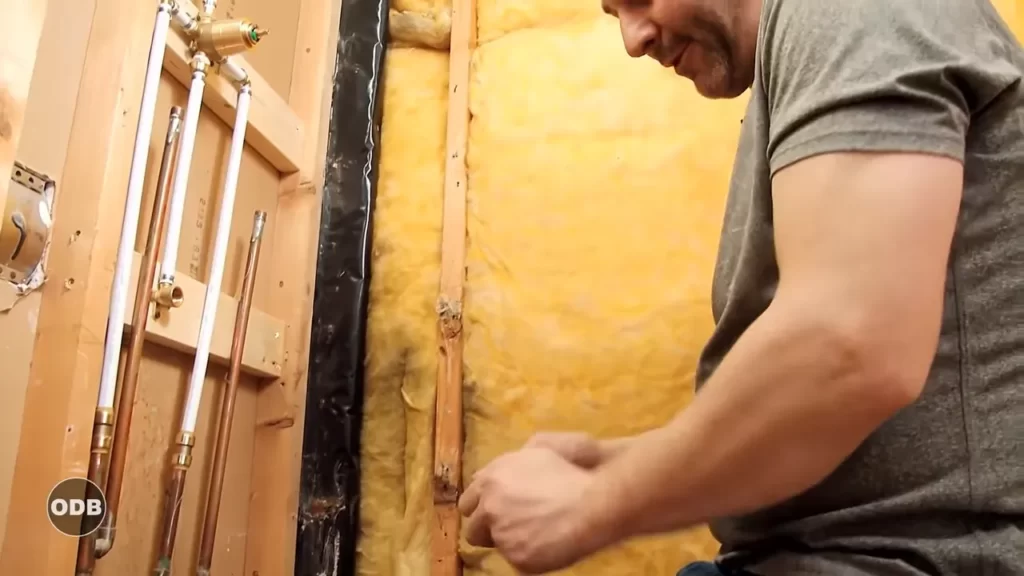
Connecting the plumbing connections
The next step involves reconnecting the plumbing connections. Follow the steps below:
- Apply plumber’s tape to the threads of the drain connections.
- Screw the drain connections back into place, securing them tightly with a wrench.
- Ensure all connections are properly aligned and tight to prevent any leaks.
By reconnecting the plumbing connections, you are one step closer to completing the installation.
Testing the newly installed bathtub drain and overflow system
Now that you have successfully installed the new drain and overflow system, it’s important to test its functionality. Follow these steps:
- Fill the bathtub with water.
- Wait for a few minutes to see if any water leaks from the connections.
- If there are no leaks, drain the water from the bathtub to ensure the system is functioning properly.
If you notice any leaks or issues, you may need to make adjustments or repairs as necessary.
Checking for leaks and proper functionality
After testing the system, thoroughly check for any leaks or signs of improper functionality. Pay close attention to the connections and ensure everything is working as expected.
If you notice any leaks or issues, promptly address them by making the necessary adjustments or repairs. This will help prevent any future plumbing problems.
By following this step-by-step guide, you can confidently install a bathtub drain and overflow system. Remember to prioritize safety, gather the necessary tools and materials, and take your time to ensure a successful installation. With a fully functional drain and overflow system, you can enjoy your relaxing baths without any worries.
Troubleshooting Tips For Common Installation Issues
Installing a bathtub drain and overflow may seem like a straightforward task, but sometimes issues can arise during the process. Here are some common installation issues you may encounter and how to troubleshoot them effectively.
Dealing with leaks or water drainage problems
If you notice water leaks or drainage problems after installing your bathtub drain and overflow, it’s crucial to address them promptly. Leaks can cause damage to your floors and walls, while poor water drainage can lead to stagnant water and potential health hazards. Here are some troubleshooting tips to consider:
- Inspect the drain assembly: Check the drain assembly to ensure all parts are properly aligned and tightly connected. Sometimes, a loose connection can cause leaks. Use a wrench to tighten any loose fittings.
- Look for cracks or damages: Examine the drain piping and overflow pipe for any cracks or damages. If you find any, replace the damaged parts immediately to prevent leaks.
- Apply plumber’s putty or sealant: If there are gaps between the bathtub and the drain assembly, apply plumber’s putty or sealant to create a watertight seal. This can help prevent leaks and water drainage issues.
- Check the bathtub drain stopper: Ensure that the bathtub drain stopper is functioning correctly. A faulty stopper can cause water to leak or prevent proper drainage. Adjust or replace the stopper as needed.
- Test the water flow: Fill the bathtub with water and observe if the drainage is smooth. If the water drains slowly, there might be a clog in the drainpipes. Proceed to the next section for troubleshooting tips specifically related to clogs and improper draining.
Handling issues with improper draining or clogging
If you’re experiencing improper draining or clogging problems with your bathtub drain and overflow, there are several troubleshooting measures you can take to resolve the issue. Consider the following:
- Use a plunger: Begin by using a plunger to try and dislodge any potential clogs in the drain. Apply firm pressure and create a tight seal around the drain opening. Plunge in a vertical motion several times, then test the drainage.
- Try a drain snake: If plunging doesn’t solve the problem, a drain snake can be helpful. Insert the end of the drain snake into the drain and rotate it clockwise while pushing it further into the pipe. This action helps break up and remove clogs.
- Use a chemical drain cleaner: Chemical drain cleaners are another option when handling stubborn clogs. Follow the manufacturer’s instructions carefully when using these products, as they can be corrosive. Use them sparingly and ensure proper ventilation.
- Call a professional plumber: If you’ve exhausted your DIY options and the problem persists, it’s time to seek help from a professional plumber. They have the expertise and specialized tools to resolve complex clogging issues.
By following these troubleshooting tips, you can address common installation issues related to leaks, water drainage, and clogs. Remember to take appropriate safety precautions and seek professional help when needed to ensure a successful bathtub drain and overflow installation.
Maintenance And Care For Bathtub Drains And Overflows
Proper maintenance and care for your bathtub drains and overflows are essential to ensure their longevity and efficient functioning. Regular cleaning and addressing common issues can prevent major problems in the future. In this section, we will discuss the proper cleaning and maintenance techniques, removing hair and debris from the drain, preventing mold and mildew buildup, addressing common issues and repairs, fixing minor leaks or drain blockages, and replacing damaged or worn-out components.
Proper cleaning and maintenance techniques
Keeping your bathtub drain and overflow clean is crucial for optimal performance. Follow these steps to ensure proper maintenance:
- Regularly remove any visible debris or hair from the drain using a small wire brush or drain snake.
- Use a mixture of baking soda and vinegar to clean the drain. Pour half a cup of baking soda down the drain, followed by half a cup of vinegar. Let it sit for a few minutes, then rinse with hot water.
- For stubborn clogs, use a chemical drain cleaner specifically designed for bathtubs. Follow the manufacturer’s instructions carefully.
- Once a month, flush the drain with boiling water to clear any residue or buildup.
- Consider using a drain strainer to catch hair and debris before they enter the drain.
Removing hair and debris from the drain
Hair and debris are common culprits for clogged drains. Here’s how you can effectively remove them:
- Wear gloves to protect your hands.
- Use a pair of tweezers or needle-nose pliers to pull out any visible hair or debris from the drain.
- If necessary, use a small wire brush or drain snake to remove stubborn clogs.
- Flush the drain with hot water to ensure everything is cleared.
Preventing mold and mildew buildup
Mold and mildew can thrive in damp environments, including your bathtub drain and overflow. Prevent buildup by following these steps:
- Regularly wipe down the drain and overflow areas with a mixture of bleach and water to kill any existing mold or mildew.
- Ensure proper ventilation in your bathroom to reduce excess moisture.
- Consider using mold-resistant caulk around the edges of your bathtub to prevent water from seeping into cracks or crevices.
Addressing common issues and repairs
Over time, bathtub drains and overflows may encounter various issues that require attention. Here are some common problems you may encounter:
- Slow drainage: If your drain is draining slowly, try using a plunger to dislodge any clogs. If the problem persists, consider using a drain snake or contacting a professional plumber.
- Unpleasant odors: To eliminate foul odors coming from your drain, pour a mixture of baking soda and vinegar down the drain, followed by boiling water.
- Leaking overflow: If you notice water leaking from the overflow cover, it may be due to a worn-out gasket. Remove the cover and replace the gasket.
Fixing minor leaks or drain blockages
If you have identified a minor leak or blockage in your bathtub drain or overflow, follow these steps to fix the issue:
- Inspect the area carefully to locate the source of the leak or blockage.
- Tighten any loose connections or valves.
- If there is a blockage, use a plunger or drain snake to clear it.
- If necessary, disassemble the drain or overflow components and clean them thoroughly.
- Reassemble the components and test for any leaks or blockages.
Replacing damaged or worn-out components
If you have identified damaged or worn-out components that cannot be repaired, it may be necessary to replace them. Follow these steps:
- Turn off the water supply to the bathtub.
- Remove the old components, such as the drain stopper, gasket, or overflow cover.
- Install the new components according to the manufacturer’s instructions.
- Test the newly installed components for any leaks or issues.
By following these maintenance and care techniques for your bathtub drains and overflows, you can ensure their longevity and prevent major issues. Regular cleaning, removing hair and debris, preventing mold and mildew buildup, addressing common issues, fixing minor leaks or blockages, and replacing damaged components will keep your bathtub functioning efficiently for years to come.
Frequently Asked Questions
How Much Does It Cost To Replace A Bathtub Drain And Overflow?
The cost to replace a bathtub drain and overflow can vary depending on factors like the type of materials, labor fees, and additional services needed. On average, you can expect to invest anywhere from $200 to $500 for this replacement.
However, it’s recommended to consult a professional plumber to get an accurate estimate for your specific situation.
How Do You Replace A Bathtub Overflow Drain?
To replace a bathtub overflow drain, follow these steps: 1. Remove the bathtub drain stopper. 2. Unscrew the screws holding the overflow cover plate in place. 3. Disconnect the drain linkage. 4. Unscrew the old overflow drain and remove it. 5.
Install the new overflow drain and reassemble the components. Make sure to turn off the water supply before starting the process.
Do You Use Plumbers Putty On Tub Drain?
Yes, plumbers putty is commonly used on tub drains.
Do I Need To Caulk Around Tub Overflow?
Yes, caulking around the tub overflow is necessary. It helps prevent water leaks and damage to the surrounding walls and floors.
Conclusion
Installing a bathtub drain and overflow doesn’t have to be a daunting task. With the help of a step-by-step instructional video, you can easily master this home improvement project. By following the detailed instructions provided, you’ll be able to install the drain and overflow in no time.
Remember to gather all the necessary tools and materials before starting, and be cautious throughout the process to ensure a successful installation. Happy DIY-ing!