To install a tile tub surround, measure and mark the wall, apply waterproof membrane, and then apply a layer of thin-set adhesive before laying the tiles in place. A tile tub surround can add style and functionality to your bathroom.
Whether you’re replacing an old surround or installing one for the first time, it’s important to take the proper steps to ensure a successful installation. In this guide, we’ll outline the process of installing a tile tub surround. By following these steps, you can create a beautiful and durable surround that will enhance the look and feel of your bathroom.
So let’s dive into the details of how to install a tile tub surround and transform your bathroom into a stunning oasis.
Collecting The Necessary Tools And Materials
Installing a tile tub surround can completely transform the look of your bathroom, giving it a modern and sophisticated feel. However, before you can dive into the installation process, it’s important to gather all the necessary tools and materials. This step is crucial to ensure a smooth and efficient installation process. In this section, we will go over the essential tools and materials you’ll need for a successful tile tub surround installation.
Gather the Essential Tools and Materials
Before you begin the installation process, it’s essential to make sure you have all the tools and materials you’ll need. This will save you time and frustration later on when you’re in the midst of the project. Below is a list of the essential tools and materials you should have on hand:
| Tools | Materials |
|---|---|
|
|
Having the right tools and materials will ensure that your tile tub surround installation goes smoothly and that the end result is both durable and visually pleasing. Additionally, it’s important to have the proper safety equipment when working with power tools and chemicals. This includes safety goggles, gloves, and a dust mask.
Now that you have gathered all the necessary tools and materials, you are ready to move onto the next step of the installation process, which is preparing the tub area. Stay tuned for the next section where we will guide you through this process.

Preparing The Tub And Surround Surface
Clean and dry the tub and surrounding area thoroughly
Before installing a tile tub surround, it is crucial to clean and dry the tub and the surrounding area properly. This step is essential to ensure proper adhesion of the tiles and to create a smooth and long-lasting installation. Follow these steps:
- Clear the tub of any personal items or debris.
- Using a mild, non-abrasive cleaner, scrub the tub surface thoroughly to remove any dirt, grime, or soap scum. Make sure to reach all the nooks and crannies.
- Rinse the tub with clean water to remove any residue from the cleaning agent.
- Dry the tub surface completely using a clean cloth or towel. Any moisture left behind may affect the adhesive and compromise the installation.
- Similarly, clean the surrounding wall surfaces, paying attention to areas around the tub where the tile will be installed.
- Rinse the walls with water and dry them thoroughly to ensure a clean, moisture-free surface.
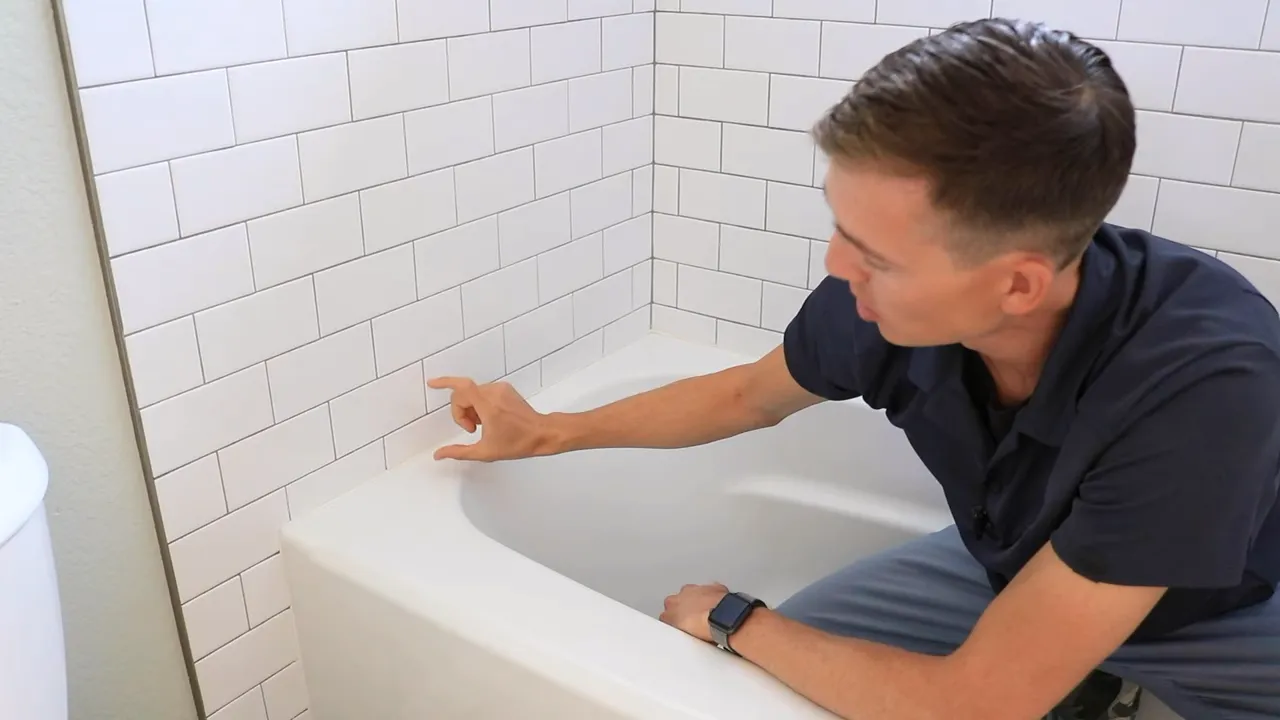
Remove any existing caulk or sealant
Prior to installing the tile tub surround, it is crucial to remove any existing caulk or sealant. This step will ensure a smooth, flat surface for the tiles to adhere properly. Follow these steps:
- Inspect the tub surround for any old caulk or sealant. This could be around the edges of the tub or along the joints of the existing tiles.
- Using a caulk removal tool or a utility knife, carefully scrape away the old caulk or sealant. Be careful not to damage the tub or surrounding tiles during this process.
- Ensure that all traces of the old caulk or sealant are removed completely. Any residue left behind may interfere with the adhesion of the new tile.
- Once all the caulk or sealant is removed, clean the area again to ensure it is free from any debris or residue.
By properly preparing the tub and surround surface, you are setting the foundation for a successful tile installation. This process will ensure that the tiles adhere securely and create a beautiful and functional tub surround that will stand the test of time.
Measuring And Planning The Tile Layout
Measuring and planning the tile layout is a crucial step when installing a tile tub surround. It ensures that you have the right quantity of tiles and creates a well-organized and aesthetically pleasing design. In this section, we will discuss how to measure the area and create a layout plan for your tile installation.
Measure the area to determine the quantity of tiles needed
Before you start shopping for tiles, it’s important to accurately measure the area of your tub surround. This will enable you to determine the quantity of tiles needed for the installation. Here’s how you can do it:
- Begin by measuring the height of the walls where the tiles will be installed. Use a tape measure to measure from the top of the tub to the desired height of your tile installation. Take note of this measurement and move on to the next step.
- Next, measure the length of each wall where the tiles will be placed. Measure from one corner of the wall to the other corner and record the measurement for each wall.
- To calculate the total square footage of tiles needed, multiply the height measurement from step 1 by the sum of the length measurements from step 2. This will give you the total square footage of tile required for your tub surround.
By accurately measuring the area, you can ensure that you purchase the right quantity of tiles for your tile tub surround. It’s always a good idea to add a little extra to account for any mistakes or future repairs.
Create a layout plan for the tile installation
Having a well-thought-out layout plan is essential to achieve a professional-looking tile tub surround. It enables you to visualize the overall design and ensures that the tiles are installed symmetrically. Follow these steps to create your tile layout plan:
- Start by laying out the tiles on a flat surface, such as the floor, using spacers to maintain even gaps between them. This will help you visualize how the tiles will look when installed.
- Consider the focal point of your tub surround and decide whether you want to center the tiles around it or create a different pattern.
- Measure and mark the center point on each wall where the tiles will be installed. This will serve as a reference point for your layout plan.
- Using a chalk line or a level, draw vertical and horizontal guidelines on the walls to guide your tile installation. These guidelines will ensure that the tiles are aligned properly.
- Place the first tile at the corner of your layout plan, following the guidelines. Apply adhesive to the wall using a notched trowel and press the tile firmly into place. Repeat this step for the remaining tiles, always checking that they are level and aligned with the guidelines.
- Once all the tiles are in place, allow them to dry according to the adhesive manufacturer’s instructions. Remove the spacers and clean off any excess adhesive using a damp sponge.
Creating a layout plan before starting the tile installation process will save you time and ensure a visually pleasing outcome. It allows you to make adjustments and plan for any potential challenges that may arise during the installation.
Applying The Tile Adhesive
Prepare the tile adhesive according to the manufacturer’s instructions
Before you start applying the tile adhesive for your tub surround, it is crucial to read and understand the manufacturer’s instructions. Different types of tile adhesives have varying mixing ratios and application techniques. Taking the time to familiarize yourself with the instructions will ensure that you have the right consistency and avoid any mishaps during the installation process.
The manufacturer’s instructions will typically outline the necessary tools and materials you need for preparing the adhesive. This may include a mixing paddle, a bucket, and water. Make sure you have everything on hand before you begin.
Apply the adhesive evenly on the surface
Once you have prepared the tile adhesive according to the manufacturer’s instructions, it’s time to apply it to the surface of your tub surround. Here are the steps you need to follow:
- Start by using a notched trowel. This tool ensures that you spread the adhesive evenly on the surface. The size of the trowel notches will depend on the size of the tiles you are using. The larger the tile, the deeper the notches should be.
- Take a small amount of adhesive with your notched trowel and apply it to the surface. Make sure to hold the trowel at a 45-degree angle to create even ridges.
- Once you have a section with adhesive, use the smooth edge of the trowel to flatten the ridges. This will help create a level surface for your tiles.
- Continue applying adhesive and flattening the ridges in small sections as you work your way across the tub surround. It’s important to work efficiently so that the adhesive doesn’t dry out before you start adding the tiles.
Keep in mind that tile adhesive is typically sticky and can be challenging to remove once it dries. Therefore, it’s important to constantly clean off any excess adhesive from the tiles or the grout lines as you go along. This will save you time and effort during the cleanup process.
If you’re working with larger tiles or if the surface is vertical, you may need to provide additional support to prevent the tiles from sliding down. Secure the tiles in place using temporary supports, such as wooden shims or wedges, until the adhesive dries.
Remember, taking the time to ensure the adhesive is applied evenly and following the manufacturer’s instructions will result in a professional-looking tile tub surround that will stand the test of time.
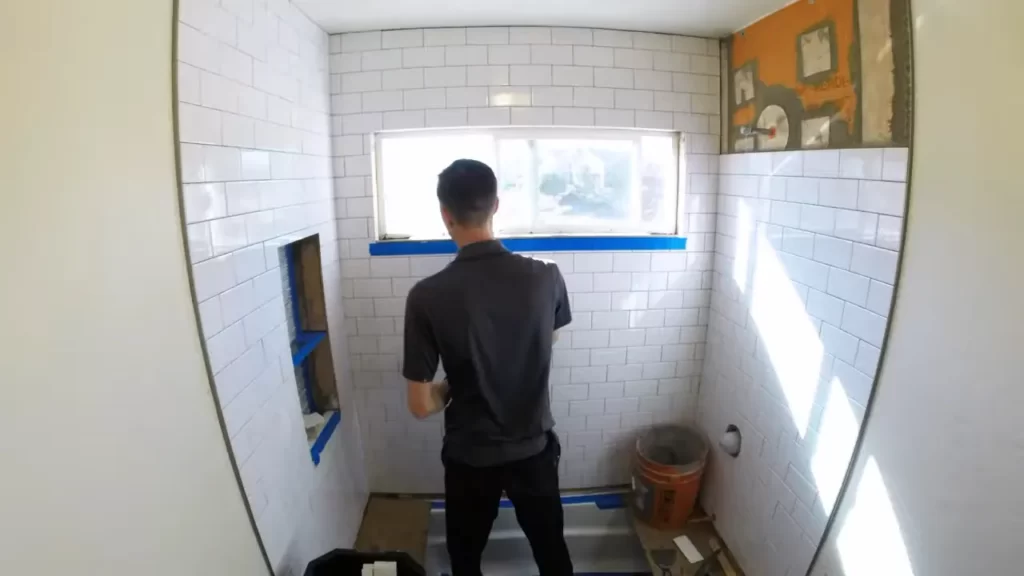
Setting The First Row Of Tiles
Start with the bottom row of tiles
Setting the first row of tiles is a crucial step when installing a tile tub surround. This initial row serves as the foundation for the entire project and sets the tone for the overall appearance. To ensure a successful installation, follow these steps:
Use tile spacers to achieve even spacing
Tile spacers are essential tools for achieving even spacing between tiles during installation. These small plastic or rubber spacers come in various sizes and are inserted between tiles to create uniform gaps. By using spacers, you can ensure that your tiles are properly aligned and visually appealing. Here’s how to use them:
- Begin by placing the first row of tiles along the bottom edge of the tub surround, starting from one corner.
- Spread a thin layer of tile adhesive on the wall using a notched trowel, ensuring the adhesive covers an area slightly larger than the size of the tile.
- Press the first tile firmly into place, making sure it is level and aligned with the reference lines you’ve marked on the wall.
- Insert tile spacers on all four sides of the tile, pressing them into the adhesive until they are snug. These spacers will determine the width of the grout lines between tiles.
- Continue placing the remaining tiles in the first row, following the same process. Use a level and a measuring tape to ensure each tile is properly aligned and spaced.
Remember to periodically check the level and alignment of the tiles as you work your way across the wall. This will help you catch any inconsistencies early on and make adjustments as needed. Additionally, ensure that the spacers are properly inserted and flush with the tile edges to maintain consistent spacing.
By starting with the bottom row of tiles and using tile spacers for even spacing, you’ll lay a solid foundation for a beautiful and professional-looking tile tub surround. Stay tuned for the next step in this installation guide, where we’ll cover the process of setting the subsequent rows of tiles.
Installing The Remaining Tiles
Continue Setting Rows of Tiles, Working from the Bottom Up
Now that you have successfully completed the initial rows of your tile tub surround installation, it’s time to move on to the remaining tiles. This step-by-step guide will help you navigate through the process seamlessly.
- Preparation: Before you begin, ensure that all the necessary materials are within reach. This includes the tiles, adhesive, trowel, grout, spacers, and a sponge for cleaning.
- Apply Adhesive: Using your trowel, apply a thin layer of adhesive to the back of a tile. Make sure to spread it evenly and consistently to ensure proper adhesion.
- Place the Tile: Carefully place the tile onto the wall, starting from the bottom. Press firmly, ensuring that it is level and aligned with the previous rows. Use spacers to maintain an even gap between each tile for grouting.
- Continue the Rows: Repeat the adhesive and placement process for the remaining tiles, working your way up the wall. Remember to periodically check for levelness and alignment.
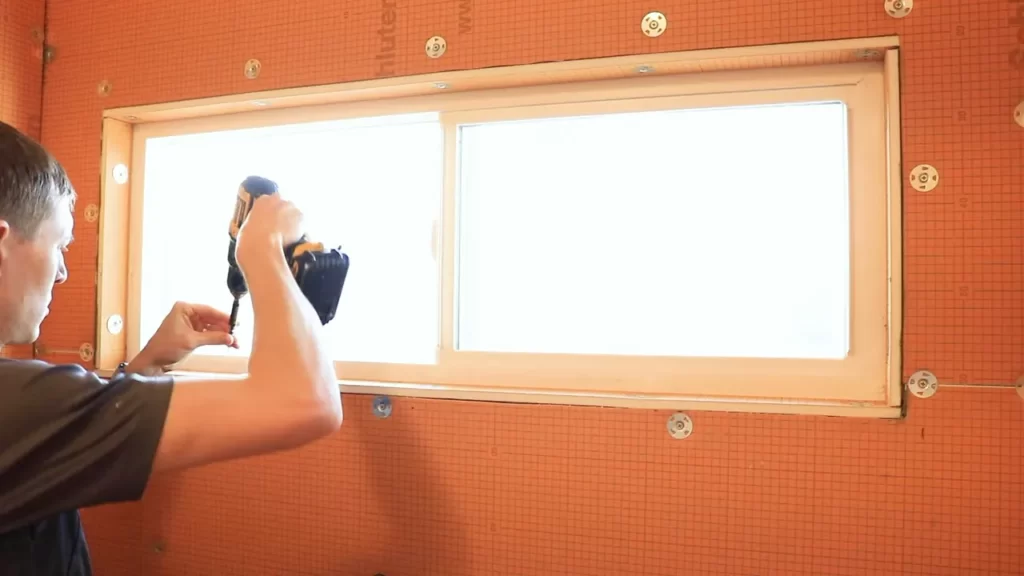
Make Necessary Cuts to Fit Around Fixtures or Corners
As you progress with the tile installation, you may encounter fixtures or corners that require special attention. Here’s how to tackle these situations effectively:
- Measure and Mark: Take precise measurements of the area that needs to be cut. Use a pencil to mark the tile accordingly, ensuring that it fits snugly around the fixture or corner.
- Cut the Tile: Using a tile cutter or wet saw, carefully cut along the marked line. Take your time and follow safety precautions to avoid any mishaps.
- Fit and Adjust: Test the cut tile to ensure it fits correctly. Make any necessary adjustments by trimming small sections until it fits perfectly.
- Continue Installation: Once you have successfully cut and fit the tiles around fixtures or corners, continue setting the remaining tiles as previously described.
By following these steps, you can confidently complete the installation of the remaining tiles for your tub surround. Remember to work from the bottom up, ensuring each tile is properly aligned, leveled, and adhered. Take your time when making cuts to fit around fixtures or corners, as precision is crucial. With attention to detail and patience, you will achieve a beautifully tiled tub surround.
Applying Grout And Finishing Touches
Once the tile adhesive has fully dried, it is time to apply the grout and add those finishing touches to your tile tub surround. Follow these steps to ensure a seamless and professional-looking result.
Allow the adhesive to dry before grouting
Before you start applying grout, it is crucial to allow the tile adhesive to fully dry. This typically takes around 24 to 48 hours, but it’s always best to consult the manufacturer’s instructions for precise drying times. Patience is key in this step as rushing could compromise the adhesion of your tiles.
Apply grout using a grout float
Now that the adhesive has dried and you’re ready to proceed, it’s time to apply the grout. Grab a grout float and begin spreading the grout mixture over the tiles, ensuring you press it into the gaps between each tile. Work in small sections at a time to prevent the grout from drying out too quickly.
- Start by holding the grout float at a 45-degree angle and spread the grout diagonally across the tiles.
- Ensure that the grout fills the gaps completely and evenly.
- Use the edge of the grout float to scrape off any excess grout.
- Continue this process until you have covered all the tiled areas.
Clean off excess grout and buff the tiles
Once you have finished applying the grout, it’s time to clean off any excess grout and buff the tiles to achieve a polished and professional look. Follow these steps to complete the final touches:
- Using a damp sponge, gently wipe away any excess grout from the tiles and grout lines. Be careful not to remove too much grout from the gaps between the tiles.
- Allow the grout to dry for the recommended amount of time as specified by the grout manufacturer.
- After the grout has dried, use a clean, dry cloth to buff the tiles, removing any haze or residue left by the grout.
- Repeat this process if necessary until the tiles are clean and shiny.
Congratulations! You have now successfully applied grout and completed the finishing touches to your tile tub surround. Take a step back and admire your handiwork. Your newly installed tile tub surround is not only functional but also a beautiful addition to your bathroom.
Sealing The Grout
Let the grout cure for the recommended time
After applying the grout to your newly installed tile tub surround, it’s important to allow it sufficient time to cure. This process typically takes around 24 to 48 hours, but it’s essential to follow the manufacturer’s instructions for the specific grout product you’re using. During this time, it’s crucial to avoid any excessive moisture or heavy use of the tub area to ensure the grout sets properly.
Apply a grout sealer to protect against stains and moisture
Once the grout has fully cured, it’s time to add an extra layer of protection to ensure the longevity and durability of your tile tub surround. Applying a grout sealer will not only safeguard against stains but also prevent moisture from penetrating the grout lines and causing potential damage.
How to apply grout sealer:
- Clean the grout lines: Before applying the grout sealer, make sure to thoroughly clean the grout lines to remove any dirt, dust, or residue. Using a grout brush or toothbrush along with a mild cleaner will help you achieve the best results.
- Prepare the sealer: Shake the grout sealer bottle well, ensuring all the contents are mixed properly. If required, pour the sealer into a small container for easy application.
- Apply the sealer: Starting from one corner, use a small paintbrush or foam brush to apply the grout sealer onto the grout lines. Be sure to cover each line evenly by gently brushing the sealer over the surface. Take care not to allow the sealer to come into contact with the tiles themselves, as it may cause discoloration.
- Allow for absorption: Once you’ve applied the grout sealer, let it sit for a few minutes to allow for absorption. This will ensure that the sealer penetrates the grout lines effectively.
- Wipe off excess sealer: After the absorption period, take a clean, dry cloth or paper towel and gently wipe off any excess sealer from the tile surfaces. This step is crucial to prevent any hazy or cloudy residue from forming on the tiles.
By following these simple steps, you can protect your newly installed tile tub surround and grout lines from stains and moisture, ensuring its beauty and functionality last for years to come. Don’t overlook the importance of sealing the grout, as it can significantly contribute to the overall lifespan and aesthetics of your tub surround.
Regular Cleaning And Maintenance
Maintaining a clean and functional tile tub surround is essential for both the longevity and aesthetics of your bathroom. With regular cleaning and maintenance, you can keep your tiles and grout looking their best. In this section, we will discuss the importance of using non-abrasive cleaners and inspecting for any damaged or cracked tiles.
Use non-abrasive cleaners to clean the tiles and grout
Cleaning the tiles and grout regularly is crucial to prevent the buildup of dirt, grime, and mildew. However, it’s important to use non-abrasive cleaners to avoid damaging the tile surface. Abrasive cleaners can scratch the tiles and make them appear dull over time. To ensure the longevity of your tile tub surround, follow these steps:
- Start by sweeping or vacuuming the tiles to remove any loose dirt or debris.
- Mix a solution of warm water and a mild, non-abrasive cleaner. Avoid using harsh chemicals or acidic cleaners as they can damage the grout and tiles.
- Dip a soft sponge or cloth into the cleaning solution and gently scrub the tiles and grout lines. Pay extra attention to areas that are prone to soap scum or mildew accumulation.
- Rinse the tiles thoroughly with clean water to remove any residue from the cleaning solution.
- Dry the tiles with a clean towel or let them air dry.
Regularly cleaning your tile tub surround with non-abrasive cleaners will not only keep it looking its best but also prevent the growth of mold and mildew, maintaining a hygienic environment in your bathroom.
Inspect and repair any damaged or cracked tiles
Over time, tiles may get chipped, cracked, or become loose. It’s important to inspect your tile tub surround periodically and repair any damaged tiles to ensure the integrity of the installation. Here’s what you should do:
- Thoroughly examine the tiles for any signs of damage, such as cracks, chips, or loose tiles.
- If you notice any damaged tiles, remove them carefully using a grout saw or chisel.
- Replace the damaged tiles with new ones of the same size and style. Use tile adhesive to secure them in place.
- After replacing the tiles, allow the adhesive to dry completely before grouting the area.
- Once the adhesive is dry, apply grout to the joints between the tiles with a grout float, ensuring a smooth and even finish.
- After grouting, wipe off any excess grout with a damp sponge and allow it to cure as per the manufacturer’s instructions.
Regularly inspecting and repairing any damaged tiles will prevent further problems, such as water leakage, and help maintain the overall appearance of your tile tub surround.
In conclusion, regular cleaning and maintenance are essential for preserving the beauty and functionality of your tile tub surround. Use non-abrasive cleaners to clean the tiles and grout, making sure to follow the proper cleaning techniques. Additionally, regularly inspect the tiles for any damage and promptly repair or replace them as needed to ensure the longevity of your tub surround installation.
Additional Tips And Considerations
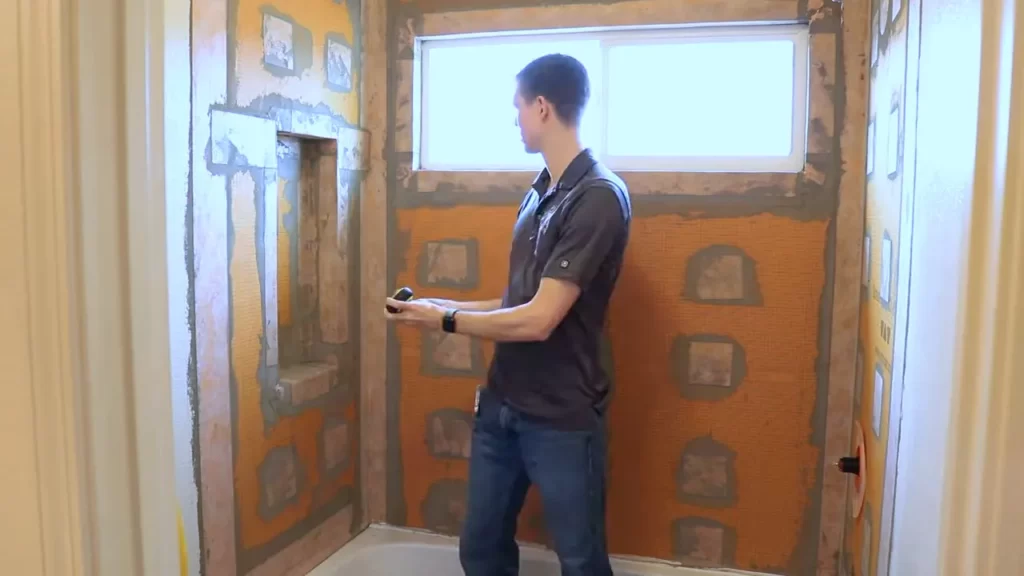
Consider using waterproofing products for added protection
In order to ensure the longevity and durability of your tile tub surround, it’s essential to consider using waterproofing products. These products provide an extra layer of protection against moisture and prevent water seepage into the walls.
One of the most commonly used waterproofing products is a liquid membrane, which is applied directly onto the surface of the walls before tiling. This membrane acts as a barrier, preventing water from penetrating the walls and causing damage.
Another option to consider is a waterproofing fabric, which is often used in conjunction with the liquid membrane. This fabric is embedded into the membrane and provides additional reinforcement, particularly in areas that are prone to moisture exposure, such as corners and joints.
Furthermore, it’s recommended to apply a layer of waterproofing product on the tub or shower base before tiling. This additional step helps to prevent any potential leaks that may occur at the base of the tub surround.
By incorporating waterproofing products into your tile tub surround installation, you can ensure that your walls remain protected and free from any water-related damage.
Seek professional assistance for complex installations
While installing a tile tub surround can be a rewarding DIY project, it’s important to recognize the complexity of certain installations. In some cases, seeking professional assistance may be necessary to ensure a successful and long-lasting outcome.
If you’re dealing with a complex installation, such as one that involves custom designs, intricate patterns, or unconventional layouts, it’s best to consult a professional tile installer. Their expertise and experience will guarantee that the installation is done correctly and meets your expectations.
Moreover, professionals have access to specialized tools and equipment that may be required for complex installations. These tools can ensure precise cuts, accurate measurements, and a seamless finish.
Additionally, professional installers have the knowledge and skill to overcome any unforeseen challenges that may arise during the installation process. They can identify potential issues and provide suitable solutions to avoid any costly mistakes or unnecessary repairs.
Ultimately, seeking professional assistance for complex installations will not only save you time and effort but also give you the peace of mind that your tile tub surround is in capable hands.
Frequently Asked Questions
How Do You Install Tile On A Tub Surround?
To install tile on a tub surround, follow these steps: 1. Measure and prepare the wall surface. 2. Apply cement backer board and seal the joints. 3. Plan the tile layout and mix the mortar. 4. Install the tiles using a notched trowel, making sure they’re level.
5. Apply grout, wipe off excess, and let it dry.
How Do You Install Tile Around A Shower Surround?
To install tile around a shower surround, first, prepare the wall surface by removing any existing materials and ensuring it is clean and smooth. Then, apply a waterproofing membrane to the wall. Next, measure and mark the area where the tiles will be installed.
Apply tile adhesive to the wall and carefully press the tiles into place, using spacers to maintain even spacing. Finally, grout the tiles and seal the edges for a durable and water-resistant installation.
Is It Better To Tile Or Use A Tub Surround?
Tiling or using a tub surround depends on personal preference. Tiling gives a stylish, customizable look while a tub surround offers convenience and easy installation. Consider the desired aesthetic, maintenance, and budget to determine which option is better for you.
Can I Tile My Own Tub Surround?
Yes, you can tile your own tub surround if you carefully follow these guidelines: 1. Prep the surface. 2. Use suitable tiles and materials. 3. Ensure proper waterproofing. 4. Carefully measure and cut tiles. 5. Use appropriate adhesive and grout.
Conclusion
To sum up, installing a tile tub surround is a relatively straightforward process that can transform the look and feel of your bathroom. By following the steps outlined in this guide, you can achieve professional-looking results without the need for extensive expertise or specialized tools.
Remember to prepare the surface properly, plan your layout, and take your time to ensure precise and accurate installation. With a few days of work, you can enjoy a beautiful and durable tub surround that will enhance your bathroom for years to come.