
To install a 3 piece tub surround, start by measuring and marking the layout on the wall. Use a level to ensure the lines are straight.
Then, attach the back panel to the wall using adhesive or screws. Next, install the side panels, making sure they fit tightly against the back panel. Finally, seal any gaps with caulk and finish by attaching trim pieces for a polished look.
This installation process is straightforward and can be completed with basic tools and materials. By following these steps, you can easily install a 3 piece tub surround in your bathroom.
Planning Your Tub Surround Installation
Choosing the Right Tub Surround Materials
One of the first steps in planning your tub surround installation is selecting the right materials. The material you choose will not only impact the overall aesthetics of your bathroom, but also its durability and maintenance requirements. There are several options available, each with its own pros and cons.
1. Fiberglass: Fiberglass tub surrounds are lightweight, easy to install, and highly resistant to water damage. They come in a variety of colors and styles, making it easy to find one that matches your bathroom decor. However, fiberglass may require more regular cleaning and can be prone to scratches.
2. Acrylic: Acrylic tub surrounds are known for their durability and low maintenance requirements. They are resistant to stains, scratches, and fading, making them a popular choice among homeowners. Additionally, acrylic surfaces are non-porous, making them resistant to mold and mildew growth. However, they may be more expensive than other options.
3. Tile: Tile tub surrounds offer a timeless and customizable look. With countless options in terms of colors, patterns, and styles, you can create a truly unique and personalized bathroom. Tile is also highly durable and resistant to water damage. However, it can be more challenging to install and requires regular cleaning and maintenance to prevent grout discoloration and mold growth.
| Material | Pros | Cons |
|---|---|---|
| Fiberglass | Lightweight, easy to install, variety of colors and styles | Requires regular cleaning, prone to scratches |
| Acrylic | Durable, low maintenance, resistant to stains, scratches, and fading | More expensive |
| Tile | Customizable, durable, resistant to water damage | Challenging to install, requires regular cleaning and maintenance |
Taking Accurate Measurements
Before you begin the installation process, it’s crucial to take accurate measurements of your bathroom and tub area. This step will ensure that your tub surround fits perfectly and avoids any gaps or overlaps. Follow these steps to take precise measurements:
- Measure the width, height, and depth of your tub area using a tape measure or ruler.
- Take note of any obstacles like faucets or showerheads, and measure the distance between them and the tub edge.
- Transfer these measurements to a piece of paper or use a digital tool to create a detailed diagram of your tub area.
Gathering the Necessary Tools and Supplies
Before starting the installation process, make sure you have all the necessary tools and supplies on hand. This will save you time and frustration during the installation. Here are some essential items you’ll need:
- Tub surround kit: Purchase a tub surround kit that includes all the necessary panels and hardware for installation.
- Utility knife: A sharp utility knife will come in handy for cutting and trimming the tub surround panels.
- Caulk gun: You’ll need a caulk gun to apply adhesive or caulk to secure the tub surround panels in place.
- Screwdriver: Depending on the type of tub surround, you may need a screwdriver to secure the panels to the wall.
- Tape measure: Use a tape measure to take accurate measurements of your tub area.
- Pencil or marker: These will be used to mark the measurements on the tub surround panels.
- Safety goggles and gloves: Protect your eyes and hands while handling tools and materials.
By gathering all the necessary tools and supplies beforehand, you’ll be prepared to tackle your tub surround installation with confidence and efficiency.
Preparing The Bathroom For Installation
Before you can install a 3 piece tub surround, it’s important to properly prepare your bathroom. This step is crucial to ensure a smooth and successful installation, as well as the longevity of your tub surround. In this section, we will guide you through the necessary steps to prepare your bathroom for the installation process.
Removing the old tub surround
The first step in preparing your bathroom for a new 3 piece tub surround is to remove the old one. This may sound like a daunting task, but with the right tools and some patience, it can be done relatively easily. Here’s how:
- Gather the necessary tools: utility knife, pry bar, hammer, and goggles.
- Put on your goggles to protect your eyes from any debris that may fly during the removal process.
- Using a utility knife, carefully cut away any caulking or adhesive between the tub surround and the wall.
- Once the caulk is removed, use a pry bar and hammer to gently pry the old tub surround away from the wall. Start at one corner and work your way around, being careful not to damage the surrounding walls.
- Continue prying until the entire tub surround is free from the wall.
- Dispose of the old tub surround responsibly.
Inspecting and preparing the walls
After removing the old tub surround, it’s important to inspect and prepare the walls to ensure they are clean and ready for the new installation. Follow these steps:
- Inspect the walls for any signs of damage or mold. If you notice any, it’s important to address these issues before proceeding with the installation.
- Remove any remaining adhesive or caulk from the walls using a scraping tool or sandpaper.
- Wipe down the walls with a damp cloth to remove any dust or debris.
- Allow the walls to dry completely before moving on to the next step.
Repairing any damage or imperfections
If you found any damage or imperfections during the inspection process, now is the time to address them. Follow these steps to repair any issues:
- Fill in any cracks or holes in the walls using a patching compound.
- Smooth out the patching compound using a putty knife.
- Allow the patching compound to dry according to the manufacturer’s instructions.
- Sand down any rough patches until the walls are smooth and even.
- Clean the walls once again to remove any dust or debris from the repair process.
By following these steps to prepare your bathroom for installation, you will ensure a solid foundation for your new 3 piece tub surround. This will not only result in a professional-looking installation but also prolong the lifespan of your tub surround.
Installing The First Piece Of The Tub Surround
Applying adhesive to the wall
Before you start installing the first piece of your tub surround, it’s important to properly prepare the wall. To ensure a secure and long-lasting installation, apply adhesive to the wall surface. This adhesive will help bond the tub surround to the wall, keeping it firmly in place.
Here’s how you can apply adhesive to the wall:
- Clean the wall surface thoroughly to remove any dust, grease, or dirt that may interfere with the adhesive’s effectiveness. Use a mild cleanser and a soft cloth to gently wipe down the wall.
- Once the wall is clean and dry, apply the adhesive according to the manufacturer’s instructions. It’s important to follow these instructions carefully to ensure proper application and maximum adhesion.
- Use a notched trowel to spread the adhesive evenly over the wall. The notches in the trowel will help create ridges in the adhesive, increasing the surface area for better adhesion.
- Work in small sections, spreading the adhesive on one section of the wall at a time. This will prevent the adhesive from drying out before you can install the tub surround.
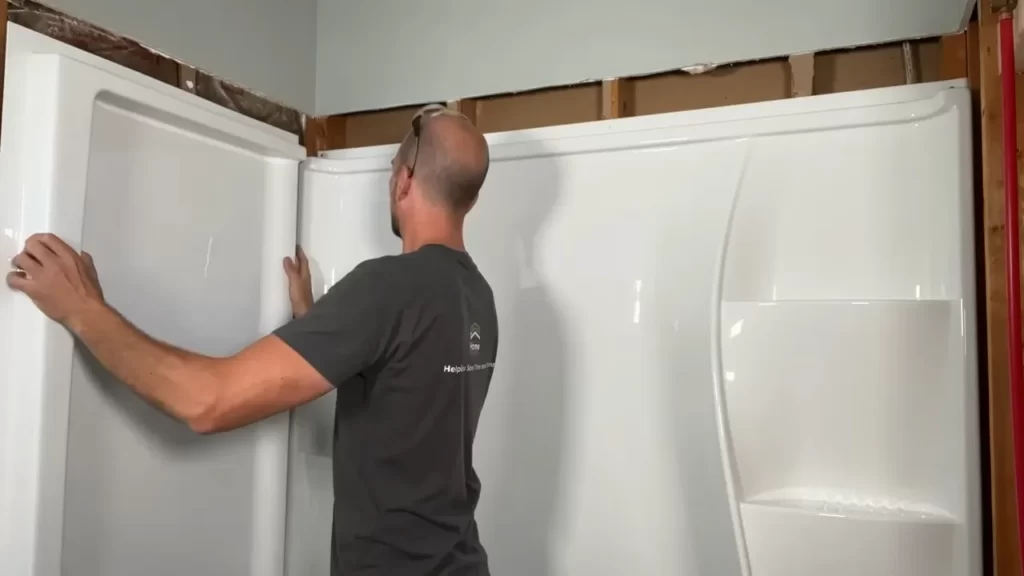
Positioning and securing the first piece
Now that the adhesive is applied to the wall, it’s time to position and secure the first piece of the tub surround. Here’s how you can do it:
- Start by holding the first piece of the tub surround against the wall, aligning it with the edges and corners of the tub.
- Slide the piece into place, ensuring that it fully covers the area you want to surround. Make sure it is level and properly positioned before proceeding.
- Once the first piece is in position, gently press it against the wall to ensure good contact with the adhesive. Use a rubber mallet or a block of wood to tap the piece into place, if necessary.
- Check for any gaps or misalignments and make adjustments as needed. It’s important to address any issues with the first piece before moving on to the next ones to ensure a seamless and professional-looking installation.
Checking for level and adjusting if necessary
After securing the first piece of the tub surround, it’s crucial to check for level and make any necessary adjustments. A level installation will not only enhance the aesthetic appeal of your tub surround but also ensure its proper functionality.
Here’s how you can check for level and adjust if necessary:
- Use a level to check the horizontal and vertical alignment of the first piece. Place the level on top of the tub surround and adjust it until the bubble is centered.
- If the bubble is off-center, gently tap the top or bottom of the piece using a rubber mallet or a block of wood to adjust its position. Keep checking with the level until it is perfectly level.
- If needed, you can also use shims to level the first piece. Slide shims behind the tub surround to fill any gaps or uneven areas, ensuring a secure fit.
- Once the first piece is level and properly aligned, move on to the next pieces of the tub surround, following the same steps for installation.
By following these steps and ensuring the adhesive, positioning, and levelness of the first piece, you’ll be on your way to successfully installing your 3-piece tub surround. Keep in mind that attention to detail and precision are key to achieving a professional-looking result. Get ready to transform your bathroom with a beautiful and functional tub surround!
Installing The Remaining Pieces Of The Tub Surround
Now that you have successfully applied the adhesive to the first piece of the tub surround, it’s time to move on to installing the remaining pieces. This process involves connecting the pieces together and ensuring a snug fit and proper alignment to achieve a seamless finish. Follow the steps below to complete the installation:
Applying adhesive to each piece
Before connecting the remaining pieces of the tub surround, it is crucial to apply adhesive to each one. This ensures a firm bond and long-lasting installation. Take the adhesive recommended by the manufacturer and apply it to the back of each piece using a caulking gun or a trowel. Make sure to spread the adhesive evenly, covering the entire surface of the piece.
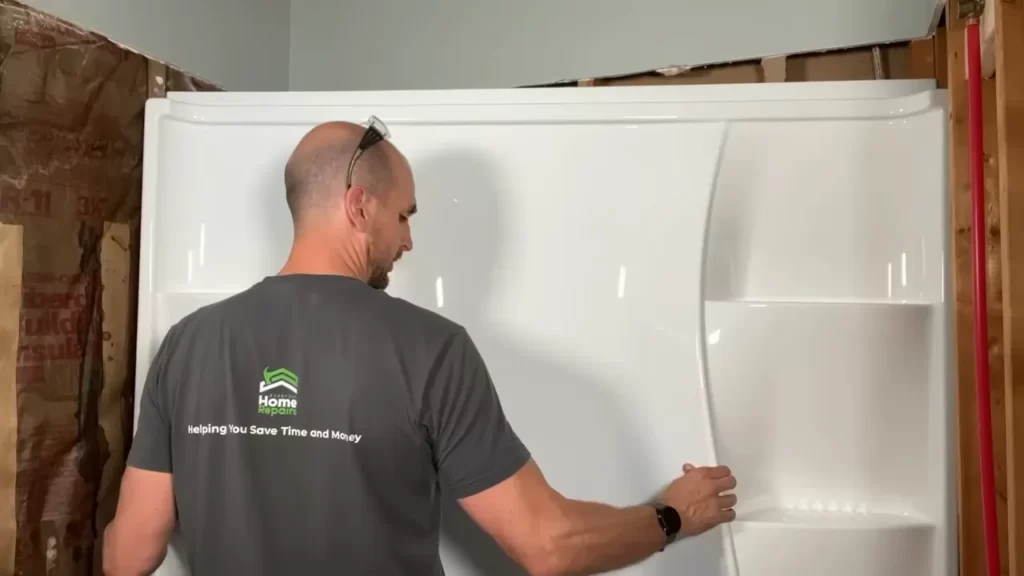
Connecting the remaining pieces together
Once the adhesive is applied, carefully connect the remaining pieces of the tub surround together. Start with the second piece and align it with the already installed piece. Press it firmly against the wall, making sure it is level and properly aligned. Hold it in place for a few seconds to allow the adhesive to bond.
Continue with the remaining pieces, connecting each one to the previous piece in the same manner. Use a level to ensure that the pieces are straight and properly aligned. Adjust as necessary to achieve a seamless appearance.
Ensuring a snug fit and proper alignment
The key to a successful tub surround installation lies in achieving a snug fit and proper alignment of each piece. During the connection process, make sure that there are no gaps between the pieces and the wall. Use a rubber mallet or a block of wood to gently tap the pieces into place if needed.
Check the alignment of each piece using a level. If adjustments are necessary, carefully shift the piece until it is straight and aligned with the surrounding walls and the first piece of the tub surround.
Remember, it is important to take your time during this step to ensure a flawless installation. Properly aligned and tightly fitted pieces will contribute to the overall durability and attractiveness of your tub surround.

Sealing And Finishing The Installation
Once you have installed your 3-piece tub surround, the next crucial step in ensuring a long-lasting and visually appealing result is sealing and finishing the installation. This process involves applying caulk to seal the joints, smoothing the caulk for a professional finish, and allowing the tub surround to dry and cure. Following these steps will not only enhance the overall appearance of your tub surround but also protect it from water damage and leakage.
Applying caulk to seal the joints
One of the most important steps in sealing your tub surround is applying caulk to seal the joints. Caulk is a waterproof sealant that prevents water from seeping into the gaps between the tub surround panels. To start, gather a high-quality caulk designed for bathroom use and a caulking gun. Begin by cutting a small hole in the tip of the caulk tube at a 45-degree angle.
Smoothing the caulk for a professional finish
After applying the caulk along the joints, it’s important to smooth it out for a professional finish. This not only improves the appearance of the tub surround but also ensures a tight seal. To smooth the caulk, dip your finger in water and run it along the caulk line, applying gentle pressure. The water acts as a lubricant, allowing you to smooth the caulk evenly. Remember to wipe your finger clean with a damp cloth frequently to avoid excess build-up.
Another handy tool you can use for a smoother finish is a caulk smoother or a plastic spoon. Gently press the smoother or spoon against the caulk line to smooth out any imperfections or ridges. This step will give your tub surround a polished look and prevent any water infiltration.
Allowing the tub surround to dry and cure
After sealing the joints and smoothing the caulk, it’s essential to allow the tub surround to dry and cure. Follow the manufacturer’s instructions on the caulk tube for the recommended drying time. During this period, avoid using the tub or shower to prevent any disturbance to the freshly applied caulk.
Once the caulk is fully cured, which usually takes around 24 hours, you can proceed with using your tub as usual. However, it’s important to ensure the tub surround is thoroughly dry before you start using it again. This will guarantee the longevity and effectiveness of your newly installed 3-piece tub surround.
Cleaning And Maintenance Tips For Your Tub Surround
Your tub surround is an essential part of your bathroom, providing both functionality and aesthetic appeal. To ensure that it remains in top condition and prolong its lifespan, proper cleaning and regular maintenance are crucial. In this section, we will discuss some effective cleaning techniques and products, as well as the importance of regular inspections and prompt addressing of any issues to prevent further damage.
Proper Cleaning Techniques and Products
When it comes to cleaning your tub surround, it’s important to use proper techniques and suitable products that will effectively remove dirt and grime without causing any damage. Here are some recommended cleaning techniques:
- Start by removing any loose debris or dirt using a soft brush or cloth.
- Mix a solution of mild soap and warm water.
- Dip a sponge or cloth into the cleaning solution and gently scrub the surface of the tub surround.
- Rinse off the soap residue thoroughly with clean water.
- Dry the tub surround with a clean and dry cloth to prevent water spots.
When it comes to cleaning products, it’s best to avoid harsh chemicals and abrasive cleaners that can cause damage to the tub surround. Instead, opt for mild soaps or specialized tub surround cleaners that are gentle yet effective.
Regular Inspections for Signs of Wear or Damage
To ensure that your tub surround remains in good condition, regular inspections are essential. These inspections can help identify any signs of wear or damage early on and allow you to address them promptly. Here are some areas to focus on during your inspections:
- Check for any cracks, chips, or discoloration on the surface of the tub surround.
- Inspect the caulking around the edges of the tub surround for any signs of mold, mildew, or deterioration.
- Pay attention to any leaks or water damage near the tub surround.
By conducting regular inspections, you can catch any issues before they become major problems, saving you time and money in the long run.
Addressing Any Issues Promptly
If you notice any signs of wear or damage during your regular inspections, it’s crucial to address them promptly. Ignoring these issues can lead to further damage and potentially expensive repairs. Here are some steps to take:
- If you spot any cracks or chips on the tub surround, apply a waterproof sealant or epoxy to prevent further damage.
- If the caulking shows signs of mold or mildew, remove and replace it with a new, waterproof caulking.
- If you discover any leaks or water damage, identify the source and repair it as soon as possible.
By addressing these issues promptly, you can maintain the integrity and longevity of your tub surround, ensuring it continues to provide a beautiful and functional feature in your bathroom.
Troubleshooting Common Installation Challenges
Dealing with uneven or poorly prepared walls
If you come across uneven or poorly prepared walls while installing a 3 piece tub surround, don’t panic. This is a common challenge that can be easily overcome with some simple steps.
First, make sure to thoroughly clean the walls before starting the installation process. Remove any dirt, dust, or debris that could affect the adhesion of the tub surround.
If the walls are uneven, you might need to use shims or spacers to create a level surface. This will ensure that the tub surround fits properly and looks seamless. Place shims at the bottom of the walls, adjusting them until you achieve a level surface. Remember to trim any excess shims for a neat finish.
Once the walls are level, you can proceed with installing the tub surround as per the manufacturer’s instructions. It’s important to use a high-quality adhesive or caulk to ensure a strong bond between the tub surround and the walls.
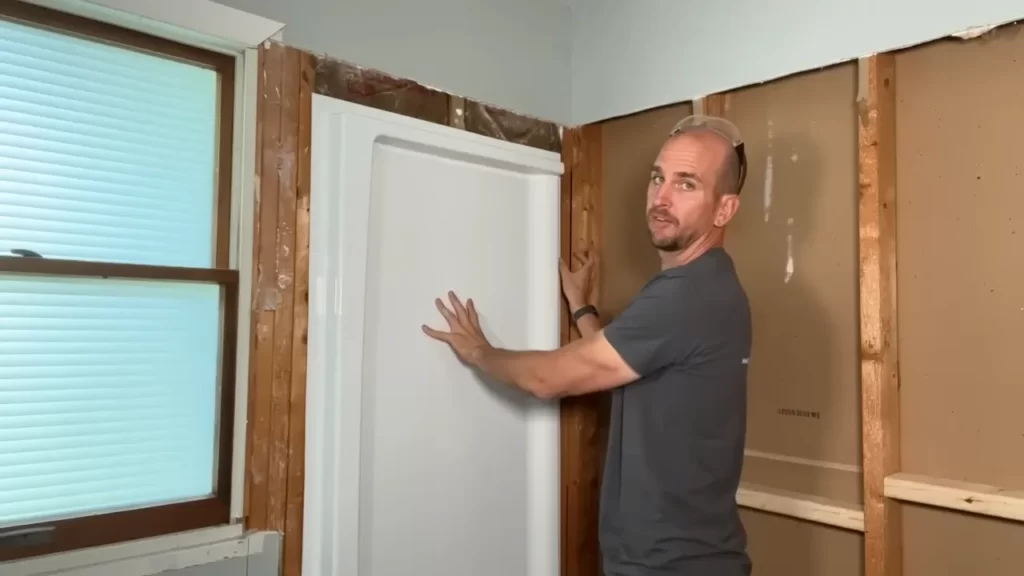
Handling difficult corner installations
When it comes to corner installations, the process may require some additional attention and care. Here are a few tips to help you handle these tricky areas:
- Start by measuring the corner space accurately to ensure the tub surround will fit snugly. Use a level to ensure that the corner is plumb and straight.
- Cut the tub surround panels to the correct size, taking into account any angles or corners. It’s crucial to make precise cuts to ensure a tight fit. Use a jigsaw or a circular saw for this task.
- Apply adhesive or caulk to the back of the panels, as well as the corner area of the walls. Press the panels firmly into place and hold them for a few seconds to ensure they adhere properly.
- For added stability, you can use corner brackets or reinforcement strips to secure the panels in place. These can be installed along the corners to provide extra support and prevent any movement.
- Finally, use a high-quality silicone caulk to seal any gaps and joints in the corner area. This will prevent water leakage and ensure a professional-looking finish.
Resolving adhesive or caulk issues
If you encounter adhesive or caulk issues during the installation process, it’s important to address them promptly to ensure a successful outcome. Here are some troubleshooting steps:
- If the adhesive is not sticking properly, check if the walls are clean and dry. Remove any residue or moisture and reapply the adhesive. Make sure to follow the manufacturer’s instructions for the specific adhesive you are using.
- If the caulk is not adhering well, double-check that it is compatible with the tub surround material and the walls. Use a caulk specifically designed for bathroom installations to ensure maximum adhesion and durability.
- For any gaps or cracks in the caulk, carefully remove the old caulk and clean the area. Apply a fresh bead of caulk, smoothing it with a caulk smoothing tool or your finger. This will create a seamless finish and prevent water from seeping into the gaps.
By following these troubleshooting steps, you can overcome common installation challenges when installing a 3 piece tub surround. Remember to always refer to the manufacturer’s instructions and take your time to ensure a professional and long-lasting result.
Frequently Asked Questions
How To Install A 3 Piece Shower Surround?
To install a 3 piece shower surround, follow these steps: 1. Measure the shower area accurately. 2. Clean the walls and make sure they are smooth and dry. 3. Apply adhesive to the back of the surround panels. 4. Place the panels on the walls, starting from the corners.
5. Secure the panels with screws or nails.
Do You Need To Caulk A 3 Piece Tub Surround?
Yes, it is recommended to caulk a 3 piece tub surround. Caulking helps to prevent water leakage and damage, ensuring a watertight seal. Apply caulk along the edges where the tub surround meets the walls to maintain the cleanliness and longevity of your tub surround.
How Do You Install A Bathtub Surround?
To install a bathtub surround, follow these steps: First, clean and prepare the area. Next, measure and cut the surround panels to fit. Then, apply adhesive to the back of the panels and press them firmly onto the walls. Finally, seal the edges with caulk for a watertight finish.
What Do You Put Behind A Tub Surround?
You can put cement board or moisture-resistant drywall behind a tub surround.
Conclusion
Installing a 3-piece tub surround can be a daunting task, but with the right tools and step-by-step instructions, anyone can do it successfully. By following this guide, you’ve learned the necessary steps to prepare, measure, cut, and install the tub surround.
Remember to take your time, be patient, and double-check your work to ensure a durable and waterproof finish. Now, you’re ready to transform your bathroom and enjoy the satisfaction of a job well done.