To install a tub surround, start by measuring and cutting the surround panels to fit your tub area. Then, apply adhesive to the back of the panels and press them firmly against the wall.
Finally, secure the panels with screws or clips and caulk the edges for a water-tight seal. Are you looking for an easy and efficient way to upgrade your bathroom? Installing a tub surround can instantly transform the look of your bathtub while providing a waterproof barrier against moisture.
Whether you’re a DIY enthusiast or a homeowner looking to save money on installation costs, this guide will walk you through the step-by-step process of installing a tub surround. With just a few tools and some basic skills, you can have a beautiful and functional tub surround in no time. So, let’s dive in and discover how to install a tub surround like a pro.
Materials Needed
List of materials required for the installation process
Before embarking on the installation of a tub surround, it’s essential to ensure that you have all the necessary materials ready. Having the right materials not only saves you time but also ensures a smooth and hassle-free installation process. From adhesives to measuring tapes, each of these materials plays a crucial role in achieving a professional-looking tub surround. Let’s take a look at the comprehensive list of materials you’ll need:
| Materials | Description |
|---|---|
| 1. Tub surround panels | These panels are designed to fit around your bathtub, providing a waterproof barrier and a visually appealing finish. |
| 2. Construction adhesive | High-quality adhesive specially formulated for tub surround installation ensures a strong bond between the panels and the wall. |
| 3. Caulk | A tube of caulk is necessary to seal any gaps between the tub surround panels and the bathtub or walls, preventing water leakage. |
| 4. Measuring tape | Accurate measurements are crucial for a precise fit. A measuring tape helps you determine the dimensions required for your tub surround. |
| 5. Utility knife | A sharp utility knife allows for precision cuts on the tub surround panels, ensuring a seamless and professional-looking installation. |
| 6. Level | Using a level is essential to ensure that your tub surround panels are perfectly aligned, creating a visually pleasing result. |
| 7. Putty knife | A putty knife is useful for spreading adhesive evenly on the tub surround panels, ensuring a secure bond. |
| 8. Sandpaper | Sanding the edges of the tub surround panels creates a smooth surface, allowing for a seamless and professional finish. |
By gathering all the materials mentioned above, you’ll be well-prepared to install your tub surround efficiently and effectively. Remember, having the right materials on hand is essential for a successful installation process, saving you both time and frustration. So, double-check your toolbox and make sure you have all the necessary items before starting your tub surround installation. Let’s dive into the installation process!

Preparing The Area
When it comes to installing a tub surround, proper preparation of the area is crucial for a successful and long-lasting installation. This involves accurately measuring the tub surround area, cleaning and preparing the wall surface, as well as addressing any existing issues or repairs needed. By following these steps, you can ensure a smooth and professional installation process.
Measuring the tub surround area accurately
Before you begin the installation process, it is important to measure the tub surround area accurately. This will help you determine the amount of material you will need and ensure a perfect fit. To measure the area, follow these steps:
- Start by measuring the length and width of the bathtub area where the surround will be installed. Use a tape measure to get precise measurements.
- Take note of any irregularities or protrusions, such as faucets or showerheads. Measure the distance from these fixtures to ensure the surround will fit properly.
- Consider the height of the surround you want to install. Measure the distance from the top of the bathtub to the desired height of the surround.
By taking accurate measurements, you can avoid any potential issues during the installation process and ensure a seamless fit.
Cleaning and preparing the wall surface for installation
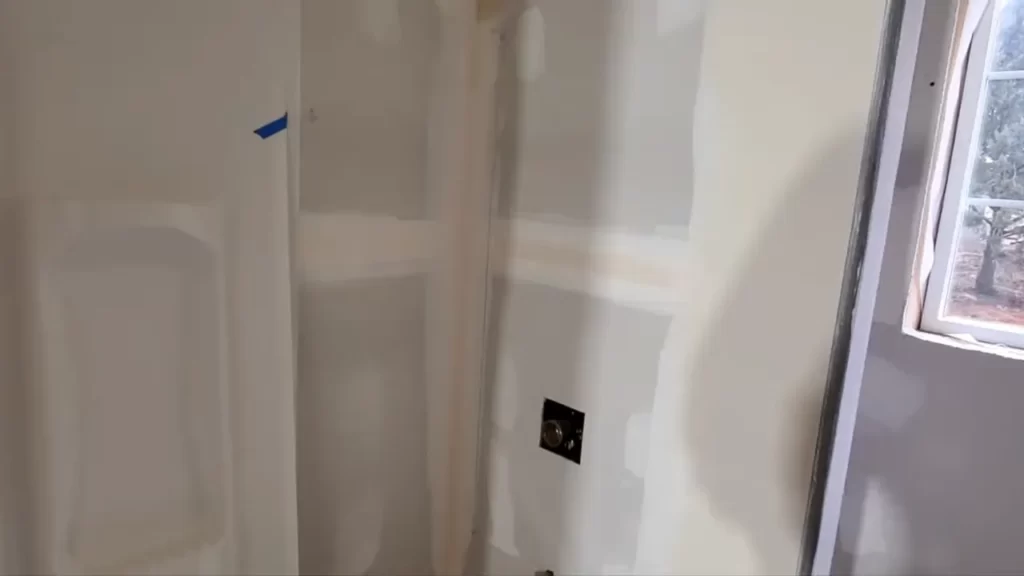
Once you have measured the tub surround area, it is essential to clean and prepare the wall surface for installation. This will help ensure proper adhesion and a professional finish. Follow these steps to prepare the wall surface:
- Start by removing any existing tiles, wallpaper, or other wall coverings from the area where the surround will be installed. Use a scraper or putty knife to gently peel away the material.
- Thoroughly clean the wall surface using a mild detergent and warm water. Remove any dirt, grease, or stains that may affect the adhesion of the surround. Use a scrub brush or sponge for stubborn stains.
- Rinse the wall surface with clean water to remove any remaining soap or cleaning residue. Allow it to dry completely before proceeding with the installation.
By ensuring a clean and dry wall surface, you provide a suitable foundation for the tub surround and enhance its durability.
Addressing any existing issues or repairs needed
Prior to installing the tub surround, it is important to address any existing issues or repairs that may affect the installation or the performance of the surround. Here are some common issues to look out for:
- Inspect the wall surface for cracks, holes, or other damages. Fill these imperfections with spackling compound or a suitable wall patching material. Smooth out the patched areas and allow them to dry completely before proceeding.
- If there is any mold or mildew present on the wall surface, treat it with a mold and mildew remover. Scrub the affected areas with a brush to remove the growth and ensure a clean surface.
- Check for any plumbing leaks or water damage around the bathtub area. Address any leaks or repairs needed before installing the tub surround to prevent further damage.
By addressing these existing issues and performing the necessary repairs, you can ensure a stable and secure installation, as well as a long-lasting tub surround.
Installing The First Panel
Step-by-step Instructions for Installing the First Panel of the Tub Surround
Ready to give your bathroom a fresh new look? Installing a tub surround is a cost-effective and relatively simple way to update the appearance of your bathtub. To ensure a successful installation, it’s essential to start with the first panel. In this section, we’ll guide you through the process step by step, from ensuring proper alignment and levelness to securing the panel in place. Let’s get started!
Ensuring Proper Alignment and Levelness
Before you begin installing the first panel of your tub surround, it’s crucial to ensure proper alignment and levelness. This will ensure that the panels fit together seamlessly and create a sleek, professional-looking finish.
To ensure proper alignment, follow these steps:
- Measure the width and height of your tub area to determine the dimensions of the first panel. Use a tape measure and write down the measurements for reference.
- Using a level, check if the top edge of the tub is level. If not, use shims to adjust and level it as needed.
- Once the tub edge is level, use a pencil to mark a horizontal line on the wall, indicating the top edge of the first panel.
- Double-check that the line is level using the level. Adjust as necessary.
Securing the Panel in Place
Now that you have ensured proper alignment and levelness, it’s time to secure the first panel in place. This will ensure that it stays in position during the rest of the installation process.
Follow these steps to secure the panel:
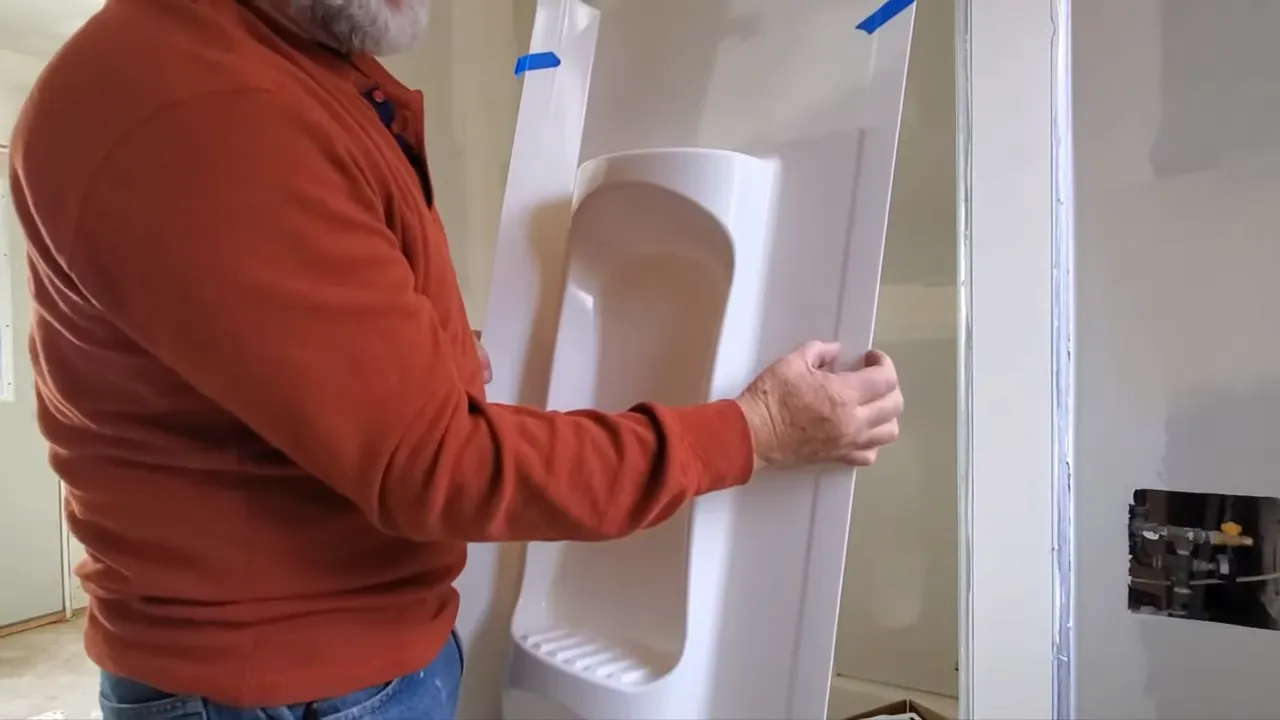
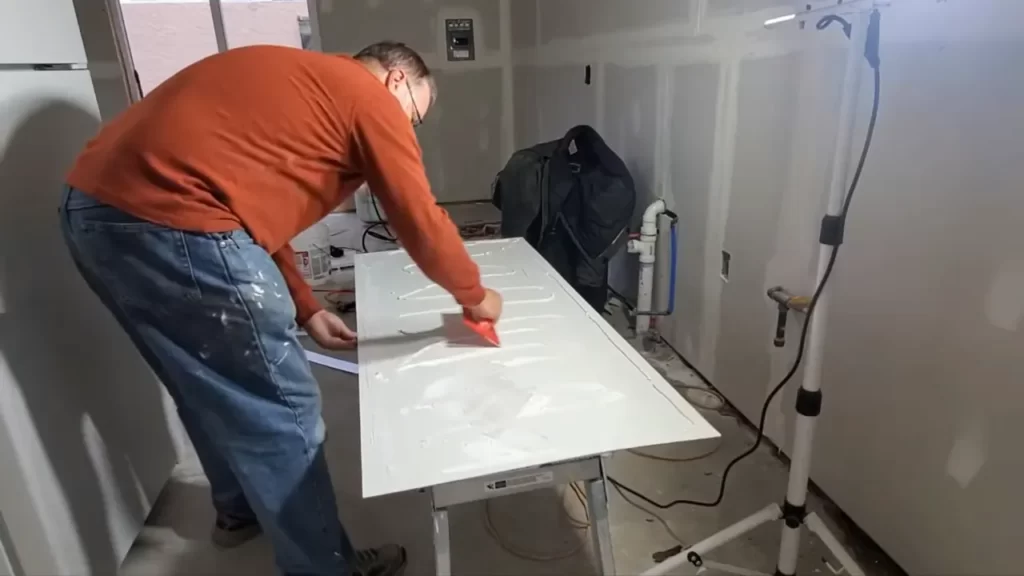
- Apply a generous amount of adhesive to the back of the panel. Use a notched trowel to create ridges, which will improve the adhesion.
- Press the panel firmly against the wall, aligning it with the marked line from earlier.
- Use a level to ensure that the panel is perfectly vertical. Adjust if necessary.
- Once the panel is in the desired position, firmly press it against the wall to ensure proper adhesion.
- If needed, use masking tape or clamps to hold the panel in place until the adhesive sets. Refer to the manufacturer’s instructions for recommended drying time.
Congratulations! You have now successfully installed the first panel of your tub surround. Take a moment to step back and admire your progress. In the next section, we will guide you through installing the remaining panels to complete your tub surround. Stay tuned!
Installing The Remaining Panels
Once you have successfully installed the first panel of your tub surround, it’s time to move on to the remaining panels. This part of the installation process requires careful alignment and securing to ensure a professional and polished finish. Follow these step-by-step instructions to install the remaining panels of your tub surround.
Step-by-step instructions for installing the remaining panels of the tub surround
- Measure and cut: Begin by carefully measuring the remaining panels to fit your specific tub surround. With accurate measurements in hand, use a saw or another appropriate cutting tool to trim the panels accordingly. Ensure that the edges are clean and smooth to facilitate a seamless installation.
- Apply adhesive: Apply a generous amount of adhesive to the back of the panel, ensuring full coverage. This will create a strong bond between the panel and the wall. Pro tip: Make sure to use an adhesive that is recommended for tub surrounds to ensure long-lasting durability.
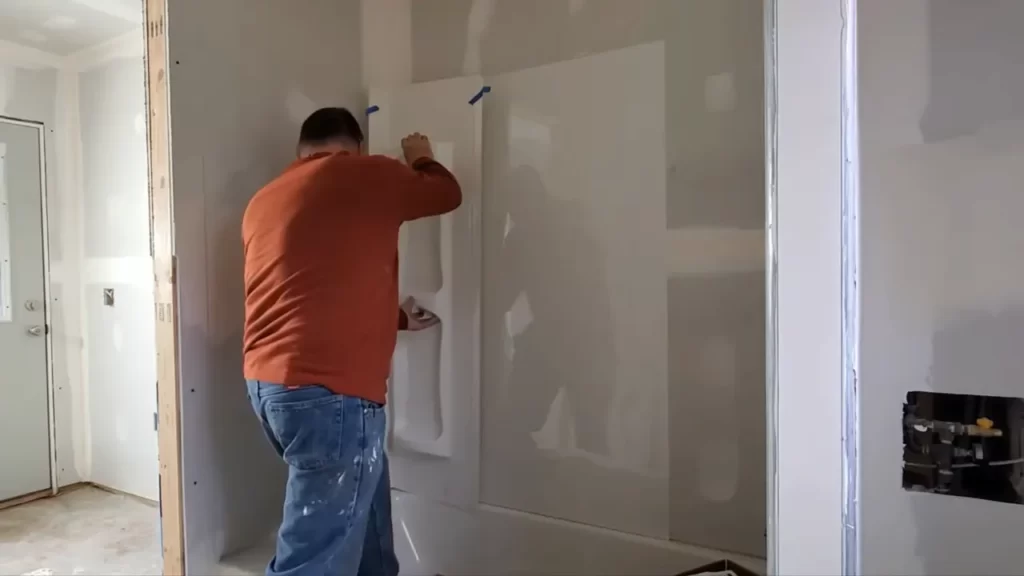
- Align the panel: Now, carefully align the panel with the already installed one. Pay close attention to the edges and corners to ensure a perfect fit. It’s essential to align the panels precisely as any misalignment can result in an unprofessional appearance.
- Secure the panel: Once the panel is properly aligned, firmly press it against the wall to secure it in place. You can use a rubber mallet or a block of wood to tap the panel gently into position. Be sure to wipe away any excess adhesive with a damp cloth.
- Repeat the process: Follow the same procedure to install the remaining panels, one by one. Remember to measure, cut, apply adhesive, align, and secure each panel meticulously for a flawless end result.
Properly aligning the edges and corners of each panel
Ensuring proper alignment of the edges and corners of each panel is crucial for a seamless and professional-looking tub surround installation. Here’s how to achieve it:
- Measure twice: Before cutting the panels, double-check your measurements to avoid any errors.
- Use a T-square: A T-square is a valuable tool for aligning the edges and corners. Position the T-square along the edge of the panel and adjust it until it is perfectly square. This will provide a precise guide to align the panel accurately with the already installed one.
- Check the alignment: After aligning the panel, step back and visually confirm that all edges and corners are perfectly matched. Make any necessary adjustments before securing the panel in place.
Securing all panels firmly
To ensure a stable and long-lasting tub surround, it is essential to secure all the panels firmly. Here are a few tips to help you achieve a secure installation:
- Apply adequate adhesive: Be generous when applying the adhesive, ensuring full coverage on the back of each panel. This will create a strong and durable bond between the panels and the wall.
- Use the right tools: When securing the panels, use a rubber mallet or a block of wood to gently tap them into place. This will help achieve a tight fit and eliminate any gaps.
- Remove excess adhesive: After securing each panel, wipe away any excess adhesive with a damp cloth. This will not only enhance the appearance of your tub surround but also prevent any damage caused by dried adhesive.
By following these step-by-step instructions, properly aligning the edges and corners, and securing all panels firmly, you can achieve a professional and aesthetically pleasing tub surround installation. Take your time, pay attention to detail, and enjoy the rewarding process of transforming your bathroom into a revitalizing oasis.
Sealing And Caulking
Importance of sealing and caulking the edges and seams of the tub surround
Sealing and caulking the edges and seams of your tub surround is a crucial step in the installation process. It not only enhances the overall appearance of the tub surround but also plays a vital role in preventing water damage and leakage. By properly sealing and caulking, you can ensure that water does not seep through the gaps and cause mold or mildew growth.
Step-by-step instructions for applying caulk and ensuring a watertight seal
Follow these simple steps to apply caulk and achieve a watertight seal for your tub surround:
- Clean and prepare the surfaces: Begin by thoroughly cleaning the edges and seams of the tub surround. Use a mild cleanser to remove any dirt, grease, or residue. Allow the surfaces to dry completely before moving on to the next step.
- Choose the right caulk: Select a high-quality caulk specifically formulated for bathroom or kitchen use. Look for a caulk that is waterproof, flexible, and mold-resistant. This will ensure long-lasting performance and prevent the need for frequent repairs.
- Cut the caulking tube tip: Using a utility knife, cut the tip of the caulk tube at a 45-degree angle. The size of the opening should be just wide enough to create a smooth and controlled bead of caulk.
- Apply the caulk: Carefully squeeze the caulk gun trigger to apply an even bead of caulk along the edges and seams of the tub surround. Start from one corner and work your way around, applying consistent pressure to ensure a uniform application. Avoid applying excessive caulk as it can lead to uneven results.
- Smooth the caulk: While the caulk is still wet, use a caulk smoothing tool or your finger (protected with a disposable glove) to smooth and shape the caulk. Work in small sections, applying light pressure to create a neat and professional finish. Wipe away any excess caulk using a damp cloth.
- Let it cure: Allow the caulk to cure following the manufacturer’s instructions. This usually takes around 24 to 48 hours. Avoid using the tub or shower during this time to ensure the caulk sets properly.
By following these step-by-step instructions, you can ensure a watertight seal and prevent any potential water damage or leakage in your tub surround. Remember to regularly inspect and maintain the caulk to prolong its lifespan and keep your bathroom in top condition for years to come.
Finishing Touches
HTML Format for WordPress:
When it comes to installing a tub surround, paying attention to the finishing touches is essential to achieve a polished and professional look. These final details can have a significant impact on the overall aesthetic and functionality of your tub surround. In this section, we will discuss two important aspects of finishing touches: trim and finishing options for the tub surround, as well as installing any necessary accessories.
Trim and Finishing Options for the Tub Surround
The right trim and finishing options can make a world of difference in the appearance of your tub surround. There are several choices available to suit your personal style and complement the rest of your bathroom decor. Here are some popular options:
| Option | Description |
|---|---|
| Tiled Border | Adds a decorative touch and creates a seamless transition between the tub surround and the rest of the bathroom walls. Choose tiles that match or complement the color scheme of your tub surround. |
| Wooden Molding | A more traditional option, wooden molding can enhance the elegance of your tub surround. Opt for a stain or paint that coordinates with the existing woodwork in your bathroom. |
| PVC Trim | PVC trim is a durable and waterproof choice. It can be easily cut and shaped to fit the curves and corners of your tub surround. Available in various colors and finishes, it offers a sleek and modern look. |
Once you have selected the appropriate trim, ensure that it is securely attached to your tub surround using recommended adhesive or nails, depending on the material.
Installing Any Necessary Accessories
In addition to trim and finishing options, you may also want to incorporate accessories into your tub surround. These can add functionality and convenience to your bathing experience. Here are some common accessories:
- Shelves: Installing shelves provides a convenient storage solution for toiletries, such as shampoo, conditioner, and soap. Consider the placement and number of shelves based on your specific needs.
- Soap Dishes: A soap dish can keep your soap within easy reach while keeping the tub surround neat and organized. Choose a design that complements the overall aesthetic of your tub surround.
When installing these accessories, follow the manufacturer’s instructions carefully. Ensure that they are securely attached to the tub surround to prevent any accidents or damage.
By paying attention to the finishing touches of your tub surround installation, you can elevate the overall look and functionality of your bathroom. Whether it’s the choice of trim, the addition of shelves, or the installation of soap dishes, each detail contributes to a cohesive and aesthetically pleasing design.
Cleaning And Maintenance Tips
Proper cleaning and maintenance is essential to prolong the lifespan of your tub surround and keep it looking its best. By following a few simple tips, you can ensure that your tub surround remains clean, hygienic, and free from potential damage. In this section, we will discuss some valuable cleaning and maintenance tips to help you keep your tub surround in top condition.
Tips for cleaning and maintaining the tub surround to prolong its lifespan
Regular cleaning and maintenance of your tub surround is essential to prevent the build-up of dirt, soap scum, and other contaminants. Here are some effective tips to help you keep your tub surround looking pristine:
- Use a mild, non-abrasive cleaner: When cleaning your tub surround, it is crucial to use a gentle cleanser that is specifically formulated for the material of your tub surround. Avoid using harsh chemicals or abrasive cleaners, as these can cause scratches or damage to the surface.
- Clean regularly: Make it a habit to clean your tub surround regularly. This will prevent soap scum buildup and make your cleaning tasks much easier. Ideally, a quick wipe-down with a soft cloth or sponge after each use is recommended.
- Remove stains promptly: If you notice any stains on your tub surround, it is essential to take prompt action to remove them. Using a mild solution of vinegar and water or a specialized stain remover can effectively eliminate most stains. Avoid using bleach or abrasive scrubbers, as they can cause discoloration or scratches.
- Prevent mildew and mold growth: To prevent the growth of mildew and mold, it is important to keep your tub surround dry between uses. Wipe away excess water or moisture after showering or bathing, and ensure proper ventilation in your bathroom.
- Seal the tub surround regularly: If your tub surround is made of a porous material, such as tile or stone, sealing it regularly can provide added protection against stains and damage. Consult the manufacturer’s guidelines or seek professional advice to determine the appropriate sealer for your tub surround.
Recommended cleaning products and techniques
Choosing the right cleaning products and techniques is crucial to ensure effective cleaning without causing any damage to your tub surround. Here are some recommended cleaning products and techniques to consider:
| Cleaning Product | Recommended Technique |
|---|---|
| Mild soap or dishwashing liquid | Mix a small amount with warm water and gently scrub the tub surround using a soft cloth or sponge. Rinse thoroughly with water afterward. |
| White vinegar | Mix equal parts of vinegar and water in a spray bottle. Spray the solution onto the tub surround, let it sit for a few minutes, then rinse thoroughly with water. |
| Baking soda | Make a paste by mixing baking soda with water and apply it to stained areas of the tub surround. Gently scrub with a soft cloth or sponge, then rinse thoroughly with water. |
| Commercial tub and tile cleaner | Follow the manufacturer’s instructions for the specific product you are using. Apply the cleaner to the tub surround, let it sit for the recommended time, then rinse thoroughly with water. |
Remember to always test any cleaning product on a small, inconspicuous area of your tub surround first to ensure compatibility and prevent any potential damage.
By following these cleaning and maintenance tips, you can keep your tub surround looking fresh and beautiful for years to come. Regular cleaning, prompt stain removal, and proper use of recommended cleaning products will help maintain the appearance and extend the lifespan of your tub surround.
Common Mistakes To Avoid
Installing a tub surround can be a great way to enhance the look of your bathroom and ensure a watertight seal around your tub. However, there are some common mistakes that beginners often make during the installation process. By being aware of these potential pitfalls and learning how to overcome them, you can have a successful tub surround installation that lasts for years to come.
Highlight potential pitfalls and mistakes that should be avoided during the installation process
When installing a tub surround, it’s important to be mindful of certain mistakes that can hinder the overall outcome. By avoiding these pitfalls, you can save time, money, and frustration down the line. Here are some common mistakes to watch out for:
- Failure to properly prepare the surface: One of the main reasons tub surrounds fail is due to improper surface preparation. Before starting the installation, make sure the surface is clean, dry, and free of any loose debris. Removing old caulk or adhesive and thoroughly cleaning the area will ensure a solid foundation for the new surround.
- Not measuring accurately: Accurate measurements are crucial when installing a tub surround. Failing to measure properly can lead to gaps, uneven installation, or a poor fit. Take the time to measure twice and cut once to avoid unnecessary headaches.
- Inadequate adhesive application: Applying the adhesive too thinly or unevenly can result in a weak bond between the tub surround and the wall. Use a notched trowel to apply the adhesive evenly, ensuring complete coverage of both the surround and the wall. This will provide a strong and reliable adhesion.
- Ignoring manufacturer’s instructions: Each tub surround may come with specific installation instructions provided by the manufacturer. Ignoring or disregarding these instructions can lead to installation mistakes or voiding the product’s warranty. Always read and follow the manufacturer’s guidelines for a successful installation.
Provide tips on how to overcome common challenges
While tub surround installations can present challenges, there are several ways to overcome them and ensure a smooth installation process. Here are a few tips:
- Use a level: To ensure a properly aligned installation, use a level throughout the process. This will help you identify any areas that are not straight and make necessary adjustments.
- Apply caulk correctly: Properly applying caulk is essential for a watertight seal. Use a caulk gun and ensure an even and continuous line of caulk along the edges of the surround. Smooth the caulk with a finger or a caulk smoothing tool for a neat finish.
- Allow for curing time: After installing the tub surround, it’s important to allow sufficient time for the adhesive to cure. Read the manufacturer’s instructions to determine the recommended curing time, and avoid using the tub during this period to avoid any damage or movement of the surround.
- Seek professional help if needed: If you encounter significant challenges or lack the necessary skills and experience, it’s wise to seek professional assistance. Hiring a professional can ensure a proper installation and save you time and potential headaches in the long run.
By being aware of common mistakes and following these tips, you can easily navigate the tub surround installation process with confidence and achieve a professional-looking result. Remember to take your time, pay attention to detail, and refer to the manufacturer’s instructions as your guide.
Frequently Asked Questions
You can put a cement backer board or gypsum board behind a tub surround to provide a solid and moisture-resistant surface. This helps support the surround and prevents water damage.
How Are Tub Surrounds Installed?
Tub surrounds are installed by first preparing the wall surface and removing any existing tile or fixtures. The surround panels are then placed and secured using adhesive or screws. Finally, the seams are sealed to prevent water leakage. Proper installation ensures durability and a seamless look.
Can You Put A Tub Surround On An Existing Tub?
Yes, it is possible to install a tub surround on an existing tub. This can help enhance the appearance and protect the walls from water damage. It is recommended to hire a professional for proper installation.
What Adhesive Do You Use To Install A Tub Surround?
To install a tub surround, use an adhesive specifically designed for wet areas such as a waterproof construction adhesive or a tub surround adhesive. Make sure to choose a high-quality adhesive to ensure a firm and long-lasting bond.
Conclusion
Installing a tub surround doesn’t need to be daunting. By following these easy steps, you can transform your bathroom without breaking the bank. Remember to gather all the necessary tools and materials, prepare the walls properly, and proceed with caution during the installation process.
With some patience and attention to detail, you’ll have a beautiful and functional tub surround in no time. So why wait? Start your project today and enjoy the rewards of a stunning bathroom space.