To install a bathtub stopper, first, locate the drain assembly and remove the old stopper by unscrewing or lifting it out. Then, insert the new stopper into the drain hole and secure it according to the manufacturer’s instructions.
Make sure to test the stopper to ensure it opens and closes properly before use. A bathtub stopper is an essential component of any bathroom, as it helps to prevent water from draining out of the bathtub. Whether you’re replacing an old stopper or installing a new one, the process is relatively simple.
We will guide you on how to install a bathtub stopper effectively. By following these steps, you’ll be able to enjoy a fully functioning bathtub without any water leakage. So let’s get started and make your bathroom experience even more relaxing.
Getting Started With Bathtub Stopper Installation
Installing a bathtub stopper is a simple and cost-effective way to enhance your bathing experience. Whether you want to enjoy a relaxing soak or need to plug the drain for other purposes, a properly installed bathtub stopper can be a game-changer. In this guide, we will walk you through the process of getting started with bathtub stopper installation. By following the steps outlined below, you will be able to determine the type of bathtub stopper you have, gather the necessary tools and materials, and prepare your bathtub for installation. Let’s dive in!
Determine the type of bathtub stopper
If you’re new to bathtub stopper installation, the first step is to identify the type of stopper you have. There are several common types, including:
| Type | Description |
|---|---|
| Flip-It | A lever on the overflow plate lifts and lowers the stopper. |
| Push-Pull | A knob on the overflow plate is used to push and pull the stopper. |
| Toe-Touch | A spring-loaded stopper controlled by pressing it with your toe. |
Identifying the type of stopper you have is important, as each type may require different installation techniques. If you’re unsure, consult the manufacturer’s instructions or seek professional advice.
Gather the necessary tools and materials
Once you’ve determined the type of stopper you have, it’s time to gather the tools and materials needed for installation. You may need:
- Adjustable wrench
- Screwdriver
- Plumbers putty or silicone caulk
- Plunger
- Old towel or rag
Having these tools on hand will ensure a smooth and hassle-free installation process.
Prepare the bathtub for installation
Before installing the bathtub stopper, it’s essential to prepare the bathtub surface. Follow these steps to get started:
- Clear the area around the drain, removing any debris or objects that may hinder the installation process.
- Apply a small amount of plumbers putty or silicone caulk around the drain flange.
- Insert the stopper into the drain and gently press down to create a tight seal. Make sure it sits flush with the bathtub surface.
- Use an adjustable wrench to tighten the retaining nut located under the bathtub.
- Check for any leaks by filling the bathtub with water and observing if water escapes through the drain.
By following these steps, you’ll be well on your way to successfully installing a bathtub stopper. Remember, if you encounter any difficulties or are unsure about any step, it’s always best to consult a professional plumber.

Choosing The Right Bathtub Stopper
Types of Bathtub Stoppers
When it comes to choosing the right bathtub stopper, one of the first things you need to consider is the type of stopper that will work best for your needs. There are several different types of bathtub stoppers available in the market, each with its own set of benefits and drawbacks.
1. Flat Rubber Stoppers
Flat rubber stoppers are a traditional and cost-effective option. These stoppers create a tight seal and are relatively easy to install. However, they may not be as durable as some other types of stoppers.
2. Twist-and-Lift Stoppers
This type of stopper is often found in older bathrooms. It features a knob on top that you can twist and lift to open and close the drain. Twist-and-lift stoppers are reliable and durable, but they may require a bit more effort to operate compared to other types.
3. Pop-up Stoppers
Pop-up stoppers are a popular choice for modern bathrooms. These stoppers are attached to a lever, which is typically located behind the faucet. With a simple push and pull motion, you can easily open and close the drain. Pop-up stoppers are convenient to use and provide a tight seal, but they can be more expensive than other options.
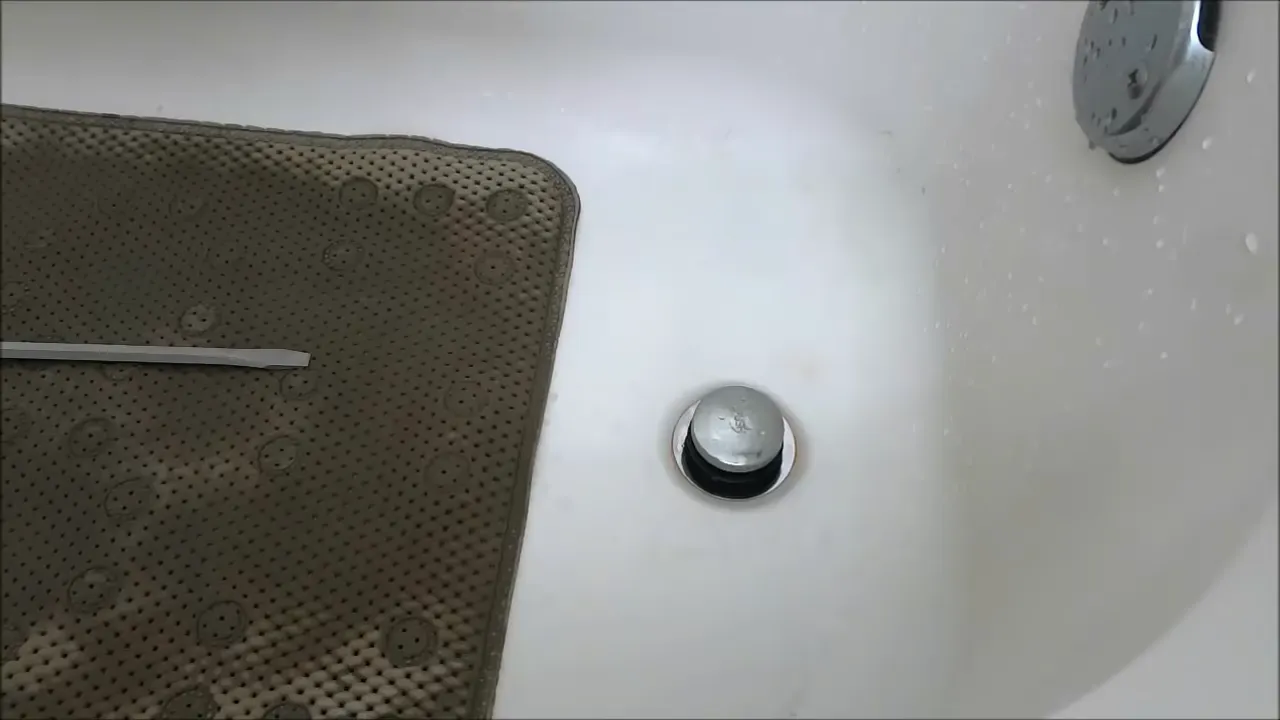
4. Toe-Touch Stoppers
Toe-touch stoppers are another common choice for modern bathrooms. As the name suggests, you can operate these stoppers by simply tapping them with your toe. They are stylish and user-friendly, but they may not create as tight of a seal as other types.
Considerations for Selecting the Right Stopper
When selecting the right bathtub stopper, there are a few key considerations to keep in mind. These factors will help ensure that you choose a stopper that suits your specific needs and preferences.
- Drain Size: The size of your bathtub drain will determine the type of stopper that is compatible. Measure the diameter of your drain before making a purchase to ensure a proper fit.
- Material: Bathtub stoppers come in various materials such as rubber, plastic, or metal. Consider the durability, maintenance requirements, and overall aesthetic appeal of different materials.
- Functionality: Think about how you want to operate the stopper. If easy operation is a priority, a pop-up or toe-touch stopper may be the best choice. On the other hand, if you prefer a traditional and simple option, a flat rubber stopper may be more suitable.
- Price: Set a budget for your bathtub stopper and compare prices across different brands and types. Keep in mind that higher-priced stoppers may offer additional features or enhanced durability.
Factors to Keep in Mind When Purchasing
| Factor | Importance |
|---|---|
| Compatibility | High |
| Durability | High |
| Functionality | High |
| Aesthetics | Medium |
| Maintenance | Medium |
| Price | Medium |
Before making a purchase, it’s important to keep these factors in mind. Ensure that the stopper you choose is compatible with your bathtub drain, durable enough to withstand regular use, and offers the functionality you desire. Additionally, consider the overall aesthetics, maintenance requirements, and price to find the best fit for your bathroom.
Removing The Old Bathtub Stopper
When it comes to renovating your bathroom, one of the tasks you might have to tackle is removing the old bathtub stopper. Whether your stopper is broken, rusty, or simply outdated, this step-by-step guide will help you remove it efficiently and effectively. Before you dive into the process, it’s important to assess the existing stopper and determine the removal method based on its type.
Assess the existing stopper
Before you start removing the old bathtub stopper, take a moment to assess its type. Different stoppers require different removal methods, so knowing what you’re dealing with will save you time and frustration. There are three common types of bathtub stoppers: lift-and-turn, push-and-pull, and pop-up stoppers. Here’s a brief description of each:
| Type of Stopper | Description |
|---|---|
| Lift-and-Turn | A stopper that is lifted and turned to open and close the drain. |
| Push-and-Pull | A stopper that is pushed down and pulled up to open and close the drain. |
| Pop-up | A stopper that is controlled by a lever or knob on the overflow plate. |
Determine the removal method based on the type of stopper
Once you have identified the type of stopper you have, you can determine the appropriate removal method. Here’s a breakdown of how to remove each type of stopper:
- Lift-and-Turn: Twist the stopper counterclockwise until it is loose, then lift it out of the drain.
- Push-and-Pull: Grasp the stopper and pull it straight up to remove it from the drain.
- Pop-up: Remove the screws that secure the overflow plate to the bathtub, then lift the plate and lever assembly out. From there, you can access the stopper and unscrew it to remove it.
Step-by-step guide to removing the stopper
Now that you know the type of stopper you have and the corresponding removal method, let’s dive into the step-by-step guide to removing the old bathtub stopper:
- Assess the type of stopper you have based on the descriptions provided above.
- Determine the appropriate removal method for your specific stopper.
- Follow the removal method instructions outlined above to take out the old stopper from the drain.
- Once the stopper is removed, clean the drain area to ensure there is no debris or residue left behind.
By following these steps, you’ll be able to remove the old bathtub stopper with ease and prepare for the next step in your bathroom renovation process. Remember to be careful and gentle when handling the stopper to avoid any damage to your bathtub or personal injury.
Installing A Standard Bathtub Stopper
Installing a bathtub stopper may seem like a daunting task, but with the right knowledge and tools, it can be a straightforward process. In this section, we will guide you step-by-step on how to install a standard bathtub stopper. Whether you are replacing an old stopper or installing a new one, the process remains the same. Let’s get started!
Prepare the new stopper for installation
Before you can begin the installation process, you need to gather the necessary materials. Here’s a list of what you will need:
| Tape measure | Adjustable pliers |
| Screwdriver | Plumber’s putty |
| Plunger | New stopper assembly |
Once you have all the materials, follow these steps to prepare the new stopper for installation:
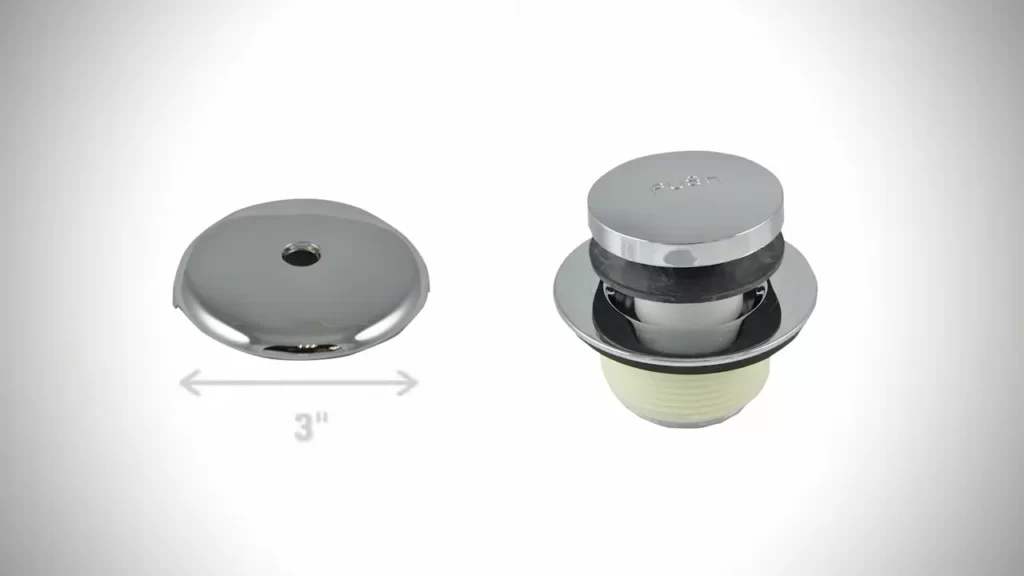
- Measure the diameter of your drain to ensure that the new stopper will fit properly.
- Apply plumber’s putty to the underside of the stopper flange. This will create a watertight seal when installed.
Inserting the stopper into the drain
Now that the new stopper is prepared, it’s time to insert it into the drain. Follow these steps:
- Remove the old stopper by unscrewing it counterclockwise or lifting it out.
- Insert the new stopper into the drain, ensuring that it fits securely.
- Tighten the stopper clockwise until it is snug and doesn’t move.
Adjusting the stopper for optimal functionality
After inserting the stopper, you may need to make some adjustments to ensure optimal functionality. Follow these steps:
- Test the stopper by filling the bathtub with water and checking for any leaks.
- If the stopper is not sealing completely, try adjusting the linkage rod by unscrewing the nut at the back of the overflow plate and moving the rod up or down.
- Once you have achieved the desired functionality, tighten the nut to secure the linkage rod in place.
Congratulations! You have successfully installed a standard bathtub stopper. Remember to check for any leaks periodically and make adjustments if necessary. With proper installation and maintenance, your bathtub stopper should provide you with years of trouble-free use.
Installing A Pop-Up Bathtub Stopper
If you’re tired of dealing with water draining too quickly or not at all, installing a pop-up bathtub stopper can solve your problem. This simple mechanism is designed to control the flow of water, allowing you to enjoy a relaxing bath without worrying about a constantly draining tub. In this guide, we will walk you through the process of installing a pop-up bathtub stopper, ensuring that you understand the mechanism, remove the old stopper if necessary, and install the new stopper correctly.
Understanding the pop-up stopper mechanism
Before you start replacing your bath stopper, it’s important to understand how the pop-up stopper mechanism works. The pop-up stopper is typically located inside the drain pipe and is connected to a lever or trip assembly. When the lever is lifted or moved, it causes the stopper to rise, effectively closing off the drain and preventing water from escaping.
To release the water and allow it to drain, simply push down on the stopper, and it will revert to its closed position. Understanding this mechanism will help you better visualize the installation process that follows.
Removing the old stopper if necessary
If you already have a stopper in place but it’s not working properly or you simply want to replace it, you’ll need to remove the old stopper before installing the new one. Here’s how you can do it:
- Start by finding the drain plug, which is typically located in the bathtub near the faucet.
- Next, locate the lever or trip assembly that controls the stopper from behind the bathtub.
- Using a screwdriver or pliers, unscrew or detach the lever or trip assembly, carefully removing it from the drain pipe.
- With the lever or trip assembly removed, you should be able to lift the old stopper out of the drain pipe.
This process may vary depending on the specific type of stopper you have. If you encounter any difficulties, consult the manufacturer’s instructions or seek professional assistance.
Installing the new pop-up stopper correctly
Now that you’ve successfully removed the old stopper, it’s time to install the new pop-up stopper. Follow these steps to ensure a proper installation:
- Carefully insert the new stopper into the drain pipe, making sure it fits securely.
- Attach the lever or trip assembly to the back of the bathtub, aligning it with the stopper mechanism.
- Tighten any screws or fasteners to secure the lever or trip assembly in place.
- Test the stopper by lifting and pushing down on the lever. It should easily rise and fall, allowing water to be drained or retained as desired.
Once you’ve completed these steps, you can enjoy your newly installed pop-up bathtub stopper, confident in its functionality and ability to control the water flow in your bath. Remember to regularly clean and maintain your stopper to ensure it continues to work effectively.
Installing A Push-Pull Bathtub Stopper
Having a fully functional bathtub stopper is essential for a satisfying bathing experience. If you’re tired of dealing with a faulty stopper or want to upgrade to a push-pull mechanism, this guide will help you install a push-pull bathtub stopper with ease.
Understanding the push-pull stopper mechanism
The push-pull stopper mechanism is a popular choice among homeowners due to its simplicity and convenience. Unlike other types of stoppers, the push-pull stopper allows you to easily control the drainage of your bathtub by simply pushing or pulling the stopper. This mechanism eliminates the need for any complex turning or twisting, making it user-friendly for all ages.
Removing the old stopper if necessary
If you already have a bathtub stopper installed and it’s not a push-pull mechanism, you’ll need to remove it before installing the new one. Follow these steps to remove the old stopper:
- Locate the stopper in the bathtub drain.
- Check if there is a visible stopper linkage under the sink or behind the tub.
- Use pliers or a wrench to loosen the stopper linkage, rotating it counterclockwise.
- Gently pull out the old stopper from the drain.
By removing the old stopper, you’ll clear the way for the installation of the new push-pull stopper.
Installing the new push-pull stopper correctly
Now that you have successfully removed the old stopper, it’s time to install the new push-pull stopper. Follow these steps carefully for a proper installation:
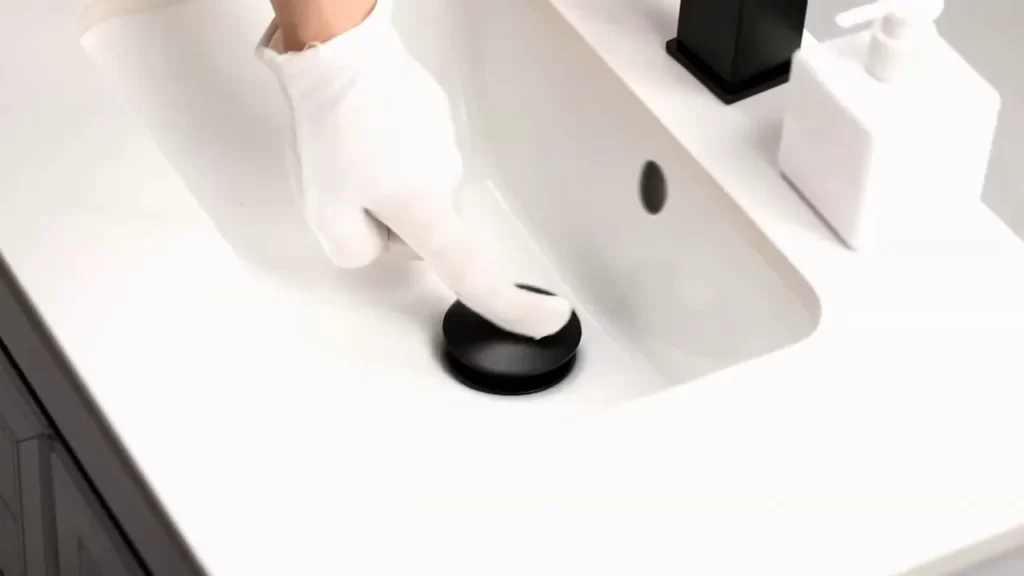
- Insert the push-pull stopper into the bathtub drain.
- Ensure the stopper fits securely and evenly into the drain opening.
- Test the push-pull mechanism by pushing and pulling the stopper to ensure smooth operation.
- Adjust the stopper height if necessary to achieve the desired level of water retention during baths.
Note: Make sure the push-pull stopper is properly aligned and fully inserted before testing its functionality to prevent any water leakage.
Congratulations! You have successfully installed a push-pull bathtub stopper and can now enjoy the convenience and easy operation it provides. Remember to periodically clean and maintain the stopper to ensure its longevity and proper functioning.
Troubleshooting Common Issues
While installing a bathtub stopper can be a relatively simple task, it’s not uncommon to encounter a few hiccups along the way. Fortunately, these common issues can be easily resolved with a little patience and know-how. In this section, we will address some of the most encountered problems when it comes to bathtub stoppers, including loose or stuck stoppers, leaks or water drainage problems, and adjusting the stopper for desired water depth.
Addressing loose or stuck stoppers
If you find that your bathtub stopper is loose or stuck, don’t panic. This is a common issue that can be fixed with a few simple steps. First, check if there is any debris or hair clogging the stopper mechanism. Use a pair of tweezers or a small brush to remove any obstructions.
Once the stopper is free from debris, carefully examine the stopper assembly to ensure that all parts are properly aligned and tightened. If necessary, tighten the screws or bolts holding the stopper in place and test it again. In some cases, lubricating the stopper’s moving parts with a silicone-based lubricant can also help improve its function. Remember, a properly functioning stopper should open and close smoothly without any resistance or wobbling.
Fixing leaks or water drainage problems
Having a leaky bathtub or experiencing water drainage issues can be quite frustrating. Fortunately, these problems can often be resolved by examining the stopper and its associated components. First, check the stopper itself for any cracks, damage, or wear. If you notice any defects, replacing the stopper may be necessary. Next, inspect the rubber gasket or O-ring located around the stopper assembly. If it appears worn or damaged, it should be replaced.
Additionally, check the drainpipe for any blockages or build-up that may be obstructing the water flow. Clear any debris using a plunger or a plumbing snake, and ensure that the drainpipe is securely connected to the stopper assembly. Finally, run water into the bathtub to test for any remaining leaks or drainage problems. If the issue persists, it may be best to seek professional assistance to avoid further damage.
Adjusting the stopper for desired water depth
Adjusting the stopper for your desired water depth is an important step to ensure a comfortable and relaxing bathing experience. To do this, start by positioning the stopper in the closed position and filling the bathtub with water. Once the desired water level is reached, carefully raise the stopper using the attached lever or knob until the water drainage begins.
At this point, the stopper should be adjusted to the desired water depth. If you find that the water level is either too high or too low, make small adjustments to the stopper until you achieve the desired depth. Keep in mind that it may take a few adjustments to find the perfect water level that suits your preferences.
By following these troubleshooting tips, you’ll be able to address common issues that may arise during the installation of a bathtub stopper. Remember, taking the time to properly troubleshoot and resolve these problems will contribute to a more enjoyable bathing experience in the long run.
Maintenance Tips For Bathtub Stoppers
Bathtub stoppers play a crucial role in ensuring that your bathing experience remains hassle-free and enjoyable. However, over time, these stoppers can accumulate debris, become stiff, or even get damaged, which can hamper their functionality. To make sure your bathtub stopper stays in optimal condition, here are some essential maintenance tips you should follow:
Cleaning and removing debris from stoppers
One of the most common issues with bathtub stoppers is the accumulation of debris such as hair, soap scum, or grime. This can lead to clogging and prevent the stopper from properly sealing the drain. To clean the stopper and ensure smooth drainage, follow these simple steps:
- Start by removing the stopper from the drain. You can do this by twisting it counterclockwise or lifting it upwards, depending on the type of stopper you have.
- Once removed, inspect the stopper for any visible debris. Use a pair of tweezers or a small brush to gently remove any hair or gunk that might be stuck in the stopper holes.
- Next, clean the stopper using a mixture of warm water and mild soap. Gently scrub the stopper with a soft brush or sponge to remove any remaining dirt or residue.
- Rinse the stopper thoroughly with clean water and dry it completely before reattaching it to the drain.
Lubricating movable parts regularly
To ensure that your bathtub stopper operates smoothly, it’s important to lubricate the movable parts regularly. This will prevent any stiffness or friction that can hinder proper functioning. Here’s how you can lubricate your bathtub stopper:
- Start by removing the stopper from the drain as mentioned earlier.
- Inspect the stopper’s movable parts, such as the lever or linkage, for any signs of rust or corrosion. If you notice any, use a rust remover or vinegar to clean these parts before proceeding.
- Apply a small amount of silicone-based lubricant to the movable parts. Be sure to use a lubricant that is safe for use with plumbing fixtures.
- Gently move the stopper up, down, and sideways to distribute the lubricant evenly. This will ensure smooth movement and prevent any sticking or jamming.
- Reattach the stopper to the drain, making sure it fits snugly without any obstruction.
Inspecting stoppers for any signs of damage
Regular inspections of your bathtub stoppers can help identify any signs of damage or wear and tear. By spotting these issues early on, you can prevent further damage and ensure that your bathtub stopper functions effectively. Here’s what you should look for during your inspection:
- Check for any cracks, chips, or breaks in the stopper material. Damaged stoppers can allow water to leak, which can lead to water damage in the surrounding areas.
- Inspect the stopper seal for any signs of deterioration or flattening. A worn-out seal can result in improper sealing and cause leaks.
- Ensure that all the components of the stopper, such as the lever, linkage, or spring, are intact and properly aligned.
- If you notice any damage or issues during the inspection, it’s important to replace or repair the stopper promptly to avoid further problems.
By following these maintenance tips, you can extend the lifespan of your bathtub stopper and ensure a smooth and relaxing bathing experience every time. Remember to clean and remove debris regularly, lubricate movable parts, and inspect for any signs of damage. Investing a little time in maintaining your bathtub stopper will save you from unnecessary inconvenience and costly repairs in the long run.
Frequently Asked Questions
Why Won T My Bath Plug Stay Down?
If your bath plug won’t stay down, it could be due to a clogged drain, worn-out plug mechanism, or a faulty overflow pipe. Inspect and clean the drain, check the plug for damage, and ensure the overflow pipe is functioning properly to resolve the issue.
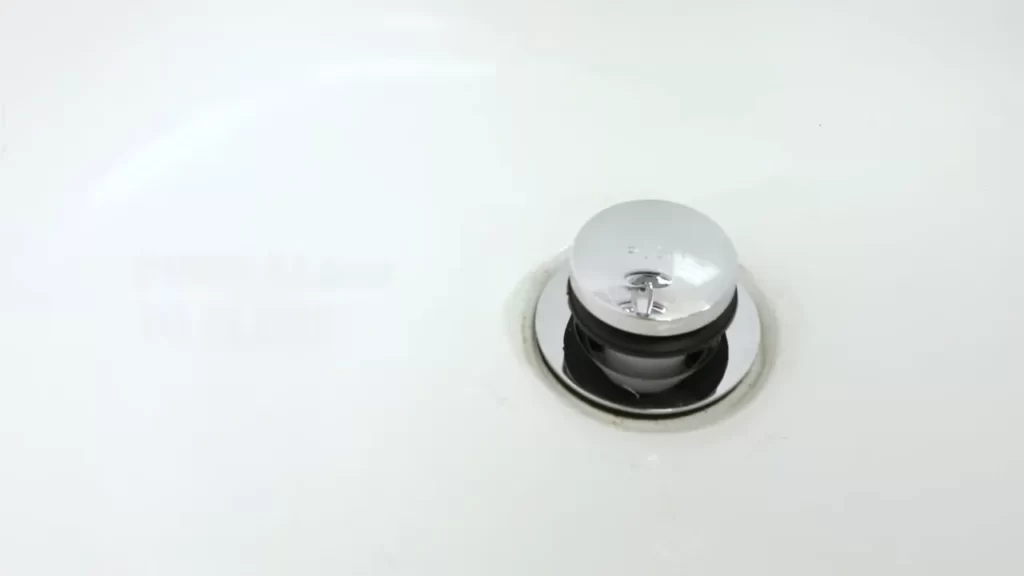
How Do You Install A Toe Touch Tub Stopper?
To install a toe touch tub stopper, locate the drain and remove the old stopper. Insert the new stopper and securely tighten the mounting nut. Test the stopper by pushing it down and releasing it. Adjust the stopper if necessary for proper function.
What Are The Different Types Of Bathtub Drain Stoppers?
There are four main types of bathtub drain stoppers: the lift-and-turn stopper, the push-and-pull stopper, the toe-touch stopper, and the pop-up stopper. Each type operates differently but serves the same purpose of preventing water from draining out of the bathtub.
How Does A Pop-Up Bathtub Drain Stopper Work?
A pop-up bathtub drain stopper works by using a lever mechanism to raise or lower the stopper. When the lever is pushed down, the stopper is raised, allowing water to flow through the drain. When the lever is pulled up, the stopper is lowered, blocking the drain and preventing water from draining out.
Conclusion
Installing a bathtub stopper is a simple yet essential task that can be easily accomplished with the right guidance. By following the step-by-step instructions provided in this blog post, you can ensure a properly functioning stopper that prevents water leakage and enhances your bath experience.
Don’t let the fear of installation hold you back – with these tips, you’ll be enjoying a relaxing soak in no time. Happy installing!