To install a glass shower, first measure and mark the designated area. Then, carefully install the shower door using the provided hardware and sealant for a secure fit.
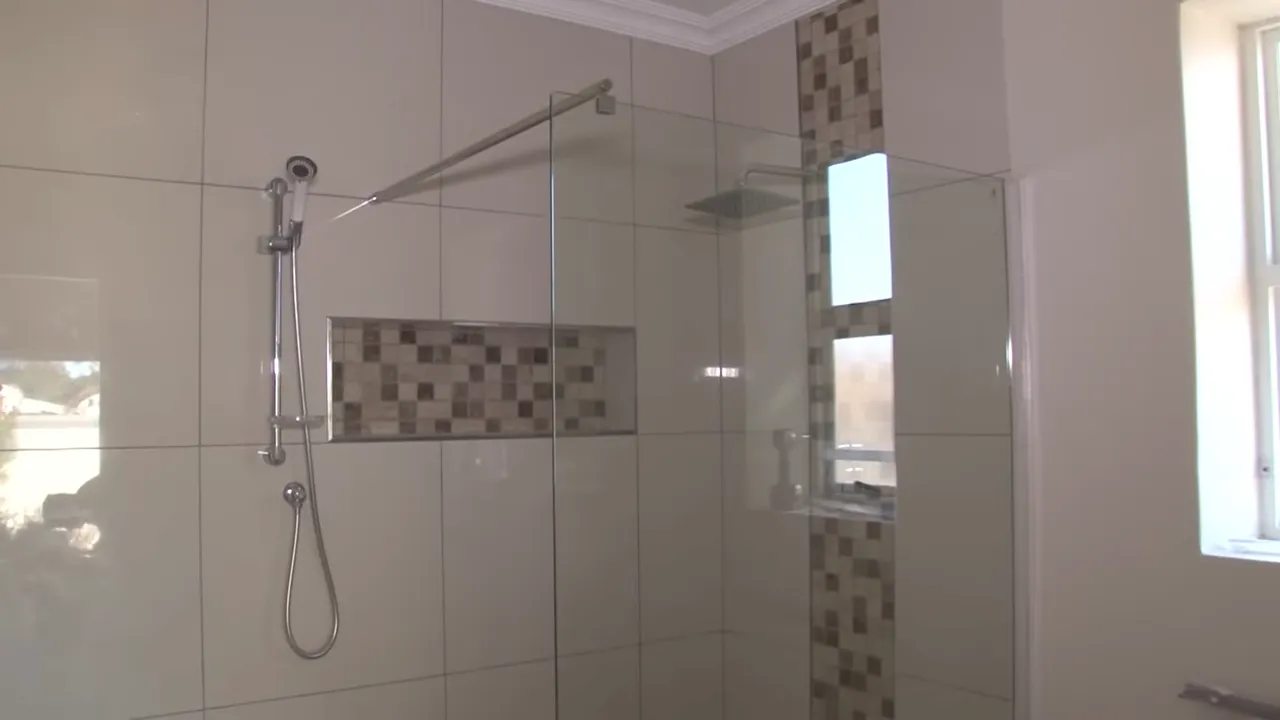
Glass showers have become a popular choice for modern bathrooms due to their sleek and sophisticated appearance. Installing a glass shower can elevate your bathroom’s aesthetic while also creating a more open and spacious feel. Whether you’re remodeling your bathroom or simply upgrading an old shower, installing a glass shower can be a simple and rewarding DIY project.
In this guide, we will walk you through the step-by-step process of installing a glass shower, from measuring and marking the area to securing the shower door and applying the necessary sealant. By following these instructions, you can have a luxurious and functional glass shower in no time.
Understanding The Requirements And Measurements
Gathering the necessary tools and materials
Before you begin the installation process, it’s important to gather all the necessary tools and materials you will need. Having everything ready in advance will save you time and ensure a smoother installation.
Here’s a list of the tools and materials you will need:
- Glass shower panels
- Shower door
- Measuring tape
- Level
- Caulk gun
- Drill
- Screwdriver
- Shower head and fixtures
- Waterproofing membrane
- Trowel
- Grout
- Silicone caulking
This comprehensive list will ensure that you have everything you need to complete the installation professionally.
Measuring the shower space accurately
Accurate measurements are crucial when installing a glass shower to ensure a perfect fit. Taking the time to measure the shower space properly will prevent any inconvenient surprises and help you plan the installation process effectively.
Here are the steps to measure the shower space accurately:
- Start by measuring the width of the shower opening at the top, bottom, and middle. Note down the smallest measurement, as it will determine the width of the glass shower panels.
- Next, measure the height of the shower opening on both sides and in the middle. Again, write down the smallest measurement, which will be the height of the glass panels.
- Measure the depth of the shower recess to ensure that the shower door will swing open and close without any obstructions.
- Check the walls for any unevenness or irregularities that might affect the installation. Use a level to verify if the wall is straight and make note of any adjustments that need to be made.
By following these measurement guidelines, you can ensure that your glass shower installation will be a precise and seamless process.
Choosing The Right Glass Shower Design
When it comes to creating a stylish and functional bathroom, choosing the right glass shower design is essential. The design you select will not only impact the overall aesthetics of your bathroom but also determine the level of comfort and convenience you experience. To help you make an informed decision, this section explores different glass shower options and presents factors you should consider, such as style, size, and functionality.
Exploring different glass shower options
Before diving into the selection process, it’s important to familiarize yourself with the various glass shower options available. There are numerous designs to choose from, ranging from traditional framed showers to sleek frameless ones. Let’s take a closer look at some popular glass shower designs:
- Framed shower: This classic design features metal framing around the glass panels, providing a sturdy and traditional look. It is a popular choice for those looking to blend simplicity and affordability.
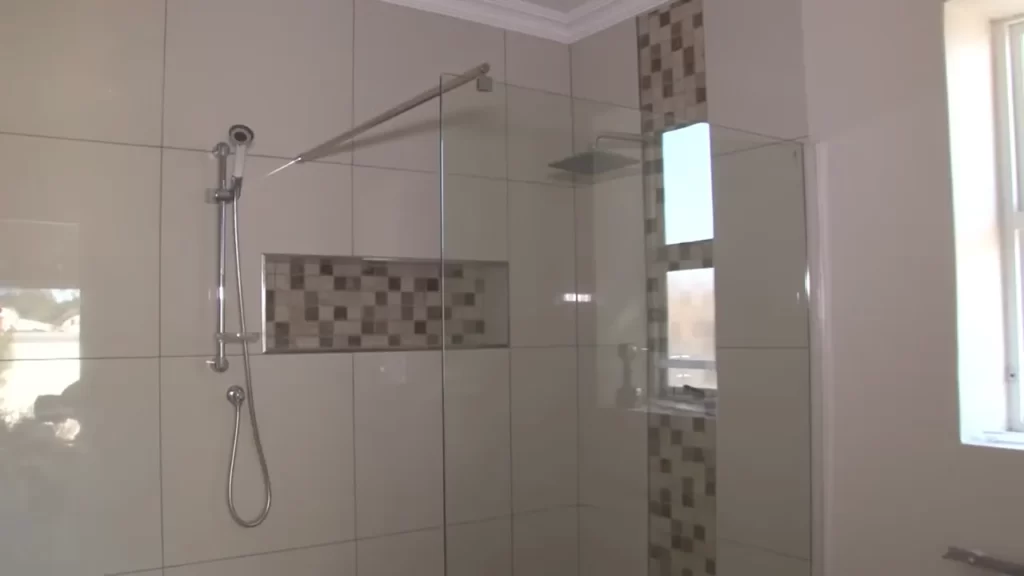
- Frameless shower: For a more modern and minimalist appearance, a frameless shower design is a fantastic option. This design offers uninterrupted glass panels supported by discrete hardware, creating a sleek and open feel that complements contemporary bathrooms.
- Semi-frameless shower: Combining elements of both framed and frameless showers, the semi-frameless design offers the best of both worlds. It features minimal visible framing around the edges of the glass, providing structural support while still maintaining a stylish and open look.
- Curved shower: If you’re looking to add a unique touch to your bathroom, a curved glass shower can be an excellent choice. This design incorporates curved glass panels, providing an elegant and distinctive look that can make a bold statement.
Considering factors such as style, size, and functionality
When selecting the right glass shower design for your bathroom, it’s crucial to consider several factors, including style, size, and functionality.
Style: The style of your glass shower should align with the overall design and aesthetic of your bathroom. Whether you prefer a contemporary, traditional, or eclectic look, choose a glass shower design that complements the existing elements in your bathroom.
Size: The size of your bathroom and the available space will influence the type of glass shower design you can install. Measure the area where the shower will be placed and consider the dimensions of the glass panels to ensure a proper fit.
Functionality: Think about how you plan to use your glass shower. Do you prefer a spacious enclosure for a luxurious showering experience, or do you need a compact design that maximizes space in a small bathroom? Consider factors like door opening options, accessibility features, and ease of cleaning when evaluating the functionality of different shower designs.
By exploring different glass shower options and considering factors such as style, size, and functionality, you can make an informed decision and choose the right glass shower design for your bathroom. Remember, selecting a design that suits your personal preferences and meets your practical needs will ensure a visually appealing and functional bathroom that you’ll enjoy for years to come.
Ensuring Proper Waterproofing And Drainage
Proper waterproofing and drainage are crucial when it comes to installing a glass shower. These two aspects not only ensure the functionality of the shower but also prevent potential water damage to the surrounding areas. In this section, we will discuss the importance of evaluating the existing waterproofing and drainage system and implementing necessary modifications or improvements.
Evaluating the Existing Waterproofing and Drainage System
Before beginning the installation process, it is essential to thoroughly evaluate the existing waterproofing and drainage system in your bathroom. This step allows you to identify any potential issues or areas that may require improvement. Here are a few key aspects to consider:
- Inspect the condition of the current shower base or floor. Look for any cracks, gaps, or signs of water damage.
- Check the integrity of the waterproofing membrane. Ensure that it is properly installed and intact.
- Examine the effectiveness of the drain system. Make sure it is capable of efficiently evacuating water without any obstructions.
By thoroughly evaluating these aspects, you can determine the current state of your bathroom’s waterproofing and drainage system. This evaluation forms the foundation for implementing necessary modifications or improvements.
Implementing Necessary Modifications or Improvements
Based on the evaluation of the existing waterproofing and drainage system, you may need to implement certain modifications or improvements to ensure optimal performance. Here are some steps you can take:
- Repair any cracks or gaps in the shower base or floor using suitable sealing products.
- Apply additional layers of waterproofing membrane to reinforce the existing barrier and provide extra protection against water leakage.
- Upgrade the drain system if necessary. This may involve replacing the drain assembly or adding a drain pan to enhance water evacuation.
- Consider installing a secondary waterproofing system, such as a shower pan liner or a liquid waterproofing membrane, for added protection.
These modifications or improvements ensure that your glass shower is properly sealed and equipped with an efficient drainage system, reducing the risk of water damage. By taking the time to assess and address any potential issues, you can enjoy your glass shower without any concerns.
Removing The Existing Shower System
Removing the existing shower system is the first step towards installing a new glass shower. This process involves disassembling the current shower fixtures and components, as well as removing any leftover adhesive or sealants. By following these steps, you can ensure a smooth and hassle-free removal of your old shower.
Disassembling the current shower fixtures and components
The first step in removing the existing shower system is to disassemble the current shower fixtures and components. This includes removing the showerhead, handles, and any other attachments. To do this, follow these simple steps:
1. Turn off the water supply: Before starting any disassembly work, make sure to turn off the water supply to the shower. This can usually be done by locating and shutting off the water valves.
2. Remove the showerhead: Using an adjustable wrench, carefully twist off the showerhead from the shower arm. In some cases, you may need to use a strap wrench to loosen a tight showerhead.
3. Take out the handles: If your shower has handles, use a screwdriver or Allen wrench to remove them. Depending on the type of handles, you may need to unscrew a cover plate or use a set screw to release them.
4. Disconnect any additional attachments: If your shower system has any additional attachments such as a handheld showerhead or a soap dispenser, disconnect them following the manufacturer’s instructions.
Removing any leftover adhesive or sealants
Once you have disassembled the shower fixtures and components, the next step is to remove any adhesive or sealants leftover from the previous installation. This ensures a clean surface for installing your new glass shower. Here’s how you can do it:
1. Scrape off the adhesive: Use a putty knife or scraper to gently scrape off any adhesive or sealants from the shower walls and base. Be careful not to damage the surface underneath.
2. Apply a solvent or adhesive remover: If the adhesive or sealants are stubborn and not easily removed by scraping alone, you can apply a solvent or adhesive remover. Follow the product instructions carefully and use in a well-ventilated area.
3. Clean the surface: Once the adhesive or sealants are removed, clean the shower walls and base thoroughly with a mild detergent and water. This will help remove any residue or dirt left behind.
By following these steps to disassemble the current shower fixtures and components, as well as removing any leftover adhesive or sealants, you can now proceed with the installation of your new glass shower. Stay tuned for the next steps in our series on How to Install a Glass Shower.
Installing The Glass Panels
Installing the glass panels is a crucial step in creating a stunning glass shower that enhances the aesthetic appeal of your bathroom. This section will guide you on the proper techniques for safely handling and maneuvering the glass panels, as well as securing them in place with either silicone adhesive or mounting brackets.
Safely handling and maneuvering the glass panels
When it comes to working with glass panels, safety should be your utmost priority. These heavy and fragile materials require careful handling to avoid any accidents or damage. Here are some essential tips to keep in mind:
- Wear protective gloves and goggles to prevent any injuries from sharp edges or shattered glass.
- Work in pairs whenever possible. Having an extra set of hands can make the maneuvering process much smoother.
- Use suction cups to securely grip and lift the glass panels. This will provide you with a firm hold and minimize the risk of dropping them.
- Always lift and carry the glass panels in a vertical position. Tilting them horizontally can put unnecessary stress on the glass and increase the chances of breakage.
- Ensure that the pathway from your entry point to the installation area is clear of any obstacles. This will allow for easy movement and reduce the likelihood of accidental collisions.
Securing the panels in place with silicone adhesive or mounting brackets
Once you have safely maneuvered the glass panels into position, it’s time to secure them firmly to the shower enclosure. There are two primary methods for this: using silicone adhesive or mounting brackets.
Silicone adhesive: This is the preferred option for frameless glass showers. Here’s how to do it:
- Thoroughly clean both the glass panels and the surrounding surfaces to ensure a strong bond.
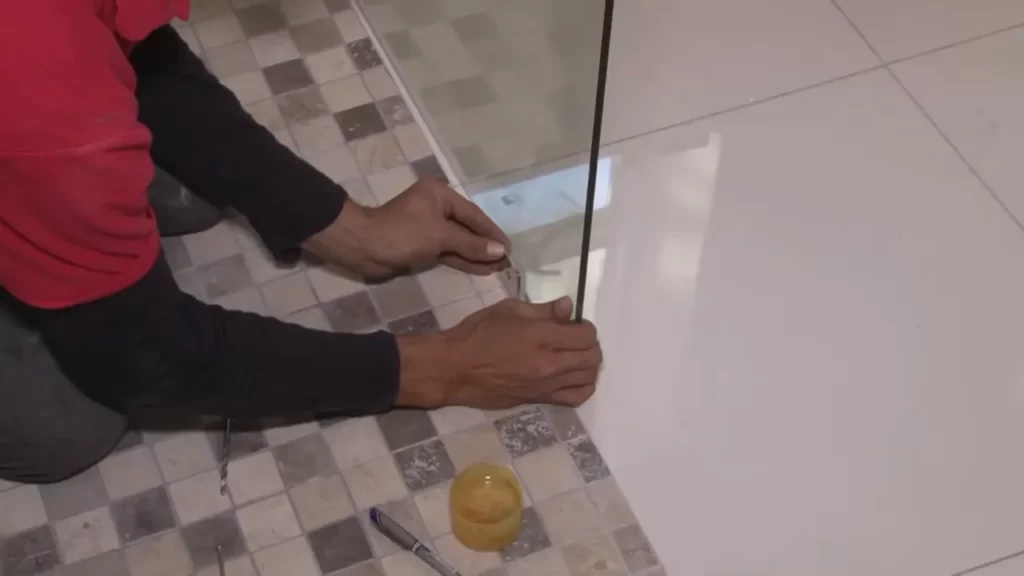
- Apply a thin and even layer of silicone adhesive to the edges of the glass panels that will come into contact with the shower enclosure.
- Press the panels firmly against the enclosure, making sure they are aligned correctly.
- Allow the silicone adhesive to cure for the recommended time as per the manufacturer’s instructions.
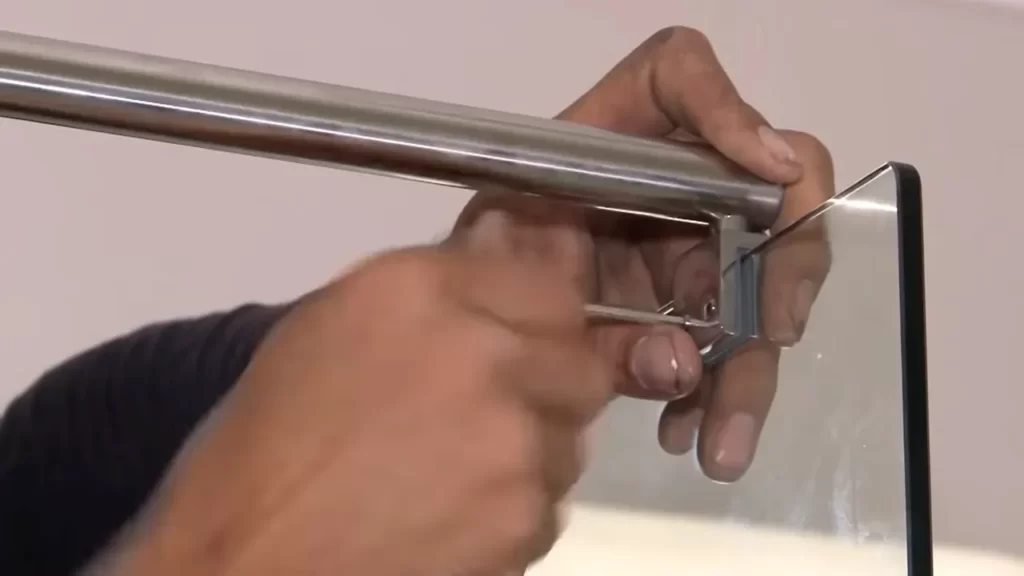
Mounting brackets: If you have a framed glass shower, mounting brackets may be the better choice. Follow these steps:
- Position the mounting brackets at the desired locations on the shower enclosure walls.
- Securely attach the brackets using the provided screws, ensuring they are level and evenly spaced.
- Gently slide the glass panels into the brackets, ensuring a snug fit.
- Check that the panels are aligned correctly and adjust the brackets if necessary.
- Tighten the screws on the brackets to secure the panels in place.
By following these guidelines for safely handling and maneuvering the glass panels, as well as securing them with silicone adhesive or mounting brackets, you’ll be well on your way to achieving a beautiful and functional glass shower installation.
Installing The Shower Door And Hardware
Now that you have successfully prepared the shower enclosure and installed the necessary framework, it’s time to move onto the next crucial step: installing the shower door and hardware. This step is essential as it not only adds a finishing touch to your glass shower but also ensures functionality and durability. In this section, we will guide you on choosing the right type of shower door and hardware and installing and aligning it according to the manufacturer’s instructions.
Choosing the right type of shower door and hardware
Before diving into the installation process, it’s important to choose the right type of shower door and hardware that suits your needs and preferences. There are various options available in the market, each with its own set of features and design. Here are a few popular choices:
- Sliding shower doors: These doors are a great space-saving option, especially for smaller bathrooms. They slide along a track, allowing easy access to the shower.
- Hinged shower doors: Hinged doors swing open like a traditional door and provide a wide opening for accessibility. They can be installed to swing inward or outward, depending on the layout of your bathroom.
- Pivot shower doors: Pivot doors operate on a pivot hinge, allowing the door to swing in and out. They are often used for larger shower enclosures and provide a sleek and modern look.
Once you have decided on the type of shower door, it’s time to select the accompanying hardware. This includes handles, hinges, brackets, and any other accessories necessary for the installation. Consider the style and finish of the hardware to ensure it complements the overall aesthetic of your bathroom.
Installing and aligning the door according to manufacturer instructions
After choosing the shower door and hardware, it’s crucial to follow the manufacturer’s instructions for installation. This will ensure that the door functions properly and is aligned correctly. Here are the general steps involved in installing and aligning the shower door:
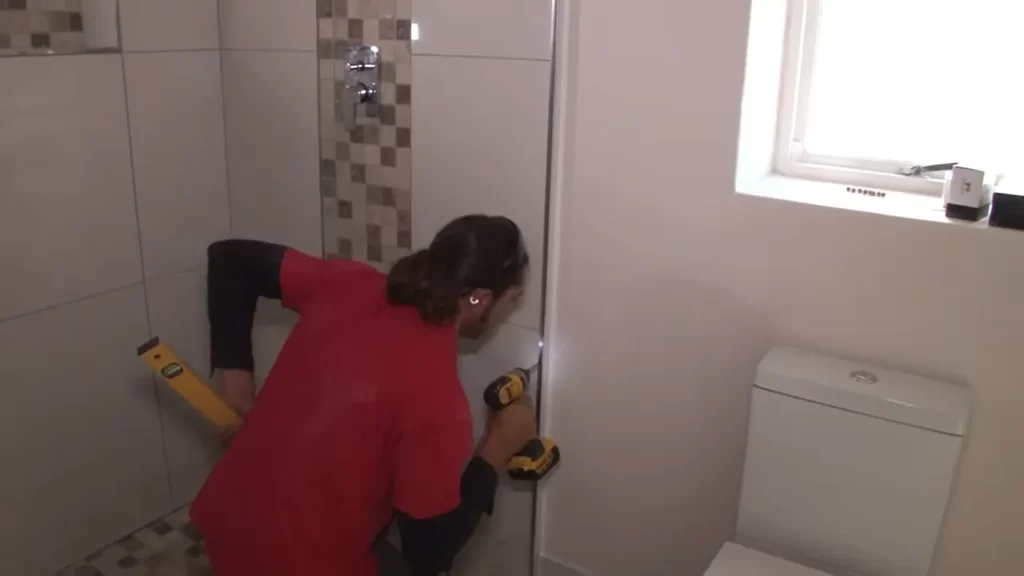
- Start by attaching the hinges or brackets to the shower enclosure or wall, following the provided measurements and guidelines.
- Next, carefully place the door onto the hinges or brackets, ensuring it is level and plumb. Use a level to check for any discrepancies.
- Secure the door by tightening the screws or bolts, making sure they are snug but not too tight to avoid damaging the glass.
- Test the door’s movement by opening and closing it multiple times. Make any necessary adjustments to ensure smooth operation.
- Install the door handle and any additional hardware according to the manufacturer’s instructions.
Keep in mind that installation steps may vary slightly depending on the specific shower door and hardware you choose. Always refer to the manufacturer’s instructions for precise guidance.
By carefully selecting the shower door and hardware and following the correct installation techniques, you can achieve a stunning and functional glass shower that adds elegance and value to your bathroom.
Sealing And Finishing Touches
Sealing and finishing touches are crucial steps in the installation of a glass shower. These steps not only ensure the durability and longevity of your shower but also enhance its overall appearance. Applying waterproof sealant to all joints and seams is an important part of the sealing process. Additionally, installing necessary accessories like handles and towel bars adds functionality and convenience to your shower. Let’s delve into each of these steps in detail.
Applying waterproof sealant to all joints and seams
One of the most important steps in sealing your glass shower is applying a waterproof sealant to all joints and seams. This helps prevent leaks and water damage, ensuring that your shower remains watertight.
Here are the steps to follow when applying the waterproof sealant:
- Ensure that all joints and seams are clean and dry before applying the sealant.
- Apply the sealant evenly along the edges of the glass panels and on any joints.
- Use a caulk gun or a sealant applicator to apply the sealant smoothly and accurately.
- Allow the sealant to dry completely according to the manufacturer’s instructions.
- Once dry, inspect the joints and seams for any gaps or areas that may need additional sealant.
- Apply a second coat of sealant if necessary, making sure to fill in any gaps or uneven areas.
- Finally, wipe away any excess sealant with a damp cloth to achieve a clean and polished look.
Installing necessary accessories like handles and towel bars
Once the sealing is complete, it’s time to install the necessary accessories that will enhance the functionality and aesthetics of your glass shower. Handles and towel bars are popular accessories that provide convenience and a touch of style.
Follow these steps to install handles and towel bars:
- Mark the desired locations for the handles and towel bars on the glass panels.
- Ensure that the marked locations are level and symmetrical.
- Drill holes at the marked locations using a glass drill bit, taking care to apply gentle and steady pressure.
- Insert wall anchors into the drilled holes to provide stability for the accessories.
- Attach the handles and towel bars using the provided screws or mounting brackets.
- Tighten the screws securely, ensuring that the handles and towel bars are firmly attached to the glass panels.
With the handles and towel bars securely installed, your glass shower is now complete. Take a step back and admire the transformation it has undergone. The waterproof sealant and well-placed accessories not only ensure the functionality of your shower but also add a touch of elegance to your bathroom.
Remember, proper sealing and finishing touches are essential for the longevity and performance of your glass shower. Follow these steps diligently to create a stunning and well-protected addition to your bathroom.
Testing And Adjusting The Shower System
Once you have successfully installed the glass shower, it’s important to thoroughly test and adjust the system to ensure optimal functionality. This final step will help guarantee that your shower is leak-free and all fixtures and hardware are properly adjusted. By following these simple guidelines, you can confidently enjoy your new glass shower without any worries.
Checking for any leaks or water seepage
To start, carefully inspect the entire shower system for any signs of leaks or water seepage. Even a small leak can lead to costly water damage if left unnoticed. Begin by checking the connection points between the glass panels and the walls or floor. Look for any signs of moisture or discoloration that may indicate a leak.
Next, examine the seals around the shower door and any other openings in the glass panels. Ensure that the seals are intact and properly aligned. Run your hand along the edges to feel for any moisture or drafts. If you detect any leaks, promptly address them by resealing the affected area using a reliable waterproofing material.
Adjusting fixtures and hardware to ensure proper functionality
After confirming that there are no leaks or water seepage, it’s time to focus on adjusting the fixtures and hardware to ensure everything is functioning as it should. Start by inspecting the showerhead and faucets. Turn on the water and examine the flow and temperature. Make sure the water pressure is adequate and the temperature can be easily adjusted. If needed, adjust the control valves or seek professional assistance to resolve any issues.
Next, check the drain system to ensure proper drainage. Run water into the shower and observe how quickly it drains. Verify that there is no pooling or slow drainage. If you notice any issues, such as clogged drains or improper slope, address them promptly to prevent any future complications.
Lastly, take a moment to appreciate the aesthetics of your glass shower. Ensure that all hardware, such as towel bars and soap dishes, are securely attached and properly aligned. Clean the glass panels to remove any fingerprints or smudges and restore their clarity. This will not only enhance the overall appearance of your shower but also prolong its lifespan.
By following these simple yet crucial steps, you can confidently test and adjust your glass shower system to ensure its proper functionality. Remember to address any leaks or water seepage promptly and adjust the fixtures and hardware to your satisfaction. Taking the time to conduct these tests and adjustments will ensure that your glass shower provides a refreshing and enjoyable experience for years to come.
Cleaning And Maintenance Tips
Keeping the Glass Shower Clean and Sparkling
Proper cleaning and maintenance are essential to keep your glass shower looking pristine and sparkling. Here are some tips to help you maintain the cleanliness and enhance the longevity of your glass shower:
- Choose the right cleaning products: When cleaning your glass shower, it is important to use non-abrasive cleaning products that will not damage the glass surface. Avoid abrasive cleaners or harsh chemicals as they can leave scratches or cause the glass to lose its transparency. Opt for mild liquid soap or specially formulated glass cleaners, which are gentle yet effective in removing soap scum, water spots, and grime.
- Regularly wipe down the glass: To prevent the build-up of soap scum and water spots, make it a habit to wipe down the glass after each use. You can use a squeegee or a soft microfiber cloth to remove any water residue or soap residue from the glass surface. This quick and simple step will help maintain the clarity of the glass and prevent the need for frequent deep cleaning.
- Deep clean at least once a week: While regular wiping helps to keep the glass clean, it is important to deep clean the glass shower at least once a week. Spray the glass cleaner on the glass surface and let it sit for a few minutes to dissolve any stubborn stains. Use a soft sponge or brush to gently scrub the glass in circular motions, paying special attention to corners and edges. Rinse thoroughly with water and wipe dry with a clean cloth.
- Prevent the growth of mildew: To prevent the growth of mildew and mold, which can thrive in moist environments, make sure your glass shower is properly ventilated. After each shower, open windows or turn on the exhaust fan to allow the proper circulation of air. This will help reduce humidity levels and minimize the chances of mildew growth.
- Seal the glass: Applying a glass sealant can help repel water and soap scum, making it easier to clean the glass shower. Look for a high-quality glass sealant that is specifically formulated for glass surfaces. Follow the manufacturer’s instructions for application, and repeat the sealing process periodically to maintain its effectiveness.
Following Recommended Maintenance Practices to Extend its Lifespan
In addition to regular cleaning, following recommended maintenance practices is crucial to extend the lifespan of your glass shower. Here are some essential maintenance tips:
- Avoid slamming the shower door: Glass shower doors are designed to be gentle and should be handled with care. Avoid slamming or forcefully closing the door as it can cause stress on the hinges and lead to damage. Instead, close the door gently and ensure it latches properly.
- Periodically check and replace seals: Over time, the seals around your glass shower may wear out or become damaged. Periodically inspect the seals to ensure they are intact and in good condition. If you notice any signs of wear or gaps, consider replacing the seals to prevent water leakage and maintain the structural integrity of your shower.
- Prevent hard water stains: Hard water stains can mar the appearance of your glass shower. To prevent these stains, consider installing a water softening system or using a water softener spray. Additionally, wiping down the glass after each use can help eliminate the minerals that cause hard water stains.
- Address any issues promptly: If you notice any chips, cracks, or loose hardware in your glass shower, address them promptly. Ignoring these issues can lead to further damage and compromise the safety of your shower. Contact a professional glass shower specialist to repair or replace any damaged components.
Adding Personal Touches
Once you have installed your sleek and modern glass shower, it’s time to add some personal touches to make it truly yours. Enhancing the aesthetics with decorative elements and making the space more functional and comfortable with additional features will turn your glass shower into a personal oasis. Let’s dive deeper into these ideas:
Enhancing the aesthetics of the glass shower with decorative elements
Adding decorative elements to your glass shower can elevate its overall appearance and create a visual impact. Here are a few ways to enhance the aesthetics:
- Choose an attractive shower curtain with patterns or textures that complement your bathroom’s color scheme. Consider using bold colors or unique designs to add a pop of personality.
- Incorporate decorative mosaic tiles on the walls or floor of the shower enclosure, providing a stunning focal point. Opt for tiles that complement the overall bathroom design and bring a touch of elegance.
- Install a stylish and functional showerhead that matches the bathroom’s theme. Choose from various options such as rainfall showerheads, handheld sprayers, or multi-functional shower panels.
Making the space more functional and comfortable with additional features
Apart from enhancing the aesthetics, you can also improve the functionality and comfort of your glass shower by adding some extra features. Here are a few ideas to consider:
- Install a built-in bench or seat inside the shower, providing a convenient spot for relaxation or shaving. Ensure it is made of water-resistant materials like teak wood or solid surface materials to withstand moisture and daily use.
- Consider incorporating built-in niches or shelves inside the shower to keep toiletries, bath products, and accessories within easy reach. This not only adds functionality but also helps declutter the space.
- Add LED lighting fixtures to create a soothing atmosphere and enhance the overall ambience of the shower. LED lights are energy-efficient, waterproof, and easy to install.
Incorporating these personal touches will transform your glass shower into a true sanctuary that reflects your unique style and offers enhanced comfort. Don’t be afraid to get creative and experiment with different decorative elements and features to create a delightful showering experience. Take your time to curate the perfect combination that suits your taste and needs, and enjoy the blissful moments spent in your personalized glass shower.
Frequently Asked Questions
Can You Install Shower Glass Yourself?
Yes, you can install shower glass yourself. However, it requires careful attention and proper tools. Ensure you have accurate measurements, follow instructions, and exercise caution during the installation process. It may be advisable to seek professional help for a seamless and safe installation.
What Holds Shower Glass In Place?
Shower glass is held in place by a combination of metal brackets or clips, silicone adhesive, and grout. These components provide stability and support for the glass, ensuring it remains securely fixed in the shower enclosure.
Does Shower Glass Need To Be Mounted To A Stud?
No, shower glass does not need to be mounted to a stud. It can be safely installed with the use of brackets or clips. Mounting to a stud is one option, but not the only one.
How Long Does It Take To Install A Glass Shower?
It typically takes about 1 to 2 days to install a glass shower. The process involves measuring, ordering, and fitting the glass panels, as well as installing the necessary hardware. A professional installer will ensure a proper and efficient installation.
Conclusion
To sum up, installing a glass shower can elevate the functionality and aesthetics of your bathroom. By following the steps outlined in this guide, you can ensure a smooth and successful installation process. From measuring and preparing the area to carefully fitting and sealing the glass, each step plays a crucial role in achieving the desired result.
Remember to prioritize safety and seek professional help if needed. With the right tools and knowledge, you’ll soon enjoy the luxurious experience of a glass shower in the comfort of your own home.