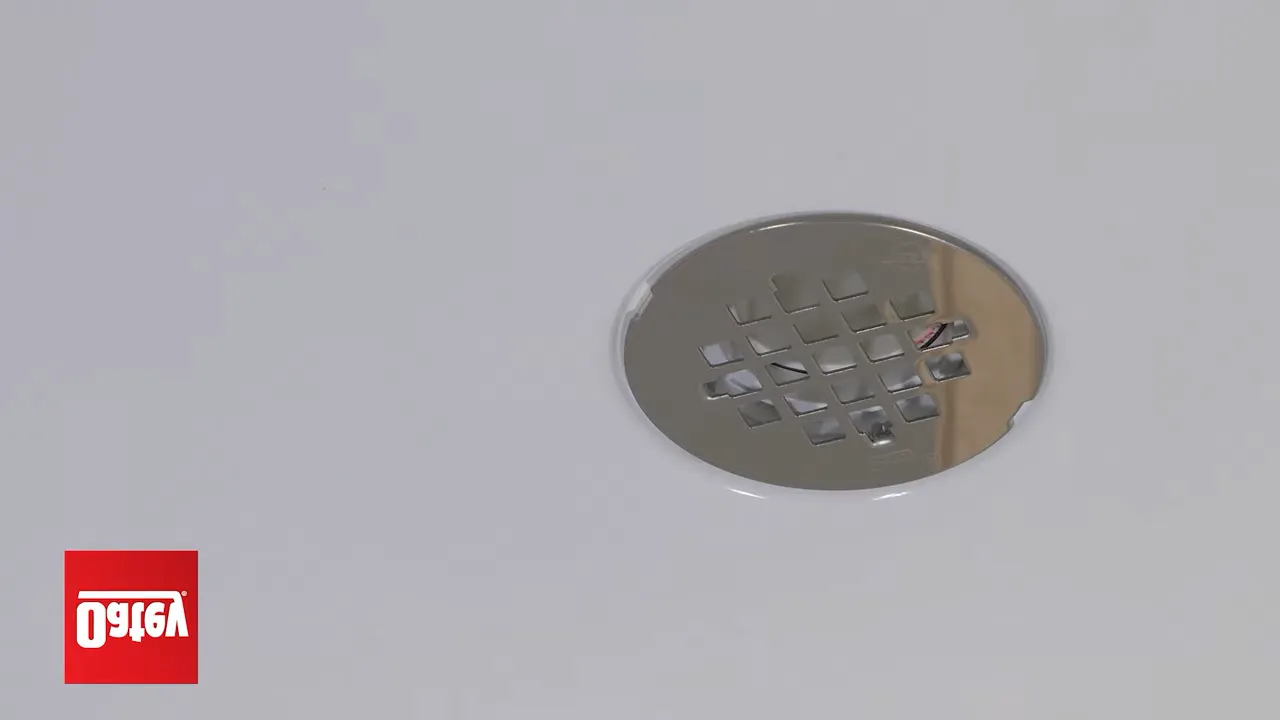
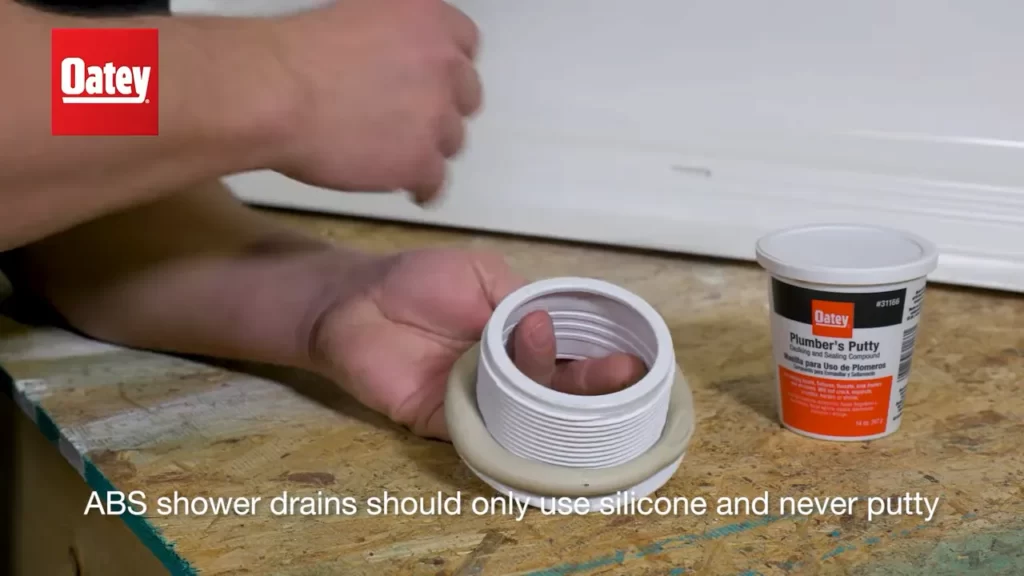
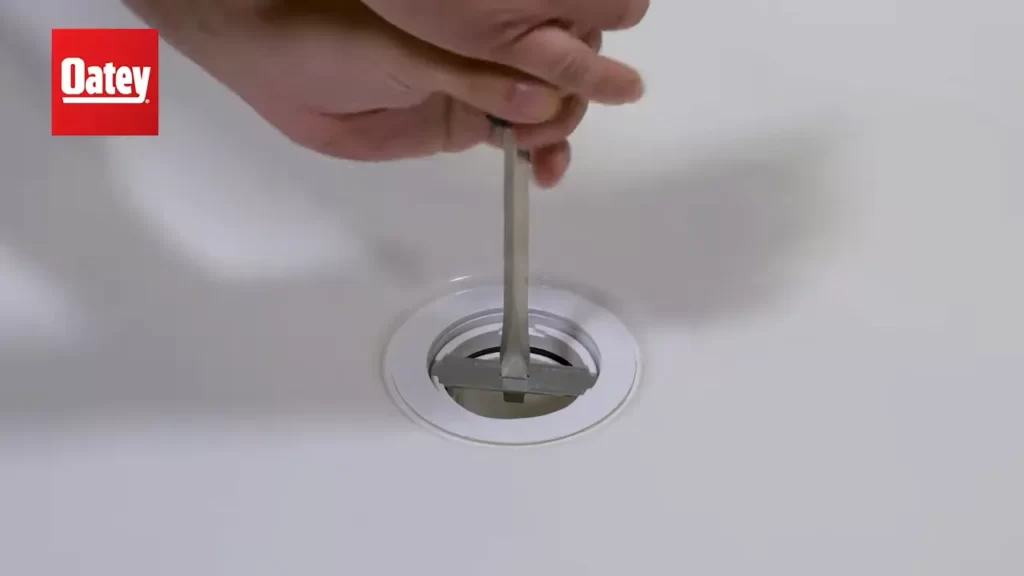
To install a shower stall drain, start by removing the old drain using a screwdriver. Then, apply plumber’s putty around the new drain flange and insert it into the drain hole.
Next, tighten the drain flange using a wrench and connect the drainpipe to the drain tailpiece. Finally, test the drain by running water to ensure it is properly installed. Installing a shower stall drain is a crucial step in any bathroom renovation or repair project.
Having a functional and properly installed drain not only prevents water damage but also ensures efficient drainage and a clean and hygienic bathing experience. In this guide, we will provide you with step-by-step instructions on how to install a shower stall drain. By following these instructions, you will be able to complete the installation process with ease and confidence. Let’s get started!
1. Understanding The Importance Of A Proper Shower Stall Drain Installation
Installing a shower stall drain may seem like a minor aspect of bathroom remodeling, but it plays a crucial role in ensuring a functional and efficient bathroom. Getting the drainage system right is vital for maintaining a clean and hygienic space. In this section, we’ll dive into the importance of a functional and well-installed shower stall drain.
Importance of a functional and well-installed shower stall drain
A shower stall drain may not be the most exciting feature of your bathroom, but it serves an essential purpose. Proper installation of the drain ensures efficient water drainage, preventing any potential damage or inconvenience. Here’s why it’s important:
- Preventing water accumulation: A well-installed shower stall drain effectively eliminates excessive water pooling, minimizing the risk of slip and fall accidents. By efficiently directing water towards the drain, you can create a safer and more comfortable showering experience.
- Protecting your bathroom from leaks: Improperly installed drains can lead to water leakage, causing structural damage to your bathroom floors, walls, and foundation. Avoid costly repairs and potential mold or mildew growth by ensuring a watertight seal during the installation process.
- Preserving your bathroom aesthetics: When water doesn’t drain properly, it can leave unsightly stains, residue, and even unpleasant odors. By installing a functional drain, you can maintain the cleanliness and appeal of your bathroom, enhancing its overall visual appeal.
- Preventing clogs and blockages: Hair, soap scum, and other debris can easily accumulate in a poorly installed drain, leading to frequent clogs. By understanding the importance of proper installation, you can reduce the chances of blockages, ensuring a smoothly flowing drain and avoiding the hassle of frequent unclogging.
Avoiding common problems and issues with a proper drain installation
When it comes to drain installation, it’s crucial to pay attention to common problems and issues that can arise if the installation is not done correctly. By understanding and addressing these concerns, you can enjoy a trouble-free shower experience:
- Odor and bacteria buildup: A poorly installed drain can cause stagnant water to collect, resulting in foul odors and the growth of harmful bacteria. A proper installation ensures proper water flow, preventing any unpleasant smells or potential health hazards.
- Water damage: An improperly installed drain can lead to water leaks, causing damage to your bathroom flooring, walls, and adjacent areas. By installing the drain correctly, you can minimize the risk of water damage and subsequent repairs.
- Reduced water flow: If the drain is not positioned and installed correctly, it can hinder the natural flow of water. This can result in slower drainage, which not only causes inconvenience but can also lead to water stagnation and potential hygiene issues.
- Difficulty in cleaning: A poorly installed drain can have intricate corners, making it harder to clean and maintain. By ensuring a proper installation, you can simplify the cleaning process and ensure a more hygienic environment.
Ensuring a long-lasting and efficient drain system
To guarantee a long-lasting and efficient shower stall drain system, focus on the following factors during installation:
- Proper positioning: Ensure the drain is positioned centrally to optimize water flow and prevent water pooling in any specific area of the shower stall.
- Secure sealing: Use high-quality sealants and ensure a watertight connection between the drain and the shower base or floor tiles. This will prevent any leaks or seepage.
- Regular maintenance: Maintain your drain system by regularly removing debris and using drain cleaners or natural solutions to prevent clogs. This proactive approach will help maintain your drain’s efficiency over time.
By understanding the importance of a proper shower stall drain installation, you can promote a safe, clean, and functional bathroom environment. Don’t overlook this seemingly small detail, as it can have a significant impact on the longevity and enjoyment of your showering experience.
2. Preparing For The Shower Stall Drain Installation
Before you can install a new shower stall drain, it’s crucial to properly prepare the area. This will ensure a smooth and efficient installation process. In this section, we will go over the necessary steps and tools required to prepare for the shower stall drain installation.
Gathering the necessary tools and materials
To begin the preparation process, you’ll need to gather the tools and materials necessary for the shower stall drain installation. Here are the items you will need:
- Tape measure
- Adjustable wrench
- Hacksaw
- Pipe cutter
- Plumber’s putty
- Plumbing sealant
- Bucket
- Sponge
Having these tools at your disposal will make the installation process much easier and efficient.
Removing the old drain system and cleaning the area
The next step is to remove the old drain system and clean the area thoroughly. Begin by turning off the water supply and removing any excess water in the shower stall. Use a bucket and sponge to collect any water remaining in the area.
Once the area is free of water, use an adjustable wrench to detach the old drain system from the shower stall. This may require some force, so be prepared to apply enough pressure to loosen the connections.
After removing the old drain, take a moment to clean the area of any dirt, debris, or old sealant. Use a sponge and soapy water to scrub the surface and ensure a clean, smooth installation area.
Inspecting and preparing the subfloor for the new drain installation
The subfloor is an essential component of the shower stall drain installation. Before installing the new drain, it’s important to inspect and prepare the subfloor properly. Follow these steps:
- Closely examine the subfloor for any signs of damage, such as rot or water stains.
- If any damage is detected, make the necessary repairs to ensure a stable and secure installation.
- Measure the dimensions of the new drain and mark its location on the subfloor using a tape measure.
- Using a pipe cutter or hacksaw, carefully cut a hole in the subfloor that matches the dimensions of the new drain.
- Ensure the hole is clean and free of any obstructions or debris.
By thoroughly inspecting and preparing the subfloor, you’ll ensure a solid foundation for the new drain installation.
3. Step-By-Step Guide To Installing A Shower Stall Drain
Installing a shower stall drain can seem like a daunting task, but with the right guidance, it can be a straightforward process. In this step-by-step guide, we will walk you through the installation process, ensuring that you choose the right type of drain system, accurately measure and mark the drain location, cut the hole with proper alignment, connect and secure the drain body in the subfloor, and finally, install the shower pan liner and drain cover. Follow these steps to ensure a successful installation.
1. Identifying and choosing the right type of drain system
Before you start the installation process, it is essential to identify and choose the right type of drain system for your shower stall. There are various options available, including linear drains, center drains, and trench drains. Consider factors such as the size and layout of your shower stall, as well as your personal preference and budget. It’s a crucial decision that will impact the functionality and aesthetics of your shower.
2. Marking and measuring the drain location accurately
A key aspect of the shower stall drain installation is marking and measuring the drain location accurately. Start by locating the center of the shower stall and determining the position of the drain within it. Use a measuring tape to mark the measurements precisely. This step is crucial to ensure proper drainage and prevent any future issues such as pooling water or uneven floor surface. Take your time to double-check the measurements before moving on to the next step.
3. Cutting the hole and ensuring proper alignment
Now that you have accurately marked the drain location, it’s time to cut the hole. Using the appropriate tools, carefully cut the hole according to the measurements you made earlier. Ensure that the hole is aligned perfectly with the drain location. It’s crucial to be precise during this step, as any misalignment can cause problems later on. Take your time, use the appropriate tools, and double-check the alignment before proceeding.
4. Connecting and securing the drain body in the subfloor
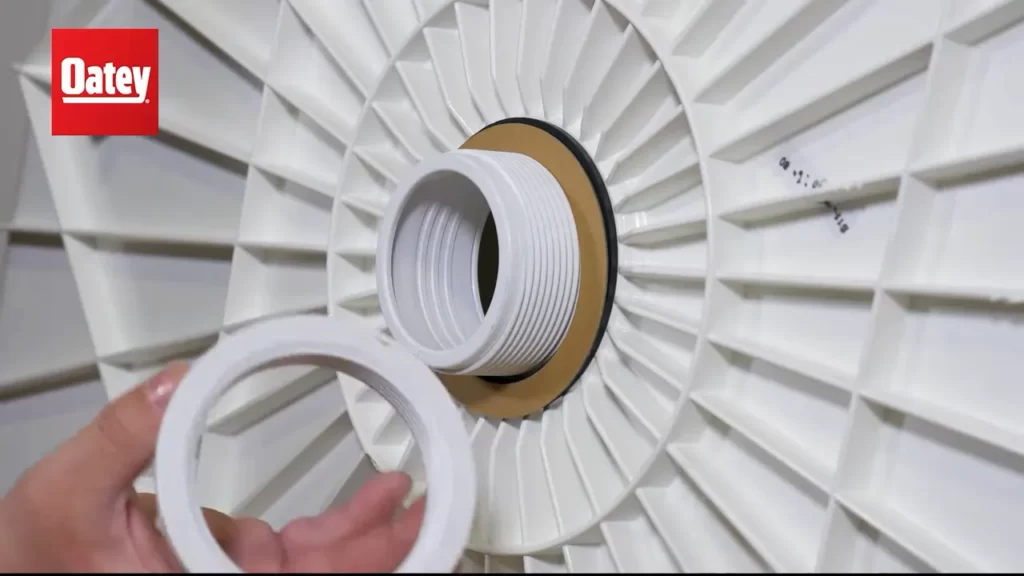
Once the hole is cut and aligned, it’s time to connect and secure the drain body in the subfloor. Follow the manufacturer’s instructions to ensure proper installation. This step usually involves applying adhesive or sealant to create a watertight seal between the subfloor and the drain body. Ensure that the drain body is firmly secured and properly aligned with the hole. A secure and well-aligned drain body is crucial for the overall functionality and longevity of the shower stall drain.
5. Installing the shower pan liner and drain cover
After successfully connecting and securing the drain body, it’s time to install the shower pan liner and drain cover. The shower pan liner acts as a waterproof barrier, preventing any water leakage into the subfloor. Carefully install the liner according to the manufacturer’s instructions, ensuring that it covers the entire shower floor surface and properly overlaps the drain. Once the liner is in place, install the drain cover securely to complete the installation process.
By following this step-by-step guide, you can confidently install a shower stall drain. Remember to choose the right type of drain system, accurately measure and mark the drain location, cut the hole with proper alignment, connect and secure the drain body, and install the shower pan liner and drain cover. With proper installation, you can ensure a functional and leak-free shower stall drain for years to come.
4. Tips And Best Practices For A Successful Drain Installation
When it comes to installing a shower stall drain, following tips and best practices can make all the difference in ensuring a successful and leak-free installation. In this section, we will discuss three crucial aspects of drain installation that should not be overlooked: using appropriate sealants and adhesives, ensuring proper slope and drainage, and testing the drain system.
Using appropriate sealants and adhesives for a watertight connection
One of the key factors in a successful shower stall drain installation is ensuring a watertight connection. This can be achieved by using the appropriate sealants and adhesives. When choosing sealants, opt for ones that are specifically designed for shower installations and are resistant to water and mold. Silicone-based sealants are often recommended for their flexibility and superior water resistance.
Additionally, it is essential to use the right adhesive for securing the drain body to the shower base or floor. Make sure to check the manufacturer’s instructions to determine the type of adhesive suitable for the specific drain material, whether it’s PVC, ABS, or cast iron.
Ensuring proper slope and drainage to prevent clogs and leaks
Adequate slope and drainage play a critical role in preventing clogs and leaks in your shower stall drain. It is essential to ensure that the shower floor slopes downward toward the drain, allowing water to flow freely and efficiently.
Some important things to consider include:
- Follow the manufacturer’s guidelines on the required slope for your specific shower base or floor material.
- Use a leveling tool to ensure the correct slope is achieved.
- Avoid low spots or depressions that can hinder proper drainage.
Testing the drain system for any potential issues before finalizing the installation
Before finalizing the installation, it is crucial to test the drain system for any potential issues. This will help you identify and address any problems before they develop into more significant complications.
Here are some steps to follow during the testing process:
- Pour a bucket of water into the shower stall to simulate normal water usage.
- Observe for any leaks or water pooling around the drain area.
- Check the drainage speed and make sure the water is efficiently flowing down the drain.
If you notice any issues during the testing phase, it is essential to address them promptly to avoid future inconveniences or potential water damage.
By following these tips and best practices, you can ensure a successful shower stall drain installation that is leak-free, efficient, and long-lasting!
5. Maintaining And Troubleshooting Your Shower Stall Drain
Once you have successfully installed your shower stall drain, it is important to know how to maintain and troubleshoot it to ensure it functions properly for years to come. This section will cover regular cleaning and maintenance tips to prevent buildup and clogs, as well as identifying common problems and troubleshooting techniques. Additionally, we will discuss when it is appropriate to seek professional help for complex drain issues.
Regular cleaning and maintenance to prevent buildup and clogs
Regular cleaning and maintenance of your shower stall drain are essential to prevent the buildup of soap scum, hair, and other debris that can lead to clogs and unpleasant odors. By following these steps, you can keep your shower drain running smoothly:
- Use a drain cover or strainer to catch hair and larger debris before it can enter the drain.
- Remove the drain cover or strainer and clean it regularly to prevent buildup.
- Once a week, pour boiling water down the drain to help dissolve any soap scum or grease.
- Every few months, use a drain cleaner specifically designed for shower drains to break down any accumulated debris.
- If you notice any slow draining or unpleasant odors, use a mixture of baking soda and vinegar to unclog and deodorize the drain. Let it sit for a few minutes before rinsing with hot water.
Identifying common problems and troubleshooting techniques
Even with regular maintenance, you may encounter some common problems with your shower stall drain. By being able to identify these issues, you can troubleshoot them effectively:
| Problem | Troubleshooting Technique |
|---|---|
| Clogged drain | Use a plunger or a drain snake to remove any blockages. If the clog persists, try using a drain cleaning solution or seek professional help. |
| Slow draining | Pour boiling water down the drain to dissolve any buildup. If the problem persists, use a drain cleaner or seek professional help. |
| Unpleasant odor | Flush the drain with boiling water and a mixture of baking soda and vinegar to eliminate any trapped debris causing the odor. |
Seeking professional help for complex drain issues
If you have tried troubleshooting your shower stall drain and the problem persists or worsens, it may be time to seek professional help. Complex drain issues, such as major clogs or damaged pipes, require the expertise of a licensed plumber. They have the tools and knowledge to diagnose and repair the problem efficiently, ensuring your shower drain functions properly once again.
By regularly cleaning and maintaining your shower stall drain and knowing how to troubleshoot common issues, you can keep your bathroom functioning smoothly and avoid the inconvenience of a clogged or malfunctioning drain. Remember, if you encounter a complex drain issue, it is always best to seek professional assistance.
6. Enhancing Your Bathroom With Innovative Drain Options
When it comes to upgrading your bathroom, installing a shower stall drain can make a significant difference in both design and functionality. Gone are the days of traditional and mundane drains; now, you have a wide range of innovative options to choose from. In this section, we will explore different types of shower stall drains available, consider design and functionality features for a personalized touch, and discuss how upgrading your bathroom with modern and stylish drain options can elevate the overall aesthetics of your space.
Exploring different types of shower stall drains available
Shower stall drains come in various types, each with its own set of features and benefits. One popular option is the linear drain, which offers a sleek and contemporary look. These drains are long and narrow, positioned in one edge or corner of the shower area. Not only do linear drains efficiently collect water, but they also provide a seamless transition between the shower floor and the rest of the bathroom.
Another type of drain to consider is the center drain. As the name suggests, this drain is located in the center of your shower stall. Center drains are often chosen for their simplicity and functional design. With minimalistic style and excellent drainage capabilities, they can be an ideal choice for bathrooms with a minimalist aesthetic.
If you prefer a more natural and organic feel, then a point drain might be the perfect fit for your shower. These drains resemble traditional circular ones but offer improved aesthetics and efficiency. Point drains are available in various designs, making it easy to find one that complements the overall theme of your bathroom.
Considering design and functionality features for a personalized touch
When selecting a shower stall drain, it’s important to consider both design and functionality to create a customized and personalized bathroom experience. Look for features such as adjustable drain covers that match your overall bathroom decor. Additionally, choose a drain size that suits your water flow needs. Opting for a larger drain size can prevent clogging and improve water drainage efficiency.
Furthermore, consider drain materials that not only enhance the visual appeal but also ensure durability. Stainless steel is a popular choice due to its sleek appearance, corrosion resistance, and easy maintenance. Copper and brass are also viable options, adding a touch of elegance and luxury to your shower stall.
Upgrading your bathroom with modern and stylish drain options
Bring your bathroom into the 21st century by upgrading with modern and stylish drain options. By incorporating innovative drain designs, you can elevate the overall aesthetics of your space while simultaneously improving functionality.
One trend in bathroom design is the incorporation of patterned or decorative drain covers. These covers can turn a mundane drain into a focal point, adding a touch of personality and style to your shower stall. Choose a cover that complements your existing bathroom fixtures, or opt for a contrasting color or pattern to create a visual statement.
Additionally, consider LED-illuminated drains that add a futuristic and luxurious vibe to your shower. These drains feature built-in LED lights that softly illuminate the waterflow, turning your shower into a relaxing and immersive experience.
In conclusion, exploring different types of shower stall drains, considering design and functionality features, and upgrading your bathroom with modern and stylish options can significantly enhance your overall bathroom experience. Take the opportunity to elevate your bathroom’s design, transforming it into a space that seamlessly combines aesthetics and functionality.
Frequently Asked Questions
What Holds A Shower Drain In Place?
A shower drain is held in place by a drain flange, screws, and a waterproof sealant. The drain flange sits on top of the drain pipe and is secured with screws. A waterproof sealant is then applied around the edges to prevent leaks.
How Do You Seal A Shower Stall Drain?
To seal a shower stall drain, follow these steps: 1. Clean the drain thoroughly to remove any debris or residue. 2. Apply a waterproof sealant around the edges of the drain. 3. Press a rubber shower drain gasket onto the drain to create a tight seal.
4. Install the drain cover and ensure it is securely tightened. 5. Test the seal by running water into the shower and checking for any leaks.
Do You Have To Put Mortar Under A Shower Pan?
Yes, it is necessary to put mortar under a shower pan for stability and proper water drainage. The mortar acts as a solid support base and helps prevent flexing of the shower pan, ensuring a long-lasting installation.
Can You Install A Shower Drain From The Top?
Yes, you can install a shower drain from the top. It’s a straightforward process that involves removing the existing drain cover and inserting the new one. Make sure to follow the manufacturer’s instructions and use proper tools for a secure and leak-free installation.
Conclusion
Installing a shower stall drain is an essential step in creating a functional and efficient bathroom. By following the steps outlined in this blog post, you can confidently tackle this project on your own. Remember to gather all necessary tools, carefully measure the drain’s location, and secure the drain in place.
With patience and attention to detail, you’ll have a properly functioning shower stall in no time. Happy DIY-ing!
