To install shower kits, first, gather all the necessary tools and materials. Then, carefully follow the manufacturer’s instructions for assembly and installation.
Welcome to the world of shower kits! If you’re planning to upgrade your bathroom with a new shower, installing a shower kit can be a great option. Whether you’re a DIY enthusiast or simply looking to save some money on installation costs, this guide will walk you through the steps of installing shower kits.
With the right tools and a little patience, you’ll have a brand-new shower in no time. So, let’s dive in and get started on your shower kit installation journey!
Materials Needed For Shower Kit Installation
When it comes to installing a shower kit, having the right materials is essential to ensure a smooth and successful installation. Before you begin, gather the following tools and supplies:
Shower kit
A shower kit is the main component you will need to install your new shower. Choose a kit that suits your style preferences and fits within the dimensions of your bathroom. Whether you opt for a complete kit or assemble your own from individual components, make sure it includes all the necessary parts, such as wall panels, a base, and a showerhead.
Adjustable wrench
An adjustable wrench is an indispensable tool for plumbing projects. It allows you to tighten or loosen nuts and bolts of various sizes easily. This tool will come in handy when connecting pipes and fixtures, ensuring a secure and leak-free installation.
Screwdriver
A screwdriver is another essential tool that you’ll need during the installation process. It enables you to tighten screws and fasten various components securely. Make sure you have both a flathead and a Phillips head screwdriver in your toolbox.
Level
A level is a valuable tool for ensuring your shower kit is installed correctly and evenly. It helps you determine if the walls and base are plumb and level, preventing any future issues such as water pooling or uneven tile installation.
Caulk
Caulk is a sealant that is used to fill gaps and create watertight seals. It is an essential material for shower kit installation as it helps prevent water leakage and protects against mold and mildew. Choose a caulk specifically designed for use in wet areas and ensure it matches your shower’s color scheme.
Tape measure
A tape measure is necessary for accurate measurements during the installation process. It allows you to determine the correct dimensions for positioning the shower kit components, ensuring a seamless fit. Measure the space carefully to avoid any costly mistakes or inconveniences down the line.
With these materials in your arsenal, you’ll be well-prepared to tackle the installation of your new shower kit. Next, let’s move on to the step-by-step installation process.

Step 1: Preparing The Shower Area
Before you begin the exciting process of installing a new shower kit, it’s important to properly prepare the shower area. This allows for a smooth and hassle-free installation, ensuring that your shower kit fits perfectly and functions optimally. In this step, we will go through the necessary tasks of measuring the shower area, removing any existing fixtures or fittings, and cleaning the shower area to create a clean and blank canvas for your new shower kit.
Measuring the shower area
The first step in preparing the shower area is to measure the space where your shower kit will be installed. This ensures that you select the right size of shower kit and that it fits perfectly into your bathroom. To measure the shower area, follow these simple steps:
- Grab a measuring tape.
- Measure the width of the shower area from wall to wall.
- Measure the height of the shower area from the floor to the ceiling or the desired height of your shower.
- Note down the measurements to refer to when selecting a suitable shower kit.
By accurately measuring the shower area, you can confidently choose a shower kit that fits perfectly, eliminating any unnecessary adjustments or modifications later on.
Removing any existing fixtures or fittings
Before installing your new shower kit, it’s crucial to remove any existing fixtures or fittings that might obstruct the installation process. This step ensures a clean and unobstructed space for your new shower. Follow these simple steps to remove the existing fixtures or fittings:
- Turn off the water supply to the shower area.
- Using the appropriate tools, remove the showerhead, faucet handles, and any other fixtures attached to the shower wall.
- If there is a shower pan or bathtub, remove it carefully according to the manufacturer’s instructions.
- Dispose of the old fixtures and fittings properly or save them for future use if they are still in good condition.
By removing any existing fixtures or fittings, you create a clean and uncluttered space to work with, making the installation process much easier and more efficient.
Cleaning the shower area
Once you have removed any existing fixtures or fittings, it’s time to clean the shower area thoroughly. This ensures that the new shower kit adheres properly and allows for a fresh and hygienic start. Follow these steps to clean the shower area:
- Remove any debris, such as loose tiles or old sealant, from the shower area.
- Thoroughly clean the walls, floor, and corners of the shower area using a suitable cleaner or disinfectant.
- Remove any soap scum, grime, or mold using a scrub brush or sponge.
- Rinse the shower area with water to remove any residue from the cleaning process.
- Allow the shower area to dry completely before proceeding with the installation.
By cleaning the shower area thoroughly, you create an ideal surface for the new shower kit, ensuring a seamless installation and a fresh, clean start.

Step 2: Installing The Shower Base
Once you have prepared the shower area and assembled all the necessary tools and materials, it’s time to move on to the second step of installing your shower kit: installing the shower base. The shower base is an important component that provides a sturdy foundation for your shower enclosure.
Placing the shower base in position
Before placing the shower base, ensure that the floor is clean and free from debris. Carefully position the shower base in the desired location, aligning it with the plumbing connections. Use a measuring tape to check if the base is centered and ensure there is enough space for proper drainage.
Checking the level of the shower base
Ensuring that the shower base is level is crucial for proper water drainage. Use a level tool to check the base’s levelness in all directions. If the base is not level, you can use shims or adjustable feet to make necessary adjustments. This step is crucial to avoid water pooling or drainage issues in the future.
Securing the shower base in place
Once you have confirmed that the shower base is level, it’s time to secure it in place. Follow the manufacturer’s instructions to determine the appropriate method for securing the base. This may involve using screws, adhesive, or a combination of both. Ensure that the base is securely fastened to the floor, providing stability for the entire shower enclosure.
Testing the stability of the shower base
With the shower base securely in position, now is the time to test its stability. Apply gentle pressure to different areas of the base to check for any movement or flexing. The base should feel solid and stable, without any noticeable give. If you detect any issues, double-check the installation and make any necessary adjustments before proceeding to the next step.
By following these steps, you can ensure a proper installation of the shower base, providing a sturdy foundation for your shower enclosure. Next, we will move on to step 3, which involves installing the shower walls.
Step 3: Attaching The Shower Walls
Once you have prepared the shower walls, it’s time to begin the installation process. Follow these steps to ensure a secure and proper attachment of the shower wall panels.
Preparing the shower walls for installation
Before attaching the shower walls, make sure they are clean and dry. Remove any dirt, dust, or debris that may prevent the panels from adhering properly. Also, check the walls for any imperfections such as bumps or uneven surfaces. Smooth out any rough areas to ensure a flat and even installation.
Installing the first shower wall panel
Begin by positioning the first shower wall panel at one corner of the shower area. Start from the bottom and lift the panel into place. Ensure that it aligns with the pre-marked level or reference line on the wall. Use a level to check if the panel is vertically straight.
Checking the alignment of the first panel
Double-check the alignment of the first panel before proceeding further. An accurate alignment is crucial to maintain a level and seamless installation. Use shims to adjust the position of the panel if necessary, ensuring it is perfectly aligned with the reference line.
Installing the remaining shower wall panels
Continue the installation process by attaching the remaining shower wall panels. Follow the same method as the first panel, ensuring that each panel aligns properly with the previous one and maintains a level position. Apply gentle pressure to push the panels against the adhesive or mounting brackets.
Securing the shower wall panels together
Once all the shower wall panels are in place, it’s time to secure them together. Depending on the specific shower kit, there may be different methods to ensure a secure fit. This can include using screws, adhesive, or interlocking mechanisms. Consult the manufacturer’s instructions for the recommended method to secure the panels. Ensure that the panels are tightly joined together to prevent any water leakage or movement.
In conclusion, attaching the shower walls is a critical step in the installation process. By properly preparing the walls, aligning the panels accurately, and securing them together, you can create a sturdy and aesthetically pleasing shower enclosure. Follow these steps and refer to the manufacturer’s instructions for a successful installation.
Step 4: Installing The Shower Door
Installing the shower door is the final step in creating a stylish and functional shower space. A properly installed shower door not only enhances the overall look of your bathroom but also provides a barrier to keep water from splashing out. Follow these steps to install the shower door with ease:
Measuring and marking the position of the shower door
Before you begin installing the shower door, it’s crucial to measure and mark the position accurately. Start by measuring the width and height of the shower opening. Use a measuring tape to ensure precise measurements.
Once you have the measurements, mark the position of the door frame on the wall and the shower base. Use a pencil or a marker to make clear and visible markings, ensuring that they are level and plumb.
Attaching the shower door frame
Next, it’s time to attach the shower door frame. Carefully align the door frame with the markings on the wall and the shower base. Use a level to ensure that the frame is straight and even from top to bottom. Once you’re satisfied with the alignment, secure the frame into place using the appropriate screws or anchors, depending on the materials of your shower walls.
Installing the shower door panels
Now that the frame is securely attached, it’s time to install the shower door panels. Carefully place the panels into the frame and ensure they are aligned properly. Most shower doors come with pre-drilled holes for the panels, making installation easier. Attach the panels to the frame using the provided screws or clips. Double-check the alignment and make any necessary adjustments.
Adjusting the shower door for proper fit
After installing the shower door panels, it’s essential to check if the door opens and closes smoothly. Adjust the hinges or rollers, if necessary, to ensure a proper fit. The door should move freely without any interference or binding. Take your time with this step to ensure the door operates smoothly and effortlessly.
Ensuring proper sealing and waterproofing around the door
Proper sealing and waterproofing around the shower door are crucial to prevent any water leakage. Apply a silicone sealant or caulk along the edges of the door frame and where it meets the shower walls or base. This will create a watertight seal and prevent water from escaping. Be thorough and ensure that all gaps and seams are adequately sealed to provide maximum protection against water intrusion.
By following these simple steps, you can successfully install your new shower door and create a beautiful, functional, and leak-free shower space!
Step 5: Connecting The Plumbing
Once you have successfully installed the showerhead and faucet, it’s time to move on to the next crucial step: connecting the plumbing. This step involves connecting the water supply pipes to ensure a smooth and functional water flow. In this section, we will guide you through the process of connecting the plumbing pipes and testing the water flow for any potential leaks.
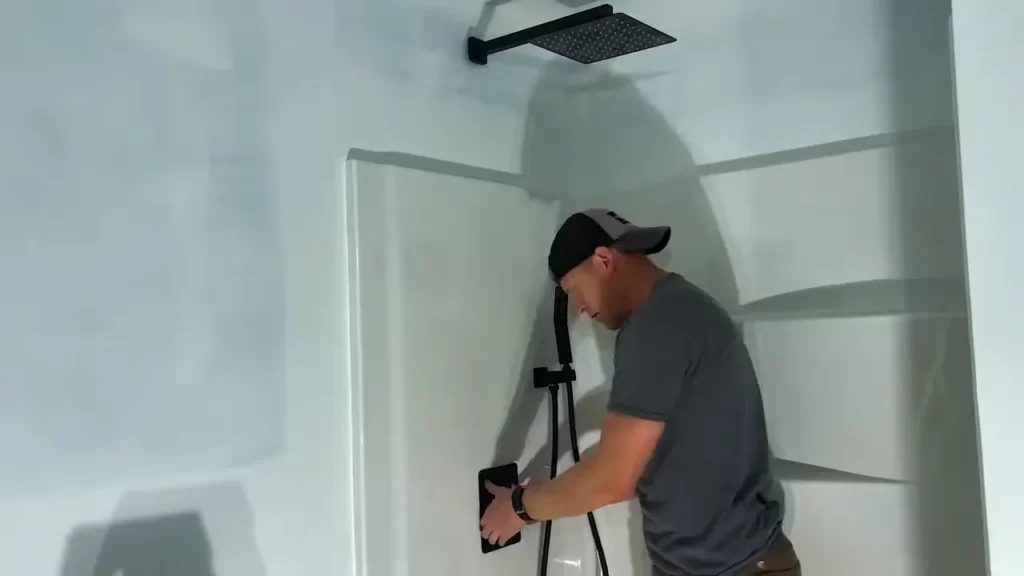
Installing the showerhead and faucet
Before you can connect the plumbing pipes, make sure to properly install the showerhead and faucet. Follow these steps:
- Start by attaching the showerhead to the shower arm, making sure it is tightly secured. Use a wrench if necessary.
- Next, apply plumber’s tape to the threads of the faucet connections to prevent any leaks.
- Now, screw the faucet onto the valve, ensuring a tight fit. Use a wrench or pliers if needed, but remember to protect the faucet finish with a cloth to avoid any scratches.
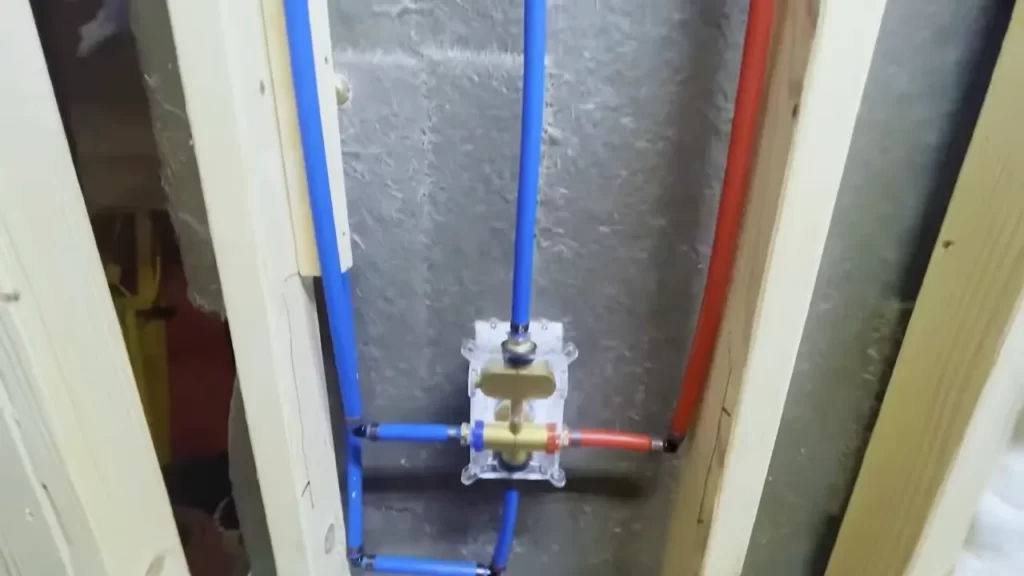
Connecting the plumbing pipes
After installing the showerhead and faucet, you can proceed with connecting the plumbing pipes. This involves connecting the water supply pipes to the faucet and showerhead. Follow these steps:
- Start by determining the type of plumbing pipes you have, such as copper or PVC.
- Measure and cut the pipes to the appropriate length using a pipe cutter or saw. Ensure the cuts are clean and straight.
- Attach the pipes to the faucet and showerhead connections using appropriate fittings or connectors. Make sure to tighten them securely to prevent any leaks.
- If necessary, apply plumber’s tape to the threaded connections for extra security against leaks.
Testing the water flow and checking for leaks
Once you have connected the plumbing pipes, it’s crucial to test the water flow and check for any leaks. Follow these steps:
- Turn on the water supply and observe the water flow from the showerhead and faucet. Ensure the flow is consistent and without any disruptions.
- Check all the connections for possible leaks by inspecting for any dripping water or dampness. If you notice any leaks, tighten the connections or apply plumber’s tape as needed.
- If everything looks good, let the water run for a few minutes to ensure there are no hidden leaks. Monitor the pipes and connections for any signs of dripping or moisture.
- Once you are satisfied with the water flow and confirmed there are no leaks, congratulations! You have successfully connected the plumbing for your shower kit.
By following these steps, you can ensure a proper and functional plumbing connection for your shower kit, providing you with a seamless and enjoyable shower experience.
Step 6: Finishing Touches
Once you have successfully installed your shower kit, it’s time to put the finishing touches to ensure a perfect end result. This step primarily involves applying caulk to the seams and edges, cleaning up any excess caulk, and checking for any final adjustments or touch-ups. Follow the instructions below to complete this last stage of your shower kit installation.
Applying caulk to the seams and edges
Applying caulk is an essential step to prevent water leakage and ensure a waterproof seal around the shower kit. Here’s how you can apply caulk:
- Cut the tip of the caulk tube at a 45-degree angle using a utility knife.
- Insert the tube into a caulking gun and push it until you feel resistance.
- Hold the caulking gun at a 45-degree angle and apply a thin, continuous bead of caulk along the seams and edges of the shower kit.
- Smooth the caulk using a caulk smoothing tool or your finger, making sure it fills any gaps or cracks completely.
Cleaning up any excess caulk
After applying caulk, it’s important to clean up any excess to achieve a neat and professional finish. Follow these steps to clean up excess caulk:
- Moisten a rag or sponge with water and gently wipe away any excess caulk.
- Use a damp cloth or paper towel to remove any caulk smears or fingerprints.
- Allow the caulk to dry completely before proceeding to the next step.
Checking for any final adjustments or touch-ups
Before considering the installation complete, take a few moments to perform some final checks and touch-ups:
- Inspect all the seams and edges to ensure they are properly sealed and free from any gaps or cracks.
- If you notice any areas that require additional caulk or touch-up, apply the necessary amount of caulk and smooth it as previously demonstrated.
- Allow the caulk to dry completely before using the shower.
By following these instructions for applying caulk, cleaning up excess caulk, and checking for any final adjustments or touch-ups, you’ll ensure a professional, watertight, and visually appealing installation for your shower kit.
Frequently Asked Questions
Can I Install A Shower Kit Myself?
Yes, you can install a shower kit yourself. It is a DIY project that can be done with proper tools and instructions. Just make sure to follow the instructions carefully and take necessary safety precautions. It is always a good idea to consult a professional if you are unsure about any step.
How Do You Install A Shower Wall Kit?
To install a shower wall kit, follow these steps: 1. Measure and mark the wall for proper placement. 2. Prepare the wall surface by cleaning and removing any old materials. 3. Apply adhesive or caulk to the back of each panel and press it onto the wall.
4. Secure the panels with screws or nails as instructed. 5. Seal the edges and joints with silicone caulk for a watertight seal.
What Goes Behind A Shower Kit?
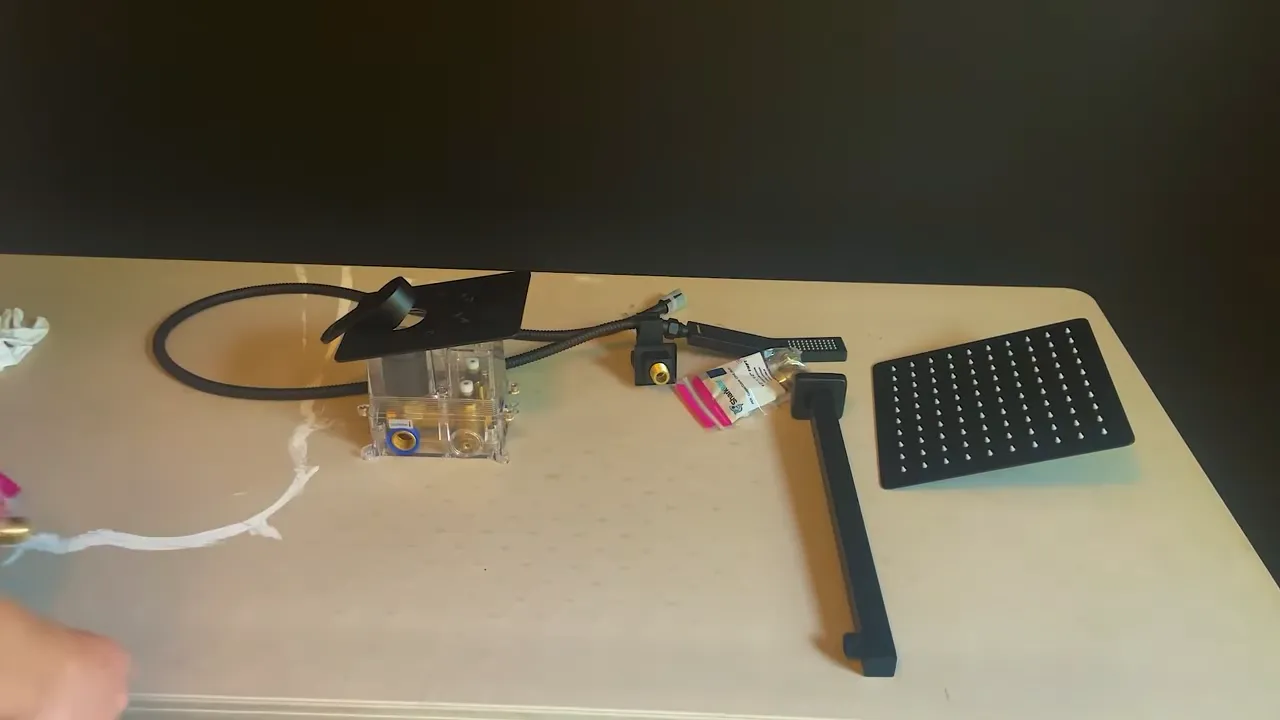
A shower kit typically includes a showerhead, shower hose, and mounting accessories. Some kits may also include a shower arm, diverter valve, and handheld showerhead. These components come together to provide a complete showering experience.
How Much Does It Cost To Have A Shower Kit Installed?
The cost of installing a shower kit varies depending on factors like the kit type, size, and complexity. On average, you can expect to spend between $500 to $3,000 for the installation. However, prices may fluctuate depending on your location and additional customization requirements.
Conclusion
Installing shower kits can greatly enhance the functionality and aesthetic appeal of your bathroom. By following the step-by-step guide provided in this blog post, you can confidently install shower kits without the need for professional assistance. Remember to gather all the necessary tools and materials, prepare the area properly, and follow the instructions carefully.
With a little patience and attention to detail, you can successfully complete this DIY project and enjoy a refreshing and stylish shower experience in no time.