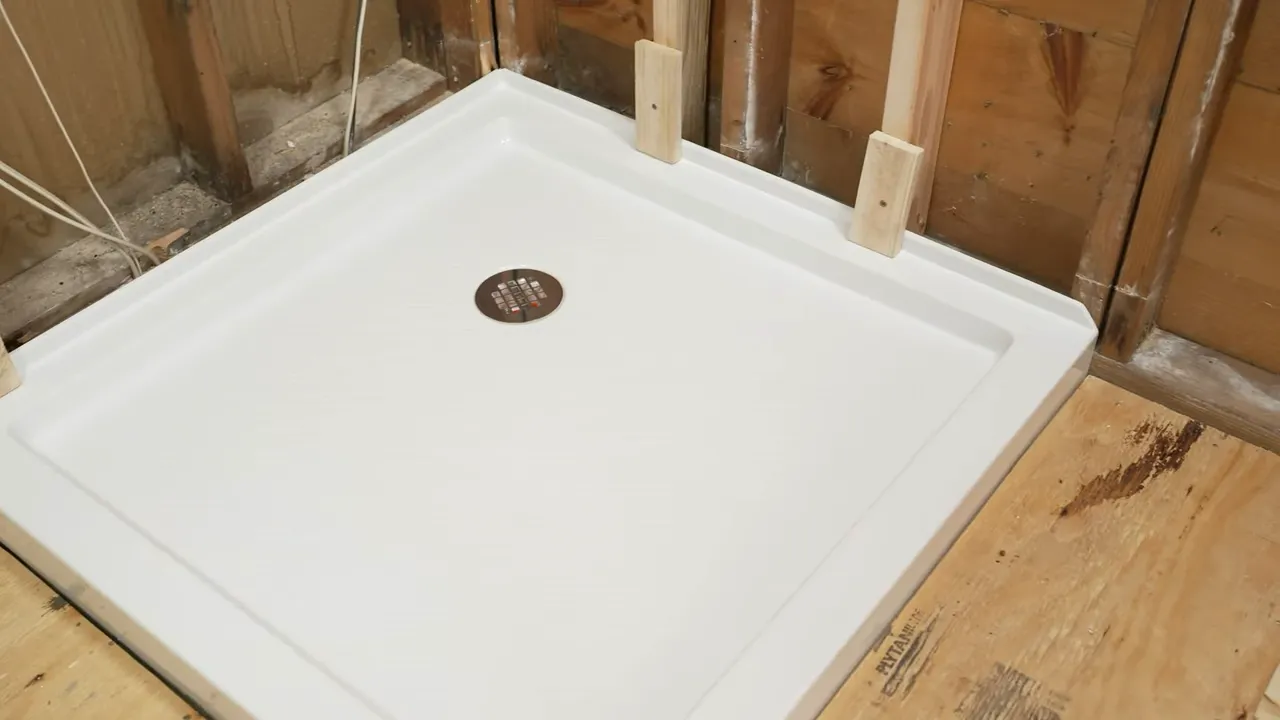
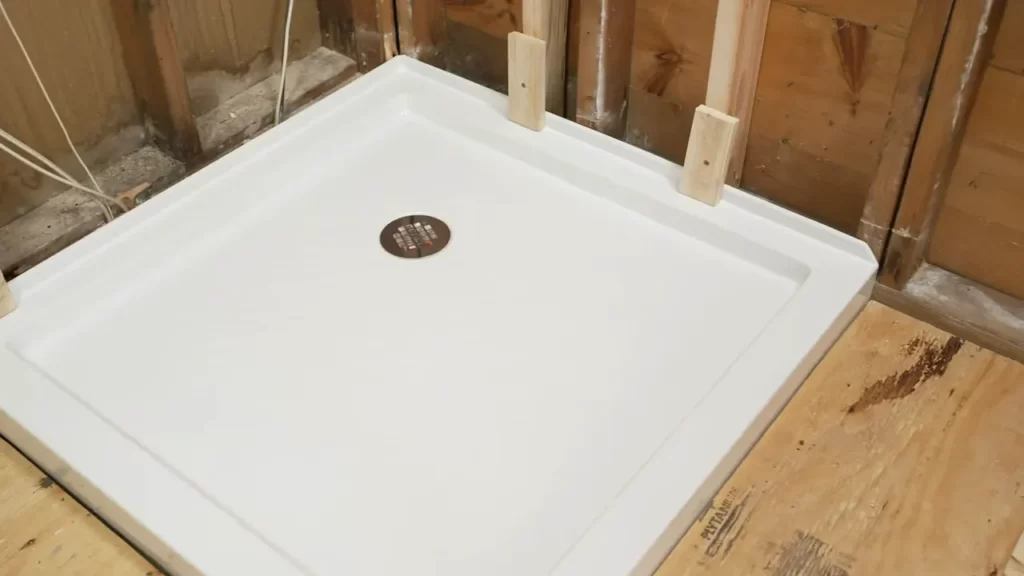
To install an acrylic shower pan, start by leveling the floor and making sure it is clean and debris-free. Then, position the pan in place, ensuring the drain opening aligns with the plumbing.
After that, secure the pan to the floor using the appropriate adhesive and fasteners, making sure it is level and properly aligned. Finally, connect the drain pipe and test the pan for leaks.
What Is An Acrylic Shower Pan?
Definition and Description of an Acrylic Shower Pan
An acrylic shower pan is a type of shower base made from solid sheets of acrylic material. It is designed to fit into the shower floor and serves as a watertight base for your shower enclosure. Unlike traditional shower pans that are often made from materials such as fiberglass or ceramic, acrylic offers several unique advantages.
Acrylic shower pans are lightweight, yet durable, making them easy to handle and install. They are available in a wide range of sizes and shapes, allowing you to choose the perfect fit for your bathroom. Additionally, acrylic shower pans can be customized to meet your specific design preferences, offering a variety of colors and patterns to complement your bathroom décor.
These shower pans are non-porous, which means they are resistant to mold, mildew, and stains. This makes them incredibly easy to clean and maintain, saving you time and effort in your bathroom routine. Furthermore, the smooth surface of acrylic shower pans is slip-resistant, ensuring your safety while showering.
Benefits of Using Acrylic Shower Pans
There are several benefits to choosing an acrylic shower pan for your bathroom:
- Easy Installation: Acrylic shower pans are lightweight and easy to install, reducing the time and effort required for the installation process.
- Customizable Design: With a wide range of colors and patterns available, acrylic shower pans offer endless design possibilities, allowing you to create a unique and personalized look for your bathroom.
- Durability: Despite their lightweight nature, acrylic shower pans are durable and long-lasting. They are resistant to cracks, chips, and fading, ensuring that your shower base remains in excellent condition for years to come.
- Low Maintenance: The non-porous surface of acrylic shower pans repels dirt and grime, making them incredibly easy to clean. A simple wipe down with a mild cleanser is all that is needed to keep your shower base looking like new.
- Comfort: Acrylic shower pans are warm to the touch and retain heat, providing a comfortable and enjoyable showering experience.
- Cost-effective: Acrylic shower pans are generally more affordable compared to other shower base materials, making them a budget-friendly option without compromising on quality or style.
Overall, an acrylic shower pan offers a combination of practicality, durability, and aesthetic appeal. Its versatility and low maintenance requirements make it a popular choice for homeowners looking to upgrade their bathroom.
Key Considerations Before Installation
Before installing an acrylic shower pan, it is crucial to carefully consider certain factors to ensure a successful installation. This section will guide you through the key considerations that need to be addressed before proceeding.
Assessing the bathroom layout and space requirements
First and foremost, assess your bathroom layout to determine if it is suitable for an acrylic shower pan installation. Consider the available space and how it will accommodate the shower pan dimensions. Take into account any existing fixtures or features in the bathroom that may affect the installation process. This assessment will help you determine if any modifications are needed to accommodate the new shower pan effectively.
Measuring the shower area accurately
Accurate measurements are essential for a precise installation of an acrylic shower pan. To measure the shower area, follow these step-by-step instructions:
- Prepare your measuring tape, level, and pencil.
- Start by measuring the length of the shower area from one wall to the other. Record this measurement.
- Next, measure the width of the shower area from the back wall to the front edge. Take note of this measurement as well.
- To ensure accuracy, measure the diagonals of the shower area. The measurements should be identical, indicating that the area is square. If the measurements differ, adjustments may be required.
- Transfer these measurements onto a piece of paper or a digital device for reference during the installation process.
Following proper measuring techniques is essential to avoid any errors or fitting issues during the installation. It is worth taking the time to measure accurately to ensure a seamless and leak-free installation of your acrylic shower pan.
Gathering The Necessary Tools And Materials
Before you begin with the installation of an acrylic shower pan, it is crucial to ensure you have all the necessary tools and materials at hand. Gathering these beforehand will save you time and frustrations later on. In this section, we will discuss the essential tools and recommended materials you will need for a seamless acrylic shower pan installation.
Essential tools required for the installation process
To successfully install an acrylic shower pan, you will need the following tools:
- Measuring tape: This tool will help you accurately measure the dimensions of your shower space.
- Pencil: Use a pencil to mark the measurements and outline of the shower pan.
- Power drill: A power drill will be needed to create holes for screws and attachments.
- Screwdriver: A screwdriver is essential for tightening and loosening screws during the installation process.
- Level: A level will ensure that your acrylic shower pan is properly aligned and leveled.
- Tile saw or utility knife: Depending on the type of material you are working with, you will need either a tile saw or utility knife for cutting.
- Caulking gun: This tool will be used to apply silicone caulk to seal the edges of the shower pan.
- Plumber’s tape: Plumber’s tape will help create a watertight seal between the shower pan and the drain.
- Safety glasses and gloves: It is essential to protect yourself during the installation process by wearing safety glasses and gloves.
Recommended materials for a seamless acrylic shower pan installation
To achieve a seamless acrylic shower pan installation, the following materials are highly recommended:
| Materials | Description |
|---|---|
| Acrylic shower pan: | Choose a high-quality acrylic shower pan that is durable and fits the dimensions of your shower space. |
| Drain assembly: | Select a drain assembly that is compatible with your acrylic shower pan and provides efficient water drainage. |
| Silicone caulk: | Invest in a waterproof silicone caulk that is specifically designed for use in showers. This will ensure a tight seal around the edges of the shower pan. |
| Plumber’s tape: | Get a roll of plumber’s tape to create a secure and watertight seal between the shower pan and the drain. |
| Shims: | Shims will help level the shower pan and provide support during the installation process. |
By gathering these essential tools and recommended materials, you will be well-prepared to install an acrylic shower pan without any hassle. Make sure to double-check your measurements and follow the manufacturer’s instructions for a successful installation.

Removing The Old Shower Pan (If Applicable)
Removing the old shower pan is a crucial step in installing an acrylic shower pan. If you’re replacing your current shower pan, you’ll need to safely dismantle and remove it before proceeding with the installation process. This section will guide you through the necessary steps and precautions to take to ensure a smooth and hassle-free removal.
Steps to safely dismantle and remove the existing shower pan
Here are the steps to follow when removing the old shower pan:
- 1. Begin by turning off the water supply to the shower. This will prevent any accidental leaks or water damage during the removal process.
- 2. Next, remove any attachments or fixtures connected to the shower pan, such as showerheads, faucets, and drain covers. Use the appropriate tools, such as a wrench or screwdriver, to disconnect and remove these components.
- 3. Once the attachments are removed, inspect the edges of the shower pan to identify any visible seals or adhesive materials. Carefully cut or scrape away these seals using a utility knife or putty knife, taking care not to damage the surrounding tiles or walls.
- 4. After removing the seals, locate any screws or fasteners securing the shower pan to the subfloor. Use a screwdriver or power drill to unscrew these fasteners, ensuring you keep them in a safe place for later use.
- 5. With the attachments, seals, and screws removed, it’s time to lift and remove the old shower pan. Enlist the help of a friend or family member to assist you with this step, as shower pans can be heavy and awkward to handle.
- 6. Carefully lift the old shower pan, being mindful of any remaining adhesive or caulking. If the shower pan doesn’t come off easily, gently tap it with a rubber mallet or pry it away using a crowbar.
- 7. Once the old shower pan is removed, clean the area thoroughly to prepare it for the installation of the new acrylic shower pan. Use a mild cleanser and a sponge or cloth to remove any debris, residue, or adhesive left behind.
Precautions to take during the removal process
While removing the old shower pan, it’s essential to take certain precautions to ensure safety and prevent any damage. Here are some precautions to keep in mind:
- • Wear protective gloves and safety goggles to protect your hands and eyes from any sharp edges or debris during the removal process.
- • Use proper lifting techniques and avoid straining your back or muscles. Seek assistance if needed.
- • Take care not to damage the surrounding tiles, walls, or plumbing fixtures when removing the old shower pan.
- • If you encounter any stubborn adhesive or caulking, avoid using excessive force that could cause damage. Instead, try using a solvent or specific adhesive remover to soften the material for easier removal.
- • Dispose of the old shower pan responsibly, following your local waste disposal guidelines.
By following these steps and precautions, you’ll be well-prepared to safely and efficiently remove your old shower pan, making way for the installation of a new and stylish acrylic shower pan.
Preparing The Subfloor For Installation
Before installing an acrylic shower pan, it is essential to prepare the subfloor to ensure a stable and reliable base. This step is crucial for both the longevity of the shower pan and the overall functionality of your shower. In this section, we will explore two important aspects of preparing the subfloor for installation: inspecting and repairing the subfloor for stability, and ensuring proper slope and drainage for the shower pan.
Inspecting and repairing the subfloor for stability
The first step in preparing the subfloor for your acrylic shower pan is to thoroughly inspect it for any signs of damage, rot, or instability. This is crucial as a weak or deteriorated subfloor can lead to sagging, flexing, or even failure of the shower pan. To inspect the subfloor, follow these steps:
- Begin by removing the existing flooring material and exposing the subfloor. Take note of any areas that feel soft, spongy, or uneven.
- Next, visually inspect the subfloor for any signs of water damage, such as discoloration, mold, or mildew.
- Probe the subfloor with a screwdriver or similar tool to check for stability. If the screwdriver easily penetrates the wood or encounters any resistance, there may be rot or damage that needs to be addressed.
- If you discover any areas of concern during the inspection, it is essential to repair or replace the subfloor before proceeding with the installation. This may involve removing damaged sections, reinforcing weak areas with additional support, or replacing the entire subfloor if necessary.
- Once you have completed the necessary repairs, ensure that the subfloor is clean, dry, and free from any debris or obstructions that could interfere with the installation of the shower pan.
Ensuring proper slope and drainage for the shower pan
In addition to inspecting and repairing the subfloor, it is vital to ensure proper slope and drainage for your shower pan. This is crucial for preventing water accumulation and potential water damage. Follow these steps to ensure adequate slope and drainage:
- Determine the location of the drain in your shower pan and mark it on the subfloor.
- Using a level, determine the highest point of the subfloor and mark it. This will serve as the reference point for creating proper slope.
- Measure the distance between the highest point and the drain. This will help calculate the slope needed for the shower pan.
- To create the slope, you can use shims, mortar, or a pre-sloped shower pan kit, depending on your specific installation requirements.
- Follow the manufacturer’s instructions to ensure the correct slope is achieved. This will typically involve gradually building up the subfloor to create a gentle slope towards the drain.
- Lastly, double-check the slope using a level or by pouring a small amount of water on the subfloor and ensuring it flows towards the drain without any pooling or puddling.
By properly inspecting and repairing the subfloor for stability and ensuring proper slope and drainage, you are laying the foundation for a successful acrylic shower pan installation. Taking the time to adequately prepare the subfloor will help prevent future problems and ensure a shower that is both functional and durable for years to come.
Installing The Drain Assembly
Choosing the Appropriate Drain Assembly for the Shower Pan
When it comes to installing an acrylic shower pan, selecting the right drain assembly is crucial. It not only ensures proper drainage but also prevents any potential leaks or water damage down the line. So, let’s dive into the factors to consider while choosing the appropriate drain assembly for your shower pan.
Firstly, determine the size of your shower pan’s drain opening. Measure the diameter to ensure compatibility with the drain assembly you select. Additionally, consider the depth of your shower pan to ensure that the drain assembly will fit seamlessly within it.
Next, take into account the type of shower pan you have. Some drain assemblies are designed specifically for tile shower pans, while others are suitable for fiberglass or acrylic shower pans. It’s important to match the drain assembly with the material of your shower pan to ensure a proper seal and prevent any future complications.
Moreover, consider the style and finish of the drain assembly. You want it to complement the overall aesthetic of your bathroom. Choose a finish that matches the other fixtures and hardware in your shower to create a cohesive look.
Positioning and Securing the Drain Assembly Correctly
Now that you’ve chosen the right drain assembly for your acrylic shower pan, it’s time to position and secure it correctly. Follow these steps to ensure a successful installation:
- Start by placing the rubber gasket onto the drain assembly.
- Insert the drain assembly into the drain opening of your shower pan, making sure it fits snugly.
- Apply a bead of waterproof silicone caulk around the edges of the drain opening to create a watertight seal.
- Tighten the drain assembly using an adjustable wrench or pliers. Be careful not to overtighten, as this can cause damage to the shower pan.
- Wipe away any excess caulk with a damp cloth.
Remember, it’s important to follow the manufacturer’s instructions for your specific drain assembly, as installation methods may vary.
By following these simple steps and choosing the appropriate drain assembly, you’ll have a properly functioning and leak-free acrylic shower pan. Enjoy your new shower experience!
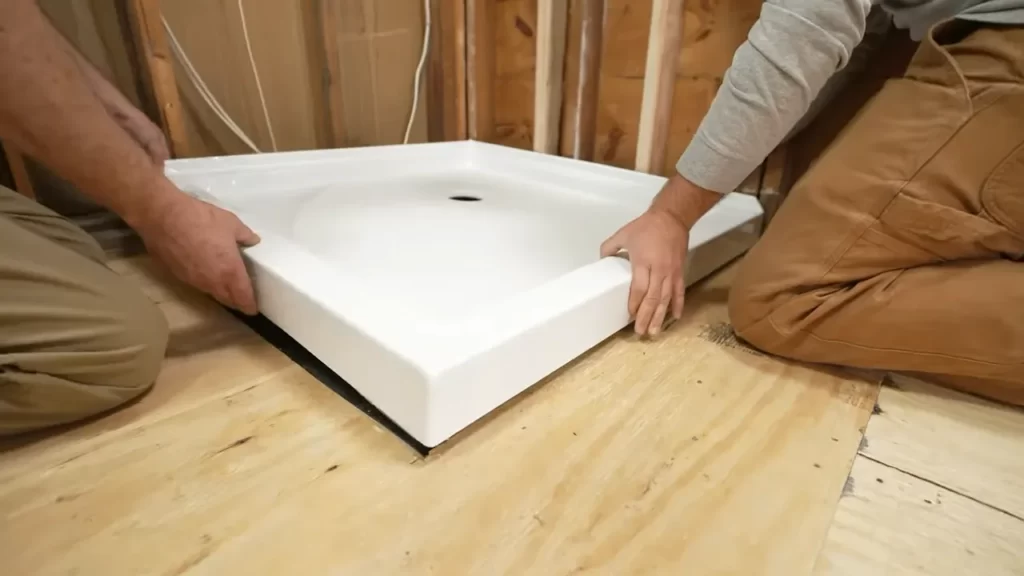
Placing And Sealing The Shower Pan
When it comes to installing an acrylic shower pan, one of the crucial steps is placing and sealing it correctly. This ensures that your shower area remains water-tight and prevents any leaks or damage to the underlying structure. In this section, we will guide you through the process of setting the acrylic shower pan in place and applying a quality sealant to achieve a watertight seal.
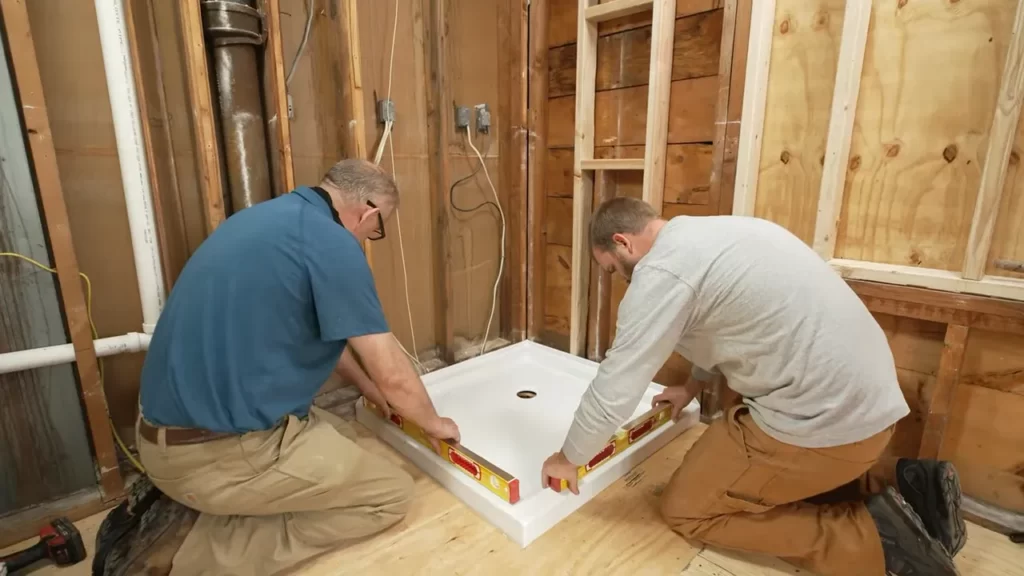
Setting the Acrylic Shower Pan in Place
To begin with, make sure you have properly prepared the subfloor before setting the acrylic shower pan. This may involve cleaning the subfloor, removing any debris, and ensuring it is level and dry. Once the subfloor is ready, follow these steps to set the acrylic shower pan in place:
- Measure and mark the location of the shower drain on the subfloor.
- Apply a layer of mortar or adhesive to the subfloor within the marked area. This will act as a base for the shower pan.
- Carefully place the acrylic shower pan on top of the mortar or adhesive, ensuring it aligns with the marked drain location.
- Press down firmly on the shower pan to ensure it makes proper contact with the mortar or adhesive and is level.
- Use a level to check the alignment of the shower pan from all sides and make any necessary adjustments.
- Secure the shower pan to the subfloor according to the manufacturer’s instructions, which may involve using screws or nails.
Applying a Quality Sealant for a Watertight Seal
Once the acrylic shower pan is securely in place, it’s important to apply a quality sealant to create a watertight seal. Here are the steps to follow:
- Clean the edges of the shower pan and the surrounding area to ensure there is no dirt or debris.
- Apply a bead of waterproof sealant along the joint between the shower pan and the wall, ensuring full coverage.
- Smooth out the sealant using a caulk gun or your finger to create a neat and even seal.
- Repeat the same process for the joint between the shower pan and the floor, as well as any other areas that require sealing.
- Allow the sealant to dry completely according to the manufacturer’s instructions before using the shower.
By following these steps and paying attention to detail, you can successfully place and seal your acrylic shower pan, providing a sturdy and leak-free foundation for your shower enclosure.
Connecting The Plumbing
Once you have successfully installed your acrylic shower pan, the next step is to connect the plumbing fixtures. This crucial step ensures that you have proper water flow and prevents any potential leaks in the future. In this section, we will discuss the process of routing and connecting the necessary plumbing fixtures, as well as checking for leaks and ensuring proper water flow.
Routing and connecting the necessary plumbing fixtures
Before you start connecting the plumbing fixtures, it is essential to have a clear understanding of how the water will flow within your shower. Take a moment to identify the hot and cold water supply lines and the drain pipe. You may need to make some adjustments to your plumbing layout to accommodate the shower pan.
Once you have determined the routing of the plumbing fixtures, it’s time to connect them. Here are the steps to follow:
- Begin by attaching the drain flange to the drain pipe. Apply plumber’s putty around the flange and insert it into the drain hole, ensuring a snug fit.
- Next, connect the hot and cold water supply lines to the corresponding valves. Use Teflon tape to create a watertight seal between the connections.
- Once the supply lines are connected, attach the showerhead and any additional fixtures, such as a handheld shower wand or body sprays.
- Ensure that all connections are tight and secure, using adjustable wrenches if necessary.
Checking for leaks and ensuring proper water flow
After you have connected the plumbing fixtures, it is vital to check for any leaks and ensure that the water is flowing correctly. Here’s how to do it:
- Turn on the water supply and let it flow for a few minutes.
- Inspect each connection point for any signs of leaks, such as water dripping or pooling.
- If you notice any leaks, tighten the connections or apply Teflon tape to create a better seal. Be careful not to overtighten, as this can damage the fittings.
- Once you have confirmed that there are no leaks, check the water flow from the showerhead. It should be steady and without any blockages.
- If you experience low water flow or uneven pressure, you may need to adjust the valves or clean the showerhead to remove any debris.
By following these steps and taking the time to properly connect the plumbing fixtures, you can ensure a leak-free and properly functioning shower. Take your time during this process and don’t hesitate to seek professional help if needed. Enjoy your new acrylic shower pan!
Testing And Fine-Tuning The Installation
Testing and fine-tuning the installation of your acrylic shower pan is a crucial step to ensure a flawless and long-lasting setup. By conducting a thorough leak test and making necessary adjustments, you can guarantee the perfect fit and functionality of your shower pan. In this section, we will guide you through the process of conducting a leak test and adjusting the shower pan as needed.
Conducting a thorough leak test to ensure a seamless installation
To begin the testing process, take the following steps:
- Inspect the shower pan for any visible gaps, cracks, or damage. It’s important to address these issues before running a leak test.
- Prep the area by ensuring the drainage system is securely installed and properly connected to the shower pan. Clear any debris or obstructions in the drain to ensure smooth water flow during the test.
- Fill the shower pan with water until it reaches a few inches from the top. Use a measuring tool to ensure an accurate water level.
- Allow the water to sit in the shower pan for at least 30 minutes. Monitor the pan for any signs of leakage, such as dripping or pooling water.
- Inspect the surrounding areas for any water damage or moisture. Pay close attention to the corners, edges, and adjacent walls.
Adjusting and fine-tuning the shower pan as needed
After conducting the leak test, it’s time to fine-tune the shower pan to ensure a perfect fit. Consider the following steps:
- Check the level of the shower pan using a spirit or bubble level. The pan should sit evenly on the floor without any noticeable slopes or unevenness.
- Make adjustments by adding or removing shims under the shower pan as needed. This will help to level it and provide stability.
- Test the stability of the shower pan by applying pressure to different areas. A properly installed pan should feel sturdy and secure. If you notice any movements or flexing, additional adjustments may be required.
- Inspect the caulk lines around the edges of the shower pan. Ensure they are applied evenly and provide a watertight seal. If necessary, reapply or touch up the caulk to prevent any potential leaks.
By conducting a thorough leak test and making necessary adjustments, you can ensure the installation of your acrylic shower pan is seamless and leak-free.
Installing The Shower Walls
Installing the shower walls is an important step in the process of installing an acrylic shower pan. The shower walls not only provide a finished look to the shower area but also help to protect the walls from water damage. In this guide, we will discuss how to choose the right shower walls to complement your acrylic shower pan and the steps to install them securely.
Choosing the right shower walls to complement the acrylic shower pan
Selecting the appropriate shower walls is crucial to create a cohesive and visually appealing shower area. Here are some factors to consider when choosing the shower walls:
- Material: The shower walls are available in a variety of materials such as tile, acrylic, fiberglass, and stone. Choose a material that complements the look of your acrylic shower pan and meets your budget and maintenance requirements.
- Color and Design: Consider the color and design of the shower walls to ensure they match the overall aesthetic of your bathroom. You can opt for solid colors, patterns, or even customize the walls with tile or stone.
- Waterproofing: Make sure the shower walls you choose are waterproof and have the necessary sealants to prevent water leakage and damage.
By keeping these factors in mind, you can select shower walls that enhance the beauty of your acrylic shower pan while providing functionality and durability.
Steps to install the shower walls securely
Now that you have chosen the shower walls, let’s take a look at the steps to install them securely:
- Prepare the walls: Ensure that the walls are clean, dry, and free from any loose debris. It is recommended to use a level and mark the desired height for the shower walls on the walls.
- Apply adhesive: Apply a suitable adhesive to the back of the shower walls in a zigzag pattern. This will help to ensure proper adhesion and prevent any gaps or lifting later on.
- Position the walls: Carefully position the shower walls at the marked height and press them firmly against the wall. Use a level to check for plumbness and adjust if necessary.
- Secure the walls: Once the shower walls are properly aligned, use screws or nails to secure them in place. Make sure to follow the manufacturer’s instructions for the recommended fastening method.
- Seal the joints: Apply a waterproof sealant to the joints between the shower walls and the shower pan as well as between the individual panels. This will prevent water from seeping through and causing damage.
- Allow for drying and curing: Leave the installed shower walls to dry and cure as per the adhesive manufacturer’s instructions. This will ensure a strong and secure installation.
Following these steps will help you install the shower walls securely, completing the installation of your acrylic shower pan and creating a beautiful and functional shower area in your bathroom.
Applying The Final Sealant And Finishing Touches
Once you have successfully installed your acrylic shower pan, it’s important to apply the final sealant and finishing touches to ensure its durability and longevity. This step will not only protect the shower pan from water damage, but also enhance its overall appearance. Here, we will discuss two crucial aspects of this process: sealing joints and seams for added durability, and cleaning and maintaining the acrylic shower pan for longevity.
Sealing joints and seams for added durability
Sealing the joints and seams of your acrylic shower pan is essential in preventing any potential leaks and keeping the installation secure. The process is relatively simple and can significantly contribute to the durability of your shower pan. Here are the steps to seal joints and seams:
- Begin by ensuring that the joints and seams are clean and dry. Remove any dirt, debris, or old sealant that may have accumulated during the installation process.
- Apply a bead of high-quality silicone caulk along each joint and seam. Be sure to choose a caulk that is specifically designed for use in wet areas and is compatible with acrylic surfaces.
- Smooth the caulk using a caulk smoothing tool or your finger, ensuring a tight seal. This will help to prevent any water or moisture from seeping into the joints or seams.
- Allow the caulk to dry completely, following the manufacturer’s instructions.
By sealing the joints and seams of your acrylic shower pan, you can greatly enhance its resistance to water damage and ensure its longevity.
Cleaning and maintaining the acrylic shower pan for longevity
Cleaning and maintaining your acrylic shower pan regularly is crucial for its long-term durability and aesthetics. Here are some important tips to help you keep your shower pan in optimal condition:
- Use a mild, non-abrasive cleaner specifically formulated for acrylic surfaces. Avoid using harsh chemicals or abrasive cleaners, as they can scratch or damage the acrylic.
- Regularly remove any soap scum, grime, or residue using a soft sponge or cloth. Gently scrub the surface in a circular motion.
- Rinse the shower pan thoroughly with warm water to remove any remaining cleaning solution.
- Dry the shower pan with a soft towel to prevent water spots or streaks.
- Avoid using abrasive scrub brushes or scouring pads, as they can scratch the surface of the acrylic.
By following these simple cleaning and maintenance steps, you can ensure that your acrylic shower pan remains in top condition for many years to come.
Enjoying Your Newly Installed Acrylic Shower Pan
Congratulations on your newly installed acrylic shower pan! You now have a beautiful and functional shower that can bring relaxation and convenience to your daily routine. To ensure that you get the most out of your shower pan, there are a few tips and practices that you should keep in mind. By following these suggestions, you can maximize the lifespan and functionality of your acrylic shower pan.
Tips for maximizing the shower pan’s lifespan and functionality
1. Use a shower mat: Placing a shower mat inside your acrylic shower pan can help prevent scratches and provide extra traction, minimizing the risk of slips and falls. Choose a mat with suction cups on the bottom to ensure it stays securely in place.
2. Avoid harsh chemical cleaners: While acrylic shower pans are durable, using harsh chemicals can damage the surface over time. Instead, opt for mild, non-abrasive cleaners that are specifically formulated for acrylic surfaces. These cleaners will effectively remove soap scum and other residue without causing harm to your shower pan.
3. Wipe down after each use: Regularly wiping down your acrylic shower pan after each use can prevent the buildup of soap scum and minerals. Simply use a soft cloth or sponge and mild soap to clean the surface. This quick and easy step will help maintain the pristine appearance of your shower pan.
4. Avoid abrasive tools: When cleaning your acrylic shower pan, avoid using abrasive tools such as scouring pads or brushes with stiff bristles. These can cause scratches and damage the surface. Instead, opt for gentle cleaning tools, such as a soft sponge or microfiber cloth, to protect the integrity of your shower pan.
5. Inspect for leaks: Regularly check for any signs of leaks around your acrylic shower pan. Look for water stains on the floor or walls adjacent to the shower, as well as any dripping or pooling water. If you notice any leaks, it’s essential to address them promptly to prevent further damage.
Recommended cleaning and maintenance practices
Here are some recommended cleaning and maintenance practices that can help you keep your acrylic shower pan in excellent condition:
- Regular cleaning: Clean your shower pan at least once a week to prevent the buildup of dirt, soap scum, and mildew. Use a mild, non-abrasive cleaner and a soft sponge or cloth. Rinse thoroughly with water to remove any remaining cleaner.
- Preventing hard water deposits: If you live in an area with hard water, you may notice mineral deposits on your acrylic shower pan. To prevent this, wipe the surface dry after each use or invest in a squeegee to remove excess water.
- Avoiding excessive weight: While acrylic shower pans are designed to be sturdy, it’s important not to place heavy objects or exert excessive weight on the surface. Avoid stepping or kneeling on the shower pan and be mindful when placing heavy shampoo bottles or bath accessories.
- Inspecting caulking: Check the caulking around your acrylic shower pan regularly. If you notice any cracks or gaps, it’s essential to reseal them to prevent water from seeping behind the pan and causing damage. Use a quality silicone caulk for best results.
- Schedule professional inspections: Consider scheduling professional inspections of your acrylic shower pan periodically. A qualified technician can identify any potential issues and provide maintenance recommendations to ensure the longevity of your shower pan.
By following these tips and recommended cleaning practices, you can enjoy your newly installed acrylic shower pan for years to come. With proper care and maintenance, your shower pan will continue to provide you with a clean, comfortable, and luxurious showering experience.
Frequently Asked Questions
What Do You Put Under An Acrylic Shower Base?
Acrylic shower bases should be placed on a solid and level surface, such as a mortar bed or a cement board. It is important to ensure the area is properly prepared to provide a stable foundation for the shower base.
Do You Have To Glue Down A Shower Pan?
No, it is not necessary to glue down a shower pan. The shower pan is designed to be installed without adhesive, as it has a built-in waterproof membrane that prevents water from seeping through. Simply follow the manufacturer’s instructions for proper installation.
What Is The Proper Way To Install A Shower Pan?
To install a shower pan properly, follow these steps: 1. Prepare the subfloor by ensuring it’s level and clean. 2. Attach the drain assembly according to manufacturer instructions. 3. Position the shower pan on the subfloor and secure it in place.
4. Connect the drain to the plumbing. 5. Test for leaks and ensure proper drainage before tiling or sealing the shower.
How Thick Should Mortar Be Under Acrylic Shower Pan?
The mortar under an acrylic shower pan should be approximately 2 inches thick. It provides a stable, level base for the pan and ensures proper installation.
Conclusion
Installing an acrylic shower pan is a simple and cost-effective way to upgrade your bathroom. With the step-by-step instructions provided in this blog post, you can confidently tackle this project and enjoy a beautiful and functional shower in no time.
Remember to gather all the necessary tools and materials, follow safety precautions, and take your time to ensure a successful installation. Now, you have the knowledge and confidence to transform your bathroom with a stunning acrylic shower pan. Happy renovating!