
Installing solid surface shower walls is a straightforward process that requires careful preparation and the use of proper tools and materials. The following steps provide a concise guide to help you install solid surface shower walls successfully.
Solid surface shower walls are a popular choice for upgrading bathrooms due to their durability, low maintenance requirements, and sleek appearance. Whether you are remodeling your bathroom or building a new one, installing solid surface shower walls can transform your space into a modern and stylish oasis.
We will guide you through the step-by-step process of installing solid surface shower walls, ensuring a smooth and hassle-free installation. So, let’s get started!
Preparing The Workspace
Before installing solid surface shower walls, it’s important to prepare your workspace properly. This will ensure a smooth and efficient installation process. In this section, we’ll discuss the necessary tools and materials you’ll need, as well as the steps to measure and mark the shower walls for installation. We’ll also cover how to prep the existing walls to ensure a secure and professional installation.
Gathering the necessary tools and materials
Before you begin the installation, it’s essential to gather all the tools and materials you’ll need. Having everything on hand will prevent unnecessary delays and interruptions. Here’s a list of the items you’ll need:
| Tools | Materials |
|---|---|
|
|
Measuring and marking the shower walls for installation
Accurate measurements and proper marking are crucial to ensure a precise fit for your solid surface shower walls. Here’s a step-by-step process to help you measure and mark the walls:
- Start by measuring the height and width of each wall where the solid surface panels will be installed. Make sure to measure from the floor or base to the ceiling or top of the shower.
- Transfer these measurements onto the solid surface panels, using a chalk line or pencil to mark the lines.
- Double-check the measurements and ensure the panels are cut accurately before proceeding to the next step.
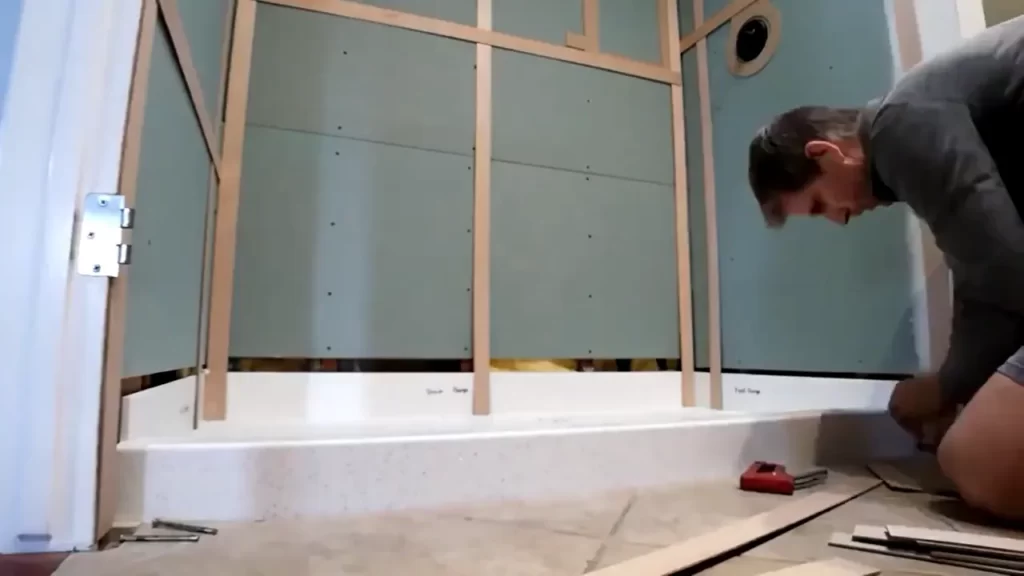
Prepping the existing walls for installation
Preparing the existing walls is an essential step to ensure the proper installation and longevity of your solid surface shower walls. Follow these steps to prep the walls:
- Remove any existing tile or other wall coverings from the shower area.
- Inspect the walls for any damage or moisture issues. Repair any damages and ensure the walls are dry before proceeding.
- Apply a primer to the walls to create a smooth and suitable surface for the adhesive.
- Place strips of masking tape along the edges of the shower area to protect other surfaces from excess adhesive or caulk.
- Once the walls are prepped and ready, you can proceed with the installation process.
By following these steps in preparing the workspace, you’ll be well on your way to a successful solid surface shower wall installation. Taking the time to gather the necessary tools and materials, as well as measuring, marking, and prepping the walls, will ensure a professional and durable result.
Applying Adhesive And Attaching The Solid Surface Panels
Installing solid surface shower walls is a practical and stylish way to enhance your bathroom. One crucial step in the installation process is applying adhesive and attaching the solid surface panels to the walls. This step ensures a secure and long-lasting installation. In this section, we will guide you through the process of choosing the right adhesive, applying it properly, aligning the panels, and ensuring proper spacing and alignment. Let’s dive in!
Choosing the right adhesive for the job
When it comes to choosing the adhesive for your solid surface shower walls, it’s essential to select the right one that offers both strength and durability. Two popular options for bonding solid surface panels are silicone adhesive and epoxy adhesive. Each adhesive type has its advantages, and you should consider factors such as the specific brand recommendations, ease of use, and the environment the shower walls will be exposed to.
| Silicone Adhesive | Epoxy Adhesive |
|---|---|
| Suitable for most solid surface materials | Provides excellent bonding and strength |
| Dries clear for a seamless look | Resistant to moisture and humidity |
| Flexible and forgiving during installation | Requires proper mixing for optimal performance |
Applying adhesive to the back of the solid surface panels
Before applying adhesive, ensure that the back of the solid surface panels is clean and free from dust or any debris. This step will help to create a strong bond between the panels and the walls. Using a putty knife or a trowel, apply a thin, even layer of adhesive to the back of each panel. Be sure to follow the adhesive manufacturer’s instructions regarding the amount and coverage area to achieve optimal bonding.
Aligning and attaching the panels to the walls
Once the adhesive is applied, carefully align the first panel with the desired position on the wall. It’s crucial to ensure that the panel is level and plumb using a level tool. Apply even pressure against the panel to help the adhesive bond securely. Repeat this process for the remaining panels, ensuring they are properly aligned and spaced to create a seamless appearance.
If necessary, use shims or spacers to ensure proper spacing and alignment between the panels. These will help maintain consistency and prevent any gaps or unevenness between the panels. Remember to remove any excess adhesive that may squeeze out during installation using a damp cloth or sponge.
By following these steps and using the appropriate adhesive, you’ll achieve a professional installation of solid surface shower walls. Take your time during this process to ensure a flawless result that will enhance the beauty and functionality of your bathroom for years to come.
Finishing Touches And Maintenance
When it comes to installing solid surface shower walls, the finishing touches and maintenance are essential for achieving a polished result that lasts. Trimming and shaping the edges of the panels, applying caulk and sealant for a watertight finish, cleaning and maintaining the solid surface shower walls, and troubleshooting common installation issues are all crucial steps in achieving a professional-looking shower. In this section, we will explore these aspects in detail, ensuring that your solid surface shower walls not only look great but also stand the test of time.
Trimming and Shaping the Edges of the Panels
Trimming and shaping the edges of the panels is an important step in the installation process. It ensures that the solid surface shower walls fit perfectly into the designated space while providing a seamless appearance. To trim and shape the edges:
- Measure the walls carefully to determine the precise dimensions needed.
- Cut the solid surface panels using a fine-toothed saw or a router. This will help you achieve clean, smooth edges.
- Once the panels are cut, use sandpaper to refine the edges further, removing any roughness or imperfections.
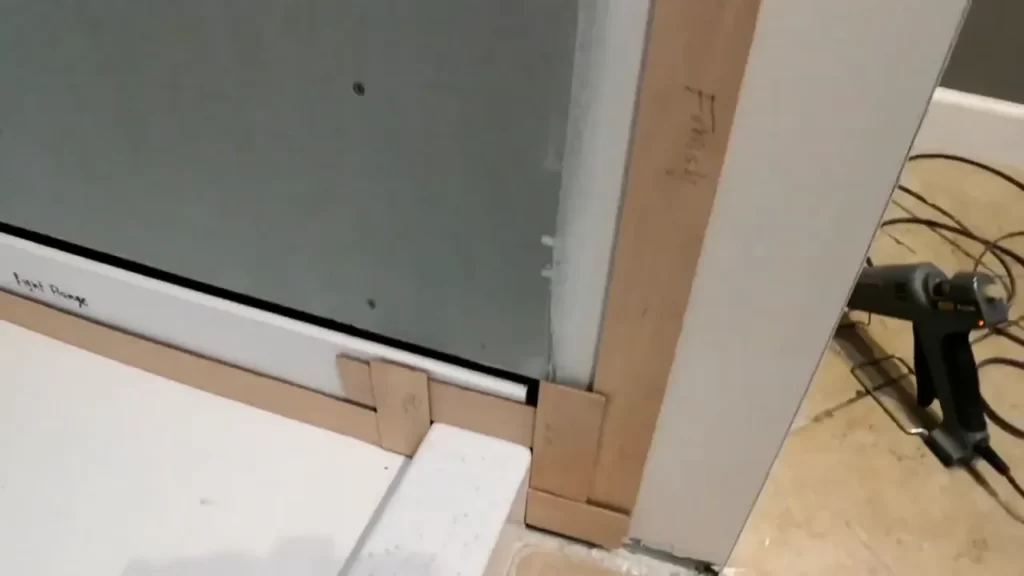
Applying Caulk and Sealant for a Watertight Finish
Applying caulk and sealant is crucial to ensure a watertight finish and prevent any water leakage or damage. Follow these steps to achieve a secure seal:
- Choose a high-quality caulk that is specifically designed for solid surface shower walls.
- Clean the edges of the panels thoroughly to remove any dust or debris.
- Apply a bead of caulk along the edges, ensuring even coverage.
- Smooth the caulk using a caulk-smoothing tool or your finger, making sure to remove any excess caulk.
- Allow the caulk to dry completely before exposing the shower walls to water.
- For an added layer of protection, consider applying a sealant on top of the caulk. This will provide extra durability and longevity.
Cleaning and Maintaining the Solid Surface Shower Walls
Cleaning and maintaining your solid surface shower walls is essential to preserve their beauty and functionality. Follow these tips to keep them in pristine condition:
- Regularly wipe down the walls with a mild cleanser and a soft cloth or sponge.
- Avoid using abrasive cleaners or scrub brushes, as they can damage the surface.
- For stubborn stains or grime, use a non-abrasive cleaner specifically formulated for solid surface materials.
- Dry the walls thoroughly after each use to prevent the buildup of water spots or minerals.
- Regularly inspect the caulk and sealant, and reapply if necessary.
Troubleshooting Common Installation Issues
Even with careful installation, issues can sometimes arise. Here are some common installation problems and their solutions:
| Issue | Solution |
|---|---|
| Uneven panel edges | Use a sander or file to smooth the edges and ensure a proper fit. |
| Visible seams | Apply a color-matched adhesive or filler to minimize the visibility of seams. |
| Water leakage | Check the caulk and sealant for any gaps or cracks, and reapply as needed. |
By following these finishing touches and maintenance guidelines, you can ensure that your solid surface shower walls not only look stunning but also remain functional and durable for years to come.

Planning And Preparation
Before embarking on the installation of solid surface shower walls, it is crucial to plan and prepare. This will ensure a seamless and successful installation process. Paying attention to every detail during this stage will save time and prevent any errors or delays in the future. Here are some key factors to consider when planning and preparing:
Accurate measurements lead to a smooth installation process
To begin with, accurate measurements are essential for a flawless installation of solid surface shower walls. Measure the height, width, and depth of your shower area, taking into account any irregularities or variations. Be meticulous and double-check your measurements to avoid any discrepancies that may lead to ill-fitting walls. By doing this, you will eliminate the risk of having to make adjustments or ordering additional materials.
Clearing the workspace and removing any obstacles
Once you have your measurements ready, it’s time to clear the workspace. Remove any obstructions or obstacles that may hinder the installation process. This includes any toiletries, shower curtains, or other fixtures that may get in the way. A clutter-free and spacious workspace will give you the freedom to move around comfortably, ensuring a smooth and efficient installation.
Making sure the walls are clean and dry before installing
Before installing the solid surface shower walls, it is of utmost importance to ensure the walls are clean and dry. Any moisture, dirt, or residue on the walls can compromise the adhesive and hinder the bonding process. Take the time to thoroughly clean the walls, removing any traces of soap scum or grime. Additionally, ensure that the walls are completely dry before proceeding with the installation. This will guarantee a strong and long-lasting bond between the walls and the solid surface material.
Applying The Adhesive
Choosing the right adhesive is crucial for a strong bond
When it comes to installing solid surface shower walls, one of the most important steps is applying the adhesive. This is crucial for creating a strong bond that will keep the walls securely in place for years to come. Choosing the right adhesive is key to ensuring a successful installation. There are different options available, so it’s essential to select the one that is specifically designed for solid surface materials. A high-quality adhesive will provide the necessary strength and durability to withstand the moisture and daily use in a shower.
Applying the adhesive evenly to prevent gaps and uneven surfaces
Once you have chosen the right adhesive, the next step is to apply it evenly onto the back of the solid surface shower walls. This is important to prevent any gaps or uneven surfaces that could compromise the integrity of the installation. Start by mixing the adhesive according to the manufacturer’s instructions, making sure to achieve a smooth and consistent consistency. Then, using a notched trowel, apply the adhesive in even, horizontal lines on the back of the walls. Make sure to cover the entire surface to ensure a secure bond.
Allowing sufficient curing time for the adhesive to set
After applying the adhesive to the solid surface shower walls, it is crucial to allow sufficient curing time for the adhesive to set. This step is often overlooked but is vital for the long-term durability of the installation. The curing time will vary depending on the type of adhesive used, so be sure to consult the manufacturer’s instructions for specific guidelines. During this time, it’s important to avoid any movement or disturbance that could disrupt the bond. Once the adhesive has fully cured, you can proceed with the rest of the installation process, knowing that the walls are securely in place.
In conclusion, when installing solid surface shower walls, applying the adhesive correctly is essential for a successful and long-lasting installation. Choosing the right adhesive, applying it evenly, and allowing sufficient curing time are all crucial steps in creating a strong bond. By following these guidelines, you can ensure that your solid surface shower walls will provide years of beauty and functionality.
Attaching The Solid Surface Panels
Attaching solid surface panels to your shower walls is a crucial step in achieving a stylish and durable shower space. Proper installation ensures that the panels are securely attached and aligned, providing a seamless and professional finish. In this section, we will discuss two essential steps to follow: double-checking the alignment and positioning of the first panel, and using spacers to maintain consistent spacing between panels.
Double-checking the alignment and positioning of the first panel
Before attaching the first panel, it is essential to double-check its alignment and positioning. This ensures that the rest of the panels will follow suit, resulting in a smooth and cohesive installation. Here’s how:
- Place the first panel against one of the shower walls, starting from a corner or the center, depending on your preference.
- Using a level, check that the panel is perfectly vertical and align it with any reference lines or marks you have previously made.
- Confirm that the top and bottom edges of the panel are level as well, making any necessary adjustments.
- Once you are satisfied with the panel’s alignment, secure it to the wall using the recommended adhesive or mounting system for solid surface materials.
Using spacers to maintain consistent spacing between panels
Consistent spacing between the solid surface panels is crucial for a professional and visually appealing installation. Spacers help maintain even gaps between the panels and ensure that they are correctly aligned. Follow these steps:
- Place small spacers, such as tile spacers, between the first panel and the adjacent wall or the corner where the next panel will be installed.
- Slide the next panel into position, making sure it is snug against the spacers.
- Use a level to check for vertical alignment and adjust if necessary.
- Continue this process for the remaining panels, using spacers in between each panel.
Remember that the size of the spacers will depend on the desired spacing between the panels. Make sure to follow the manufacturer’s recommendations or consult a professional for guidance.
By double-checking the alignment and using spacers, you can ensure a precise and consistent installation of the solid surface shower panels. Once all the panels are in place, applying even pressure to secure their attachment is the final step, which we will discuss next.
Finishing And Maintaining The Solid Surface Shower Walls
Once the solid surface shower walls are installed, it is essential to focus on finishing touches and maintaining them properly. This not only ensures a seamless and aesthetically pleasing appearance but also prolongs the life of the walls. By following a few simple steps, you can achieve a professional finish and keep your shower walls looking pristine for years to come.
Using a Router or File to Trim the Edges for a Seamless Finish
One key step in achieving a seamless finish is trimming the edges of the solid surface shower walls. Whether you choose to use a router or a file, the goal is to carefully remove any rough or uneven edges. This creates a smooth and polished look that complements the overall design of your shower. Make sure to wear protective gear such as safety goggles and gloves while working with tools for your safety.
Applying a High-Quality Caulk to Seal Any Gaps or Joints
Sealing any gaps or joints is crucial to prevent water leakage and maintain the integrity of your solid surface shower walls. To do this, use a high-quality caulk that is specifically designed for bathrooms and wet areas. Before applying the caulk, ensure that the surfaces are clean and dry. Apply the caulk in a steady and consistent manner, covering all gaps and joints completely. Smooth out the caulk using a caulk smoothing tool or a wet finger to create a neat and finished look. Allow the caulk to dry completely before using the shower.
Regular Cleaning and Maintenance to Prolong the Life of Solid Surface Walls
Regular cleaning and maintenance are essential to keep your solid surface shower walls in optimal condition. By incorporating a simple cleaning routine, you can prevent the buildup of soap scum, grime, and stains. Here are a few tips to follow:
- Use a mild, non-abrasive cleaner or soap specifically formulated for solid surface materials.
- Avoid using harsh chemicals, abrasive scrub brushes, or scouring pads that can damage the surface.
- Wipe down the shower walls after each use to remove any excess moisture and prevent the growth of mold or mildew.
- For tougher stains or soap scum, create a paste using baking soda and water. Apply the paste to the stained areas, let it sit for a few minutes, then gently scrub and rinse thoroughly.
- Periodically check for any signs of damage or wear and address them promptly to prevent further issues.
In conclusion, by paying attention to the finishing details and regularly maintaining your solid surface shower walls, you can ensure their longevity and keep them looking like new. Taking these simple steps will not only enhance the overall appearance of your shower but also contribute to the functionality and durability of the walls.
Frequently Asked Questions
Is Solid Surface Good For Shower Walls?
Yes, solid surface is good for shower walls. It is durable and hygienic, making it resistant to stains and mold. Solid surface also offers a seamless and smooth finish, providing a clean and modern look to your shower walls.
How Do You Attach A Solid Surface To A Wall?
To attach a solid surface to a wall, follow these steps: 1. Ensure the wall surface is clean and dry. 2. Apply a strong adhesive or construction adhesive to the back of the solid surface. 3. Press the solid surface firmly against the wall, ensuring even contact.
4. Use clamps or tape to hold the surface in place until the adhesive dries. 5. Allow sufficient time for the adhesive to fully cure before removing any supporting devices.
How Do You Install A Solid Surface Shower Pan?
To install a solid surface shower pan, follow these steps: 1. Begin by measuring and marking the area for the pan. 2. Apply a bed of mortar to the subfloor and carefully position the pan on top. 3. Ensure the pan is level and secure it with screws or adhesive.
4. Connect the drain to ensure proper drainage. 5. Finally, seal the edges of the pan to prevent water leakage.
Do You Need Cement Board Behind Shower Surround?
Yes, a cement board is necessary behind a shower surround. It provides a sturdy and water-resistant surface, preventing moisture damage and mold growth. Cement board also helps in creating a solid base for tile installation.
Conclusion
Installing solid surface shower walls is a practical and stylish solution for your bathroom makeover. By following the step-by-step guide outlined in this post, you can easily transform your shower space into a modern oasis. From preparing the area to applying adhesive and securing the panels, each stage is important to ensure a seamless installation.
Remember, with a little patience and the right tools, anyone can achieve professional-looking results. Start your bathroom renovation today and enjoy the durability and beauty of solid surface shower walls for years to come.