To install a sliding shower door, measure the space, purchase a door kit, attach the track to the shower enclosure, and hang the doors on the track. Sliding shower doors are a popular choice for bathrooms, providing a sleek and modern look while maximizing space utilization.
Installing a sliding shower door can be done by following a few simple steps. This article will guide you through the process, ensuring a successful installation. Whether you are renovating your existing shower or building a new one, installing a sliding shower door is a straightforward project that can be completed with basic tools and some patience.
Preparing For Installation
Before you begin installing a sliding shower door, it’s important to properly prepare the installation area. Following these steps will help ensure a smooth and successful installation process.
Measuring the Shower Enclosure
First and foremost, you’ll need to measure your shower enclosure to determine the exact size of the sliding door you’ll need. Make sure to measure both the height and width of the opening, as well as the thickness of the walls. This will ensure that you purchase the correct size shower door.
Gathering the Necessary Tools and Materials
Once you have the proper measurements, you’ll need to gather all the necessary tools and materials for the installation. Here’s a handy list of what you’ll need:
| Tools | Materials |
|---|---|
|
|
Ensuring a Clean and Dry Installation Area
Prior to beginning the installation, it’s crucial to ensure that the installation area is clean and dry. Remove any debris or obstacles that could hinder the installation process. Clean the walls and floor of the shower enclosure to remove any dust or moisture that may interfere with the adhesive properties of the sealant.
Additionally, if you’re installing the sliding shower door on tiled walls, make sure to inspect the grout lines and repair any damaged or loose tiles before proceeding. This will provide a stable and secure surface for the installation.
By following these steps to prepare for the installation of your sliding shower door, you’ll be off to a great start in creating a functional and stylish shower enclosure.

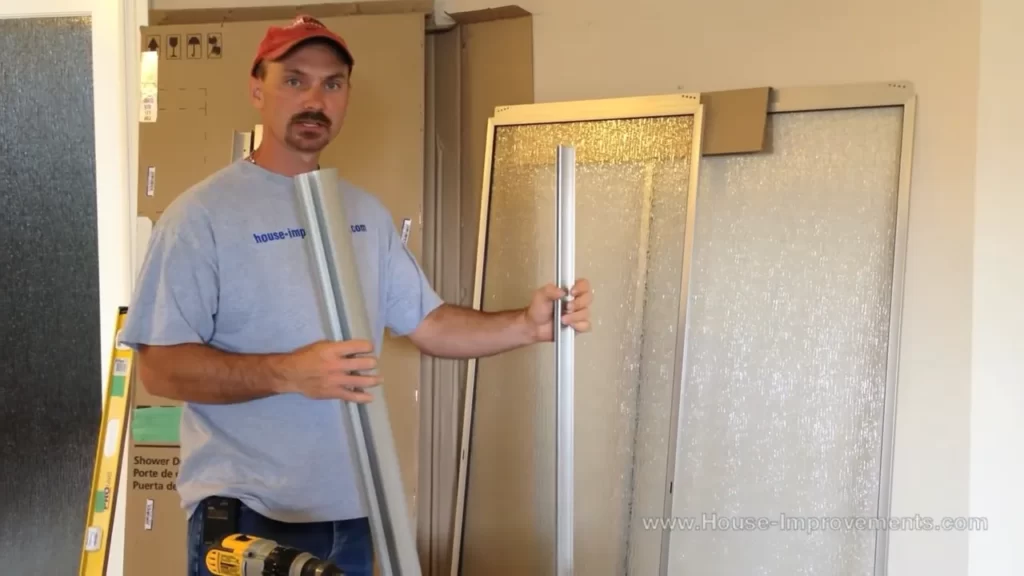
Removing Existing Shower Door
Removing the old door panels and hardware
Before you can install a new sliding shower door, you’ll need to remove the existing door panels and hardware. This process can vary depending on the type of door you have, but here are some general steps to follow:
- Start by removing the outer panel of the shower door. Most sliding shower doors have an outer panel that can be removed by loosening the screws or clips holding it in place. Once the screws or clips are loosened, carefully lift the panel out of the frame and set it aside.
- Next, remove the inner panel of the shower door. This panel is usually attached to the frame with screws or brackets. Use a screwdriver or wrench to loosen and remove the screws or brackets, then lift the panel out of the frame.
- After removing the door panels, you’ll need to remove any hardware that is still attached to the shower frame. This includes handles, brackets, and hinges. Use a screwdriver or wrench to loosen and remove any screws or bolts holding the hardware in place.
Properly disposing of the old materials
Once you have removed the old shower door panels and hardware, it’s important to properly dispose of these materials. Here are some options for disposing of the old materials:
- If the door panels and hardware are still in good condition, consider donating them to a local charity or community center. This way, someone else can benefit from your old shower door.
- If the materials are damaged or cannot be reused, check with your local recycling center to see if they accept metal or glass materials. Recycling is a great way to reduce waste and help the environment.
- If all else fails, contact your local waste management facility to inquire about proper disposal methods for the old shower door materials. They will be able to provide you with guidance on how to responsibly dispose of the materials.
Preparing the shower frame for the new door
Now that you have removed the old shower door, it’s time to prepare the shower frame for the new door installation. Follow these steps to ensure the frame is ready:
- Start by thoroughly cleaning the shower frame. Remove any dirt, grime, or old caulk using a sponge, warm water, and mild detergent. Wipe the frame dry with a clean cloth.
- Inspect the shower frame for any damage or signs of wear. If you notice any cracks or loose parts, repair or replace them before installing the new door. This will help ensure a secure and long-lasting installation.
- If necessary, apply a new layer of caulk to the edges of the shower frame. This will help create a watertight seal and prevent any leaks. Allow the caulk to dry completely before proceeding with the installation.
By following these steps to remove the old shower door, properly dispose of the materials, and prepare the shower frame for the new door, you’ll be one step closer to enjoying a beautifully updated shower space.
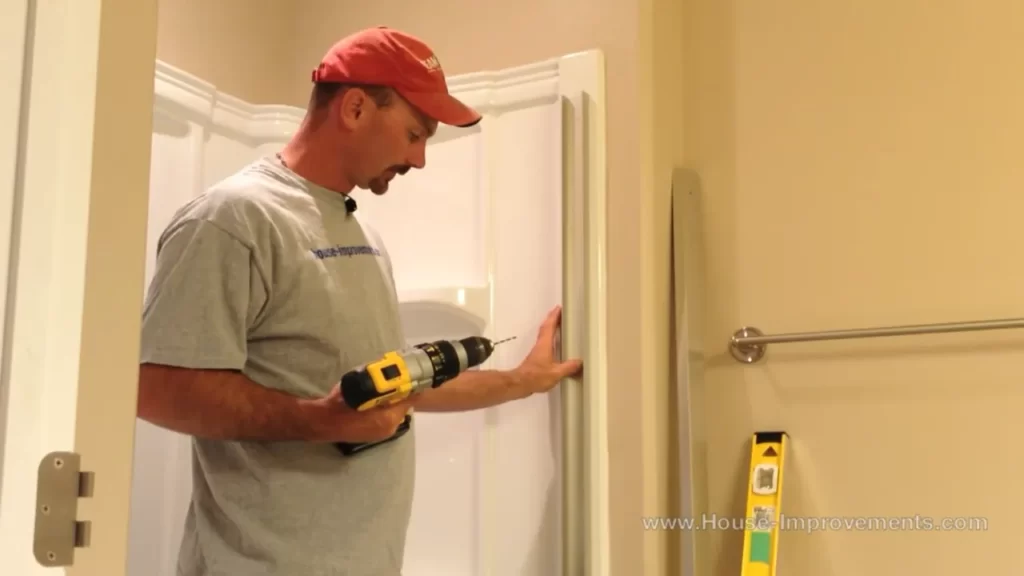
Installing The Track System
The installation of a sliding shower door involves several steps, and one of the crucial parts is installing the track system. The track system ensures smooth and secure movement of the door panels, allowing you to enjoy a functional and stylish shower enclosure. In this section, we will guide you through the process of installing the track system, covering everything from measuring and marking the position of the track to securing it onto the shower frame and adjusting it for proper alignment and levelness.
Measuring and marking the position of the track
Before you begin the installation, it’s important to measure and mark the correct position for the track system. This will ensure that the door panels align perfectly and operate smoothly. Here’s how you can go about it:
- Start by measuring the height at which you want the track system to be installed. Use a tape measure to determine this, and make a small mark on both sides of the shower frame to indicate the desired height.
- Next, measure the width of the shower opening. This will help you determine the length of the track system you need. Make sure to account for any gaps or overlaps you want between the door panels and the frame.
- Once you have the measurements, mark the positions for the top and bottom tracks on the shower frame. Ensure that the markings are level and straight using a level tool.
Securing the track onto the shower frame
After marking the position of the track system, it’s time to secure it onto the shower frame. This step will ensure that the track is firmly in place and can support the weight of the door panels. Follow these steps to securely attach the track:
- Position the track over the marked locations on the shower frame, ensuring that it aligns with the vertical markings you made earlier.
- Using a screwdriver, drive screws through the pre-drilled holes in the track and into the shower frame. Make sure to use screws of the appropriate length and type for your specific shower enclosure.
- Tighten the screws until the track is securely fastened to the frame. Be careful not to overtighten, as this could strip the screw holes or damage the track.
- Repeat this process for both the top and bottom tracks, ensuring that they are parallel and level with each other.
Adjusting the track for proper alignment and levelness
To ensure that your sliding shower door operates smoothly and effectively, you need to adjust the track for proper alignment and levelness. Follow these steps to fine-tune the track:
- Check the levelness of the track by placing a level tool on top of it. Adjust the position of the track if needed to ensure it is perfectly level. This will prevent any issues with the door panels sliding unevenly.
- If the track is not aligned properly, adjust the position by loosening the screws slightly and shifting the track as necessary. Once aligned, tighten the screws back in place.
- Test the movement of the door panels by sliding them back and forth along the track. If they glide smoothly without any resistance or wobbling, your track is properly aligned. If not, make further adjustments as needed until you achieve optimal performance.
By following these steps, you can successfully install the track system for your sliding shower door. Once the track is securely in place and properly aligned, you can move on to installing the door panels and completing your shower enclosure. Enjoy your new shower experience!
Mounting The Door Panels
Attaching the bottom rollers on the first door panel
To begin mounting the sliding shower door, the first step is to attach the bottom rollers on the first door panel. These rollers will ensure smooth movement of the door along the track system. Follow these steps to securely attach the bottom rollers:
- Place the first door panel on a flat surface, with the inside facing up.
- Locate the bottom roller assembly provided with the door kit.
- Align the roller assembly with the pre-drilled holes on the bottom of the door panel.
- Insert and tighten the screws provided with a screwdriver or power drill.
- Repeat the same process for the other bottom roller.
Make sure the bottom rollers are securely attached to the first door panel before moving on to the next step.
Inserting the door panels into the track system
Once the bottom rollers are in place, it’s time to insert the door panels into the track system. Follow these steps to ensure a proper fit:
- Carefully lift the first door panel and position it at an angle.
- Insert the rollers into the lower track, making sure they are securely seated.
- Slowly lower the door panel until it is vertical and the top is aligned with the upper track.
- Slide the door panel along the track to ensure it moves smoothly.
- Repeat the process for the second door panel, ensuring proper alignment with the upper and lower tracks.
Both door panels should now be securely inserted into the track system, ready for the final step of aligning and adjusting for smooth operation.
Aligning and adjusting the door panels for smooth operation
To ensure the sliding shower door operates smoothly, it is important to align and adjust the door panels. Follow these steps for proper alignment:
- Check the alignment of the doors in relation to each other. They should be parallel and have a minimal gap between them.
- If needed, adjust the roller screws to raise or lower the door panels for proper alignment.
- Use a level to ensure the doors are plumb and adjust as necessary.
- Check for any rubbing or sticking points along the track and make additional adjustments as needed.
- Test the operation of the doors by sliding them open and closed. They should move smoothly without any resistance.
Take your time when aligning and adjusting the door panels to ensure a flawless installation and optimal functionality.
Now that you’ve successfully mounted the door panels of your sliding shower door, the next step is to continue with the installation process, such as attaching the door handles and applying any necessary seals or weather stripping.

Installing The Handle And Accessories
Once you have successfully installed the sliding shower door panels and tracks, it’s time to focus on the finishing touches – the handle and any additional accessories or hardware you may want to include. These elements not only enhance the appearance of your shower door but also play a crucial role in its functionality and security. Here’s a step-by-step guide to help you with this final stage of the installation process.
Attaching the handle to the door panel
The handle is not only an essential part of the sliding shower door but also adds aesthetic value to its overall design. Follow these steps to securely attach the handle:
- Locate the pre-drilled holes on the door panel where the handle will be mounted.
- Insert the provided screws through the handle and align them with the holes on the door panel.
- Tighten the screws using a screwdriver, ensuring that the handle is securely attached to the door panel.
It’s important to note that different shower door models may have slightly different handle installation processes. Refer to the manufacturer’s instructions for any specific guidelines related to your particular sliding shower door.
Installing any additional accessories or hardware
To customize your sliding shower door and meet your specific needs, you may want to install additional accessories or hardware. Here are some common additions:
| Accessory/Hardware | Installation Steps |
|---|---|
| Towel bar |
|
| Soap dish |
|
| Shower caddy |
|
Feel free to explore various accessories and hardware options to create a personalized and functional shower space that suits your preferences.
Checking the functionality and security of the door
Once all the necessary handle and accessory installations are complete, it’s vital to ensure the door is functioning correctly and provides the necessary security. Perform the following checks:
- Slide the door panels back and forth to ensure smooth movement along the tracks.
- Check if the door locks securely in place when closed.
- Verify that any locking mechanisms, such as a latch or magnet, engage correctly.
- Test the handle’s grip and make sure it feels comfortable and secure.
By following these steps and ensuring the proper installation of handles, accessories, and hardware, you can enjoy a stylish sliding shower door that not only enhances the aesthetics of your bathroom but also functions smoothly and securely.
Sealing And Waterproofing
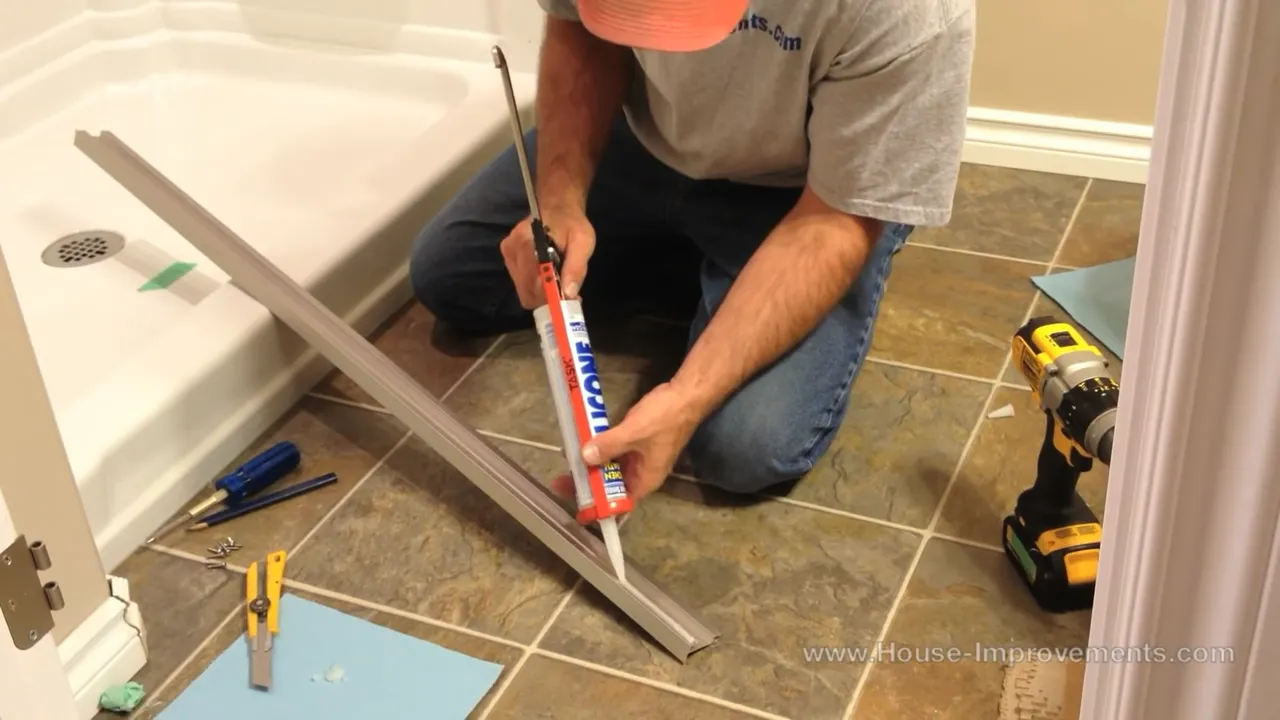
One of the most important steps in installing a sliding shower door is ensuring proper sealing and waterproofing. This ensures that water does not leak out of the shower area and prevents any damage to the surrounding walls and floor. In this section, we will discuss the necessary steps to achieve a watertight seal, including applying a silicone sealant along the edges of the door panels, ensuring a watertight seal for leak prevention, and conducting a thorough clean up and final inspection for any touch-ups required.
Applying a silicone sealant along the edges of the door panels
To start, you will need a good quality silicone sealant specifically designed for bathroom applications. This sealant will create a strong bond between the shower door panels and the adjacent walls, preventing water from seeping through. Follow these steps to apply the silicone sealant:
- Clean and dry the edges of the door panels using a mild soap and water solution, removing any dust or debris.
- Using a caulking gun, load the silicone sealant into the tube and cut the nozzle to the desired size. A smaller nozzle allows for more precise application.
- Apply a steady and even bead of sealant along the edges of the door panels, ensuring complete coverage.
- Smooth out the sealant using a caulking tool or a wet finger to create a neat finish.
- Allow the silicone sealant to cure for the recommended time mentioned on the product packaging before proceeding to the next steps.
Ensuring a watertight seal for leak prevention
Once the silicone sealant has cured, it’s time to ensure a watertight seal that will prevent any leaks. Here are a few key steps to follow:
- Close the sliding shower door and check for any visible gaps between the door panels and the adjacent walls. If gaps are present, consider adjusting the door panels or using additional sealing methods like weatherstripping or sweep seals.
- Run water over the door panels and observe if any water leaks or seeps through. Pay close attention to the bottom of the door where water collects, as this is a common area for leaks.
- If any leaks are detected, identify the source and apply additional silicone sealant to the affected areas. Allow the sealant to cure before testing for leaks again.
- Repeat the testing process until no leaks are observed and a watertight seal is achieved.
Clean up and final inspection for any touch-ups required
Once the installation and sealing process is complete, it’s essential to conduct a thorough clean up and final inspection. This step ensures that the sliding shower door is not only functional but also visually appealing. Follow these final steps:
- Remove any excess sealant or adhesive with a damp cloth or sponge before it dries.
- Inspect the door panels and surrounding areas for any imperfections, such as smudges, fingerprints, or uneven sealant lines.
- If touch-ups are required, use a clean cloth or sponge with mild soap and water solution to carefully clean or correct any blemishes.
- Address any remaining cosmetic issues and allow the area to dry completely before using the shower.
By following these sealing and waterproofing procedures, you can ensure a secure and leak-free sliding shower door installation. Taking the time to apply a silicone sealant, ensuring a watertight seal, and conducting a thorough clean up will provide you with a functional and visually pleasing shower door for years to come.
Maintenance And Care Tips
When it comes to the maintenance and care of your sliding shower door, regular cleaning and proper upkeep are essential in ensuring its longevity and functionality. By following some best practices and troubleshooting any common issues that may arise, you can keep your shower door spotless and fully operational for years to come.
Regular Cleaning and Maintenance to Prolong the Lifespan of the Sliding Shower Door
To keep your sliding shower door in top condition, regular cleaning is crucial. By incorporating a few simple maintenance tasks into your routine, you can effectively prevent buildup of dirt, grime, and hard water stains. Here are some tips:
1. Use a Mild Cleanser:
When cleaning your shower door, opt for a mild cleanser or a mixture of equal parts water and vinegar. This solution is gentle enough to prevent any damage to the glass or hardware, yet effective in removing soap scum and mineral deposits.
2. Avoid Abrasive Tools:
Steer clear of abrasive scrub brushes or harsh chemicals that can scratch or damage the glass or metal surfaces. Instead, use a soft cloth or sponge to gently clean the door and wipe it dry with a clean towel to prevent any water spots.
3. Clean the Tracks Regularly:
The tracks of your sliding shower door can accumulate debris and soap residue over time. Ensure smooth operation by regularly cleaning the tracks using a toothbrush or a soft brush to remove any dirt or grime. Wipe away any excess moisture to prevent mold or mildew growth.
4. Inspect and Tighten All Hardware:
Regularly inspect the hardware of your sliding shower door, such as screws, brackets, and hinges. Ensure all components are securely tightened to avoid any issues with door alignment or functionality.
Common Issues and Troubleshooting Methods
Despite regular maintenance, you may encounter some common issues with your sliding shower door. Understanding these problems and knowing how to troubleshoot them can help you resolve them quickly and efficiently. Here are some common issues and their troubleshooting methods:
1. Sticky or Misaligned Door:
If your shower door is difficult to slide or becomes misaligned, check for any dirt or debris in the tracks or rollers. Clean the tracks thoroughly and lubricate the rollers with a silicone-based lubricant to ensure smooth operation.
2. Leaking Door:
A leaking sliding shower door can be caused by worn-out seals or improper installation. Check the seals around the door for any signs of wear or damage. Replace them if necessary. Additionally, verify that the door is correctly aligned with the shower enclosure, ensuring a tight seal.
3. Noisy Door:
If your sliding shower door is making loud or squeaky noises, it may indicate the need for lubrication. Apply a silicone-based lubricant to the tracks and rollers to reduce friction and eliminate any noise.
Best Practices for Maintaining a Spotless and Functional Shower Door
To maintain a spotless and functional sliding shower door for years to come, follow these best practices:
- Wipe down the door and tracks after each shower to prevent soap scum and mineral buildup.
- Regularly inspect the hardware and tighten any loose screws or brackets.
- Replace worn-out seals or gaskets as soon as you notice signs of damage.
- Keep the shower enclosure well-ventilated to prevent excess moisture and mold growth.
- Avoid using harsh chemicals or abrasive tools that can damage the glass or metal surfaces.
By incorporating these maintenance and care tips into your routine, you can keep your sliding shower door looking pristine and functioning flawlessly, ensuring a rejuvenating shower experience each time.
Frequently Asked Questions
How Should Sliding Shower Doors Be Installed?
Sliding shower doors should be installed following these steps: 1. Measure the opening carefully. 2. Attach the bottom and side tracks according to the manufacturer’s instructions. 3. Hang the doors onto the tracks and adjust their position. 4. Install the handles and seals for a secure fit.
5. Test the doors to ensure they slide smoothly.
How Do You Put A Sliding Shower Door Back On Track?
To put a sliding shower door back on track, follow these steps: 1. Lift the door to remove it from the track. 2. Inspect the track for debris, and clean it if necessary. 3. Align the door rollers with the track, then slide the door back in.
4. Test the door’s movement to ensure it glides smoothly.
Can I Install A Shower Door Myself?
Yes, you can install a shower door yourself. Just follow the manufacturer’s instructions carefully, use necessary tools, and take safety precautions. Ensure proper measurements, alignment, and sealing to ensure a secure installation. Seek professional help if needed.
How Do You Install A Shower Door On A Walk In Shower?
To install a shower door on a walk-in shower, follow these steps: Measure the opening, choose the right door, clean the area, attach the frame, and secure the door with screws. Adjust the door for proper alignment, check for leaks, and voila! Your shower door installation is complete.
Conclusion
To sum up, installing a sliding shower door is a simple but rewarding task that can give your bathroom a modern and spacious feel. By following the step-by-step guide provided in this blog post, you can confidently take on this project yourself.
Remember to measure carefully, use the right tools, and take your time to ensure a perfect fit. With a little patience and effort, your new sliding shower door will make a big difference in your bathroom’s functionality and aesthetic appeal.